Ever wondered if you could grow that unique, peppery spice from your favourite Thai curry right in your own backyard? Good news for Kiwi gardeners – you absolutely can. This guide is your starting point for cultivating galangal, a flavourful cousin of ginger and turmeric that feels right at home in New Zealand's climate.
Introducing Galangal to Your Garden

Galangal (Alpinia galanga) is a rhizomatous perennial herb that brings both ornamental beauty and culinary excitement to a garden. While it might look a bit like common ginger, its flavour profile is distinctly different, offering a sharp, citrus-and-pine taste that is essential in many Southeast Asian dishes.
For those really passionate about growing their own food, something like a home food gardening certificate can seriously level up your green thumb skills.
Unlike a lot of tropical plants, galangal is surprisingly adaptable. It’s a rewarding addition to any garden, especially in the frost-free spots of the upper North Island, but don't worry, it can also be grown successfully in cooler regions with just a bit of extra care.
Why Grow Galangal in New Zealand?
Thinking of adding this spice to your patch? Here are a few compelling reasons:
- Fresh Flavour on Demand: Honestly, nothing beats the pungent aroma of freshly harvested galangal. Having a continuous supply means you can elevate your cooking without relying on store-bought alternatives, which often lack the same intensity.
- Ease of Growth: Once it's established, galangal is a relatively low-maintenance plant. It thrives in conditions that many Kiwi gardens can provide – rich, well-draining soil and a warm, sheltered position.
- Attractive Foliage: The plant itself is quite beautiful, with lush, lance-shaped leaves that can reach over a metre in height. It's a great way to add a tropical feel to your garden beds or containers.
A common misconception is that ginger and galangal are interchangeable. While related, their flavours are worlds apart. Galangal provides a peppery, almost medicinal note, whereas ginger offers a sweeter, spicier warmth. Using one for the other will dramatically change the character of a dish.
So, get ready to learn how to turn a simple rhizome into a continuous supply of fresh, aromatic spice for all your culinary experiments. It’s a lot easier than you might think to get started.
Sourcing and Preparing Galangal Rhizomes

Your galangal-growing journey doesn't start in the garden, but with finding the right rhizome. Honestly, the quality of your starting piece makes all the difference, so it’s well worth the effort to source a good one.
Fresh galangal rhizomes often pop up at local Asian markets or specialty food shops around New Zealand, which are fantastic places to start because you can get hands-on and inspect them yourself. If you'd rather shop from home, a quick online search will connect you with suppliers. For a really comprehensive look at what's available, you can explore options to buy plants online in NZ.
What to Look for in a Healthy Rhizome
Think of picking galangal like choosing seed potatoes – you're looking for signs of life and potential. A top-quality rhizome should feel firm and plump, not soft, shrivelled, or showing any signs of mould.
Get a close look at the surface and search for small, pale bumps or nubs. These are the growth nodes, or ‘eyes’, and they're exactly where the new shoots will sprout from. The more of these eyes a piece has, the more growth points you'll get.
Pro Tip: Gently scratch a tiny bit of the skin with your fingernail. A fresh, healthy rhizome will immediately release a sharp, citrusy-pine scent. If it smells a bit musty or has no fragrance at all, it’s probably past its prime and won't grow with much enthusiasm.
Preparing Rhizomes for Planting
Once you've got your rhizome, a bit of prep work can really boost your chances of success. If you've got a large piece, you can easily turn it into multiple plants by cutting it into smaller sections. Just make sure each section is at least 5-7 cm long with a minimum of two or three healthy-looking eyes.
After you've made your cuts, it's a great idea to let the cut surfaces 'cure' for a day. Simply leave the pieces on a kitchen counter or somewhere dry and airy. This allows a callus to form over the wound, which dramatically cuts down the risk of the rhizome rotting once it's in the soil.
For those of us in the cooler parts of the country, pre-sprouting is an absolute game-changer. You can give your galangal a head start by laying the pieces on a tray of slightly damp potting mix and placing it in a warm, bright spot indoors. After a few weeks, you should see those little eyes begin to swell and sprout, giving you a strong, ready-to-plant start for when the soil warms up in spring.
Your Guide to Planting and Nurturing Galangal
Alright, with your rhizomes ready to go, the real fun begins. Getting your galangal planted correctly is probably the most important thing you can do to set it up for a long, productive life. The trick is to give it a home that feels as close as possible to its native subtropical environment.
The best time to get your galangal in the ground here in New Zealand is in spring, usually between September and November. You want to wait until the soil has properly warmed up and there’s absolutely no more risk of frost. This gives the plant a full, warm season to get its roots established before the weather cools down again.
Creating the Perfect Growing Environment
Galangal isn't super fussy, but it absolutely thrives in soil that's rich, loose, and drains really well. I can't stress this enough: a waterlogged rhizome is a rotting rhizome, so getting the soil right is non-negotiable.
You're aiming for a mix that's loaded with organic goodies. A great starting point is to blend quality garden soil with an equal part of well-rotted compost or some sheep pellets. I also like to mix in a bit of sand or perlite to really help with drainage, which is crucial for healthy rhizome growth.
If you're growing in pots, a premium potting mix blended with compost is a fantastic choice. For a deep dive into getting your mix just right, check out our guide to creating the perfect potting mix and soil.
Once the soil is ready, it's time to plant.
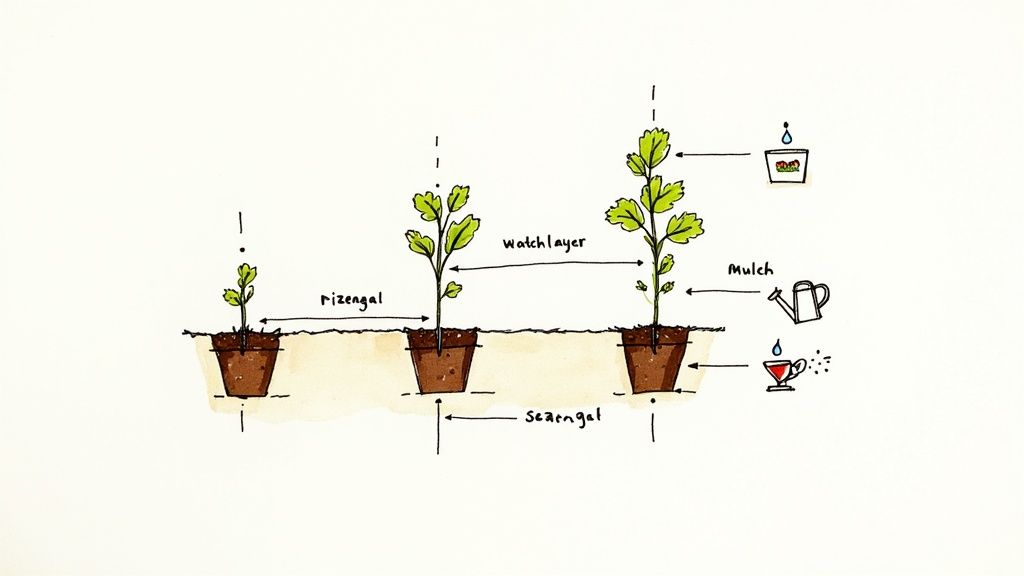
- Planting Depth: Settle your rhizome sections about 5-10 cm deep.
- Orientation: Make sure the little growth ‘eyes’ or buds are pointing upwards.
- Spacing: If you're planting a few in a garden bed, give them room to breathe. Space them about 30 cm apart so they can spread out.
Ongoing Care for a Thriving Plant
After planting, your galangal will need a bit of consistent attention to really flourish, especially during its main growing season through summer and autumn.
The goal is to keep the soil consistently moist but never soggy. A good rule of thumb is to give it a deep water whenever the top couple of centimetres of soil feel dry to the touch.
Being a subtropical plant, galangal is also a pretty hungry feeder. To support its lush growth, it loves a regular liquid feed. Every few weeks during the warm season, give it a boost with a high-nitrogen feed like a seaweed solution or some worm tea. This will give it everything it needs to produce those beautiful leaves and, more importantly, tasty rhizomes.
My number one tip for growing galangal in a Kiwi climate? Mulch, mulch, mulch. A thick layer of something like pea straw or bark chips does wonders. It helps hold moisture in the soil, keeps the weeds down, and most importantly, keeps the soil warm—a huge advantage for this subtropical gem.
To help you stay on track, here’s a simple calendar for looking after your galangal throughout the year in New Zealand.
Galangal Growing Calendar for New Zealand
This seasonal guide breaks down the key tasks to help you care for your galangal plants throughout a typical New Zealand year.
| Season | Key Tasks |
|---|---|
| Spring (Sep-Nov) | Plant rhizomes after the last frost. Prepare soil with lots of compost. Water regularly as new shoots appear. |
| Summer (Dec-Feb) | Water deeply and consistently, especially during dry spells. Feed every 2-3 weeks with a liquid fertiliser. Top up mulch. |
| Autumn (Mar-May) | Growth will slow. Reduce watering slightly but don't let the soil dry out completely. Harvest rhizomes as needed. |
| Winter (Jun-Aug) | Plant will be dormant. Protect from frost with a thick layer of mulch or by moving pots to a sheltered spot. Water sparingly. |
Following these seasonal cues will help you anticipate your plant's needs and ensure a healthy, thriving galangal patch.
Tackling Common Galangal Growing Problems
Even a tough plant like galangal can hit a snag now and then, but the good news is that most issues are simple fixes if you catch them early. Think of this as your go-to guide for keeping your galangal patch happy and healthy in your Kiwi garden.
One of the most common pitfalls I see is overwatering. It’s an easy mistake, especially when you’re trying to be a good plant parent, but too much love can quickly lead to rhizome rot. This is a fungal issue that turns those precious underground rhizomes soft and rotten. If your plant's stems are yellowing from the bottom up and the soil feels perpetually soggy, you’re almost certainly giving it too much to drink.
The fix is simple: pull back on the watering straight away. Let the top few centimetres of soil dry out completely before you even think about watering again. If your galangal is in a pot, double-check that the drainage holes are clear and never, ever let it sit in a saucer full of water.
What Your Galangal’s Leaves are Telling You
Yellowing leaves don't always mean you've overwatered; sometimes they’re sending a different signal. If the yellowing is more widespread across the plant, particularly on the older leaves, it might be hungry for nutrients. A quick feed with a balanced liquid fertiliser, like a good seaweed solution, during the main growing season (spring and summer) usually sorts it right out.
While galangal is pretty good at fending for itself, you might occasionally spot garden-variety critters like aphids or spider mites, usually making a home on fresh new growth.
- Aphids: These tiny sap-suckers can often be dislodged with a sharp spray of water from the hose. If they're a bit more persistent, a simple spray of soapy water is a fantastic organic deterrent.
- Spider Mites: Noticed some fine, silky webbing under the leaves? You've likely got spider mites. They absolutely thrive in dry conditions, so giving your plant a regular misting to up the humidity can help send them packing.
The best defence is always a good offence. A healthy, happy plant is far less likely to be bothered by pests and diseases. Getting the balance of sun, rich soil, and proper watering right from the start will save you a world of trouble down the line.
By keeping a watchful eye on your plant and learning to read these early warning signs, you can handle any issues that pop up. A little bit of proactive care goes a long way and will ensure you’re rewarded with a bountiful, continuous harvest of that amazing, spicy galangal.
How to Harvest and Store Your Galangal

After months of patient care, this is the moment you've been waiting for—reaping the rewards of your hard work. Knowing exactly when and how to harvest your galangal is the secret to capturing its signature pungent flavour at its absolute peak.
Patience really is the name of the game here. You can start with small harvests after about a year of growth. This gentle method, which some gardeners call 'bandicooting', involves carefully digging around the side of the main clump and snapping off a small piece of rhizome. It's a great way to get a taste without disturbing the parent plant, allowing it to keep growing.
Timing Your Main Galangal Harvest
For a really substantial harvest, you'll want to wait until the plant has had at least a year, ideally two, to establish a large clump. In the New Zealand climate, the perfect time is during late autumn, usually around May or June. You’ll know it’s ready when the leaves start to yellow and die back. That’s the tell-tale sign that the plant's energy is now packed into the rhizomes below.
Lifting the entire clump is pretty straightforward. Just grab a garden fork and loosen the soil all around the plant, giving it a wide berth so you don't spear the rhizomes. Then, gently lift the whole mass of roots and soil out of the ground.
Once it's up, shake off the excess soil and give the rhizomes a good rinse with the hose. The lesser galangal species, Alpinia officinarum, grows exceptionally well in private gardens across New Zealand and is prized for its aromatic, sweet, and spicy flavour. You can even find out more about its local cultivation by exploring official observation records in NZ.
Storing Your Freshly Harvested Galangal
Proper storage means you can enjoy your homegrown galangal for months. You’ve got a few great options, depending on how long you want it to last.
- Short-Term Refrigeration: For using it fresh, unpeeled rhizomes can be stored in a paper bag or wrapped in a paper towel inside a sealed container. Pop them in your fridge's crisper drawer, and they'll stay fresh for a good 2-3 weeks.
- Long-Term Freezing: Freezing is honestly the best way to preserve that just-harvested flavour. You can freeze whole rhizomes or, for sheer convenience, chop them into 2-3 cm chunks or slices. A good trick is to place them on a tray in a single layer to flash-freeze before chucking them into a freezer bag. This stops them from clumping together, so you can just grab what you need. Frozen galangal will easily last for at least six months.
Here's a fantastic kitchen hack: grate the fresh galangal before freezing it. Press the grated galangal into ice cube trays, and once frozen, pop the cubes into a bag. This gives you perfectly portioned amounts ready to be tossed straight into curries and soups.
You can also dry thin slices of galangal. Use a dehydrator or a low-temperature oven until they are completely brittle. Once they’re dry, blitz them in a spice grinder to create a powerful, homegrown galangal powder that adds an incredible depth of flavour to your cooking.
Creative Ways to Use Fresh Galangal
So you've got a steady supply of fresh galangal coming out of your garden. Excellent! Your cooking is about to get a whole lot more exciting. While it's famously the soul of Thai classics like Tom Yum, its unique, peppery-citrus flavour can transform so many other dishes.
The real secret to unlocking its incredible aroma lies in the preparation. Galangal is much tougher and more fibrous than ginger, so you can't just grate it the same way. For pastes and marinades, the traditional method of pounding thin slices in a mortar and pestle is the best way to release all those essential oils. If you're making soups or broths, simply bruising a few thick slices is all you need to do.
Beyond the Soup Bowl
If you want to really explore what galangal can do, think about how you can elevate your stir-fry game with a Chinese wok, a must-have for so many Asian dishes. A few thin slices or julienned strips of galangal add a fragrant, zesty kick that cuts right through rich sauces.
Here are a few simple ideas to get you started:
- Aromatic Tea: Steep a few bruised slices of fresh galangal with a stick of cinnamon and a good squeeze of lemon. It makes a wonderfully warming and invigorating brew.
- Zesty Marinade: Pound some sliced galangal with garlic, coriander root, and a splash of fish sauce. This creates a powerful marinade for chicken or fish before it hits the grill.
- Fragrant Rice: Just toss a couple of thick slices of galangal into the water when cooking jasmine rice. It infuses the grains with a subtle, absolutely delightful perfume.
It's worth remembering that galangal isn't just about flavour. It has a long and respected history in traditional wellness practices across Southeast Asia, where it's often used in herbal remedies for its invigorating and soothing properties.
Interestingly, modern research is also looking into its potential health benefits. One study, for example, found that an extract from Alpinia galanga rhizomes significantly reduced plasma glucose levels in subjects.
If you enjoy growing aromatic rhizomes like this, you might get a kick out of cultivating a similar plant with its own unique flavour profile. We've got a whole guide on how to grow Myoga ginger in your garden right here. Experimenting with these different ingredients is a fantastic way to broaden your homegrown flavours.
Common Galangal Questions
Even with a pretty straightforward plant like galangal, a few questions tend to pop up. Here are some of the most common queries I hear from Kiwi gardeners, answered to get you growing with confidence.
Can I Grow Galangal in a Pot in New Zealand?
Absolutely! Galangal actually does exceptionally well in containers. This is a brilliant option if you're short on garden space or live in the cooler parts of the country. A pot means you can just move it to a sheltered spot when the winter chill sets in.
Just be sure to choose a decent-sized pot—something at least 30-40 litres—with plenty of drainage holes. This gives the rhizomes enough room to spread out and, crucially, stops the soil from becoming a waterlogged mess.
What’s the Main Difference Between Ginger and Galangal Flavour?
While they look like they could be cousins, their flavours are worlds apart. Ginger has that warm, spicy, and slightly sweet heat that we all know and love.
Galangal, on the other hand, is much sharper. It has a peppery, almost citrusy flavour with really distinct notes of pine. They are not interchangeable in recipes; using one for the other will completely change the soul of your dish.
Think about the classic Thai soup Tom Kha Gai. The kha in the name literally means galangal. Swapping it for ginger would create a completely different soup – still delicious, maybe, but not the authentic flavour you were aiming for.
How Do I Know When My Galangal Is Ready to Harvest?
You can start sneaking small harvests about 10-12 months after planting. The best way is to carefully dig around the side of the clump and snap off a piece. For a bigger, more substantial harvest, it really pays to wait until the plant is at least two years old.
The prime time for a full harvest is late autumn, right after the leaves begin to yellow and die back. That's your signal. It means the plant has poured all its energy down into those flavour-packed rhizomes for the winter.
Ready to add galangal and other unique edible plants to your garden? Jungle Story connects you with a huge range of trusted New Zealand sellers, offering everything from rare tropical fruits to everyday herbs, delivered right to your door. Start your growing journey today at https://junglestory.co.nz.