There's nothing quite like the taste of a sun-ripened tomato picked straight from your own garden. Getting there is easier than you might imagine. It really boils down to a few key things: picking the right variety for your part of the country, getting your soil in top shape, planting after the last frost (usually around late October for most of us in New Zealand), and keeping up with some simple jobs like watering, feeding, and staking. Nail these basics, and you're well on your way to a summer filled with delicious harvests.
Your Guide to a Perfect Tomato Harvest
Ready to grow the best tomatoes you've ever tasted? This guide is packed with practical advice specifically for New Zealand's unique gardening conditions. It doesn’t matter if you’re in the balmy north or the cooler south; learning how to grow your own tomatoes will reward you with a depth of flavour that you simply can't find in a supermarket.
We’ll cover everything from that first tiny seed to a basket full of vibrant, homegrown fruit. Tomatoes actually have a long history in Aotearoa. Commercial growing kicked off in the early 20th century, with the first processing tomatoes popping up in Nelson around the 1920s—and possibly even earlier near Auckland. If you're curious about the early days, you can dig into the history of NZ's tomato industry on Acta Horticulturae.
This guide will give you a solid head start by focusing on the core stages of the growing process.
Key Stages for Success
The real secret to a bumper crop isn't a single magic trick, but a series of well-timed actions. A bit of prep work in spring and consistent care through summer makes all the difference.
Here are the critical steps for a successful season:
- Choosing the Right Variety: Not all tomatoes are cut out for every Kiwi climate. The first, most crucial step is picking a variety that will thrive where you are, whether that's in a greenhouse in Canterbury or on a sunny deck in Northland.
- Preparing Your Soil: Amazing tomatoes start with amazing soil. We'll show you how to enrich your garden beds or containers to create the perfect foundation for healthy plants.
- Planting and Staking: Timing is everything. You need to plant after the last frost has passed and give your plants sturdy support from day one. This helps prevent diseases and encourages strong, upright growth.
- Watering and Feeding: Consistent watering and a good feeding routine are non-negotiable. This is how you get plump, flavourful fruit and avoid common headaches like blossom end rot.
Success in the garden comes from understanding the rhythm of the seasons. A little preparation in spring leads to an abundant harvest that lasts all summer long.
To help you map out your season, here’s a quick look at what to do and when.
New Zealand Tomato Growing Season at a Glance
This table breaks down the tomato growing calendar for a typical New Zealand season. Use it as a guide to stay on track from spring planting right through to the last harvest of summer.
| Stage | Key Months (Southern Hemisphere) | Primary Tasks |
|---|---|---|
| Preparation & Sowing Indoors | August – September | Plan your garden layout. Start seeds indoors in a warm, sunny spot if growing from seed. Prepare garden beds by adding compost and fertiliser. |
| Planting Out Seedlings | October – November | Harden off seedlings. Plant outdoors once the risk of frost has passed and soil has warmed up. Install stakes or cages at planting time. |
| Growth & Maintenance | December – February | Water deeply and consistently. Begin a regular feeding schedule with a high-potassium fertiliser. Prune laterals (suckers) on vining varieties. |
| Harvesting | January – April | Pick tomatoes as they ripen to their full colour. Continue watering and feeding to encourage the plant to keep producing. |
Following this timeline will help ensure your plants get what they need at every stage, setting you up for a fantastic and tasty result.
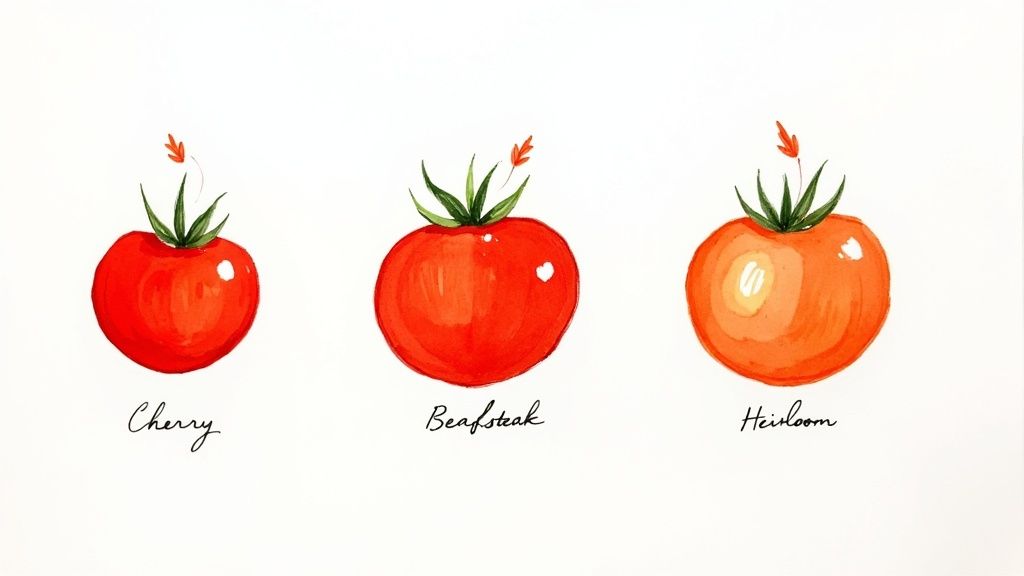
Choosing the Best Tomato Varieties for Your Region

The real secret to a bumper tomato crop in New Zealand starts long before you get your hands dirty. It all comes down to one crucial decision: which tomato variety is right for your garden? Our country’s climate varies so much, from the subtropical north to the cooler south, that picking the right plant is the first, and most important, step.
Your first big decision is getting your head around the difference between determinate and indeterminate tomatoes. Think of it as choosing between a tidy, well-behaved bush and a sprawling, adventurous vine.
-
Determinate (Bush) Tomatoes: These guys grow to a fixed, compact size—usually around 1-1.2 metres tall. They set all their fruit at once over a few weeks, and then they're pretty much done for the season. This makes them absolutely perfect for smaller gardens, pots on the deck, or for anyone who wants a huge harvest all at once for making sauces or preserves.
-
Indeterminate (Vining) Tomatoes: These are the climbers of the tomato world. They'll just keep growing and producing fruit all summer long, right up until the first frost calls it a day. They absolutely need sturdy staking or caging to support their enthusiastic growth, but they'll reward you with a steady trickle of fresh tomatoes for months.
This choice really shapes how you'll look after your plants. Bush types are fairly low-maintenance, while the vining types need a bit more attention with regular pruning and support to keep them happy and productive.
Matching Varieties to Your Garden and Kitchen
Once you've settled on a growth style, the fun part begins—picking the specific varieties. The goal here is to match the plant not just to your local climate, but also to what you actually want to do with the tomatoes. If you plant with a purpose, you’ll never be disappointed.
A big, juicy beefsteak tomato, for instance, is a dream sliced onto a sandwich but would make for a pretty watery pasta sauce. On the other hand, a dense, low-moisture paste tomato is incredible for cooking down into a rich sauce but isn't nearly as exciting to eat fresh from the vine.
Picking the right tomato is like casting a character in a play. You need to know the role it will perform. A slicing tomato is the star of a salad, while a paste tomato is the heart of a good sauce.
While many tomato growers in New Zealand are small, family-run operations, there's been a growing trend towards larger farms using advanced setups like twin-skin plastic greenhouses to get the best quality. You can copy that commitment to quality at home simply by choosing the best varieties for your own space. For more on the NZ tomato industry and its evolution, check out TomatoesNZ.co.nz.
Top Tomato Varieties for New Zealand Gardens
To get you started, here are a few tried-and-true varieties that have a great track record across many parts of New Zealand.
Reliable All-Rounders:
- 'Moneymaker': This indeterminate heirloom really lives up to its name. It's incredibly reliable, super productive, and delivers classic, medium-sized red tomatoes with a fantastic flavour. It’s a Kiwi classic for good reason.
- 'Grosse Lisse': A hugely popular indeterminate that produces large, meaty, and juicy fruit. It’s a powerhouse slicer, perfect for big sandwiches and burgers.
Small Space and Container Champions (Determinate):
- 'Tumbling Tom': An absolute star for hanging baskets and pots. This variety cascades beautifully over the sides, loaded with masses of sweet little cherry tomatoes.
- 'Tiny Tim': A true dwarf variety that only gets to about 30cm high. It’s brilliant for a sunny windowsill or a small container on the patio.
Heirloom and Speciality Choices:
- 'Black Krim': A really unique indeterminate heirloom from the Crimean peninsula. It grows large, dark reddish-purple fruit with an incredible rich, smoky, and slightly salty flavour. It does need a warm, sunny spot to really shine.
- 'Oxheart': This indeterminate variety grows massive, heart-shaped fruit that have very few seeds and dense, flavourful flesh. It's an outstanding choice for making sauces or just slicing up and eating fresh.
Whether you've got a dedicated garden bed, a high-tech glasshouse, or just a simple pot on the balcony, choosing the right tomato really does set the stage for a successful season. For more advice on looking after all your garden favourites, have a look at our comprehensive plant care guides.
Preparing Your Garden for Planting Tomatoes

A truly incredible tomato crop doesn't happen by accident. It all starts with the mahi you put in before a single seedling goes into the ground. Getting your garden bed or container environment just right is the most important thing you can do to set your plants up for a summer of explosive growth.
First things first: location. Tomatoes are absolute sun-worshippers and need a spot that gets at least six to eight hours of direct sunlight every day. Here in New Zealand, this is non-negotiable. Less sun means fewer flowers, and fewer flowers mean a disappointing harvest. It's worth taking a day to watch where the sun hits your garden before you decide on a final spot.
Building the Ideal Soil Structure
Once you’ve found that perfect sunny patch, it’s time to get your hands dirty and sort out the soil. You're aiming for a growing medium that’s both well-draining and moisture-retentive. It sounds like a contradiction, I know, but it's crucial. You want water to drain away freely so the roots don't rot, while the soil itself holds just enough moisture to keep your plants happy between waterings.
How you get there really depends on what you’re starting with:
-
Heavy Clay Soil: So common across Aotearoa, clay is packed with nutrients but can get waterlogged and hard as a rock. The secret is improving its structure. Dig in generous amounts of organic matter like good compost, well-rotted manure, or peat to create air pockets for better drainage and root growth.
-
Sandy Soil: The complete opposite of clay, sandy soil can feel like a sieve, with water and nutrients washing right through. To fix this, you need to add things that hold onto moisture. Again, high-quality compost is your best mate. I also swear by adding sheep pellets and a good seaweed-based fertiliser to give slow-release nutrients and help the soil retain that precious water.
Think of your garden soil as the pantry for your tomato plants. A well-stocked pantry, rich in organic matter and nutrients, ensures your plants have everything they need to grow strong and produce flavourful fruit all season long.
Whatever your soil type, try to work your chosen amendments into the top 20-30 cm of your garden bed a few weeks before planting. This gives everything time to settle in and start working its magic.
To help you choose the right additions for your garden, here’s a quick rundown of some popular options for Kiwi gardeners.
Soil Amendment Options for NZ Gardeners
| Amendment | Primary Benefit | Best For | Application Tip |
|---|---|---|---|
| Compost | All-rounder: improves structure, adds nutrients | All soil types, especially clay and sand | Mix liberally into the top 20-30 cm of soil. You can't really overdo it. |
| Sheep Pellets | Slow-release nitrogen, improves water retention | Sandy soils, hungry vegetable beds | A few generous handfuls per square metre, worked into the soil. |
| Well-Rotted Manure | Rich in organic matter and nutrients | Improving poor or depleted soils | Ensure it's well-aged to avoid burning plant roots. |
| Seaweed Fertiliser | Provides trace elements and stimulates root growth | All soil types, especially good as a liquid feed | Use as a soil drench before planting and a foliar spray during the season. |
These amendments are the building blocks of a fantastic tomato bed, each playing a vital role in creating the perfect foundation for your plants.
Preparing Containers for Success
Growing tomatoes in containers is a brilliant option if you're short on space. But remember, a pot-grown tomato is 100% reliant on you for everything it needs, so your potting mix has to be top-notch.
Don't just scoop soil from the garden—it compacts terribly in pots and can bring unwanted pests along for the ride. Instead, grab a bag of high-quality potting mix designed for vegetables, or mix your own. A great recipe for us Kiwis is a simple blend of one part premium potting mix, one part compost, and a good handful of sheep pellets. This trio provides structure, nutrients, and fantastic moisture retention.
Container size is also a huge deal. A small pot will choke the roots, leading to a sad, stunted plant. As a rule of thumb, a 30-litre container is a decent minimum for most determinate (bush) varieties. For the bigger indeterminate (vining) types, you’ll want a 50-litre pot or even larger. When it comes to pots for tomatoes, bigger is always better.
Planting and Supporting Your Tomatoes
Right, you've got your garden bed sorted and your soil is looking top-notch. Now for the exciting part—getting those tomato plants settled into their new home. How you handle these first few steps of planting and staking is a make-or-break moment. Get it right, and you’re setting your plants up for a summer of vigorous growth and a truly massive harvest.
If there's one golden rule for planting tomatoes in New Zealand, it's patience. You absolutely have to wait until the last frost has well and truly passed. For most of us, that’s around Labour Weekend in late October. But if you’re down south or in a chillier spot, you might be looking at early November. A surprise late frost can wipe out your young plants overnight, so it really does pay to be cautious.
Acclimatising Your Seedlings to Avoid Shock
Think about those seedlings you picked up from the garden centre. They've been living the good life in a sheltered, cosy greenhouse. Just plopping them straight into the garden—with its wild temperature swings, direct sun, and wind—is a sure-fire way to cause transplant shock. To get around this, you need to "harden them off."
Hardening off is just a fancy term for getting your plants used to the great outdoors, bit by bit, over a week or so.
- Days 1-2: Pop your seedlings outside in a sheltered, shady spot for a couple of hours. Then, bring them back inside.
- Days 3-4: Let them stay out a bit longer, maybe four or five hours. This is a good time to introduce them to some gentle morning sun.
- Days 5-6: They can now spend most of the day in their final planting spot, but still bring them in for the night.
- Day 7: They’re finally ready to spend the night outside. You can plant them in the ground the following day.
This gradual introduction toughens up the plant cells and makes for a smooth, stress-free move into the garden.
The Secret to a Massive Root System
Here’s a tip I swear by, and it makes a world of difference: plant your tomatoes deep. Tomatoes have this incredible ability to sprout roots all along any part of their stem that's buried. A bigger root system means a sturdier plant that can suck up way more water and nutrients.
When you’re ready to plant, gently pinch off the bottom two or three sets of leaves. Dig your hole deep enough to bury the stem right up to where the new lowest leaves are. This simple trick can easily double the size of your plant’s root system, creating a far more resilient and productive plant.
By burying a good chunk of the stem, you're tapping into the tomato's natural tendency to grow more roots. This creates an impressive underground network that anchors the plant and acts like a super-highway for water and nutrients, fuelling powerhouse growth all season.
Providing Support from Day One
With New Zealand’s often humid and windy weather, supporting your tomatoes isn't optional—it's essential. Good support gets the fruit and leaves up off the soil, which dramatically improves airflow and helps ward off the fungal diseases that love damp conditions. The key is to install your stakes or cages at the same time you plant, so you don't risk damaging those delicate roots later.
The best support really depends on what kind of tomato you're growing.
-
Single Stakes: This is the classic method, perfect for indeterminate (vining) types. Drive a sturdy wooden stake or a metal pole—at least 2 metres long—about 30cm into the ground, roughly 5-10cm from the plant. As the main stem grows, you’ll loosely tie it to the stake every 20cm or so with soft plant ties or even old strips of fabric.
-
Tomato Cages: Cages are brilliant for determinate (bush) varieties. They give support from all sides and save you from having to constantly tie up the plant. You can grab wire cages from any garden centre or even DIY one from concrete reinforcing mesh. Just make sure it’s tall and wide enough for the fully grown plant.
-
Trellises: If you’re growing a whole row of indeterminate tomatoes, a trellis is a fantastically efficient setup. A "Florida weave" is a simple and popular option. You just run lines of strong twine between two sturdy posts at either end of the row, weaving the string on alternate sides of the plants to cradle the stems as they grow. This method gives you amazing air circulation and makes picking your crop an absolute breeze.
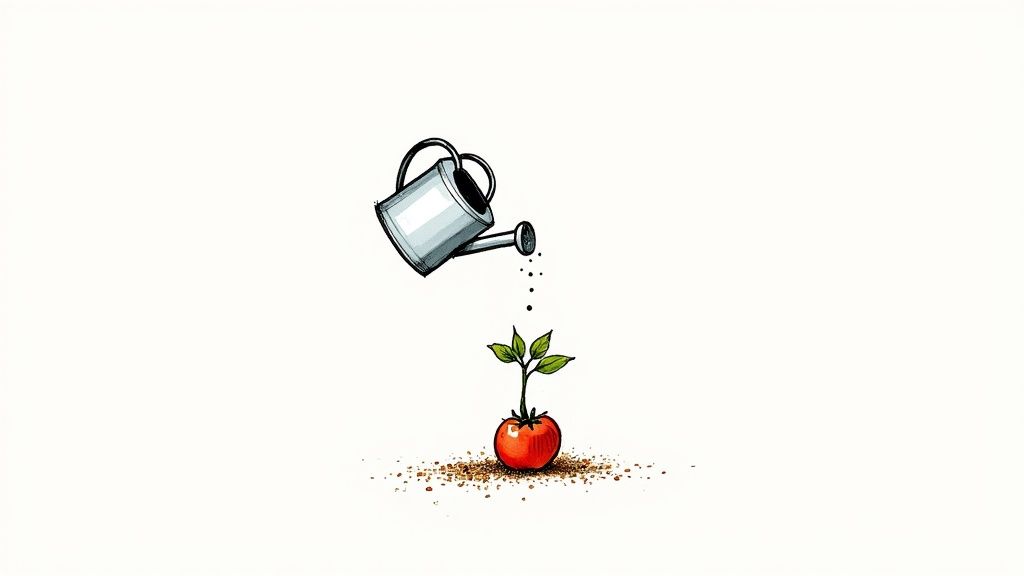
Watering, Feeding and Pruning for a Bountiful Harvest
Getting your tomatoes in the ground is a great start, but the real magic happens with consistent care throughout the growing season. Once your plants are settled in and staked, your job shifts to the three key tasks that make all the difference: watering, feeding, and pruning. Getting these simple habits right is what turns a few plants into a truly incredible harvest of juicy, flavourful fruit.
Mastering Your Watering Technique
Inconsistent watering is probably the biggest mistake Kiwi gardeners make with tomatoes. Our summer weather loves to keep us guessing, swinging from scorching hot days to humid spells, making it tough to find a rhythm.
The most important rule? Water deeply and infrequently, aiming directly at the base of the plant.
Shallow, daily sprinkles are a bad idea. They only encourage a weak, surface-level root system and splash water all over the leaves—a perfect recipe for fungal problems like blight, which absolutely loves our humid conditions. Instead, give your plants a really good, long soak every few days (or even daily during a proper heatwave). This pushes the water deep into the soil, forcing the roots to grow down and create a stronger, more resilient plant.
Not sure when to water? Just stick your finger about 5 cm deep into the soil. If it feels dry, it’s time for a drink. Remember that tomatoes in pots and containers will dry out much faster and will likely need watering every day in the peak of summer.
A Simple Feeding Schedule for More Fruit
Tomatoes are seriously hungry plants. To fuel all that growth and produce buckets of fruit, they need a steady stream of nutrients. The trick is to change what you’re feeding them as they grow, giving them the right fuel at the right time.
Early Growth (Just after planting)
For the first few weeks, the plant is focused on growing strong roots and lush green leaves. The compost you added to the soil should provide most of what it needs, but a dose of a balanced liquid fertiliser or a seaweed tonic gives them a great head start. Nitrogen is the key player here, but don't go overboard or you'll end up with a giant, leafy bush with no flowers in sight.
Flowering and Fruiting
That first glimpse of a yellow flower is your signal to change tactics. It's time to switch from a balanced feed to a liquid tomato food that’s high in potassium (K). Potassium is the secret weapon for getting heaps of flowers and, ultimately, fruit.
Think of it like this: nitrogen builds the leafy green factory, but potassium is what powers the production line to churn out actual tomatoes. Switching your fertiliser at the right time tells the plant, "Okay, stop growing leaves and start making fruit!"
Feed your plants every 1-2 weeks with a high-potassium liquid fertiliser all through summer. Just follow the directions on the packet. This regular feeding is the key to a long, continuous harvest.
Demystifying Pruning for Bigger Tomatoes
Pruning can sound a bit scary, but for vining (indeterminate) tomatoes, it's one of the easiest ways to get bigger, better-tasting fruit. The main goal is to remove the "laterals" or "suckers"—those little shoots that pop up in the crook between the main stem and a side branch, usually at a 45-degree angle.
If you let these suckers grow, they'll turn into whole new stems, demanding energy to grow their own leaves, flowers, and fruit. While more sounds better, it actually forces the plant to spread its resources too thin. By pinching them out, you channel all that energy into ripening a smaller number of bigger, more intensely flavoured tomatoes on the main stem. As a bonus, it dramatically improves airflow, which is your best defence against fungal diseases.
Simply snap these suckers off with your fingers when they’re still small and tender. You’ll need to check your plants every few days because they grow incredibly fast. It's worth noting this is essential for vining types, but bush (determinate) tomatoes generally don't need any pruning at all.
Just like looking after other household favourites, a little bit of regular attention can make all the difference. While the principles are different, you can learn more about specific plant needs in our guide to fiddle leaf fig care. By combining the right watering, feeding, and pruning, you’ll be well on your way to enjoying the best tomatoes you've ever grown.
Managing Common Pests and Diseases in New Zealand
Even with the best care, a few unwanted visitors are almost inevitable in the garden. Don’t panic. Staying vigilant and knowing what to look for is your best defence when it comes to protecting your tomato crop.
The good news is that most common issues we see here in New Zealand are entirely manageable, especially if you catch them early. Think of it like a regular health check-up for your plants. A quick look-over every few days will help you spot trouble long before it becomes a real problem.
Identifying and Treating Common Problems
From tiny insects to pesky fungi, a few usual suspects tend to cause headaches for Kiwi gardeners. The first step is always to figure out exactly what you're dealing with before you start treating it.
Here are some of the most common culprits you might find on your tomatoes:
- Tomato/Potato Psyllid: These minuscule, sap-sucking insects are a major pest in NZ. They cause leaves to yellow and curl, which stunts the plant's growth in a condition known as "psyllid yellows."
- Aphids: You’ll find these small, pear-shaped insects huddled together on new growth and under the leaves. By sucking the sap, they cause distorted growth and can spread viruses.
- Powdery Mildew: This common fungal disease looks just like it sounds—white, dusty patches on the leaves. It loves dry, warm conditions, especially where there isn't much air circulation.
- Blight (Early and Late): A serious fungal disease that absolutely thrives in our humid weather. It shows up as dark, water-soaked spots on leaves and stems and can destroy a plant very quickly.
A proactive approach is always better than a reactive one. Regularly inspecting your plants, especially the undersides of leaves, allows you to catch problems when they are small and much easier to control.
Effective and Eco-Friendly Solutions
When you do spot a problem, it's always best to start with the gentlest method first. You can often solve issues without reaching for harsh chemicals, which is much better for your garden's overall health.
For pests like psyllids and aphids, a sharp spray of water from the hose can be enough to knock them right off. If they're a bit more stubborn, a spray with neem oil or an insecticidal soap is a fantastic organic option. Companion planting can also be a game-changer; our guide on growing herbs that can help deter pests has some great tips.
When it comes to fungal issues like powdery mildew and blight, prevention is everything. Make sure your plants have good airflow by staking and pruning them properly. Always water at the base of the plant to keep the leaves as dry as possible. If you see signs of disease, snip off the affected leaves straight away and consider using a copper-based spray, which is an approved organic control.
Tackling Blossom End Rot
One of the most frustrating things to see is blossom end rot—that ugly, dark, sunken patch on the bottom of your almost-ripe tomatoes. It’s not actually a disease, but a physiological problem caused by a lack of calcium in the fruit as it develops.
More often than not, this calcium issue is directly linked to inconsistent watering. When the soil moisture swings from very dry to very wet, the plant can't properly absorb the calcium that's already in the soil. The best fix is prevention: maintain consistent, even moisture in the soil, and you'll likely never see it.
The health of our tomato crops is a big deal nationwide. New Zealand’s fresh tomato production has seen some major swings, from a peak of around 92,000 tonnes in some years down to about 41,000 tonnes in others, driven by all sorts of economic and environmental factors. You can learn more about NZ tomato production trends on Tridge.com.
Got a Few Tomato Troubles? We've Got Answers
Even the most seasoned gardeners run into a few curly questions when growing tomatoes. It's all part of the fun! Here are some of the most common issues we see from fellow Kiwi gardeners, along with some practical advice to get your plants back on track.
Why Are the Leaves on My Tomato Plant Turning Yellow?
Seeing yellow leaves can be alarming, but don't panic. If it's just the odd lower leaf yellowing and dropping off, that's often just the plant shedding its oldest foliage. A bit of nitrogen deficiency can also cause this.
However, if you're seeing yellowing creep up the whole plant, the most common culprit is actually overwatering. When the soil is waterlogged, the roots can't breathe or take up nutrients properly. Before reaching for fertiliser, check the soil first. Stick your finger in about 5 cm deep – it should feel slightly damp, but never soggy. If the soil feels fine and you haven't fed your plants in a while, a good quality liquid tomato food should sort it out.
My Plant Is All Flowers but No Fruit! What's Going On?
Ah, the classic "blossom drop." It's incredibly frustrating to see a plant covered in beautiful yellow flowers that simply fall off without setting fruit. This is almost always a temperature issue. Tomatoes can be a bit fussy; they don't like nights that consistently dip below 12°C or scorching days over 30°C, as these extremes can stop pollination from happening.
Inconsistent watering and a lack of bees can also play a part.
To give your plants a nudge, make sure you're watering deeply and regularly. You can also give nature a helping hand by gently shaking the flower trusses around midday. This helps move the pollen around, just like a buzzing bee would. Switching to a high-potassium tomato food also sends a strong signal to the plant that it’s time to focus on making fruit.
How Do I Know When My Tomatoes Are Actually Ready to Pick?
Your eyes are your best guide here. A tomato is ready when it has reached its final, glorious colour, whether that's a rich, deep red, a sunny yellow, or even a dark, moody purple-black. Give it a gentle squeeze – it should feel firm but have a slight bit of give. For the absolute peak of flavour, nothing beats a tomato ripened fully on the vine.
That said, if a surprise frost is on the forecast or the birds are getting a bit too interested, you can definitely pick them once they show the first blush of colour. Just pop them on a warm, sunny windowsill inside, and they'll finish ripening up perfectly.
Ready to put this knowledge to the test? Find everything you need, from seeds and seedlings to quality soil and tools, at Jungle Story. Explore our extensive range and get growing today at https://junglestory.co.nz.