The right fertiliser for vegetables really depends on what you’re growing, what your soil is like, and where your plants are in their lifecycle. There's no one-size-fits-all solution. A good balanced fertiliser is a fantastic starting point, but hungry crops like tomatoes will eventually demand more specific nutrients to really deliver the goods. Nailing this is what separates a decent veggie patch from a truly great one.
Your Guide to a Thriving New Zealand Vegetable Patch
Every Kiwi gardener dreams of pulling crisp lettuces, juicy tomatoes, and earthy potatoes straight from their own backyard. That dream often hinges on one key thing: giving your plants the right food. Think of fertiliser less like a magic potion and more like a well-planned diet for your veggies, making sure they have everything they need to grow strong, fend off pests, and produce the delicious kai you’re after.
This guide is written with New Zealand's unique gardening conditions in mind. From the rich volcanic soils up North to the heavy clays you find in parts of the South, our local environments throw different challenges and opportunities our way. Learning how to feed your soil is the first real step toward a garden you can be proud of.
Why Fertiliser Matters in New Zealand
New Zealand has a reputation for intensive agriculture, and a little bit of that mindset filters down to our home gardens. To get the most out of our varied soils, adding extra nutrients is pretty standard practice. In fact, on a global scale, our nation is one of the biggest users of fertiliser.
In 2022, commercial vegetable growers in New Zealand were applying an average of 1,633.4 kg of fertiliser per hectare. That's more than 12 times the global average, which really shows how much our high-value crops rely on a nutritional boost to perform in local conditions.
Now, you definitely don't need to go that hard in your own garden, but it highlights an important point: our soils often need a bit of a helping hand. The right fertiliser simply bridges the gap between what your soil can offer and what your hungry vegetables need to truly thrive.
What to Expect From This Guide
I'll walk you through everything you need to know about picking and using fertiliser in your veggie patch. We’ll skip the complicated science jargon and stick to practical advice you can actually use. You'll learn:
- How to make sense of the main nutrients your plants crave (Nitrogen, Phosphorus, and Potassium).
- The difference between organic and synthetic fertilisers, and which one might be right for you.
- A season-by-season feeding plan that works for the New Zealand climate.
- The right way to apply it so you can avoid common mistakes like fertiliser burn.
By the time you're done, you'll feel much more confident about choosing and using the perfect fertiliser for vegetables in your garden. If you want to dive deeper into this, you can explore these findings on New Zealand's fertiliser use.
Decoding the NPK Numbers on Fertiliser Labels
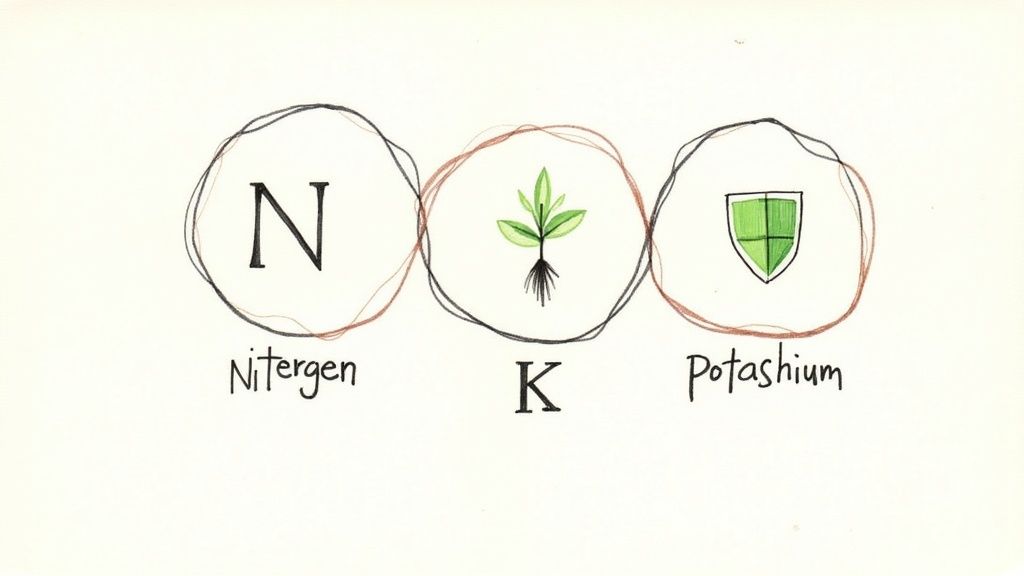
If you’ve ever walked down the garden centre aisle, you’ve probably felt a bit lost staring at all the bags of fertiliser. Each one has a series of three bold numbers stamped on it, like 5-10-5 or 4-3-6. These aren't random codes; they're the secret to understanding exactly what you’re about to feed your vegetable patch.
This trio of numbers is called the NPK ratio. It tells you the percentage, by weight, of the three most critical nutrients your plants need to thrive. Getting your head around this is the first step to moving from simply guessing to growing with real purpose.
Think of the NPK ratio as a nutritional label for your garden. Each number represents a key nutrient that does a specific job, much like proteins, carbs, and vitamins do for us. Getting this balance right means you can give your veggies the targeted support they need at every stage of their growth.
The Big Three Nutrients Explained
So, what do N, P, and K actually stand for, and what do they do? Let's break down this nutritional trio. Each one is a vital piece of the puzzle for strong, healthy plants, and knowing their individual roles will help you pick the perfect feed.
-
N is for Nitrogen (Leaf Growth): Nitrogen is all about lush, green, leafy growth. If you're growing vibrant spinach, crisp lettuce, or a big, leafy cabbage, a fertiliser with a higher first number (N) is your best friend. It’s the engine for producing chlorophyll and healthy foliage.
-
P is for Phosphorus (Root and Fruit Development): Think of phosphorus as the energy provider for strong foundations. It’s absolutely essential for developing a vigorous root system, which helps plants establish themselves properly. It also plays a massive role in encouraging flowers and, ultimately, fruit.
-
K is for Potassium (Overall Plant Health): Potassium is like a multivitamin, strengthening the entire plant from the inside out. It helps regulate water, boosts resistance to disease and pests, and improves the overall quality and flavour of your vegetables. It's the all-rounder that keeps everything ticking along smoothly.
This is especially relevant here in New Zealand, where many of our soils are naturally a bit low in phosphorus. It’s why superphosphate has been a go-to for so long, making up 46% of all fertiliser used—that’s about 788,000 tonnes in a recent reporting period. Adding that extra P is often what it takes to get things growing strong. You can dig into more of New Zealand's fertiliser statistics on the Stats NZ website.
Matching NPK to Your Vegetables
Now for the fun part: putting this knowledge into practice. The ideal NPK ratio really depends on what you’re trying to grow. A single "all-purpose" blend is a decent start, but you'll get far better results by tailoring your choice to the specific plants in your garden.
(While the principles are similar, the specific needs of houseplants can be a bit different. We've got a separate guide on fertiliser for indoor plants if you're curious!)
So, a fertiliser labelled 10-5-10 contains 10% nitrogen, 5% phosphorus, and 10% potassium. This kind of blend would be fantastic for leafy greens and brassicas that crave plenty of nitrogen for their leaves and potassium for overall resilience.
Key Takeaway: The NPK ratio on the bag is your cheat sheet. A high first number boosts leaves, a high second number fuels roots and fruits, and a high third number improves overall plant toughness.
To make it even easier, here’s a quick-reference table to help you match the right nutrient focus to your favourite garden vegetables.
NPK Functions for Common Garden Vegetables
This table shows which of the 'big three' nutrients is most important for different types of veggies, helping you pick the right bag every time.
| Vegetable Type | Primary Nutrient Focus | Why It's Important |
|---|---|---|
| Leafy Greens (Lettuce, Spinach, Kale) | Nitrogen (N) | Promotes vigorous, lush leaf development for a better harvest. |
| Root Vegetables (Carrots, Beetroot, Potatoes) | Phosphorus (P) & Potassium (K) | Encourages strong root and tuber formation, not excessive leaves. |
| Fruiting Vegetables (Tomatoes, Peppers, Courgettes) | Phosphorus (P) & Potassium (K) | Supports flowering, fruit set, and the development of high-quality produce. |
| Legumes (Peas, Beans) | Low Nitrogen (N) | These plants fix their own nitrogen, so too much can hinder pod production. |
By simply decoding those three little numbers, you can make a much more informed decision at the garden centre. You'll be choosing a fertiliser that's perfectly suited to helping your specific vegetables thrive.
Choosing Your Fertiliser: Organic vs. Synthetic

When you’re standing in the garden centre aisle, you’re faced with a choice that splits gardeners into two camps: organic or synthetic. This isn’t just a simple pick; it gets to the heart of your gardening philosophy. Are you looking to feed your plants directly, or do you want to build up the health of your soil from the ground up?
Think of it like this: synthetic fertilisers are the plant equivalent of fast food. They’re scientifically formulated to deliver a quick, powerful, and precise hit of nutrients straight to your plants. This can be a lifesaver for correcting a sudden deficiency or giving a hungry crop an immediate boost when it needs it most.
Organic fertilisers, on the other hand, are more like a slow-cooked, wholesome meal. Things like compost, blood and bone, sheep pellets, and seaweed extracts don’t just feed the plant; they nourish the entire soil ecosystem. You’re feeding the beneficial microbes, fungi, and worms that create a healthy, resilient foundation for your garden to thrive in for years to come.
The best fertiliser for vegetables in your garden really depends on your goals, your soil’s current state, and your personal approach. There’s no single right answer, and plenty of successful Kiwi gardeners use a hybrid approach, combining the best of both worlds.
The Case for Organic Fertilisers
Organic fertilisers come from natural, once-living materials. This includes plant-based sources like kelp meal and animal-based products such as blood and bone or poultry manure. Their biggest strength is their slow-release nature.
Because they need to be broken down by soil microorganisms before plants can use them, the nutrients are released gradually over weeks, or even months. This process creates a steady, gentle supply of food, which massively reduces the risk of fertiliser burn and nutrient runoff into our waterways.
Even better, this whole process actively improves your soil. Adding organic matter enhances soil structure, helps it hold onto water, and builds a bustling underground community of beneficial life. It’s a long-term investment in the health of your whole veggie patch.
Key Takeaway: Organic fertilisers build healthy, living soil over time. They release nutrients slowly, feed beneficial microbes, and improve the soil's structure and ability to hold water, creating a more resilient garden ecosystem.
Making your own compost is one of the most powerful ways to create a top-tier organic fertiliser for free. If you're keen to get started, our guide on how to start composting in New Zealand will walk you through it step-by-step.
The Power of Synthetic Fertilisers
Synthetic fertilisers, which you might also hear called chemical or inorganic, are manufactured products. They are processed to create concentrated, water-soluble nutrients in forms that plants can slurp up almost instantly.
This immediate availability is their main superpower. If your tomato plants are showing yellow leaves (a classic sign of nitrogen deficiency), a quick dose of a synthetic liquid feed can deliver the nitrogen they need right away. You can often see the results in just a few days. They are predictable and potent.
But this strength can also be a weakness. It’s much easier to overdo it with synthetics, which can burn plant roots and cause a buildup of mineral salts in the soil. Over time, relying too heavily on chemical feeds can harm the very microbial life that organic methods work so hard to encourage.
Comparing Your Options Head-to-Head
To make the choice a bit clearer, let's break down the direct pros and cons of each approach.
| Feature | Organic Fertilisers | Synthetic Fertilisers |
|---|---|---|
| Nutrient Release | Slow and steady, over a longer period. | Fast and immediate, available to plants quickly. |
| Soil Health | Improves soil structure and feeds microbial life. | Does not improve soil structure; can harm microbes if overused. |
| Risk of Burn | Very low risk of burning plant roots. | Higher risk of fertiliser burn if not applied correctly. |
| Nutrient Precision | Nutrient ratios can be less precise. | NPK ratios are exact and scientifically formulated. |
| Long-Term Impact | Builds fertile, resilient soil over time. | Can lead to salt buildup and degraded soil health. |
Liquid vs. Granular: Which Form is Best?
Beyond the organic versus synthetic debate, you'll also need to choose between liquid and granular forms. Each has a distinct purpose in the garden.
-
Granular Fertilisers: These are dry pellets or powders you mix into the soil or sprinkle around the base of your plants. They release their nutrients slowly as they break down with each watering. Granular options, whether they're organic (like sheep pellets) or synthetic (slow-release blends), are perfect for preparing new garden beds or providing a long-lasting feed at the start of the season.
-
Liquid Fertilisers: These are concentrated liquids that you dilute with water before applying to the soil or even as a foliar spray. They provide an instant nutritional hit, making them ideal for giving seedlings a quick start, helping a struggling plant recover, or providing a mid-season boost to heavy feeders like courgettes and corn just as they start producing.
In the end, a balanced approach often gives the best results. Start by building a strong foundation with organic matter like compost, then use targeted applications of either organic or synthetic fertilisers as needed to meet the specific demands of your vegetables throughout New Zealand's growing seasons.
A Seasonal Fertiliser Schedule for Your Garden

In gardening, just like in life, timing is everything. You can have the perfect fertiliser for vegetables, but applying it at the wrong time can be a waste—or worse, actually set your plants back. To really get the most out of your veggie patch, it helps to work with the natural rhythm of the seasons, giving your plants what they need, exactly when they need it.
For us Kiwi gardeners, that means tuning into our Southern Hemisphere seasons. A great harvest in summer really starts with careful prep work in the cooler months. This seasonal approach makes sure your soil is primed, your seedlings are supported, and your mature plants have the fuel they need to produce an incredible bounty.
Autumn and Winter: The Foundation Months
As the days get shorter and the garden winds down from summer's frantic pace, it’s tempting to hang up the trowel until spring. But hold on! Autumn (March to May) and winter (June to August) are golden opportunities to prepare your soil and set the stage for next season's success.
This is the perfect time to add slow-release, soil-building goodies. Think of it as putting money in the bank for your garden; you’re making a long-term investment that will pay off big time later. The cool, damp weather lets all that organic matter break down slowly, enriching the soil with a complex web of nutrients.
Here’s what to focus on:
- Spread Compost: Be generous! Layer your garden beds with well-rotted compost. It improves soil structure, helps hold water, and provides a gentle, broad-spectrum feed.
- Add Manures: Well-aged animal manures, like sheep pellets or poultry manure, are fantastic slow-release sources of nitrogen and other key nutrients.
- Sow Green Manure Crops: Consider planting a cover crop like lupin or mustard. These "green manures" protect the soil over winter and can be dug in before spring planting for a massive boost of organic matter.
Spring: The Growth Spurt
Spring (September to November) is when the garden truly wakes up. As you plant out your seedlings and sow seeds, the focus shifts from long-term soil building to providing immediate fuel for that first burst of growth. Young plants are like hungry teenagers; they need plenty of energy to establish strong roots and healthy foliage.
At planting time, a balanced, all-purpose granular fertiliser is your best friend. Just work it into the top layer of soil according to the package directions. This ensures there's a ready supply of nitrogen, phosphorus, and potassium right where those new little roots can find it.
A common mistake is going too hard on high-nitrogen feeds at this stage. Sure, nitrogen fuels leafy growth, but too much can lead to weak, sappy plants that are a magnet for pests like aphids. A balanced approach is always best for growing tough, resilient seedlings.
For an extra gentle start, you can also water your new seedlings in with a diluted liquid seaweed solution. This acts as a plant tonic, helping to reduce transplant shock and encouraging the growth of fine root hairs, which are vital for nutrient uptake.
Summer: Peak Production Season
Summer (December to February) is when your garden is working its hardest, so your feeding schedule needs to ramp up to match. This is the season of the heavy feeders—plants that need a constant supply of nutrients to churn out their harvests.
Crops like tomatoes, courgettes, cucumbers, capsicums, and sweetcorn are incredibly demanding. The initial fertiliser you added in spring will be running low by now, so it’s time for a top-up. A liquid fertiliser applied every two to four weeks is ideal for these hungry plants.
Once your plants start flowering and setting fruit, choose a feed that's higher in potassium (the 'K' in NPK). Potassium is absolutely essential for fruit development, flavour, and overall plant health. Tomatoes, in particular, will thank you for this boost. To dive deeper into their specific needs, check out our guide on how to grow tomatoes in New Zealand.
For root veggies like carrots and beetroot, ease off high-nitrogen feeds during summer. Too much will just give you big, leafy tops at the expense of the roots you’re actually waiting for. A light side-dressing with a balanced fertiliser is usually plenty if you prepared your soil well.
New Zealand Seasonal Feeding Guide for Vegetables
To pull it all together, here’s a simple table outlining the key fertilising jobs throughout the year for a Kiwi garden.
| Season (Southern Hemisphere) | Key Fertilising Task | Recommended Fertiliser Types |
|---|---|---|
| Autumn (Mar - May) | Build soil structure and long-term fertility. | Compost, aged manures, green manure crops. |
| Winter (Jun - Aug) | Allow organic matter to break down; plan for spring. | Minimal feeding; focus on soil conditioning. |
| Spring (Sep - Nov) | Provide initial nutrients for new seedlings. | Balanced granular fertiliser, liquid seaweed tonic. |
| Summer (Dec - Feb) | Support heavy-feeding crops during peak production. | Liquid feed high in potassium, targeted side-dressing. |
By aligning your use of fertiliser for vegetables with the seasons, you create a sustainable cycle of soil health and plant nutrition. The result? A more productive, resilient, and rewarding garden.
How to Apply Fertiliser and Avoid Common Mistakes

Knowing what fertiliser to use is only half the battle. Figuring out how to apply it correctly is what truly unlocks a bumper crop. So many well-intentioned Kiwi gardeners make the classic mistake of thinking more is better, but with fertiliser, a heavy hand can do more harm than good. It’s all about finding that sweet spot—providing just enough nutrition without overwhelming your plants.
The aim is simple: get the nutrients to the plant's root zone as efficiently as possible, making sure every granule or drop is put to good use. This means getting to know the different ways to apply it and, just as importantly, sidestepping the common pitfalls that can stress your veggies or damage your soil.
Mastering Different Application Methods
Choosing the right technique all comes down to what you’re trying to achieve. Are you prepping a big garden bed for a new season, or just giving a single plant a mid-season pick-me-up? Each scenario calls for a different way of delivering your chosen fertiliser for vegetables.
Let's break down the three main methods you'll use in your garden.
-
Broadcasting: This is your go-to when preparing new garden beds or large areas before planting. You simply scatter the granular fertiliser evenly over the entire soil surface, a bit like feeding chooks. Afterwards, gently work it into the top few centimetres of soil with a rake and give it a good watering. This creates a uniformly fertile base for your seeds or seedlings to get started in.
-
Side-Dressing: This is a more targeted approach for feeding established plants, especially hungry ones like tomatoes and corn, partway through their growing season. You sprinkle a small amount of granular fertiliser in a shallow trench or a band along the row, about 10-15 cm away from the plant stems. This stops the granules from touching the stems, which can cause burn, while delivering nutrients right where the active roots are.
-
Foliar Feeding: This method involves spraying a diluted liquid fertiliser straight onto the leaves. Think of it as a quick nutritional top-up. The leaves absorb the nutrients incredibly fast, making it a fantastic way to fix a minor deficiency or give plants a rapid boost. A liquid seaweed tonic is a popular choice for this, but always make sure you dilute it properly to avoid scorching the foliage.
Expert Tip: Apply foliar feeds early in the morning or on an overcast day. If you do it in direct, hot sun, the liquid can evaporate too quickly and potentially burn the leaves.
Once you get the hang of these techniques, you can apply fertiliser with precision and purpose.
Dodging the Most Common Fertiliser Mistakes
Applying fertiliser incorrectly can lead to a whole lot of disappointment, setting your plants back instead of helping them thrive. Avoiding these common mistakes is crucial for a healthy, productive veggie patch. It's also important from a wider perspective, as using it efficiently cuts down on waste.
New Zealand's reliance on imported fertilisers is pretty significant. In 2022, our fertiliser consumption was reported at 305% of what we produce here at home, which highlights a heavy dependence on international supply for the nutrients vital to our gardens and farms. Making every application count isn't just good for your plants; it’s a more mindful way to manage resources. You can learn more about New Zealand's fertiliser consumption trends and data.
Here are the top mistakes to watch out for:
-
Applying Too Much (Fertiliser Burn): This is easily the most frequent error. Excess fertiliser, particularly synthetic types, releases a high concentration of mineral salts that literally pull moisture out of plant roots. This results in "burn," which shows up as yellowing or browning leaf edges and scorched-looking foliage. Always follow the package directions, and if you’re unsure, it’s better to start with a slightly weaker dose.
-
Applying Directly to Stems or Leaves: Never pile granular fertiliser right up against a plant stem or let granules sit on wet leaves. This direct contact is a surefire way to cause chemical burns on the plant tissue.
-
Forgetting to Water It In: Granular fertilisers need water to start breaking down and move the nutrients into the soil where roots can actually get to them. Always water your garden thoroughly after a granular application to activate the feed and wash any stray bits off the plant foliage.
By applying fertiliser thoughtfully and steering clear of these simple errors, you’ll ensure your hard work translates directly into a healthier, more abundant vegetable patch.
Common Fertiliser Questions Answered
Even with the best plan in hand, questions always pop up once you start getting your hands dirty. Let's be honest, figuring out the world of fertiliser for vegetables can feel a bit baffling at first, especially when you're trying to decode what your plants are telling you.
Don't worry—most Kiwi gardeners have been right where you are.
This section is all about clearing up some of those common queries we hear all the time. We'll give you straight-up, practical answers to help you feel more confident, solve problems on the fly, and make the smart calls that lead to a truly fantastic harvest.
Can I Just Use Compost Instead of Store-Bought Fertiliser?
You absolutely can, and for many Kiwi gardens, it’s the best way to go. Good-quality compost is the absolute foundation of a healthy veggie patch. It's packed with a huge range of nutrients, helps your soil hold onto water, and feeds the buzzing community of microbes that keep everything in balance.
For many veggies, a garden bed loaded with well-rotted compost will give them everything they need to thrive. Think of it as the ultimate slow-release, all-in-one soil conditioner and plant food.
That said, some crops are what we call "heavy feeders." Plants like tomatoes, broccoli, corn, and courgettes are seriously hungry and might need an extra boost, especially if your soil is still getting established.
Imagine compost is the wholesome main meal. A balanced fertiliser is like a vitamin supplement—not always essential, but a game-changer when your plants need a bit more oomph. A great strategy is to build your soil with heaps of compost, then use a balanced organic fertiliser for vegetables to top up those hungry crops during their peak growing season.
How Do I Know if My Vegetables Need Fertilising?
Your plants are actually great communicators; you just have to learn their language. They’ll give you some pretty clear visual cues when they're running low on fuel.
The most common sign is yellowing leaves, a condition known as chlorosis. If the older, lower leaves on your plant are turning a pale green or yellow, that’s a classic signal of a nitrogen deficiency.
Other clues to watch for include:
- Stunted or slow growth: Are your plants just sort of sitting there, not really taking off like they should be?
- Weak, spindly stems: This can point to a general lack of nutrients needed for strong, sturdy growth.
- Poor fruit production: A big leafy plant with hardly any flowers or fruit is often a sign of a nutrient imbalance.
- Purplish leaves: A purple tinge on the leaves, especially on young plants like corn, can sometimes hint at a phosphorus deficiency.
Of course, the best approach is to be proactive. Kick off the season by digging in plenty of compost. Then, just keep a close eye on your plants. If they start looking a bit pale or just aren't growing with vigour, it’s probably time to give them a feed.
Is It Possible to Over-Fertilise My Vegetables?
Yes, and it’s a surprisingly easy mistake to make. When it comes to fertiliser, more is definitely not better. Overdoing it can cause a lot more harm than not fertilising at all, especially with those potent, fast-acting synthetic products.
Too much fertiliser, particularly nitrogen, can lead to fertiliser burn. This happens when the high concentration of mineral salts in the soil literally sucks the moisture out of the plant's roots, causing them to dehydrate. You’ll see it on the leaves—they'll look scorched, with brown, crispy edges.
Over-fertilising doesn't just burn roots; it can also create a frustrating imbalance. For example, a tomato plant fed too much nitrogen will often grow into a huge, lush, leafy bush but produce very few actual tomatoes. All its energy goes into foliage at the expense of fruit.
If you suspect you've been a bit too heavy-handed, the best fix is to flush the soil. Give the area a deep, thorough watering a few times over a couple of days. This helps wash the excess salts down and away from the delicate root zone.
To stay on the safe side, always stick to the application rates on the packet. If you're ever in doubt, it’s far better to start with a weaker dose and see how your plants respond.
At Jungle Story, we're passionate about helping Kiwi gardeners succeed. Whether you're growing a few herbs on your windowsill or planning a massive vegetable patch, having the right plants and tools makes all the difference. Explore our extensive marketplace to find everything you need for your next gardening adventure, from seeds and seedlings to quality tools and expert advice.