So, you're thinking about starting a compost system? It’s simpler than you might think. At its core, it's all about choosing a good spot for your bin, layering it with a mix of 'greens' (like kitchen scraps) and 'browns' (like cardboard and dry leaves), keeping it a bit damp, and giving it a turn now and then to let the air in.
The real secret is getting that balance right—mixing your nitrogen-rich kitchen scraps with carbon-rich materials is what creates that beautiful, nutrient-dense soil your garden will absolutely love.
Why Composting Matters in New Zealand
Before we get into the "how-to," let's quickly cover the "why." Understanding the impact of this simple habit really brings home why it's so important for us Kiwis. Every time you scrape leftover food into the rubbish, it joins a nationwide flow of waste that has a massive environmental and financial cost.
The numbers are pretty startling. Every year, New Zealand homes and businesses chuck over 300,000 tonnes of food waste into landfills. Once it’s buried and deprived of oxygen, that organic matter breaks down and releases methane – a powerful greenhouse gas that accounts for a hefty 4% of our country’s total emissions.
It’s a huge missed opportunity, and it hits us in the wallet too. Food waste costs the average Kiwi household around $3 billion each year.
Turning Waste into a Valuable Resource
Composting completely flips this problem on its head. Instead of your kitchen and garden scraps creating harmful emissions, they transform into what gardeners lovingly call 'black gold'. This dark, crumbly, nutrient-packed material is genuinely one of the best things you can feed your soil.
By learning how to start composting, you're doing more than just shrinking your household rubbish pile. You’re actively creating a top-tier, natural soil conditioner that breathes life back into your garden, makes your plants healthier, and helps the soil hold onto precious moisture.
This homemade soil improver brings a whole lot of direct benefits for any Kiwi gardener:
- Enriches Soil Naturally: It provides a slow-release source of vital nutrients, meaning you can cut back on chemical fertilisers. To learn more about feeding your plants, check out our guide to indoor plant fertilizer.
- Improves Soil Structure: Got sandy soil? Compost helps bind it. Struggling with heavy clay? Compost breaks it up, improving drainage and aeration so plant roots can thrive.
- Saves You Money: When you make your own high-quality fertiliser and soil conditioner, you’ll find yourself spending a lot less at the garden centre.
- Conserves Water: Soil rich in compost acts like a sponge, holding onto water for much longer. This is a game-changer during our dry Kiwi summers.
Ultimately, setting up a compost bin is a small change that delivers a big impact. It creates a beautiful, sustainable cycle from your kitchen to your garden, benefiting your plants, your budget, and the wider New Zealand environment.
How To Choose The Right Composting System For Your Home
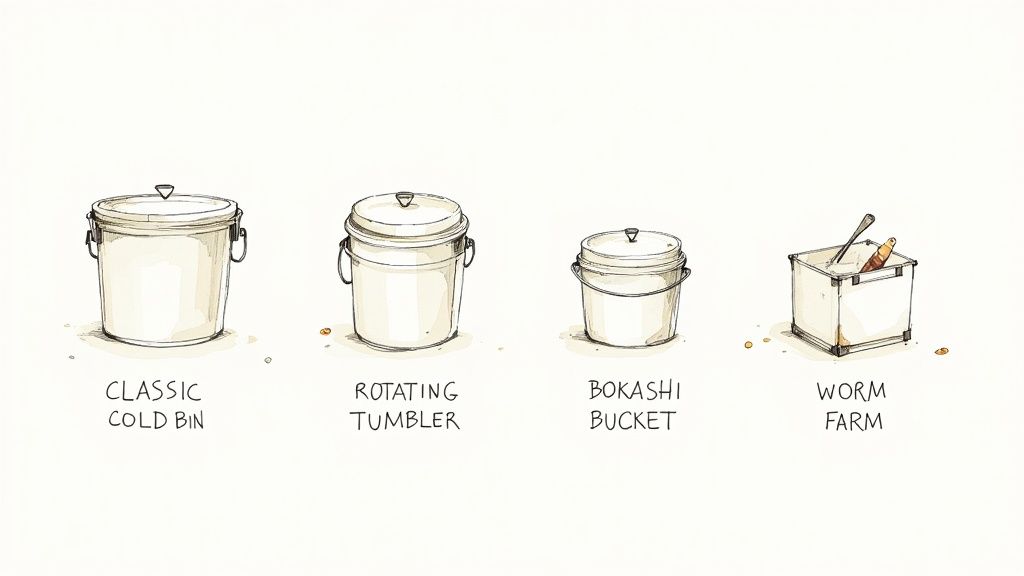
So, you're ready to start composting? Brilliant. The first big question is deciding how you're going to do it. The best system is always the one you'll actually use, and that comes down to your space and your lifestyle.
Whether you've got a classic quarter-acre paradise in Canterbury or a sunny balcony in Auckland, there’s a perfect setup for you. Let's walk through the most common methods we see in Kiwi homes.
Traditional Bins And Piles
This is what most of us picture when we think of composting. A simple bin or even an open pile tucked away at the back of the garden is a fantastic choice if you have a decent amount of outdoor space.
They’re especially good if you generate a lot of garden waste—think lawn clippings, prunings, and piles of autumn leaves. You can even build your own from old pallets if you're feeling handy. They’re simple, effective, and low-cost to get started.
The trade-off is that they do require a bit of grunt work. You'll need to get in there with a garden fork every few weeks to turn the pile, which is crucial for keeping it aerated and breaking down properly. Finished compost can also take a while, often anywhere from six months to a year, especially during our cooler, wetter winters.
Contained Compost Tumblers
If you're short on space, not keen on the digging, or just want a tidier look, a compost tumbler is an excellent alternative. These are fully-sealed barrels on a frame that you can spin to mix the contents. No fork required!
This clever design has a few key advantages:
- It’s faster. The enclosed barrel traps heat much more effectively, which speeds up the whole process. In summer, you could be looking at usable compost in as little as two to three months.
- It's pest-proof. Being sealed and off the ground means no curious rodents can get in.
- It's easier to turn. A simple crank of the handle or spin of the barrel is all it takes to aerate your compost.
A dual-chamber tumbler is a real game-changer. It lets you fill one side while the other "cooks," meaning you always have a place for fresh scraps and a continuous supply of that beautiful black gold for the garden.
Tumblers are perfect for urban backyards, patios, or even a small deck. Their main downside is the initial cost, which is higher than a simple bin, and they hold less material, making them a bit small for homes with massive gardens.
Compact Indoor Systems
What if you have no outdoor space at all? No worries, you can still get in on the composting action. Systems like vermicomposting (worm farms) and bokashi bins are designed specifically for small indoor spaces.
A worm farm, or vermicomposter, uses special tiger worms to munch through your kitchen scraps. They produce incredibly nutrient-rich worm castings and a liquid fertiliser often called 'worm tea'. When managed well, they are compact and completely odour-free.
Bokashi is a bit different—it's actually a fermentation process. You layer your food scraps in a special airtight bucket with a bran inoculant, which effectively pickles the waste. One huge plus is that a bokashi system can handle things traditional compost can't, like meat, fish, and dairy. After a few weeks, the fermented material just needs to be buried in the garden or a larger compost pile to finish breaking down.
To help you decide, let's compare these options side-by-side.
Comparing Home Composting Methods for NZ Homes
Every home is different, so here’s a quick rundown to help you find the best fit for your situation.
| Compost System | Best For | Space Required | What It Processes | Effort Level |
|---|---|---|---|---|
| Traditional Bin/Pile | Large gardens, high volume of green waste | Medium to Large (backyard) | Garden waste, leaves, most kitchen scraps | Medium |
| Compost Tumbler | Small to medium gardens, patios, decks | Small to Medium | Most kitchen and garden scraps | Low to Medium |
| Worm Farm (Vermicompost) | Apartments, kitchens, small households | Very Small (indoors or balcony) | Raw fruit & veg scraps, coffee grounds, paper | Low |
| Bokashi Bin | Any size home, especially apartments | Very Small (kitchen) | All food waste, including meat, dairy, oil | Low |
Ultimately, the goal is to choose a system that feels manageable and fits seamlessly into your routine. Any of these methods will successfully turn your waste into a valuable resource for your garden.
The Art of Balancing Greens and Browns
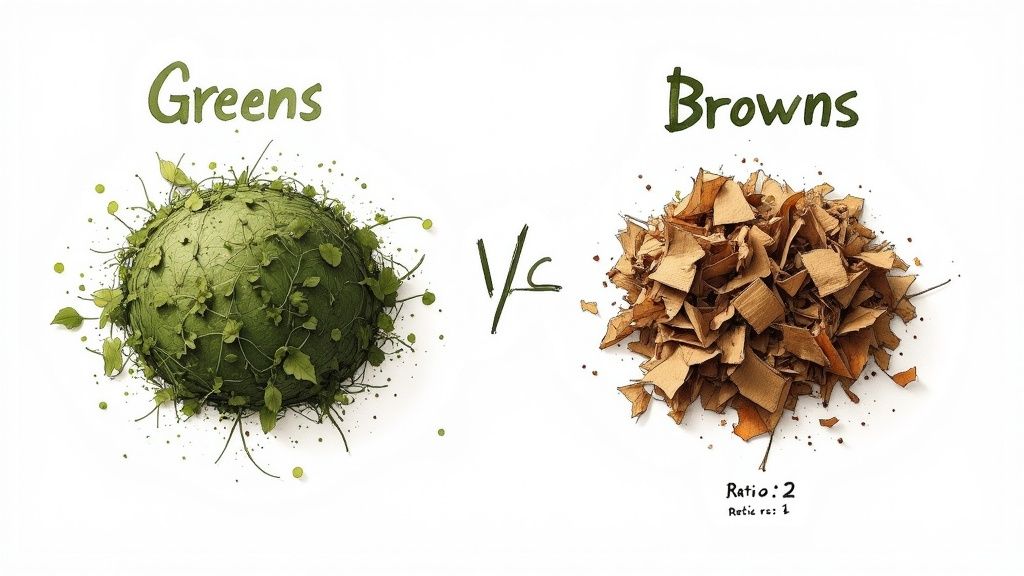
The real secret to amazing compost has nothing to do with fancy bins or special activators. It all comes down to a simple recipe: getting the right mix of ‘greens’ and ‘browns’.
Think of it this way. ‘Greens’ are your nitrogen-rich materials. They provide the protein and kick-start the tiny microbes that do all the hard work. On the other hand, ‘browns’ are loaded with carbon, which is the fuel that keeps those microbes going.
Getting this balance right is hands-down the most important part of starting a compost pile. A happy, well-balanced pile breaks down fast, gets hot enough to kill weed seeds, and smells wonderfully earthy. Get it wrong, and you could end up with a slimy, smelly mess that takes forever to decompose.
Identifying Your Greens and Browns
So, what are these greens and browns I’m talking about? You’ve got tonnes of both sitting around your typical Kiwi home, I guarantee it.
Green (Nitrogen-Rich) Materials: These are the wet, fresh ingredients that really get the party started in your compost bin.
- Kitchen Scraps: All your fruit and veggie peels, apple cores, and manky salad greens.
- Coffee Grounds & Tea Leaves: Don’t throw them out! Your daily brew is a fantastic source of nitrogen.
- Fresh Lawn Clippings: That sweet-smelling grass from the weekend mow is pure gold for your pile.
- Garden Weeds: As long as they haven’t set seed, chuck them in. Green plant trimmings are perfect, too.
Brown (Carbon-Rich) Materials: These are the drier, woodier bits that give your compost structure and stop it from turning into a swampy sludge.
- Autumn Leaves: The absolute classic brown material. Every Kiwi garden has plenty from about April onwards.
- Shredded Cardboard & Paper: Rip up those old egg cartons, loo rolls, and non-glossy newspaper. Cardboard from your online shopping is brilliant.
- Twigs & Wood Chips: Small branches and untreated sawdust are great for adding structure and airflow.
- Dry Straw or Hay: If you can get your hands on some, it’s a fantastic carbon source.
The Golden Ratio for a Healthy Pile
Here’s the rule of thumb for a healthy, odour-free compost pile. For every one part of 'green' stuff you add, you want to add about two to three parts of 'brown' stuff.
Don't stress about measuring this perfectly. Just think in terms of volume. If you dump in a bucket of kitchen scraps, try to follow it up with two or three buckets of dry leaves or ripped-up cardboard.
This carbon-heavy recipe is crucial. The browns soak up any extra moisture from your greens, stopping things from getting soggy. They also create little air pockets, giving your microbes the oxygen they need to breathe and work their magic.
If your compost starts to smell a bit like ammonia or rotten eggs, that’s a dead giveaway you’ve got too many greens. The fix is dead simple: just stir in more browns. On the flip side, if your pile looks dry and nothing much is happening, it’s probably crying out for more nitrogen-rich greens and a splash of water. Nailing this balance is what turns a beginner into a seasoned composting pro.
How to Build and Maintain Your Compost Pile

Right, you’ve picked your composting system and you know your greens from your browns. Now for the exciting bit – actually building the pile. This is where you create the perfect home for nature's recycling crew: the millions of tiny microbes that will turn your scraps into black gold.
Think of building your first compost pile a bit like making a lasagne. The idea is to create alternating layers that give those microbes the perfect mix of food, air, and moisture. This structure is key to stopping the pile from turning into a compacted, soggy mess and really kick-starts the whole process.
Crafting Your First Compost Layers
You’ll want to start with a solid foundation. Get a thick layer of coarse brown stuff, like small twigs or scrunched-up cardboard, and lay it at the bottom of your bin. This first layer, about 10-15 cm deep, is absolutely essential for good drainage and airflow from the bottom up.
Next, it’s time for your first layer of greens—your kitchen scraps or fresh grass clippings. Straight after that, add a layer of browns that's about twice as thick. Think dry autumn leaves, shredded newspaper, or cardboard. Give each layer a light watering as you go. You’re aiming for the consistency of a wrung-out sponge, not sopping wet.
Just keep layering like this until you've used all your materials or the bin is full. Always, always finish with a thick layer of browns on top. This works as a kind of natural biofilter, keeping smells in and curious flies or pests out.
The Importance of Aeration and Turning
Once your pile is built, your main job is maintenance, and nothing is more important than turning it. Just like us, the microbes doing all the hard work need oxygen to breathe and work their magic. Turning the pile mixes everything up and gets fresh air in there, which is vital for a hot, active compost system.
You’ll know you’re on the right track when your pile starts heating up. Don't be surprised if you see steam rising or feel real warmth when you dig into it. A pile reaching 55°C to 65°C in the centre is the sign of a healthy, thriving ecosystem at work.
So, how often do you need to turn it? A good rule of thumb is once every one to two weeks with a garden fork or a shovel. If you've got a tumbler, a few spins every couple of days is perfect. This regular mixing makes sure all the material gets a turn in the hot central core, which speeds up decomposition and kills off any pesky weed seeds.
Seasonal Composting Tips for New Zealand
Here in New Zealand, managing your compost means adapting to our pretty distinct seasons. Our climate can throw everything from a soaking winter downpour to a scorching summer day at your pile.
- During a Wet Winter: A classic Kiwi winter can easily waterlog your compost. To stop it from becoming a sludgy, smelly disaster, keep a stash of dry browns (like cardboard or bagged autumn leaves) handy. Every time you add wet kitchen scraps, throw in a generous handful of browns to soak up that extra moisture.
- Through a Hot Summer: On the flip side, a Hawke's Bay summer can dry your pile out completely, bringing the whole process to a screeching halt. Check the moisture level every week just by grabbing a handful. If it feels dry, give it a light watering to keep things ticking along. Popping a lid or even a piece of old carpet on top can also help hold that moisture in.
When your compost is finally ready, it’s a brilliant ingredient for improving your garden soil. If you're keen to learn more about creating the perfect foundation for your plants, have a look at our advice on the best indoor potting mix. With a little bit of attention to these simple steps, you'll have an active, productive compost pile all year round.
Solving Common Composting Problems
Every composter, whether you're a seasoned green thumb or just starting out, runs into a snag at some point. Don't worry—most composting problems are surprisingly simple to fix.
Think of your compost pile as a living ecosystem. It has its own way of telling you when things are out of balance. Usually, the issue boils down to the wrong mix of materials, or not enough moisture and air. Once you learn to spot the signs, you'll be able to get your pile healthy and happy again in no time.
Why Does My Compost Smell Bad?
A healthy compost pile should have a lovely, earthy smell, almost like a forest floor after it rains. If you're catching a whiff of something nasty, it's a clear signal that something’s not right.
-
Smells like rotten eggs or ammonia: This is the most common complaint, and it's almost always a sign of too much nitrogen (your 'greens') and not enough oxygen. The pile gets compacted and becomes anaerobic. The fix is straightforward: add a generous layer of carbon-rich 'browns' like shredded cardboard, dry leaves, or sawdust. Then, give the whole pile a thorough turn with a garden fork to get some air in there.
-
Smells sour or vinegary: This usually happens when the pile is too wet, which suffocates the good microbes. Once again, the solution is to add more dry, brown materials and mix it all through.
Why Is My Compost Not Heating Up?
If your pile isn't warming up, it means the decomposition process has ground to a halt. This usually happens for a couple of key reasons.
The pile might be too dry, which stops the microbes from doing their thing. Another common culprit is an imbalance of materials—specifically, not enough nitrogen-rich 'greens' to kick-start all that microbial activity. A pile that’s too small can also struggle to build and hold onto heat.
To get things cooking again, check the moisture. Grab a handful; it should feel like a well-wrung-out sponge. If it feels dry, give it a light watering. If the balance seems off, add a fresh layer of greens like kitchen scraps or grass clippings and turn them through the pile.
It's amazing how quickly household scraps can add up. The 2025 Rabobank-KiwiHarvest Food Waste survey found Kiwis still waste enough food each year to feed 536,000 people. Even something as simple as sandwiches accounts for 1,430 tonnes of avoidable waste that could be fuelling compost piles instead. You can read the full research about Kiwi food waste for more insights.
What About Pests in My Compost?
Unwanted visitors like rats or mice are usually drawn in by the wrong kinds of food scraps. A golden rule for an open compost pile is to never add meat, fish, bones, or dairy products, as these are a massive attraction for pests.
Make sure you always bury fresh kitchen scraps deep into the centre of the pile. Cover them with a good, thick layer of brown material. This simple step masks the tempting smells and makes it much harder for critters to find a meal. A well-managed, hot pile is always your best defence.
Harvesting and Using Your Finished Compost
After months of patiently feeding your compost bin and giving it the odd turn, the moment you’ve been waiting for has finally arrived. It’s time to harvest your own homemade 'black gold'. This stuff is the ultimate reward for your efforts and truly the best thing you can add to your Kiwi garden.
So, how can you tell when it's ready? Finished compost has a few tell-tale signs. It should be a beautiful dark brown or black, with a fine, crumbly texture. Most importantly, it will have a rich, earthy smell, just like a healthy forest floor after a bit of rain. If you can still make out last week's banana peels or it smells a bit sour, it just needs more time to do its thing.
Getting the Good Stuff Out
Harvesting is pretty straightforward. If you have a standard bin with a little hatch at the bottom, you can simply scoop out the finished compost from there. That’s where the oldest, most broken-down material will be. For tumblers or open piles, you’ll need to stop adding new scraps for a few weeks to let the entire batch finish up.
You’ll almost certainly find a few stubborn bits that haven’t fully broken down, like avocado pits or small twigs. Don’t stress about these. A simple way to deal with them is to sift your compost through a screen of wire mesh. Just toss any of the big pieces back into the bin to break down with the next batch.
Pro Tip: I always save a few handfuls of finished compost to use as a "starter" for my next pile. It’s absolutely teeming with beneficial microbes that will kick-start the decomposition process and speed things up considerably.
Putting Your Black Gold to Work
Now for the really fun part: using your beautiful, homemade compost. Its versatility is one of its biggest strengths, and there’s almost no part of your garden that won't benefit from it.
Here are a few of my favourite ways to use it:
- Enrich Your Veggie Patch: Before you do your spring planting, work a generous layer of compost into the top 15 cm of your garden beds. This improves the soil structure and provides a fantastic slow-release source of nutrients for hungry plants. It's especially brilliant for heavy feeders; our guide on how to grow tomatoes explains just how much they adore nutrient-rich soil.
- Top-Dress Existing Plants: Spread a 2-3 cm layer around the base of your established shrubs, flowers, and fruit trees. This acts as a nourishing mulch, helping the soil hold onto moisture during our dry summers while also keeping the weeds down.
- Create a Potent 'Compost Tea': For a quick liquid feed, you can steep a shovelful of compost in a bucket of water for a day or two. Strain the liquid and use it to water your potted plants—they’ll love the instant nutrient boost.
Your Composting Questions, Answered
As you get your hands dirty and start composting, you're bound to have a few questions pop up. It's all part of the process! To help you out, I've put together some quick answers to the most common queries we get from beginner composters around New Zealand.
What Should I Never Put in My Compost Bin in NZ?
Knowing what to leave out is just as important as knowing what to put in. A few common items can cause some real headaches, attracting pests or simply refusing to break down.
To keep your compost happy and healthy, you’ll want to avoid adding these:
- Meat, fish, bones, and dairy products: These are a magnet for rats and other unwanted visitors, and they can create some pretty awful smells as they decompose.
- Oily or greasy foods: Leftover salad dressings or fatty food scraps can throw off the moisture balance in your pile. They tend to coat other materials, slowing everything down.
- Diseased plants: If your tomatoes got hit with blight, the compost bin isn't the place for them. Some plant pathogens are tough enough to survive the composting process and could infect your garden later on.
- Persistent weeds: Nasty weeds like oxalis, couch grass, or wandering willie are incredibly resilient. They can regrow from the tiniest root fragments, so it’s much safer to pop them in your council green waste bin instead.
- Treated wood and charcoal ash: These often contain chemicals you really don't want leaching into your garden soil.
- Pet waste: Droppings from cats or dogs can contain harmful pathogens that aren't safe for a home compost system.
How Long Does It Take to Make Compost in New Zealand?
This is the big question! The truth is, it really depends on your setup and, of course, the season. There’s no single timeline, but here’s a rough guide for our Kiwi climate.
A well-managed hot compost pile can give you finished compost in as little as 2-3 months during the warmer spring and summer months. But when things cool down from June to August, decomposition slows right down, and you might be looking at 6 months or more.
If you've gone for a simple 'cold' pile that you don't turn very often, be prepared to wait a lot longer – potentially a year or even more for everything to fully break down.
Can I Put All My Lawn Clippings in the Compost?
Absolutely! Grass clippings are a fantastic source of nitrogen (a 'green') for your compost pile. But there’s a trick to it.
Freshly cut grass is very wet and can easily mat together into a slimy, smelly layer if you just dump the whole lawnmower catcher in at once. This starves the pile of air and everything turns anaerobic.
To sidestep this common mistake, you've got two great options:
- Dry them out first. Just spread the clippings on a tarp in the sun for a day or so before you add them to the bin.
- Mix them thoroughly with browns. This is the best approach. For every bucket of fresh clippings, make sure you mix in at least two buckets of 'brown' materials like shredded newspaper or dry autumn leaves. This keeps things balanced and allows air to flow freely.
At Jungle Story, we believe that beautiful gardens start with healthy soil. Composting is one of the most powerful ways to enrich your garden naturally. Explore our huge range of plants, from vibrant indoor foliage to productive edibles, and find the perfect companions for your homemade black gold. Discover your next plant at Jungle Story.