Choosing the right fertilisers for vegetables is one of the real secrets to a garden that doesn't just survive, but truly thrives. It’s what turns struggling plants into a harvest you can be proud of. A good fertiliser is like a perfectly balanced diet for your veggies, giving them all the essential nutrients they might not be getting from the soil alone.
This is how you get everything from the crispiest lettuce to the juiciest tomatoes, all grown healthy, productive, and packed with flavour.
Why The Right Fertiliser Matters for Your Veggie Patch
Ever looked at a neighbour's veggie patch, bursting with life, and wondered why yours is lagging behind? The answer is almost always hiding in the soil. A truly successful garden isn't about guesswork; it's built on understanding exactly what your plants need to flourish in our unique New Zealand conditions.
Think of your garden soil as a pantry. Every time you grow a crop of veggies, they take nutrients out of that pantry. If you don't restock it, your next lot of plants will go hungry. That’s when you start seeing weak growth, yellowing leaves, and a pretty disappointing harvest. This is exactly where fertilisers come in.
Building a Foundation for Growth
Adding the right fertiliser does so much more than just feed the plant you see above the ground—it enriches the entire soil ecosystem. You're basically setting the stage for season-long success.
- Boosts Plant Vigour: Well-fed plants are simply stronger. They grow faster and are far better at shrugging off pests and diseases.
- Improves Yield and Quality: It's a direct line—proper nutrition seriously impacts the size, taste, and how many vegetables you actually get to harvest.
- Corrects Soil Deficiencies: Let's face it, many New Zealand soils are naturally low in certain key elements. Fertilisers are the best way to fill those nutritional gaps.
This guide is all about giving you the confidence to feed your plants properly. We'll get into everything from decoding the NPK numbers on fertiliser bags to mastering feeding schedules that work with Aotearoa's climate. If you're curious about the bigger picture, it's worth reading up on the role of fertilizer in landscapes.
The goal here is simple: to help you give your garden targeted nutrition. When you get that right, you’ll be rewarded with healthier, more productive, and tastier vegetables all season long. Let's dig in.
Decoding Your Soil and Plant Nutrient Needs
Before you even think about reaching for a bag of fertiliser, the first step to a seriously productive veggie patch is understanding what you’re already working with. Think of your garden soil like a personality; some are naturally rich and giving, while others need a bit of a boost. Getting to know your soil's unique makeup is the secret to feeding your plants what they actually need, rather than just guessing and hoping for the best.

It all begins with figuring out what your veggies are truly hungry for. Just like people, different plants have different dietary requirements to really thrive. Forget the old one-size-fits-all advice; learning to read your soil and plants is a skill that pays you back with every single harvest.
The Big Three Nutrients: N-P-K
Whenever you look at a bag of fertiliser, you'll see three numbers staring back at you. This is the NPK ratio, and it represents the percentage of the three big macronutrients essential for plant life. Getting your head around what each one does is the key to choosing the right fertilisers for your vegetables.
-
Nitrogen (N) is the engine for growth. It’s responsible for producing all that lush, green foliage, making it vital for leafy greens like silverbeet, lettuce, spinach, and cabbage. A classic sign of nitrogen deficiency is yellowing leaves, especially the older ones down the bottom of the plant.
-
Phosphorus (P) is all about building a strong foundation. It fuels robust root development, flowering, and fruiting. Root crops like carrots, potatoes, and kūmara absolutely depend on it to bulk up underground.
-
Potassium (K) acts as the plant's all-around wellness manager. It helps regulate water, bolsters disease resistance, and seriously improves the quality, colour, and flavour of your harvest. It's a non-negotiable for fruiting crops like tomatoes, capsicums, and courgettes.
A "balanced" fertiliser will have fairly even numbers (something like a 5-4-6), whereas a specialised one might be jacked up with one nutrient to target a specific job, like a high-nitrogen feed for a hungry lawn. For a deeper dive into creating the perfect foundation, check out our guide on choosing the right soil for your plants.
Matching Nutrients to Your Veggies
Not all vegetables have the same appetite. Grouping them by what they crave most helps you feed your garden much more effectively. For instance, giving a high-nitrogen feed to your carrots might sound like a good idea, but you'll likely end up with massive, beautiful green tops and sad, tiny little roots.
That’s because the plant puts all its energy into leafy growth instead of the part you actually want to eat. Smart, targeted feeding ensures each plant gets exactly what it needs to produce the goods.
Your goal is to become a bit of a garden detective, observing your plants and soil to figure out what’s missing. This tailored approach is what separates a casual gardener from a skilled cultivator who gets consistently amazing results.
For example, brassicas like broccoli and cauliflower are notoriously heavy feeders that absolutely crave nitrogen to form those big, dense heads. On the flip side, legumes like peas and beans are clever "nitrogen-fixers." They can pull nitrogen right out of the atmosphere and store it in their roots, which means they need far less of it from the soil.
Here’s a quick-reference guide to help you match your veggies with their primary nutrient needs during their main growth phases.
Nutrient Needs for Common New Zealand Veggies
| Vegetable Type | Primary Nitrogen (N) Need | Primary Phosphorus (P) Need | Primary Potassium (K) Need | Best For |
|---|---|---|---|---|
| Leafy Greens | High | Medium | Medium | Lush foliage growth |
| Root Veggies | Low | High | Medium | Strong root development |
| Fruiting Veggies | Medium | Medium | High | Flower/fruit production |
| Legumes | Low | Medium | Medium | Pod development |
Keep this in mind when you’re planning your feeding schedule, and you’ll be well on your way to a bumper crop.
New Zealand Soil: A Unique Challenge
Kiwi gardeners often face a specific soil challenge: many of our soils are naturally low in phosphorus. This is a huge factor in our agricultural landscape and has a big influence on the types of fertilisers you’ll find on the shelves.
In fact, superphosphate fertiliser has long dominated New Zealand's farming sector, mainly because it directly tackles this widespread phosphorus deficiency. According to Stats NZ, superphosphate was the main fertiliser applied to agricultural land, accounting for a massive 46 per cent of the total, or 788,000 tonnes. This gives us home gardeners a pretty valuable clue about what our own soil might be lacking.
So, what does this mean for your backyard veggie patch? It strongly suggests that, without a little help, your soil might struggle to provide enough phosphorus for strong root systems and good fruit development. This is precisely why adding well-rotted compost and balanced organic fertilisers is so critical for building healthy, fertile soil over the long term. It helps replenish not just phosphorus, but the whole spectrum of nutrients your veggies will be pulling out of the ground all season long.
Choosing Your Fertiliser: Organic vs Synthetic Options
Walking down the fertiliser aisle at your local garden centre can feel a bit overwhelming. With so many bags, bottles, and boxes all promising amazing results, it’s tough to know which one is the right choice for your veggie patch. The decision often boils down to one key question: should you go organic or synthetic?
Honestly, there's no single "best" answer. Each type has its place, and knowing the fundamental differences will help you make a smart choice that lines up with your gardening philosophy and what your plants need right now.
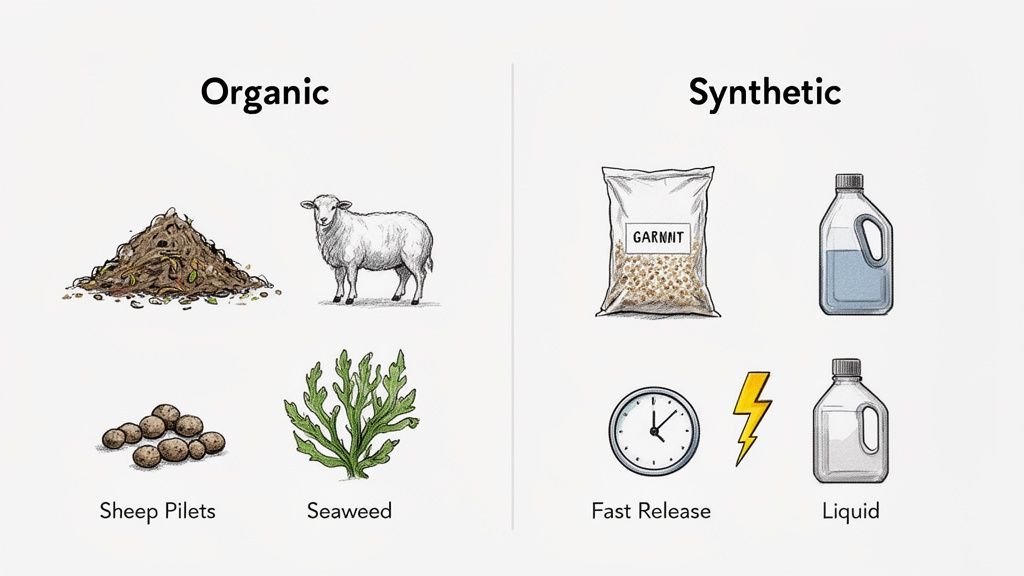
The Organic Approach: Building Healthy Soil
Organic fertilisers come from natural sources—think plant matter, animal manures, and mineral deposits. Here in New Zealand, you’ll see trusted options like sheep pellets, blood and bone, compost, and seaweed solutions everywhere.
The idea behind organics is simple: feed the soil, and the soil will feed your plants. You're really providing a feast for the huge ecosystem of beneficial bacteria, fungi, and worms in your garden. As these tiny helpers break down the organic matter, they release nutrients in a form that plant roots can easily absorb.
It’s a slow-and-steady process, which brings some great benefits:
- Long-Term Fertility: You’re building a resilient, fertile foundation that lasts for seasons to come by improving soil structure and microbial life.
- Reduced Risk of Burn: Because nutrients are released gradually, there's very little chance of "burning" your plants with too much fertiliser.
- Improved Soil Health: Organic matter helps the soil hold onto water and nutrients, making your garden more drought-resistant and efficient.
If you’re keen on natural soil enrichment, learning how to compost at home can seriously improve your garden's health while cutting down on waste. Seaweed solutions are another fantastic option for conditioning the soil. We cover this in-depth in our guide on using seaweed fertiliser in your NZ garden.
The organic method is a long-term investment in your garden's ecosystem. It's about creating a self-sustaining environment where healthy soil naturally supports vigorous, productive plants.
The Synthetic Solution: Fast-Acting and Targeted
Synthetic fertilisers, on the other hand, are manufactured through chemical processes. They’re engineered to deliver specific, concentrated nutrients directly to the plant in a water-soluble form that roots can absorb almost immediately.
This fast-acting nature is their biggest selling point. Synthetics are powerful tools for giving a quick boost or correcting a very specific nutrient deficiency with pinpoint accuracy.
Picture a tomato plant with yellowing leaves—a classic sign it’s crying out for nitrogen. A quick dose of a liquid synthetic feed can deliver that nitrogen straight away, often showing a visible improvement in just a few days. It's like giving your plant an emergency shot of vitamins.
But that speed comes with a few trade-offs. Synthetic fertilisers feed the plant directly, but they do very little for the soil's microbial life or long-term structure. Over-relying on them can lead to depleted soil that becomes dependent on chemical inputs. There's also a much higher risk of nutrient burn if you get the dose wrong, and the water-soluble nutrients can easily wash out of the soil with heavy rain, potentially ending up in our waterways.
Making an Informed Choice for Your Garden
So, which path should you choose? Many savvy Kiwi gardeners find a balanced approach works best, using organic methods as the foundation and keeping synthetics as a targeted tool for when they’re truly needed.
For example, you could work rich compost and sheep pellets into your garden beds in spring to build that long-term fertility. Then, if your heavy-feeding corn or courgette starts to look a bit tired mid-summer, a fast-acting liquid feed can give them the quick pick-me-up they need to finish strong.
It's also worth keeping an eye on the market. New Zealand's fertiliser import costs went on a wild ride recently, peaking at nearly NZ$1.5 billion in 2022 before a huge 46 per cent drop in 2023. This kind of volatility in the agricultural supply chain affects the price and availability of fertilisers for us home gardeners, so buying when the market is down can be a smart move for your wallet.
Ultimately, choosing the right fertilisers for vegetables is about matching the product to your goals and what your garden needs at that moment.
Mastering How and When to Apply Fertiliser
Picking the right fertiliser is a great start, but knowing exactly how and when to apply it is what really makes a garden thrive. You can have the best plant food in the world, but it’s all wasted if it doesn't get to your plants when they need it. This is where we get our hands dirty and learn the techniques that deliver maximum benefit without risking any harm.
Timing is everything. Giving nutrients to a plant that isn't ready for them is pointless, but a well-timed feed during a key growth spurt can produce incredible results. A few simple application methods are all you need to master to feed your garden like a pro.
Applying Granular Fertilisers
Granular fertilisers, whether organic or synthetic, are the slow-and-steady members of the feeding team. They break down over time, providing a consistent source of food for your veggies.
The easiest way to use them is to mix them into the soil before you even start planting. As you’re preparing a new garden bed, scatter the granules over the surface. A good rule of thumb is about 50-100 grams per square metre, but always double-check the packet instructions.
Once scattered, just gently work the fertiliser into the top few centimetres of soil with a rake. This 'broadcasting' technique gets the nutrients evenly distributed, ready for the roots of your new seedlings. Always give the bed a good water afterwards to help activate the granules.
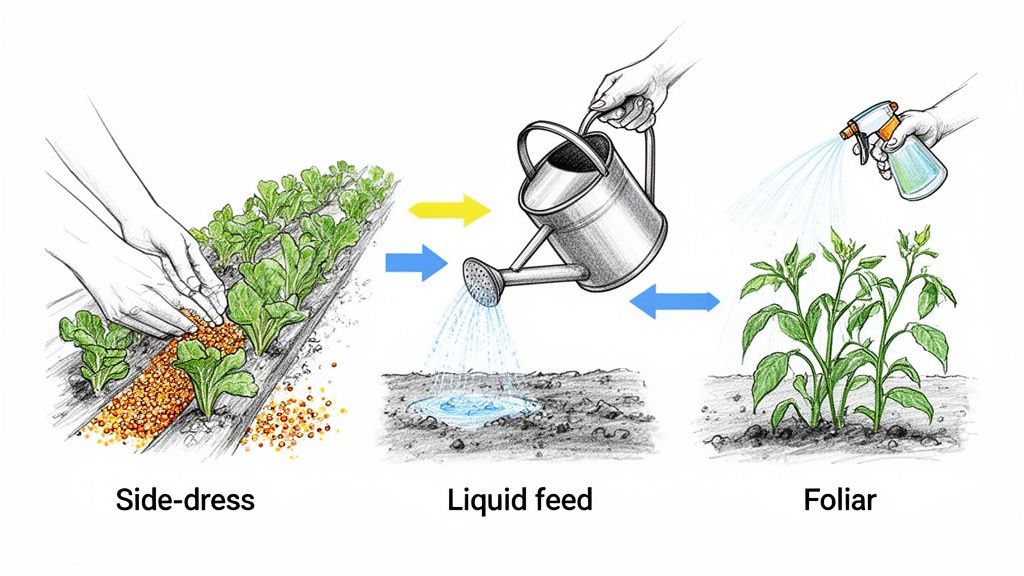
The Art of Side-Dressing
Side-dressing is a brilliant trick for giving established plants a targeted boost right when they need it most. It’s perfect for hungry, long-season crops that can start to run out of puff halfway through.
Think of heavy feeders like tomatoes, corn, courgettes, and capsicums. Their nutrient demand skyrockets just as they begin to flower and set fruit. This is the perfect moment to side-dress.
Simply scratch a shallow trench in a ring a few centimetres away from the plant's base. Sprinkle your granular fertiliser into the trench—just be careful not to let it touch the stem, as this can cause fertiliser burn. Cover it back up with a bit of soil and water it in well.
This method gets fresh nutrients right to the plant’s active root zone without digging around and disturbing them. It's a simple, super-efficient way to keep your most productive veggies going strong right through to harvest.
The Power of Liquid Feeding
For a fast-acting nutrient hit, you can't beat liquid fertilisers. Because the nutrients are already dissolved in water, plant roots can slurp them up almost instantly. This makes them the go-to solution for a quick pick-me-up or for correcting a deficiency you can see.
Noticed your silverbeet leaves looking a bit pale and yellow? A quick dose of liquid feed can often restore their vibrant green in just a few days. It's also ideal for veggies in containers, where frequent watering can wash nutrients out of the potting mix more quickly.
Most liquid feeds are concentrates that you dilute in a watering can. Follow the bottle's instructions to the letter, because a mix that's too strong can easily burn sensitive roots. Apply the solution to the soil around the base of your plants—you're essentially watering them with a nutrient-rich drink. For most veggies, a liquid feed every two to four weeks during the main growing season here in New Zealand is plenty.
Understanding Foliar Sprays
A foliar spray is another form of liquid feeding, but instead of watering the soil, you spray it directly onto the leaves. Plants are actually able to absorb small amounts of nutrients through tiny pores on their leaf surfaces.
It's not a replacement for good soil and root feeding, but a foliar spray is fantastic for delivering a rapid dose of micronutrients or giving a stressed plant an immediate lift. Seaweed-based solutions are my favourite for this, as they’re packed with trace elements that boost overall plant health.
Here’s how to do it:
- Mix Your Solution: Dilute your liquid fertiliser (like a seaweed tonic) as per the foliar application directions on the packet. It’s usually a weaker concentration than for a soil drench.
- Time It Right: The best time is early morning or late evening. Spraying in the hot midday sun can scorch the leaves.
- Spray Thoroughly: Use a fine-mist sprayer and aim to coat both the tops and undersides of the leaves until they're dripping.
Think of foliar feeding as a vitamin shot for your plants—it’s a great supplement, but not the main course. The real foundation of a healthy garden will always be rich, well-fed soil.
A Seasonal Feeding Schedule for Your Kiwi Garden
Feeding your veggie patch isn't a one-and-done job; it's more like a year-round conversation with your soil and plants. Here in New Zealand, our distinct seasons call for a flexible approach to fertilising, making sure we're giving our plants the right nutrients at exactly the right time. Nailing a seasonal schedule is the secret to keeping your soil fertile and pulling in a continuous, bountiful harvest from your Kiwi garden.
Think of it as a calendar for your garden's appetite. It helps you get ahead of its needs, from preparing the soil for that explosion of spring growth to sustaining hungry crops through the long, hot days of summer. It’ll also guide you through replenishing tired beds in autumn and protecting your precious soil during the cooler winter months.
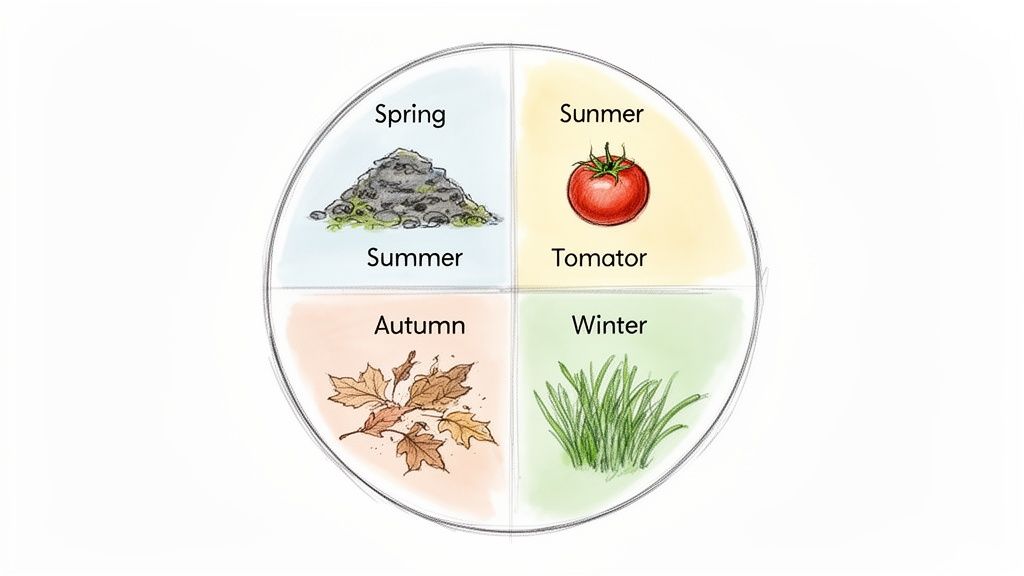
Spring (September – November): Waking Up the Garden
Spring is all about preparation and fuelling new life. As the soil finally starts to warm up, your focus should be on creating a nutrient-rich foundation for the busy growing season ahead. This is without a doubt the most crucial time for adding slow-release fertilisers that will support your plants for months to come.
Before you even think about planting your summer veggies, enrich your garden beds by digging in a generous amount of well-rotted compost. This does more than just add a wide array of nutrients; it also works wonders for soil structure and water retention. Alongside the compost, I like to incorporate a balanced, slow-release granular fertiliser like sheep pellets or blood and bone.
- Action: Work 50-100 grams per square metre of a balanced granular fertiliser into the top 10-15 cm of soil.
- Target: This initial feed is perfect for establishing strong root systems and vigorous early growth for seedlings like lettuce, silverbeet, and beans.
This groundwork in spring ensures your young plants have immediate access to the food they need to get off to a flying start.
Summer (December – February): Sustaining Peak Production
Summer is when your garden really hits its stride, but it’s also when your plants are at their hungriest. Heavy-feeding vegetables like tomatoes, cucumbers, capsicums, and corn are working overtime to produce flowers and fruit, and they'll rapidly strip the soil of its nutrient reserves.
To keep them productive, you'll need to provide some supplementary feeding. This is the perfect time for liquid fertilisers because they deliver a boost of energy that plants can absorb almost instantly. A seaweed tonic or a diluted worm tea applied every two to four weeks will make a huge difference. Keep a close eye on your plants—if you spot any yellowing leaves, it’s a dead giveaway they need a feed.
For more specific advice on feeding these summer stars, you might find our guide on how to grow tomatoes particularly helpful.
A consistent feeding schedule through summer is non-negotiable for high-yield crops. Think of it as refilling the tank for your hardest-working plants, ensuring they have the fuel to keep producing right through until autumn.
Autumn (March – May): Replenishing and Recharging
As your summer harvest winds down, your garden soil is probably feeling pretty tired and depleted. Autumn is your chance to put those lost nutrients back and prepare your beds for the cooler months or for next spring's planting.
After you’ve cleared away the old summer plants, add another layer of compost or aged manure to your beds. This kicks off the process of rebuilding soil fertility. If you're planning on planting overwintering crops like garlic, broad beans, or kale, work in a small amount of slow-release fertiliser that's a bit higher in phosphorus to encourage strong root development before winter properly sets in.
This is also an excellent time to sow a "green manure" crop like lupin or mustard. These plants are brilliant at drawing nutrients up from deep in the soil, and you can just dig them back in come spring, adding valuable organic matter.
Winter (June – August): Protecting and Resting
While plant growth slows to a crawl during the New Zealand winter, your work isn't quite over. The main goal now is to protect your soil from the winter rains, which can easily wash away valuable topsoil and nutrients.
The best way to do this is by covering your empty garden beds with a thick blanket of mulch, such as straw, shredded leaves, or pea hay. This protective layer insulates the soil, keeps the weeds down, and slowly breaks down over the months, adding even more organic matter. It’s a simple act that ensures your soil stays healthy and alive, ready for the cycle to begin all over again in spring.
Troubleshooting Common Fertiliser Problems
Even with the best intentions, things can go a bit sideways in the veggie patch. Plants have their own way of sending out an S.O.S., and learning to read these signals is key to fixing problems before they get out of hand. From nutrient deficiencies to the fallout from a little too much kindness, let’s decode what your plants are telling you.
Often, the issue isn't a lack of care but a simple imbalance. Getting your plants back on track usually just requires a bit of detective work and a gentle, corrective response.
Identifying Nutrient Deficiencies
When your vegetables aren't getting enough of a specific nutrient, they’ll show it. These are the most common cries for help you’ll see in a Kiwi garden.
-
Yellowing Leaves (Nitrogen Deficiency): This is the classic. You'll spot older, lower leaves turning a pale yellow before the problem slowly creeps up the plant. A quick dose of a liquid feed high in nitrogen will usually bring the colour back.
-
Purplish Tint (Phosphorus Deficiency): If your plants, especially young seedlings, develop a purplish or reddish hue on their leaves, they're likely short on phosphorus. This is a common sight in the cold, wet soils of early spring. Applying a balanced liquid feed or a top-dressing of blood and bone can sort it out.
-
Yellow Edges on Leaves (Potassium Deficiency): When you see yellowing or browning specifically along the outer edges of older leaves, it’s a tell-tale sign of low potassium. Fruiting plants like tomatoes are especially prone to this. A seaweed tonic or a fertiliser formulated for tomatoes can correct the imbalance.
The Dangers of Over-Fertilising
It’s surprisingly easy to kill your plants with kindness. Being over-enthusiastic with feeding is a common mistake that can do more damage than not feeding at all. Too much fertiliser, especially synthetic types, creates a build-up of salts in the soil that’s toxic to plant roots.
One of the most important lessons in gardening is knowing when to step back. More is not always better when it comes to fertilisers for vegetables. A heavy hand can lead to burnt roots, stunted growth, and a disappointing harvest.
Symptoms of over-fertilising often include:
- Burnt Leaf Tips: The edges of the leaves look brown and scorched.
- Stunted Growth: Despite being fed, the plant just doesn't seem to grow.
- White Crust on Soil: A visible layer of salty residue might form on the soil surface.
If you suspect you've gone overboard, the best remedy is to flush the soil. Water the affected area deeply and slowly for an extended period, allowing the excess salts to drain away from the root zone. Then, hold off on any further feeding until the plant shows clear signs of recovery.
Safety and Environmental Care
Responsible gardening means looking after your patch and the wider environment. When using any fertilisers for vegetables, a few simple precautions ensure your practices are both safe and sustainable.
Always store fertilisers in their original containers, sealed and in a dry, secure place away from children and pets. When you’re applying granular products, try to avoid scattering them on windy days to prevent drift. Be sure to sweep any stray pellets off paths and driveways to stop them from washing into stormwater drains. Following the recommended application rates isn’t just good for your plants; it prevents excess nutrients from leaching into our precious waterways.
At Jungle Story, we believe that a healthy garden starts with knowledge. Explore our extensive range of plants and garden care products to find everything you need for a thriving veggie patch. Visit us at https://junglestory.co.nz to get started.