Choosing the right plant fertiliser for indoor plants is one of the best ways to unlock that lush, vibrant growth we all want. I like to think of it as preparing a balanced meal for your green flatmates; stuck in their pots, they rely entirely on you to meet their dietary needs. The key is getting your head around the big three nutrients—Nitrogen (N), Phosphorus (P), and Potassium (K)—which are the absolute foundation of their health.
Understanding Your Indoor Plant's Diet
Ever looked at the numbers on a fertiliser bag and wondered what they actually mean? They represent the core of your plant's diet, a trio of essential macronutrients that fuel everything from leafy growth to beautiful flowers. Just like we need a good mix of proteins, carbs, and fats, your plants need a specific blend of these elements to really thrive.
Without access to the vast nutrient reserves of an outdoor garden, your indoor plants are completely dependent on the soil you provide and any food you add. Over time, they'll use up whatever is available in the pot, which makes regular feeding a crucial part of any good plant care routine. Understanding what each nutrient does is the first step toward becoming a more confident and effective plant parent.
The Big Three Macronutrients: N-P-K
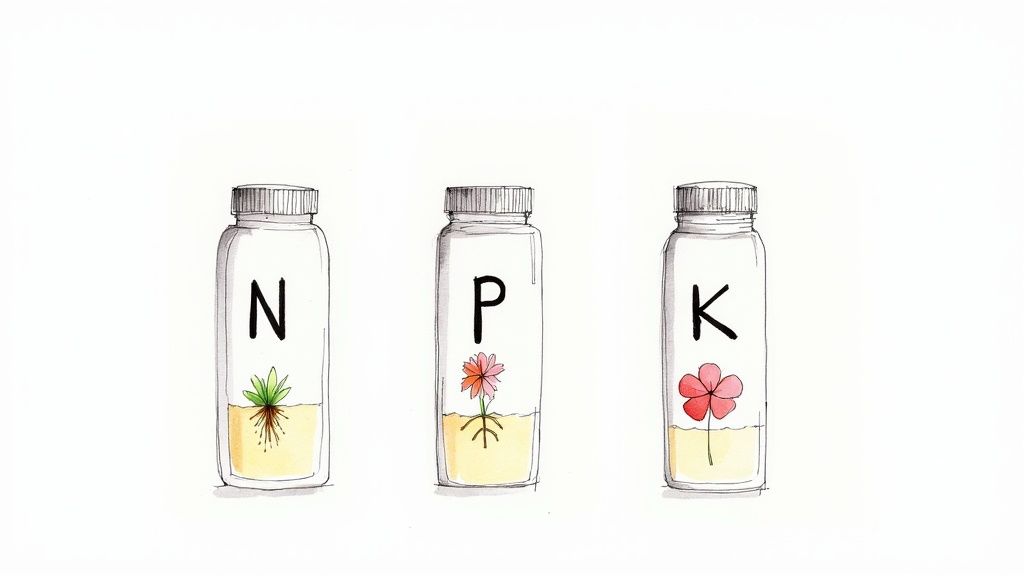
The foundation of almost every plant fertiliser is its N-P-K ratio. These three letters stand for Nitrogen, Phosphorus, and Potassium, and the balance between them determines what the fertiliser is designed to do. A simple way to remember their roles is the phrase: "up, down, and all around."
-
Nitrogen (N) for ‘Up’: This is the engine for green, leafy growth. Nitrogen is a core component of chlorophyll, the pigment that makes leaves green and powers photosynthesis. A good supply of nitrogen encourages your plants to produce that lush, full foliage and strong stems. If you’re dreaming of a bushy Monstera or a cascading Pothos, nitrogen is your best friend.
-
Phosphorus (P) for ‘Down’: This nutrient focuses its energy below the soil and on new growth. Phosphorus is vital for developing a strong, healthy root system—the plant's foundation for absorbing water and other nutrients. It also plays a key role in stimulating flower production, making it essential for any flowering indoor plants like orchids or peace lilies.
-
Potassium (K) for ‘All Around’: Potassium is the great regulator, contributing to the plant's overall health and strength. It helps manage hundreds of cellular functions, including water regulation, disease resistance, and stem sturdiness. Think of it as the plant's immune system booster, helping it withstand stress from pests, temperature changes, and even a bit of inconsistent watering.
A fertiliser labelled "10-10-10" contains an equal, balanced mix of these three nutrients—10% Nitrogen, 10% Phosphorus, and 10% Potassium.
Let's break down what each of these powerhouse nutrients does for your plants.
The Role of Key Nutrients for Indoor Plants
| Nutrient (Symbol) | Primary Role | Signs of Deficiency |
|---|---|---|
| Nitrogen (N) | Fuels leafy green growth and stem development. Essential for photosynthesis. | Yellowing of older, lower leaves (chlorosis); stunted, weak growth. |
| Phosphorus (P) | Promotes strong root development, flowering, and fruit production. | Dull, dark green or purplish leaves; poor flowering; weak root system. |
| Potassium (K) | Manages overall plant health, water regulation, and disease resistance. | Yellowing or browning along the edges of older leaves; weak stems. |
Understanding these roles will help you diagnose issues and choose the perfect formula for your plant's specific needs. For a more comprehensive overview, you can check out our guide on indoor plant fertilizer basics for more details.
The Supporting Cast of Micronutrients
While N-P-K gets most of the attention, a whole supporting cast of micronutrients is also essential for plant health, just in much smaller quantities. These include elements like magnesium, calcium, sulphur, iron, and zinc. They function a bit like vitamins for your plants, playing specialised roles in everything from enzyme activation to chlorophyll production.
Most good-quality, all-purpose fertilisers designed for indoor plants will contain a balanced spectrum of these micronutrients. A deficiency in any one of them can lead to specific problems, such as yellowing leaves (chlorosis) or stunted growth, even if the N-P-K levels are perfect.
The importance of a balanced diet for our green companions is reflected across the country. In 2022, New Zealand spent approximately NZ$1.5 billion on fertiliser imports—the highest yearly amount ever recorded. This just goes to show how critical these nutrients are for everything from large-scale agriculture to the potted ficus in your living room.
Choosing Between Organic and Synthetic Fertilisers
Stepping into the fertiliser aisle can feel a bit much, but the choice really boils down to two main camps: organic and synthetic. Getting your head around the difference is the key to picking the right plant fertiliser for indoor plants that suits your plant's needs and your own gardening style.
Think of it this way: organic fertilisers are like a slow-cooked, wholesome meal for your plant. Synthetic ones are more like a quick, high-energy shot. One builds health from the soil up over time, while the other gives an immediate, targeted boost. Neither is automatically "better"—the best choice really depends on what you and your plants need right now.
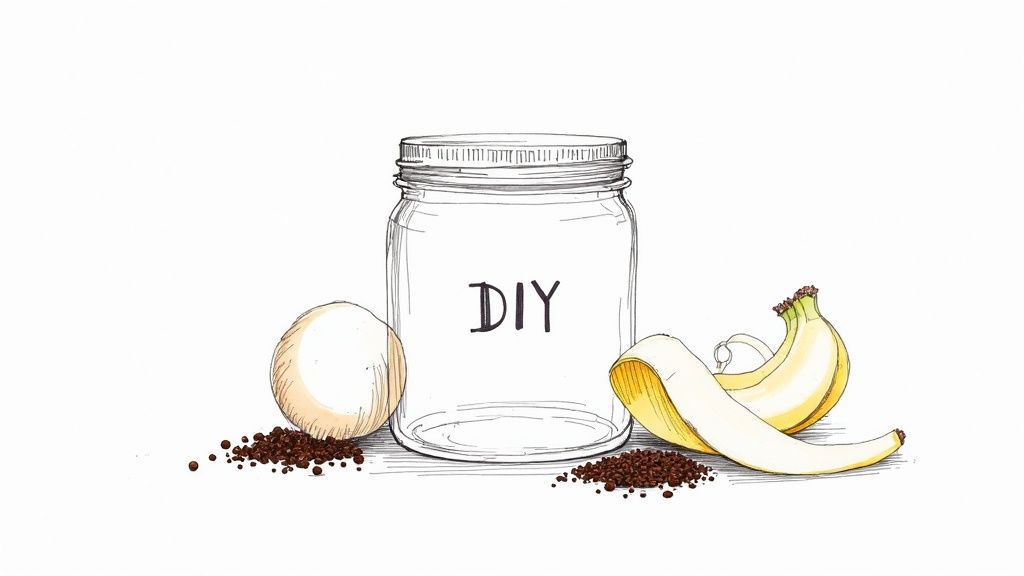
The Gentle Power of Organic Fertilisers
Organic fertilisers come from natural, living sources. In garden centres around New Zealand, you'll commonly see things like seaweed solution, worm castings (vermicompost), bone meal, and composted manures. Their magic is in their slow-release nature.
Instead of force-feeding the plant, organic options feed the soil. Microbes in your potting mix get to work, breaking down the organic matter and slowly releasing nutrients in a way the roots can easily absorb. This process doesn't just provide a gentle, steady supply of food; it also improves your soil's structure, aeration, and ability to hold moisture over time.
Because it’s such a gradual process, it’s incredibly difficult to over-fertilise and cause root burn, making organics a super safe bet for beginners. This focus on soil health is a big reason they're becoming so popular. In fact, the New Zealand fertiliser market is seeing a real boom in organic options, with a strong focus on sustainable, plant-based inputs that are perfect for our indoor jungles.
Key Takeaway: Organic fertilisers work with the natural ecosystem in your pot. They improve long-term soil health while providing a slow, steady stream of nutrients, building a resilient foundation for your plants.
The Fast Action of Synthetic Fertilisers
Synthetic fertilisers—sometimes called inorganic or chemical fertilisers—are manufactured to provide precise, concentrated doses of specific nutrients. They’re made up of water-soluble minerals and chemicals, which means they are immediately available for the plant to use as soon as you water it in.
This is where that "quick energy shot" analogy really fits. If you've got a plant showing clear signs of a nutrient deficiency, a synthetic fertiliser can deliver a fast-acting fix to help it bounce back quickly. They’re also incredibly concentrated, so a little goes a long way, often making them a more budget-friendly option.
But that speed and strength come with a word of caution. It's much easier to go overboard with synthetics, which can lead to "fertiliser burn"—a nasty situation where excess mineral salts damage your plant's delicate roots. It is crucial to follow the package instructions to the letter. Many seasoned plant parents even recommend diluting them to half-strength, just to be on the safe side. For more safety tips, you can check out our complete guide to using fertiliser for indoor plants.
How to Choose What's Right for You
So, which one should you grab? It all comes down to weighing the pros and cons against your personal plant care style.
Choose Organic if:
- You want to build amazing long-term soil health with a natural approach.
- You're a beginner and a bit nervous about the risk of over-fertilising.
- You prefer a "slow and steady" feeding routine that mimics nature.
- Your plant is generally healthy and doesn't need an emergency fix.
Choose Synthetic if:
- Your plant needs a rapid nutrient boost to correct a deficiency, fast.
- You want precise control over the exact NPK ratios your plant gets.
- You're after a highly concentrated, budget-friendly option.
- You're confident with measuring and diluting exactly as instructed.
Ultimately, many Kiwi gardeners land somewhere in the middle, using a combination of both. You might build a healthy soil base with organic amendments like worm castings, then use a diluted synthetic liquid feed during the peak growing months of spring and summer for that extra bit of oomph.
Finding the Right Fertiliser Format for You

Alright, you've got the difference between organic and synthetic fertilisers sorted. The next piece of the puzzle is deciding how you want to deliver those nutrients to your plants. The world of plant fertiliser for indoor plants isn't a one-size-fits-all deal; it comes in a few different formats, each with its own rhythm and routine.
The big three you'll come across are liquids, granules, and spikes.
Your final choice will likely boil down to what works for you. How much time do you have? How much control do you want over feeding? And, of course, what do your plants actually need? It's a bit like cooking: are you after a quick and easy meal, a slow-cooker dinner that looks after itself, or a dish where you can tweak the seasoning as you go?
Liquid Fertilisers: The Fast-Acting Boost
Liquid fertilisers are a huge favourite for a reason. They're usually concentrated, so you just dilute a small amount in your watering can and apply it as part of your normal watering schedule. It's that easy. This method gets nutrients straight to the roots in a form they can absorb almost instantly.
Because it's so readily available, liquid feed is perfect for giving your plants a quick, visible pick-me-up. It's especially brilliant during those peak growing months in a New Zealand spring and summer. You also get total control over the dose, making it simple to adjust the strength for delicate plants or dial it back in winter.
- Best For: Plant parents who enjoy a hands-on routine and love seeing fast results.
- Release Speed: Instant. Nutrients are available the moment you water.
- Application: Generally every 2-4 weeks during the growing season.
Slow-Release Granules: The Set-and-Forget Feeder
If a low-maintenance approach sounds more like your style, slow-release granules are a game-changer. These are tiny pellets coated with a clever material that breaks down slowly over time, gradually releasing nutrients into the soil with every watering.
You just mix the recommended amount into the top layer of potting mix, and the granules do the rest. Think of them as a long-term nutrient bank, providing a steady, gentle feed for anywhere from three to nine months, depending on the brand. This consistency is great for preventing the boom-and-bust cycle of irregular feeding and significantly lowers the risk of fertiliser burn.
For busy plant owners or those who travel, slow-release granules offer real peace of mind. They ensure your plants are consistently nourished without you needing to stick to a strict fortnightly schedule.
Fertiliser Spikes: The Ultimate Convenience
Fertiliser spikes take "easy" to a whole new level. These are just solid, compressed sticks of fertiliser that you push straight into the soil around your plant. Just like granules, they dissolve slowly over time, releasing a little bit of food with each watering.
They are without a doubt the simplest format to use—no measuring, no mixing. The packaging tells you exactly how many spikes to use based on the size of your pot. While they offer incredible ease, the nutrients can sometimes get a bit concentrated right around the spike. A good tip is to place them evenly around the edge of the pot, not right next to the stem, to encourage a wider spread to the entire root system.
This is the ultimate "set-and-forget" plant fertiliser for indoor plants.
Comparing Fertiliser Forms for Indoor Plants
Still weighing up the options? This quick table breaks down the key differences between the three main fertiliser formats to help you find the perfect match for your plants and your lifestyle.
| Fertiliser Type | Best For | Release Speed | Application Frequency |
|---|---|---|---|
| Liquid | Quick results, precise control, active plant parents | Instant | Every 2-4 weeks |
| Granular | Consistent, long-term feeding, low maintenance | Slow (3-9 months) | Once or twice a year |
| Spike | Ultimate convenience, no measuring, busy owners | Slow (1-3 months) | Every 1-3 months |
Ultimately, the best format is the one you'll actually use consistently. Whether you prefer the immediate impact of a liquid feed or the laid-back convenience of granules or spikes, regular feeding is what will keep your indoor jungle thriving.
Your Seasonal Feeding Guide for NZ Homes
Just like the plants in our gardens, our indoor greenery has its own internal clock, one that’s tuned to the rhythm of the seasons. Nailing your feeding schedule is all about understanding this cycle. Here in New Zealand, that means working with the Southern Hemisphere's calendar to support your plants when they want to grow and letting them rest when they don't.
Feeding isn't a year-round job. It’s a responsive process that mirrors the light and warmth in your home. By aligning your routine with our local seasons, you’re working with your plant's natural flow, giving it a boost when it’s ready and allowing it a much-needed rest during the darker, colder months. This simple trick is the key to preventing over-fertilising and keeping your plants thriving.
Spring and Summer: The Growing Season
As the days get longer and warmer, our Kiwi spring (September to November) is the wake-up call for houseplants. You’ll start to see signs of life – new leaves unfurling, stems stretching towards the light. This is the start of their peak growing season, which powers right on through summer (December to February).
During this active phase, your plants are working overtime, photosynthesising like mad and using up the nutrients in their soil much faster. Now’s the time they’ll really appreciate a regular feed. For most common houseplants, a diluted liquid fertiliser every 2-4 weeks is a great rhythm.
Think of it as providing a steady supply of energy for a marathon runner. You wouldn't give them all their fuel at the start line; you provide it consistently to maintain their performance. It's the same idea here – you’re ensuring your plants have everything they need to produce that lush new growth and, for some, beautiful flowers.
Autumn: A Time to Slow Down
When autumn arrives (March to May), you’ll notice a shift. The days get shorter, the light is less intense, and the air gets a little cooler. Your plants pick up on these cues and begin to slow down, conserving energy for the winter ahead.
This is your signal to start tapering off your feeding schedule. As your plant’s growth slows, its need for nutrients drops significantly. If you keep feeding at a summer pace, you risk a build-up of mineral salts in the soil, which can be harsh on their delicate root systems.
A good rule of thumb is to simply halve your summer routine. So, if you were fertilising every two weeks, stretch it out to every four. If you were on a monthly schedule, you might just give one very light feed for the whole season. This gentle transition helps your plant wind down naturally.
Seasonal Shift: The key is to watch your plant. If you still see active new growth, a small feed is okay. If it seems to have stopped growing altogether, it’s best to hold off.
Winter: The Dormant Period
Winter in New Zealand (June to August) is downtime for most of our tropical and subtropical houseplants. They enter a state of dormancy, and growth pretty much comes to a halt. Because they aren't actively growing, they aren't using nutrients, making fertiliser not only unnecessary but potentially harmful.
Trying to feed a resting plant is like trying to make someone eat a huge meal while they’re fast asleep. The unused fertiliser salts just build up in the soil and can lead to root burn, which damages the roots and can show up as brown, crispy edges on the leaves.
For the vast majority of your indoor plants, the winter rule is simple: stop fertilising completely. Don’t even think about it again until you spot the first signs of new growth in early spring. That’s the signal that your plant is waking up and ready for its next "meal". This easy seasonal approach is one of the best things you can do for the long-term health of your indoor jungle.
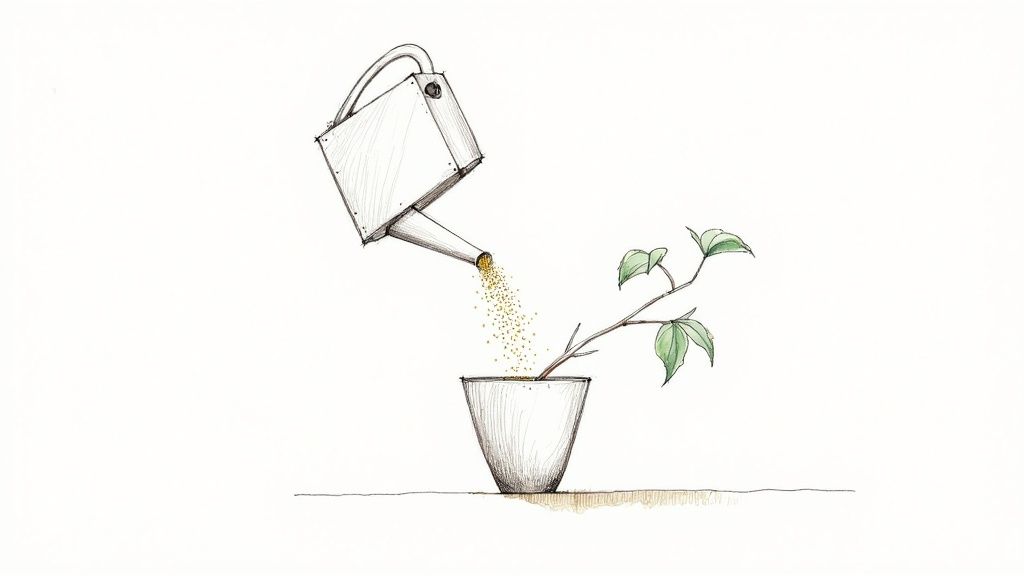
How to Safely Apply Fertiliser to Your Plants
This is where the rubber meets the road—or rather, where the nutrients meet the soil. Getting the application right is the secret to unlocking lush, happy growth. But doing it wrong can cause more harm than good, leaving you with a stressed plant and a bit of a headache.
The golden rule here is simple: less is always more.
It's far better to under-fertilise than to go overboard. Think of it like salting your dinner; you can always add another pinch, but you can’t take it out once it’s in there. This cautious approach helps you avoid the dreaded "fertiliser burn," a common issue where a buildup of mineral salts damages your plant's delicate roots.
The Golden Rules of Application
Before you even unscrew the cap, there are a couple of core principles to keep in mind. These simple steps will protect your plants and make sure they get all the benefits of their feed, without any of the risks.
First, always read the instructions on the packaging. Every product has a different concentration and recommended dose. Following the label is the most important step you can take.
Second, water your plant first. Never, ever apply fertiliser to dry soil. Giving your plant a good drink an hour or two beforehand ensures the roots are hydrated and ready to absorb the nutrients without getting scorched by the concentrated formula.
Dilution Is Your Best Friend
For liquid fertilisers, getting the dilution right is non-negotiable. The measurements on the bottle are a maximum guide, not a target. In fact, many experienced Kiwi plant parents choose to dilute their fertiliser to half or even a quarter of the recommended strength, especially for more sensitive plants.
A gentler approach is to feed a weaker solution more frequently during the growing season, rather than hitting your plant with a full-strength dose once a month. This "weakly, weekly" method provides a steady, gentle supply of nutrients that better mimics how plants feed in their natural environment.
Pro Tip: Keep a separate, clearly labelled watering can just for your fertiliser mix. This avoids any accidental mix-ups and makes your feeding routine that much quicker and easier.
Our reliance on getting these products right is a small part of a much bigger picture. In New Zealand, fertiliser consumption relative to production hit a staggering 305% in 2022, showing just how much our homes and farms depend on these nutrients.
Step-by-Step Application for Different Formats
The right technique really depends on the type of plant fertiliser for indoor plants you’ve chosen. Let’s walk through the correct methods for the most common formats.
- For Liquids: Carefully measure the concentrate and mix it into your watering can with the correct amount of water. Water your plant as you normally would, aiming for an even soak across the soil until a little water runs out of the drainage holes. This ensures the entire root system gets a look-in.
- For Granules: Check the package to see how much you need for your pot size. Sprinkle the granules evenly over the soil surface, then gently mix them into the top centimetre or two. Water thoroughly afterwards to activate the slow-release coating and get things started.
- For Spikes: Push the spikes into the soil about halfway between the plant's stem and the edge of the pot. Make sure to distribute them evenly around the plant. Pushing them too close to the stem can concentrate the nutrients in one spot and burn the main roots.
By following these simple, safe application methods, you can confidently give your plants the boost they need to truly thrive. For a deeper dive into common pitfalls, check out our article on the best fertiliser for indoor plants.
Solving Common Fertiliser Problems
Even with the best intentions, it's easy to get a bit heavy-handed or forgetful with feeding routines. Don't worry—most fertiliser mishaps are totally fixable if you know what to look for. Think of it like learning a new language; once you can read your plant’s signals, you can turn a potential problem into a thriving recovery story.
Your plant will usually give you clear visual cues when it's not happy with its diet. The trick is to spot these signs early and step in before any real damage is done. This guide will walk you through the classic symptoms of too much and too little plant fertiliser for indoor plants, along with simple ways to get things back on track.
Identifying and Fixing Over-Fertilising
Giving your plant a little too much love in the form of fertiliser is an incredibly common mistake. This "fertiliser burn" happens when excess mineral salts build up in the soil, overwhelming and damaging the plant's delicate root system. It’s pretty much the plant equivalent of us eating far too much salty food—it leads to dehydration and stress.
Look out for these classic signs of over-fertilising:
- Crispy, Brown Leaf Tips and Edges: This is the most common symptom. The edges of the leaves look scorched, almost as if they’ve been burnt.
- A White, Crusty Layer on the Soil: These are the excess mineral salts left behind after watering. It looks like a salty or chalky film on the surface of the potting mix.
- Sudden Yellowing and Dropping of Lower Leaves: While some yellowing is natural as leaves age, a sudden change affecting older leaves can point to nutrient overload.
- Stunted or Wilting Growth: Despite regular watering, the plant may look limp or stop growing altogether. This is because its damaged roots can no longer absorb water effectively.
The Rescue Mission: How to Flush Excess Fertiliser
If you suspect over-fertilising, the best thing to do is flush the soil. Take your plant to a sink or bathtub and slowly pour a generous amount of room-temperature water through the pot. Let it drain completely, then repeat the process three or four more times. This helps to physically wash the excess mineral salts out of the soil. Afterwards, let the plant dry out properly and hold off on fertilising for at least a month to give it time to recover.
Spotting and Solving Under-Fertilising
While it’s less immediately damaging than giving too much, a hungry plant is going to struggle to thrive. Over time, your plant will use up all the available nutrients in its pot, and without a top-up, its growth will eventually stall. The signs of an under-fed plant are often a bit more gradual and subtle.
Here’s what to watch for if you think your plant might be hungry:
- Pale or Yellowing Leaves: Especially in new growth, a lack of nitrogen can cause leaves to look washed-out or turn a pale, uniform yellow.
- Stunted Growth: The plant just seems stuck. New leaves might be smaller than usual, or there's very little new growth during the active season (spring and summer in NZ).
- Lack of Flowering: For flowering varieties like Peace Lilies or Hoyas, a lack of nutrients—particularly phosphorus—can stop them from producing buds and blooms.
To fix this, you just need to start feeding your plant on a regular schedule. If it has been a long time since its last feed, begin with a half-strength dose of a balanced liquid fertiliser. This will gently reintroduce nutrients without shocking its system. From there, you can move to a regular feeding routine during the growing season.
Frequently Asked Indoor Plant Fertiliser Questions
Diving into the world of plant food can feel a bit overwhelming, and it's natural to have questions. We get it. So, we've gathered some of the most common queries we hear from Kiwi plant parents to help you feed your green friends with total confidence.
How Often Should I Fertilise My Indoor Plants in New Zealand?
The best advice is simple: only feed your plants when they're actually growing. For most houseplants here in New Zealand, that means their active season is spring (September-November) and summer (December-February). During this time, a feed every two to four weeks is about right.
Once autumn rolls around, you'll notice growth slowing down, so you can ease back on the fertiliser. And when winter hits (June-August), it's time to stop completely. Feeding a dormant plant is a sure-fire way to cause root burn, so let it rest.
Can I Use One Fertiliser for All My Houseplants?
For the most part, yes. A good quality, balanced liquid fertiliser will keep a wide range of common houseplants perfectly happy. But it’s not always a one-size-fits-all situation. Some plants have specific tastes and will really put on a show if you give them what they love.
- Flowering Plants: Got orchids or African Violets? They'll thank you for a formula that's a bit higher in Phosphorus (P) to really encourage those beautiful blooms.
- Cacti and Succulents: These desert natives prefer a 'lean' diet. Look for a specialised, low-nitrogen feed and apply it far less often than you would for other plants.
- Leafy Foliage Plants: For the plants we love for their stunning leaves, like Monsteras and Fiddle Leaf Figs, a balanced feed is great. One that's slightly higher in Nitrogen (N) will also help them push out lush new growth.
What Are the Signs of Over-Fertilising My Plant?
It's easy to be a little too generous with fertiliser, but it can cause real stress for your plant – a condition often called 'fertiliser burn'. If you spot the signs, you'll need to act fast.
Key Signs of Over-Fertilising: Keep an eye out for brown, crispy leaf tips and edges. You might also see lower leaves suddenly turning yellow, or even a white, crusty salt build-up on the soil's surface. Sometimes the plant will look wilted, even though the soil is damp.
If you suspect you've gone overboard, the fix is to give the soil a good flush. At its next watering, just let plain water run through the pot for a few minutes to wash away all those excess mineral salts.
Does Tap Water Affect How I Should Fertilise?
For most of us in New Zealand, our tap water is absolutely fine for watering and mixing up fertiliser. But if you're in an area with particularly hard water, mineral salts can slowly build up in the soil, which can make it harder for your plant to absorb nutrients.
An easy way to prevent this is to just flush the soil every few months. Simply water your plant thoroughly until you see plenty of water draining out the bottom. It's a simple step that keeps the soil healthy and your plant happy.
Ready to find the perfect meal for your indoor jungle? Explore the incredible selection of plant care products from trusted Kiwi sellers at Jungle Story. Find everything you need to help your plants thrive. Visit us at https://junglestory.co.nz today.