Bringing a new plant into your home is one of the best feelings, but giving it the right start is what truly matters. Before you even think about finding the perfect sunny spot, the two most critical decisions you'll make are about its pot and its soil.
This isn't just about looks; it's about creating a healthy home for your plant's roots. Think of the pot as the foundation of a house and the soil as its pantry—get these two elements right, and you're well on your way to a thriving indoor jungle.
The Foundation of a Thriving Indoor Garden

As more of us in New Zealand embrace apartment and townhouse living, the joy of gardening has moved indoors. It’s a trend that’s easy to see, filling our homes with greenery where a backyard might not be an option. This isn't just a feeling; while the wider garden supply sector has seen some ups and downs, the demand for indoor gardening supplies continues to grow, driven by people just like us looking to bring a bit of nature inside.
Your plant's journey starts with a quality indoor potting mix that provides the right balance of nutrients, aeration, and moisture retention. But where that mix goes is just as important.
Selecting the Perfect Pot
Choosing a pot is far more than a style choice—it's a practical decision that directly affects your plant's health and how often you'll need to reach for the watering can. The material itself dictates how much air and moisture can move through, which is a game-changer for root health.
Different pots suit different plants and different types of plant parents. Let's break down the most common materials you'll find.
Choosing Your Indoor Pot Material
Picking the right material can be the difference between a happy plant and a sad, soggy one. Here’s a quick guide to help you choose the best home for your new green friend, keeping our unique NZ conditions in mind.
| Material | Drainage & Airflow | Best For | Considerations for NZ Homes |
|---|---|---|---|
| Terracotta | Excellent. Porous clay allows water and air to pass through, helping soil dry out evenly. | Plants that hate "wet feet" like succulents, cacti, and sansevierias. Also great for over-waterers! | Perfect for humid places like Auckland in summer, as it helps prevent root rot. Might dry out too quickly in a dry, heated room during a Christchurch winter. |
| Ceramic (Glazed) | Low. The glaze seals the pot, holding in moisture. A drainage hole is a must. | Thirsty plants that prefer consistently moist soil, such as ferns, calatheas, and peace lilies. | A stylish option that keeps moisture in, which is ideal for plants in homes with a dry atmosphere from heat pumps or dehumidifiers. |
| Plastic | Very Low. Non-porous material retains water well. Great for preventing soil from drying out. | Water-loving plants or for anyone who is a bit forgetful with their watering schedule. | Most nursery plants come in plastic. It’s a practical, lightweight choice. You can easily slip the plastic pot inside a decorative outer pot (a cachepot) for a better look. |
Ultimately, the best pot is one that suits both your plant's needs and your own habits. If you tend to overwater, terracotta is your best friend. If you're a bit forgetful, a glazed ceramic or plastic pot can offer a welcome buffer.
One Rule to Rule Them All: Drainage is Non-Negotiable
No matter which material you fall in love with, it absolutely must have a drainage hole. Without an escape route, water will inevitably pool at the bottom, starving the roots of oxygen and leading to the dreaded root rot. If you’ve found the perfect decorative pot but it has no hole, simply use it as a cover pot, or 'cachepot', placing your plant (in its plastic nursery pot) inside it.
A Practical Guide to Potting Your Plants
Okay, you've got your pot and the perfect soil mix. Now it’s time for the fun part—getting your hands dirty. Potting is pretty straightforward, but a few little tricks can make all the difference in helping your plant settle into its new home with as little stress as possible. This is where you give your plant the physical foundation it needs to really thrive.
First things first, let's prep the new pot. One of the biggest myths I see is the idea that you need a "drainage layer" of rocks at the bottom. This actually does more harm than good, as it can create a soggy layer of soil just above the rocks, which is a recipe for root rot.
Instead, just cover the drainage hole with a small piece of mesh, a coffee filter, or even a single, well-placed stone. All you're trying to do is stop the soil from washing straight out while letting excess water escape. Easy. Now, add a shallow layer of your fresh potting mix, just enough to get the plant sitting at the right height.
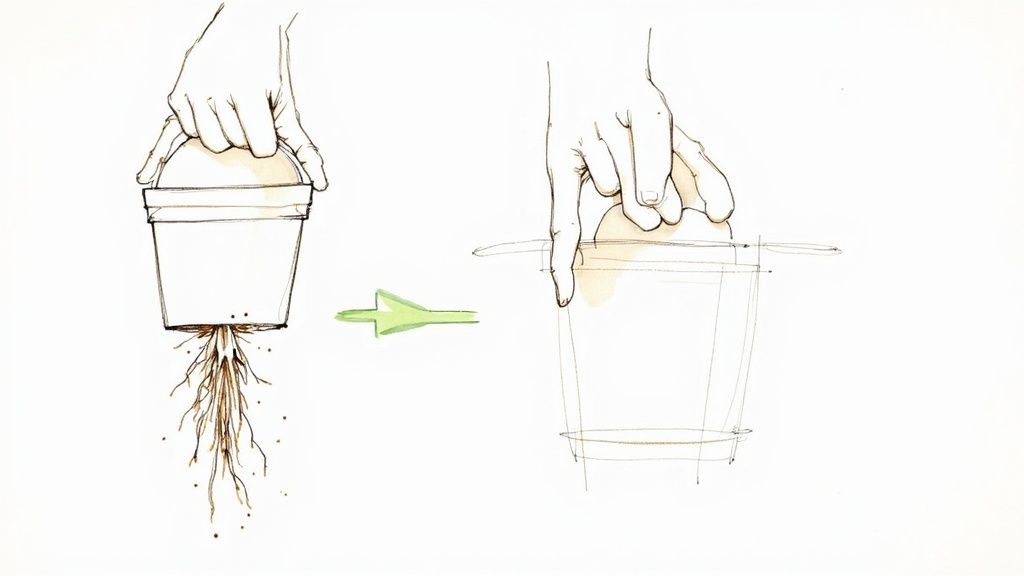
Gently Removing the Plant
Time to get your plant out of its old home. The key here is to be gentle. Damaging the root system is a super common cause of transplant shock, so never, ever pull a plant out by its stem.
Tip the pot on its side and give the base a few firm but gentle taps. The whole root ball should slide out pretty smoothly. If it's being a bit stubborn (and some are!), you can squeeze the sides of the plastic nursery pot to help loosen things up.
Once it’s out, have a quick look at the roots. Are they wrapped in a tight, dense circle? That’s what we call being root-bound. If so, gently tease the roots apart with your fingers. This encourages them to spread out into all that lovely new soil instead of continuing to strangle themselves.
Positioning and Backfilling
Pop the plant right in the centre of its new pot. You'll want to make sure the top of the root ball sits about 2-3 centimetres below the rim. Leaving this little gap is crucial—it stops water and soil from spilling over the sides every time you water.
When you're happy with its position, start adding your fresh soil mix around the root ball. I like to do this in layers, gently patting the soil down as I go. This gets rid of any sneaky air pockets that could dry out the roots. Don't pack it down too hard, though; you want it firm enough to hold the plant steady but loose enough for water and air to get through.
If you’re still pondering your container choice, we have a whole guide dedicated to choosing the perfect indoor plant pots.
The Critical First Watering
After potting, this first drink is the most important one your plant will get in its new home. Give it a thorough watering until you see it running freely from the drainage hole. This big initial soak helps settle the soil, closes up any last air pockets, and makes sure the entire root system gets a good, hydrating drink. It's the final, and most vital, step in welcoming your plant to its new space.
Aftercare for Newly Potted Plants
Getting your plant into its new pot is a great feeling, but the job isn't quite done. The next few weeks are all about recovery. Think about it from the plant's perspective: it's been moved, its roots have been disturbed, and it's now getting used to a whole new batch of soil. It's a bit of a shock to the system.
Good aftercare is what helps your plant acclimatise and really start to thrive in its new home. Its needs right now are a little different from its usual routine. The goal is simple: create a gentle, stable environment to minimise stress and encourage those roots to grow.
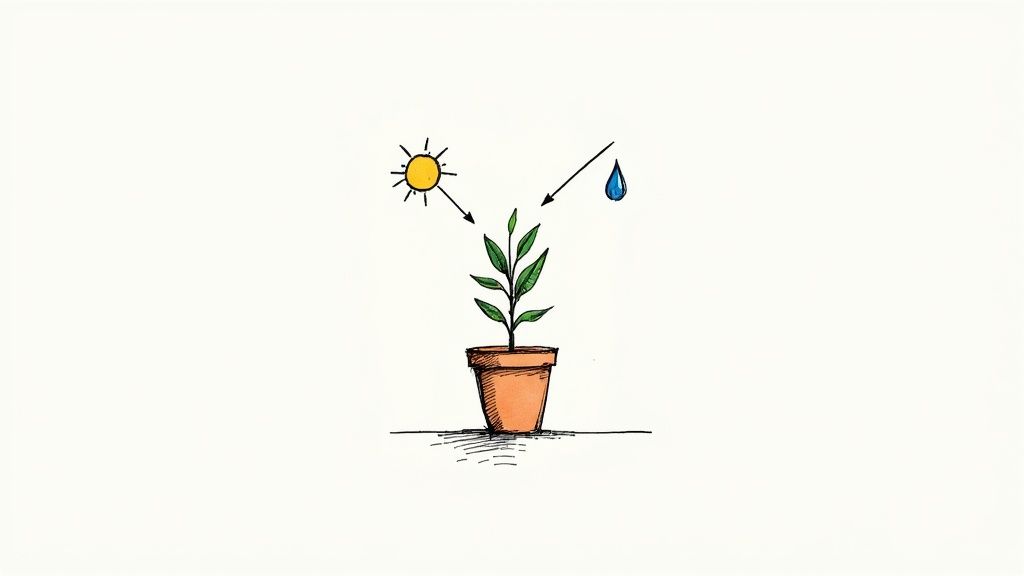
The Right Light and Location
Resist the temptation to pop your newly potted plant in the sunniest spot you have. While it might seem like a good idea to give it lots of light, direct sun can be far too intense for a plant that’s already stressed. This is especially true during a New Zealand summer when the sun is particularly harsh.
Instead, find it a home with bright, indirect light for the first week or two. This gives it enough energy to recover without the risk of scorching its leaves. A spot a couple of metres back from a north-facing window is usually perfect. Once you see signs of new growth, you can move it to its permanent, brighter location.
Watering Your Recovering Plant
After that first deep watering you gave it during the potting process, you need to adjust your approach for a little while. The plant's roots are still finding their feet and aren't absorbing water as efficiently as usual. This makes it incredibly easy to overwater – one of the most common mistakes people make.
Always, always check the soil before you even think about watering. Stick your finger about 2-3 centimetres deep. If it feels at all damp, hold off for a few more days. You only want to water once the top layer of soil has started to dry out. This simple check prevents the delicate new roots from sitting in soggy soil and developing root rot.
Hold Off on the Fertiliser
It's easy to think a dose of fertiliser will help your plant bounce back, but feeding a freshly potted plant is a big no-no. New potting mix is already full of nutrients, and adding more can actually burn the sensitive, damaged roots that are trying to heal. You need to wait at least four to six weeks before introducing any kind of plant food.
When to Start Feeding
After a few weeks have passed and you start to see new leaves or stems appearing, that's your green light. It’s a clear signal that the root system has recovered and is ready to support new growth.
When the time is right, start with a balanced liquid feed made for indoor plants. Our guide to the best indoor plant fertilizer has all the details you need to get it right. It's best to begin with a half-strength solution to avoid overwhelming the plant. A little patience during this recovery phase is the secret to long-term success with your indoor plants.
Bringing NZ Native Plants Indoors
Sure, tropical houseplants have their place, but there’s a special kind of satisfaction that comes from growing a piece of Aotearoa right in your living room. The joy of potting plants has expanded to include our own native flora, bringing them out of the garden and into our homes as living features.
Bringing New Zealand natives indoors is a brilliant way to feel more connected to our local environment. You’d be surprised how many species adapt beautifully to life in a pot, offering a look that feels uniquely grounded and authentic. While some people used to think they wouldn't cope inside, growers and enthusiasts have proven that wrong. Natives like the tough Puka or the gorgeous Kawakawa can absolutely thrive indoors, adding a real touch of local character to a space. You can read more about this growing trend in using NZ native plants in modern landscapes.
Top Native Picks for Your Home
The secret to success with indoor natives is simply choosing the right plant for your spot. Some are incredibly easy-going and perfect if you're just starting out, while others might ask for a little more specific care when it comes to light and water.
Take the Puka (Griselinia lucida), for instance. It's an absolute superstar for indoor growing. Its big, glossy, lime-green leaves give off a lush, almost tropical vibe, but it's hardy enough to handle typical indoor conditions. It loves bright, indirect light but will put up with lower light levels much better than many other popular houseplants.
Another fantastic option is Kawakawa (Piper excelsum). Known for its distinctive heart-shaped leaves, it really brings a piece of the New Zealand bush inside. It's happiest in medium, indirect light and likes its soil to stay consistently moist, making it a great choice for a slightly shadier corner of a room.
A Quick Tip for Native Care Most NZ natives that do well indoors originally come from the forest understorey. This means they're naturally adapted to dappled light, not harsh, direct sun. When you're picking a spot, think bright but gentle light—try to mimic what they'd get under a canopy of taller trees.
Great NZ Native Plants for Indoors
Feeling inspired to give it a go? This little guide should help you get started with some of our favourite native options that are well-suited for life inside.
| Native Plant Name | Light Requirement | Watering Needs | Extra Care Tip |
|---|---|---|---|
| Puka (Griselinia lucida) | Bright, indirect light | Allow top soil to dry out between waterings | Wipe leaves with a damp cloth to keep them glossy and dust-free. |
| Kawakawa (Piper excelsum) | Medium, indirect light | Keep soil consistently moist but not waterlogged | Prefers a bit of humidity, so it's great for bathrooms or kitchens. |
| Pūriri (Vitex lucens) | Bright, indirect light | Water when the top few centimetres of soil feel dry | A slower grower indoors, so be patient. Prune to maintain shape. |
| Rengarenga Lily (Arthropodium cirratum) | Bright, indirect to low light | Tolerates some dryness but prefers regular watering | Extremely versatile and forgiving, making it perfect for beginners. |
Choosing any of these is a great first step into the world of indoor natives. They're all proven performers that bring a unique Kiwi charm to any home.
Troubleshooting Common Potting Issues
https://www.youtube.com/embed/juaovVA9VDE
Even with the best intentions, it's pretty common for a newly potted plant to look a bit stressed out. Don't panic! This is often just part of the settling-in process.
The real skill is learning to read the signs your plant is giving you. Once you can do that, you can fix most issues before they become serious problems. From drooping leaves to a sudden halt in growth, most post-potting troubles are easy to sort out once you know what to look for. The usual culprit is almost always water, but things like transplant shock or soil issues can also be at play.
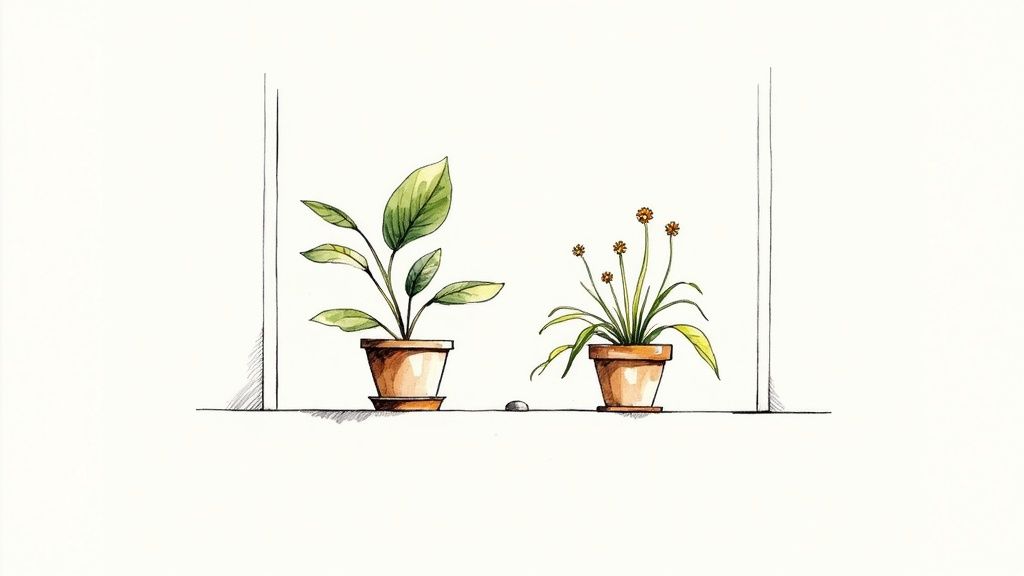
The Great Watering Debate: Overwatering vs Underwatering
This is the classic headache for any plant parent, and to make it worse, the symptoms can look confusingly similar. A drooping, sad-looking plant could be desperately thirsty or literally drowning in its pot.
So, how do you tell the difference?
Signs of Overwatering:
- Yellowing Lower Leaves: The oldest leaves at the bottom of the plant often turn yellow and feel soft or even a bit mushy before dropping off.
- Soggy, Compacted Soil: The soil surface stays wet for days on end. You might even spot a layer of green algae starting to form.
- A Musty Smell: If you get a whiff of a damp, swampy odour from the pot, that’s a big red flag for root rot, which is caused by a lack of oxygen in waterlogged soil.
Signs of Underwatering:
- Crispy, Brown Leaf Edges: The leaves will feel dry and brittle to the touch, often starting at the very tips or along the edges.
- Wilting, Limp Leaves: The whole plant looks droopy and tired, but the leaves won't feel mushy or soft.
- Lightweight Pot: The entire pot will feel noticeably light when you pick it up, which is a sure sign the soil has completely dried out.
The easiest way to be certain is the classic finger test. Stick your finger into the soil. If it’s wet and the plant is sad, you’ve almost certainly overwatered. If it’s bone dry, it needs a good drink.
Transplant Shock: A Plant's Moving Day Blues
It's completely normal for a plant to look a bit sorry for itself for a week or two after being repotted. This is called transplant shock. The plant is busy putting all its energy into repairing its disturbed root system and getting used to its new home. You might see some wilting or even a dropped leaf, but as long as you give it the right aftercare—no harsh, direct sun and careful watering—it will almost always bounce back stronger than before.
Other Common Potting Problems to Watch For
While watering is public enemy number one, a couple of other issues can pop up after you’ve finished potting. Keeping an eye out for these will help ensure your plant has a smooth recovery.
Soil Compaction Sometimes, new potting mix can settle and become too dense, especially if you packed it in a bit too tightly. This squeezes out all the important air pockets, effectively suffocating the roots. If you notice water pooling on the surface and taking ages to drain through, your soil is likely compacted.
- The Fix: Gently poke several holes deep into the soil with something like a chopstick or a skewer. This little trick helps aerate the soil and improve drainage without disturbing the roots too much.
Unwanted Pests in New Soil It doesn’t happen often, but occasionally, a new bag of potting mix can harbour dormant fungus gnat eggs. If you start seeing tiny black flies buzzing around your freshly potted plant, this is the likely cause.
- The Fix: Let the top few centimetres of soil dry out completely between waterings, as their larvae need moist conditions to survive. You can also use yellow sticky traps to catch the adult flies and break their life cycle.
Your Indoor Potting Questions Answered
Even with the best guide in hand, a few questions always seem to pop up when you're elbow-deep in soil. Here are some quick answers to the most common queries we hear from fellow Kiwi plant lovers, designed to help you tackle your next potting project with total confidence.
When Is the Best Time to Repot in New Zealand?
The ideal time to repot your indoor plants is when they're actively growing. For us here in New Zealand, that means spring and early summer are your best bet.
Aim to repot between September and December. This gives your plant the whole warm season to recover from the move and happily settle its roots into the new soil.
Try to avoid repotting in autumn or winter (from about March to August). Plant growth slows right down during these cooler, darker months. Repotting then just adds unnecessary stress when the plant has less energy to bounce back, which can also increase the risk of root rot in cold, damp soil.
How Do I Know When My Plant Needs Repotting?
Don't worry, your plant will give you some pretty clear signals when it's feeling cramped. Keep an eye out for these classic signs:
- Roots are making a great escape: This is the most obvious one. If you see roots poking out of the drainage hole, your plant is desperate for more room.
- It's completely root-bound: Gently slide the plant out of its pot. If the roots are a dense, tightly wound mass, it's definitely time for a bigger home.
- Water rushes straight through: When the pot is more roots than soil, water has nowhere to go. It’ll pour out the bottom almost instantly without getting a chance to be absorbed.
- Growth has stalled: If your plant seems to have stopped growing during spring or summer, it might be because its roots have hit a wall and can't access any more nutrients.
A quick tip: Don't rush to repot a brand-new plant the second you bring it home. Let it get used to its new surroundings for a few weeks first. This helps avoid overwhelming it with too many changes all at once.
Can I Reuse Old Potting Mix?
It’s tempting to just scoop old soil from one pot and use it again, but it’s really not a good idea. For starters, old potting mix is usually stripped of all its essential nutrients.
More importantly, it can be hiding pests, diseases, or a build-up of mineral salts from old fertiliser. You're always better off using fresh, high-quality potting mix for your indoor plants. Think of it as one of the best investments you can make for their long-term health.
This dedication to plant care is part of a much bigger picture. The global indoor plant market is booming, projected to hit over $47 billion NZD by 2031. This growth is driven by our love for their beauty, air-purifying qualities, and mental health benefits. Here in New Zealand, that connection is strong, with studies showing how plants in our homes and offices can boost productivity, lower stress, and improve morale. You can discover more insights into how Kiwis bond with their houseplants and the benefits they bring.
At Jungle Story, we provide everything you need to give your plants the best start, from premium potting mixes to a stunning range of pots. https://junglestory.co.nz