Canna lilies are a fantastic choice if you're chasing that bold, tropical vibe in your New Zealand garden. I've always admired them for their massive leaves and brilliant flowers – they bring instant drama and architectural flair from late summer right through to the first hints of autumn.
So, Why Are We So Obsessed with Canna Lilies?
There's just something about canna lilies that captures the Kiwi gardening spirit. With their huge, lush leaves and tall flower spikes, they feel like a slice of the tropics right in your own backyard. They can be a stunning focal point on their own or planted together to create a dense, colourful screen. Plus, they grow so quickly! It’s incredibly rewarding to see them put on such a spectacular show all summer without a huge amount of fuss.
Originally from Central and South America, the Canna indica species first popped up in New Zealand around 1870 as an ornamental. It absolutely loved our climate, especially in the warmer, sunnier parts of the country, and settled in a little too well. This hardiness is a bit of a double-edged sword, though. While it makes them a dream to grow, it's also created a bit of an environmental headache.
A Stunning Plant with a Tricky Reputation
That same toughness that makes cannas so popular is exactly why you need to be a mindful gardener. They have a vigorous, spreading nature, which means they can easily jump the garden fence if you're not careful.
The Department of Conservation (DOC) now lists Canna indica as one of 386 environmental weeds in New Zealand. It's a real problem because it can muscle out our native plants, especially in delicate wetland areas, by forming thick, dense clumps that totally disrupt the local ecosystem. You can read up on its official status over at the NZ Plant Conservation Network.
This doesn't mean you have to rip all your cannas out! It just means we need to be responsible. The plant mainly spreads when bits of its underground rhizomes are included in dumped garden waste, not so much by seed. Understanding this is the key.
If you make smart choices about where you plant them and how you dispose of cuttings, you can absolutely enjoy the exotic beauty of canna lilies without adding to the problem. For more ideas on building a garden that's both beautiful and responsible, have a look through the other stories on our Jungle Story blog.
Choosing The Best Canna Varieties For Your Region

Getting your cannas off to a flying start really comes down to one thing: picking the right plant for your corner of New Zealand. Our climate is famously diverse. A canna that thrives in the subtropical humidity of Northland might struggle in the cooler, frost-prone south. Choosing wisely from the get-go is your best bet for a spectacular summer display.
In warmer, frost-free spots like Auckland, you can pretty much take your pick, and they'll grow to impressive heights. But if you're gardening in Christchurch or Dunedin, you'll have better luck with hardier varieties or by simply treating them as perennials that need lifting over winter. It's also worth thinking about what you want them to do in your garden. Are you after a towering screen of foliage or a compact pop of colour for the patio?
Finding Your Perfect Canna Lily NZ Match
For smaller gardens, a Wellington balcony, or a tight courtyard space, dwarf cultivars are a brilliant solution. Varieties like the pink-blooming ‘Canna Louis Cayeux’ or the compact ‘Canna Picasso’ are perfectly happy in pots and generally stay under one metre tall.
If you’ve got the space and want to make a real architectural statement, that's when the taller varieties truly shine. A few of my personal favourites include:
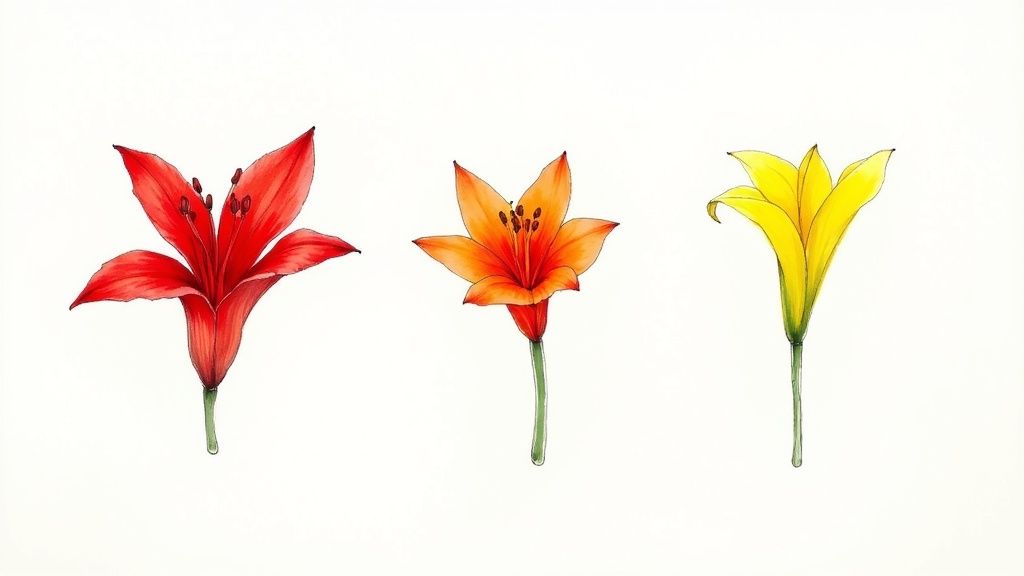
- Canna ‘Tropicanna’: It’s famous for a reason! The foliage is just outrageous, with stripes of bronze, green, and pink, all topped off with vibrant orange flowers. It brings colour to the garden even when it’s not in bloom.
- Canna ‘Australia’: This one is all about drama. Its deep, burgundy-black leaves and fiery red flowers create an incredible contrast in a sunny spot.
- Canna ‘Stuttgart’: I absolutely love the variegated green and cream leaves on this one, but it does need a bit of kindness. Keep it out of the harsh afternoon sun to stop the beautiful leaves from scorching.
To give you a better idea of what's out there, here's a quick comparison of some popular varieties that do well across New Zealand.
Popular Canna Lily Varieties for NZ Gardens
| Variety Name | Flower Colour | Foliage Type | Mature Height | Best For |
|---|---|---|---|---|
| Tropicanna | Bright Orange | Striped Bronze & Green | 1.5 - 2m | Bold tropical borders, statement plantings |
| Australia | Fiery Red | Deep Burgundy-Black | 1.2 - 1.8m | Creating high-contrast colour schemes |
| Stuttgart | Apricot-Orange | Variegated Green & Cream | 1.5 - 2m | Sheltered spots, adding light to shady corners |
| Louis Cayeux | Salmon Pink | Green | 0.8 - 1.2m | Pots, smaller gardens, softer colour palettes |
| Picasso | Yellow with Red Spots | Green | 0.6 - 1m | Containers, front of the border, vibrant spots of colour |
This table is just a starting point, but it shows the fantastic range you can choose from to suit your garden's scale and style.
A quick tip from experience: when you're buying the rhizomes (the chunky root part), give them a gentle squeeze. You want ones that feel firm and plump, with a few visible ‘eyes’ or growing points. Steer clear of any that are soft, mushy, or look completely shrivelled—they probably won't have the energy to grow. Starting with healthy stock is half the battle won.
Taking a little time to select the right canna for your slice of paradise will pay off all summer long. For more detailed advice on looking after your plants once they're in the ground, our general plant care guides are packed with useful information.
How to Plant Cannas for a Vibrant Summer Display
Getting your cannas into the ground properly is probably the single most important thing you can do for a season of explosive growth and incredible colour. These hungry, thirsty plants need a solid foundation to support their spectacular summer performance.
The sweet spot for planting in New Zealand is late spring, once the soil has warmed up and any real danger of frost is behind us. For most of us, that means late October or November. This timing gives the rhizomes the warm, welcoming start they crave to burst into life.
Cannas have had quite the journey to our gardens. They were first introduced to Europe way back in the late 1500s and became wildly popular during the Victorian era. Here in New Zealand, Canna indica arrived around 1870 as a treasured ornamental. You can see how well it's adapted—it flowers its heart out from November to April, perfectly matching our summer and autumn. If you're a bit of a history buff, you can explore more on the fascinating history of cannas and their journey around the world.
Preparing the Perfect Canna Bed
Think of preparing a canna bed like cooking a feast for royalty. These plants are seriously heavy feeders and drinkers, and they thrive in rich, fertile soil that holds moisture without ever becoming a swamp.
I always start by digging in a huge amount of organic matter. A generous helping of well-rotted compost or sheep pellets worked through the top 30 cm of soil does wonders. This doesn't just add crucial nutrients; it also improves the soil structure, which is vital for developing a strong root system.
Here's a pro tip I've learned over the years: dig your planting holes a few weeks before you actually plan to plant. It gives the compost and soil time to mingle and break down, creating a nutrient-rich pocket that's primed and ready for your rhizomes.
When you're ready to plant, lay the rhizomes down horizontally with the ‘eyes’ or growing points facing upwards. A good rule of thumb is to plant them about 10-15 cm deep.
Don't forget about spacing! Giving them enough room is just as important.
- For taller varieties, aim for about 50-60 cm between them. This prevents them from becoming a tangled mess and competing for light and air.
- Smaller, dwarf types can be planted much closer together, around 30-40 cm apart. This is perfect if you're aiming for a dense, colourful border.
Mastering Seasonal Canna Care in New Zealand

Getting your cannas in the ground is just the beginning. The real magic, the kind that results in a truly breathtaking display, comes from tuning into their seasonal rhythm. If you can give them what they need throughout the year, they’ll reward you tenfold.
This is especially true during our long, hot summers. From December through to February, cannas are working overtime, and they get incredibly thirsty and hungry. Their huge, lush leaves lose a lot of water on a sunny day, so you'll need to give them a deep, regular soaking to stop them from drying out and looking stressed.
To fuel all that growth and a non-stop parade of flowers, they need food. I find a fortnightly feed with a balanced liquid fertiliser does the trick, giving them a quick boost. Alternatively, a good slow-release granular feed at the start of the season will keep them ticking over nicely. This is what helps produce those vibrant blooms that make the canna lily so famous across NZ gardens.
Keeping the Flowers Coming and Prepping for Winter
Want to know the secret to a longer blooming season? It's a simple little job called deadheading. As soon as a flower spike starts to look a bit sad and faded, just snip it off down to the next leaf. It's a small task, but it tells the plant to stop wasting energy on making seeds and get back to producing more stunning flowers.
Once summer starts to give way to autumn, it's time to shift your thinking from flowers to winter survival. What you do between March and May is crucial for ensuring your cannas come back strong next year. The right approach really depends on where in New Zealand you’re gardening.
In the milder, virtually frost-free parts of the country—think Auckland or Northland—you can usually get away with leaving the rhizomes right where they are. Wait for the first light frost to blacken the leaves, then cut the foliage back. Cover the patch with a nice, thick 10–15 cm layer of mulch, like pea straw or bark chips, to act as a cosy blanket against the cold.
But if you're in a colder region, you'll need to take a different approach.
- Lifting Rhizomes in Colder Climates: For anyone in areas with heavy frosts, like Central Otago, Canterbury, or the inland Waikato, lifting your rhizomes is the safest bet.
- When to Lift Them: The best time is right after the first proper frost has knocked back all the foliage. This is the plant's signal that it's gone dormant for the season.
- How to Store Them: Carefully dig up the clumps and give them a gentle clean to remove most of the soil. Let them air-dry for a few days in a sheltered spot, then pop them into a box with some peat, sawdust, or sand. Store them somewhere cool, dry, and dark—a garage or shed is perfect—until it's time to plant them out again in spring.
Keeping Pests Away and Getting Rid of Cannas Responsibly
While cannas are pretty tough characters in the garden, they aren't completely bulletproof. A few common garden pests can cause a bit of bother, but with a watchful eye, they’re usually a breeze to handle.
Slugs and snails are probably the most common visitors, especially when the new leaves are unfurling and at their most tender. A quick sprinkle of pet-safe slug bait around the base of your plants usually does the trick. I often just go on a nighttime hunt with a torch—it's surprisingly effective. For a more biological approach, you might find our guides to carnivorous plants an interesting read on nature's own pest controllers.
The most infamous pest for these plants here in NZ is the canna lily leaf roller. This is the caterpillar of a small moth, and it cleverly stitches the edges of a leaf together, creating a little tube to hide in while it munches away. If you spot these rolled-up leaves, just give them a firm squeeze to crush the caterpillar inside. Or, if you're not squeamish, you can unfurl the leaf and pick the culprit out by hand.
Why Responsible Canna Disposal Is So Important
Honestly, the biggest challenge in managing cannas has nothing to do with pests. It's all about protecting our local environment. The reason these plants have spread so aggressively across New Zealand isn't from seeds blowing in the wind—it's from people dumping unwanted garden clippings.
Because cannas can regrow from even the tiniest piece of rhizome, how you dispose of them is critical. Please, never dump them in a public park, a reserve, or even on the side of the road. This is exactly how wild infestations get started, and they can quickly choke out our precious native plants.
The spread of Canna indica in our part of the world is a classic story of an ornamental plant gone rogue. Its incredible ability to propagate from rhizomes is why proper disposal is something we all need to take seriously. If you're interested in the science behind it, CABI's Digital Library has a detailed article on the dispersal dynamics of Canna indica.
So, what's the right way to get rid of them?
- Bag them up properly: Put all your unwanted rhizomes, leaves, and stems into a strong plastic bag and tie it up securely.
- Send them to landfill: This sealed bag should go straight into your general household rubbish bin. It's vital not to put cannas in your green waste or compost bin, as they can easily survive the process and spread from there.
Common Questions About Growing Canna Lilies in NZ
Even with the best game plan, you're bound to run into a few head-scratchers as you get to know your cannas. We've pulled together some of the most common questions from fellow Kiwi gardeners to help you get your beautiful tropical plants thriving.
Having clear, practical answers that are specific to our conditions here in New Zealand is the best way to grow your confidence and make sure your canna display is a showstopper, year after year. Let’s get into it.
Why Are My Canna Lily Leaves Turning Yellow?
Yellowing leaves are probably the most frequent cry for help we hear from canna growers. It's usually your plant's way of telling you it's either thirsty or hungry.
During our hot summers, cannas are incredibly thirsty and need consistently moist soil to fuel those big, lush leaves. If the soil dries out completely, the lower, older leaves will often be the first to turn yellow and die back. On the other hand, soil that's constantly waterlogged can suffocate the roots, causing rot—which, confusingly, also shows up as yellowing foliage.
The best tool you have is your own finger. Poke it about 5 cm deep into the soil next to the plant. If it feels dry, it’s time for a good, deep soak. If it feels soggy, hold off watering for a day or two. A dose of balanced liquid feed during the growing season can also rule out a simple nutrient deficiency.
Can I Leave Cannas in the Ground Over Winter in NZ?
This is a classic question, and the answer really depends on where in New Zealand you’re gardening. Our climate varies so much from region to region, so there's no single rule for overwintering your canna lily NZ collection.
- Warmer, Frost-Free Regions: If you’re lucky enough to live in places like Northland, Auckland, or the coastal Bay of Plenty, you can generally leave your rhizomes right where they are. Once the foliage has died back in late autumn, just chop it down and pile on a thick layer of mulch to give the rhizomes a bit of extra insulation.
- Colder, Frost-Prone Regions: For those gardening in Canterbury, Otago, Southland, or anywhere else that gets a solid frost, lifting is your safest bet. Leaving the rhizomes in the ground is a gamble, as a cold, wet winter can easily turn them to mush.
How Do I Stop My Cannas From Spreading?
Proper management is everything when it comes to enjoying cannas responsibly and preventing them from jumping the garden fence. As we’ve mentioned before, their aggressive reputation in New Zealand is almost entirely down to people irresponsibly dumping garden waste.
The most important thing you can do is ensure no part of the plant—not a single scrap of leaf or rhizome—ends up in green waste piles, council compost, or tossed over the back fence. To correctly get rid of any unwanted bits:
- Pop all the plant material into a sealed plastic bag.
- Toss the sealed bag into your general household rubbish bin, which goes to a proper landfill.
By keeping your own patch in check and disposing of waste carefully, you’re doing your part to protect our incredible local ecosystems.
Ready to add a splash of tropical drama to your own backyard? At Jungle Story, we connect you with trusted sellers offering a fantastic selection of canna lilies and other stunning plants. Explore our marketplace and start creating your dream garden today.