Welcome to your definitive guide for growing the tough and versatile aloe vera right here in New Zealand. You might picture this succulent in a desert, but imagine it thriving on your Kiwi windowsill or in a sunny spot in the garden. This guide is designed to walk you through everything, from picking the perfect aloe vera plant NZ gardeners can grow, to mastering its care through our unique seasons.
Why Aloe Vera Thrives in New Zealand
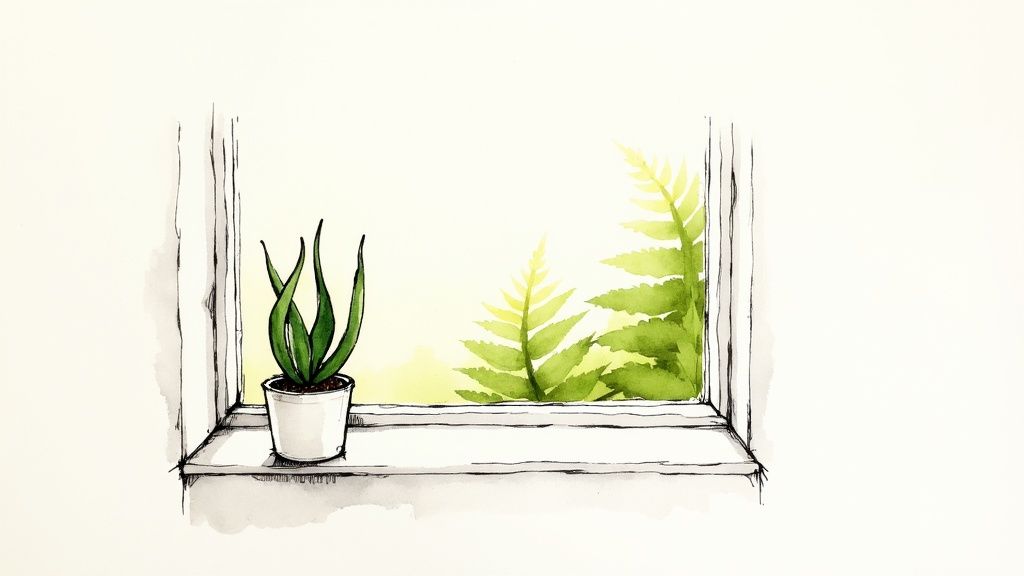
The aloe vera is a fantastic match for New Zealand's varied climates, mostly because it’s so adaptable and easy-going. Originally from arid regions, its leaves are brilliant at storing water, which makes it incredibly resilient to the odd dry spell we often get in a Kiwi summer.
This succulent is more than just a hardy survivor; it's become a beloved feature in homes and gardens across the country for its striking looks and practical uses. Its journey to our shores is part of a much bigger story of plant introduction.
While it’s not native, the aloe vera is one of many exotic species that have found a new home here. In fact, introduced plants make up a massive 85% of our country's vascular plant diversity, showing just how long we've been bringing in new horticultural treasures, especially since the 19th century.
What Makes It a Great Choice for Kiwi Gardeners?
So, why has this particular succulent won over so many of us? It really comes down to a few key traits that fit perfectly with the Kiwi lifestyle and our environment.
- Forgiving Nature: Aloe vera is incredibly forgiving, which makes it ideal for beginner gardeners or anyone with a busy schedule. It handles a bit of neglect far better than most houseplants.
- Climate Versatility: You can grow it outdoors all year round in the warmer, frost-free parts of the north, while it's perfectly happy as an indoor potted plant in the cooler south.
- Aesthetic Appeal: With its architectural leaves and classic succulent shape, it adds a touch of modern, green elegance to any space, whether it's a minimalist apartment or a lush garden bed.
While this guide is all about aloe vera in New Zealand, getting a handle on broader plant care principles can really set you up for success. For a bit more on general landscape maintenance and plant care, you might find some useful tips on things like effective watering and keeping plants healthy overall.
How to Choose Your Perfect Aloe Vera Plant
Walking into a garden centre and seeing rows of succulents can feel a bit overwhelming. But picking the right aloe vera is your first step to success, and it’s easier than you think. Not all aloes are created equal, so knowing what to look for will ensure you bring home a healthy, vibrant plant that's ready to thrive in its new Kiwi home.
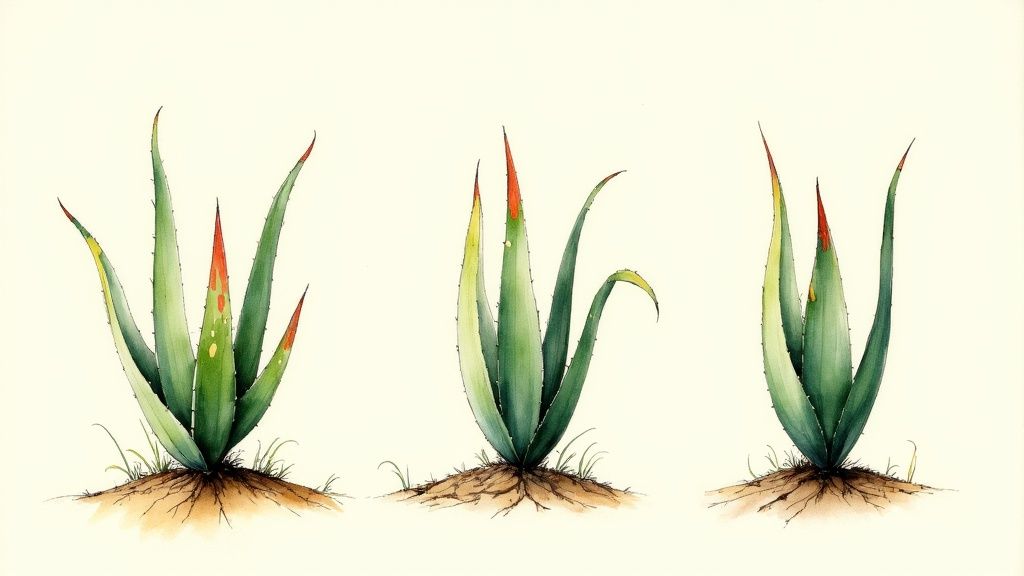
Think of it like choosing the best avos at the farmers' market—you're looking for firmness, great colour, and all the signs of vitality. A healthy aloe should have plump, firm leaves that stand upright or arch gracefully. Steer clear of plants with flat, limp, or bent leaves, as this often hints at underwatering or a weak root system.
Identifying the True Aloe Vera
While there are over 500 species in the Aloe genus, only one is the famous "true" aloe vera, prized for its medicinal gel: Aloe barbadensis miller. If you’re looking for an aloe vera plant NZ nurseries have for sale with the intention of using the gel, this is the name to watch for. It typically has thick, fleshy leaves with serrated edges and might have white spots when young, which often fade as the plant matures.
Of course, if your goal is purely ornamental, the world of aloes is your oyster! Many other stunning varieties offer incredible shapes and colours for your garden or indoor jungle. Don't be afraid to choose a plant just because you love its look.
What a Healthy Plant Looks Like
Before you head to the checkout, give your potential new plant a quick health check. A happy, healthy aloe will tick a few key boxes.
- Firm, Upright Leaves: As we mentioned, the leaves should feel full of water and stand strong. Give a leaf a gentle squeeze; it should feel solid, not mushy.
- A Strong Root System: If you can, gently tilt the pot to peek at the drainage holes. Healthy roots are usually white or light tan. Dark, mushy-looking roots are a dead giveaway for rot.
- Good Colouring: Look for a vibrant, consistent green. Any yellowing or browning leaves can be a red flag for stress, either from too much sun or dodgy watering.
- No Signs of Pests: Check around the base of the plant and under the leaves for any sticky residue, fine webbing, or tiny insects like mealybugs.
Picking a healthy plant from the get-go is like giving yourself a head start in a race. A strong, well-cared-for aloe will adapt more easily to its new environment and will be far more resilient to any common beginner mistakes.
Beyond the Classic Aloe
New Zealand’s climate is pretty accommodating, allowing us to grow some truly spectacular aloe species beyond the common houseplant. For gardeners in warmer, frost-free parts of the country, some aloes can become magnificent landscape features.
A standout example is the giant tree aloe, Aloidendron barberae. This species can grow into a dramatic, architectural tree, and one of the world's largest specimens is famously thriving on Church Hill in Nelson. Its success there just goes to show how well some South African species adapt to New Zealand's coastal, Mediterranean-like conditions.
Whether you're after the classic medicinal plant or a unique ornamental, you can find the perfect Aloe barbadensis miller for your home at Jungle Story. Starting with a healthy, well-identified specimen gives you the confidence to begin your aloe-growing journey.
Creating the Ideal Growing Environment in NZ
To get your aloe vera truly thriving here in New Zealand, you need to think a bit like a real estate agent for your plant. It’s all about finding that perfect spot with the right balance of light and warmth. The good news is that aloes aren't fussy divas. Their needs are pretty simple to meet, whether you're in sunny Northland or the cooler climes of Otago.
Think of your aloe as a sunbather that likes a bit of shade during the hottest part of the day. It absolutely loves bright, indirect sunlight. If you give it too little light, you’ll notice the leaves getting pale and a bit stretched out, or 'leggy'. But stick it in our harsh Kiwi afternoon sun, and it'll get stressed, turning a reddish-brown colour to show its displeasure.
Finding the Perfect Light Indoors and Out
For an indoor aloe vera plant NZ gardeners keep inside, a north-facing window is the absolute best spot you can find. Here in the Southern Hemisphere, that gives it consistent, bright light all day long without the risk of scorching. An east-facing window is another great option, catching all that gentle morning sun.
If you’re growing your aloe outdoors, the trick is to find a spot that gets about six hours of morning sun. A place under the dappled shade of a larger tree or on the eastern side of your house is pretty much perfect. This shields it from the intense midday and afternoon sun, which can easily burn its leaves during a classic New Zealand summer.
Temperature Needs Across New Zealand's Regions
Being a subtropical plant, aloe vera is no fan of the cold and absolutely hates frost. Its happy place is a temperature range between 13°C and 27°C. Many parts of New Zealand sit comfortably within this range for most of the year, but it's our winter temperatures that really decide whether your aloe can be a permanent garden resident.
In the upper North Island—we’re talking Northland, Auckland, Bay of Plenty, and coastal Waikato—the climate is generally mild and frost-free enough for aloes to live happily outdoors all year. They can become fantastic features in a rock garden or succulent bed.
For the rest of the country, though, including most of the South Island and the central North Island, winter frosts are a real threat. A frost can easily kill an aloe. In these regions, it's best to grow your aloe in a pot that you can bring inside or move to a sheltered porch during the coldest months, from roughly June to August.
A simple rule of thumb for Kiwi gardeners: If you need to protect your citrus trees from frost in winter, your aloe vera will need the same courtesy. Treat it as a cherished house guest until the risk of frost has passed in spring.
To keep your plant in top shape through the seasons, it’s worth thinking about its overall health, and that includes feeding. While aloes don't need a lot, giving them the right nutrients during the growing season can make a huge difference. You can learn more about the best approach in our guide to indoor plant fertilizer. This ensures it has the energy to handle temperature changes and put on healthy new growth.
Aloe Vera Care Indoor vs Outdoor in NZ
So, should your aloe live inside or out? It really comes down to your local climate. This quick table breaks down the main differences to help you decide.
| Care Aspect | Indoor Plant Care (All Regions) | Outdoor Plant Care (Frost-Free Regions) |
|---|---|---|
| Light | Place near a bright, north-facing window for consistent, indirect light. | Select a spot with morning sun and afternoon shade to prevent sunburn. |
| Temperature | Protected from frost; stable indoor temperatures are ideal. | Must be in a region where temperatures rarely drop below 5°C. |
| Watering | Easier to control moisture levels; less risk of overwatering from rain. | Requires excellent drainage to handle rainfall, especially in winter. |
| Growth | Growth may be slower and more contained due to pot size and light limits. | Can grow larger and produce pups more freely when planted in the ground. |
Ultimately, whether your aloe lives on a sunny windowsill or in a sheltered garden spot, giving it the right conditions is the key to a happy, healthy plant.
Mastering the Art of Potting and Watering
Getting the soil and watering just right is the secret handshake to keeping your aloe vera happy. It’s a lot simpler than it sounds, and once you get a feel for what this hardy succulent needs, you’ll find it’s one of the easiest plants you can own. Let's break down these two critical elements and set you up for success, Kiwi style.
The biggest mistake Kiwi gardeners make is treating their aloe like a typical thirsty houseplant. Aloe vera's roots evolved in arid, gritty soils, and they absolutely despise sitting in water. Using a standard, dense potting mix is a recipe for disaster—it holds onto far too much moisture and can quickly lead to the dreaded root rot.
Choosing the Right Pot
Before we even touch on soil, let's talk about your plant's home. The pot you choose plays a massive role in managing moisture.
- Terracotta is King: Unglazed terracotta or clay pots are hands-down the best choice for aloes. Their porous nature allows moisture and air to pass right through the walls, helping the soil dry out evenly and stopping the roots from getting soggy.
- Drainage is Non-Negotiable: Whatever pot you pick, it must have at least one decent-sized drainage hole. If excess water has no escape route, your aloe is on a fast track to root rot.
- Size Matters: Go for a pot that is only slightly larger than the current root ball. A pot that’s way too big holds a huge amount of soil that stays wet for ages, creating a swampy, unhealthy environment for the roots.
Creating the Perfect Soil Mix
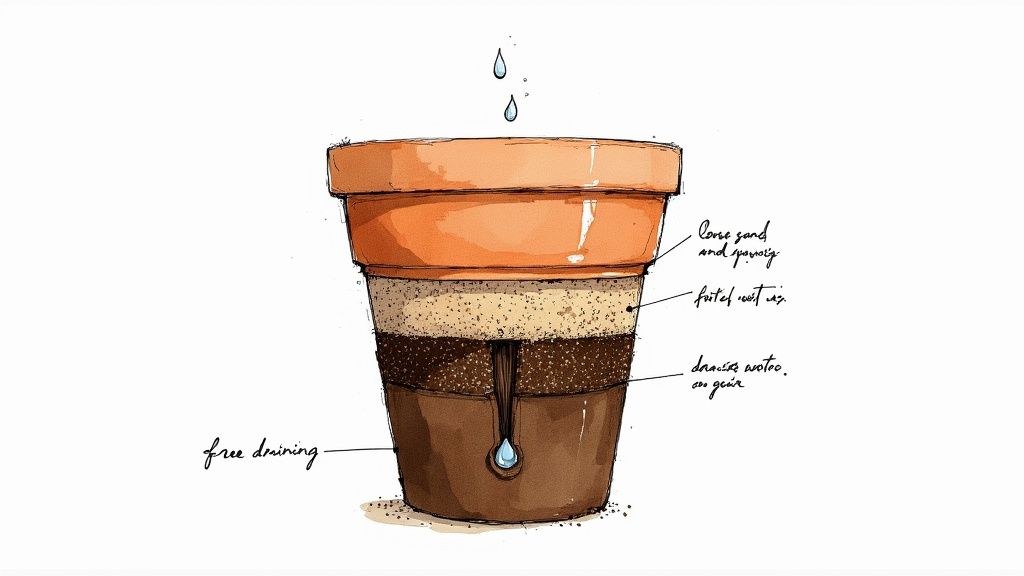
The goal for your aloe's soil is simple: excellent drainage. You’re after a mix that lets water cascade through it quickly, rather than soaking it up like a sponge. While you can buy pre-made succulent and cactus mix from garden centres, it's often better and cheaper to whip up your own.
A brilliant DIY recipe for an aloe vera plant here in NZ is a simple one-third, one-third, one-third blend:
- One part standard potting mix: This provides a bit of organic matter and nutrients.
- One part coarse sand or fine gravel: This creates essential air pockets and improves the soil's structure. Just be sure to avoid fine beach sand, which can compact over time.
- One part pumice or perlite: These lightweight volcanic bits are fantastic for boosting aeration and making sure the mix never gets waterlogged.
Mixing these together gives you a gritty, free-draining medium that beautifully mimics the aloe’s natural habitat. For a deeper dive, our guide on the ultimate potting mix for your indoor plants has more tips on creating the perfect foundation.
Think of it this way: you’re not building a dam; you’re building a sieve. The soil should hold just enough moisture for the plant to drink and let the rest flow right through. This is the single most important factor in preventing overwatering.
The Drench and Dry Watering Method
Now for the most misunderstood part of aloe care: watering. The best approach by far is the "drench and dry" method. This means you thoroughly soak the soil until water runs freely from the drainage holes, then let it dry out completely before you even think about watering again.
To check if it’s time, stick your finger about 5-7 cm deep into the soil. If you feel any moisture at all, hold off for a few more days and check again. It is always, always better to underwater an aloe vera than to overwater it.
How often you water will change dramatically with our Kiwi seasons.
- Spring and Summer (September - February): During the active growing season, your aloe will be thirstier. You might need to water every 2-4 weeks, depending on how much light and warmth it's getting.
- Autumn and Winter (March - August): As growth slows for the dormant period, your aloe's water needs plummet. You’ll want to pull back watering significantly, maybe only once every 6-8 weeks or even less for indoor plants.
Always pay more attention to how dry the soil is rather than sticking to a strict calendar. Learning to read your plant’s cues and checking the soil will make you a far better aloe parent than just watering on a set schedule.
Propagating Aloe Vera Pups Like a Pro
One of the most rewarding parts of growing aloe vera is watching your plant create its own little family. A happy, mature aloe will eventually send up small offshoots from its base, which Kiwi gardeners affectionately call ‘pups’. Propagating these pups is a brilliant way to expand your own collection or share the plant love with friends and whānau.
The great news is, this process is surprisingly simple. You don't need any high-tech gear – just a few basic tools and a bit of patience is all it takes to give these baby aloes their own home. The real trick is knowing when to make the move and handling both the mother and pup gently.
Knowing When a Pup is Ready
Timing is everything. If you separate a pup too early, it can stress the little plant out, as it might not have enough roots to survive on its own. It's far better to wait until the pup is a decent size and has started developing an independent root system.
A good rule of thumb is to wait until the pup is at least a third of the size of the mother plant. It should also have several of its own leaves, usually four or more. This tells you the new plant has enough stored energy to get established once it's on its own.
The Tools You Will Need
You won't need a professional setup for this. A few simple items from around the house or garden shed are all you need to get the job done cleanly and safely.
- A sharp, clean knife or secateurs: Giving your tool a quick wipe with rubbing alcohol before you start helps prevent any diseases from getting into the fresh cuts.
- A small pot with drainage holes: Terracotta pots are a fantastic choice for new pups because they're porous and help the soil dry out properly.
- Well-draining succulent and cactus mix: Just like its parent, the pup needs a soil that won't get waterlogged.
Separating pups is a bit like helping a chick leave the nest. You wait until it's strong enough to fly on its own, then give it a gentle nudge. This approach gives the new plant the best possible chance of success.
Step-by-Step Guide to Propagation
Ready to get your hands dirty? Follow these straightforward steps to separate and replant your aloe pups without any fuss. The whole process is quick and simple.
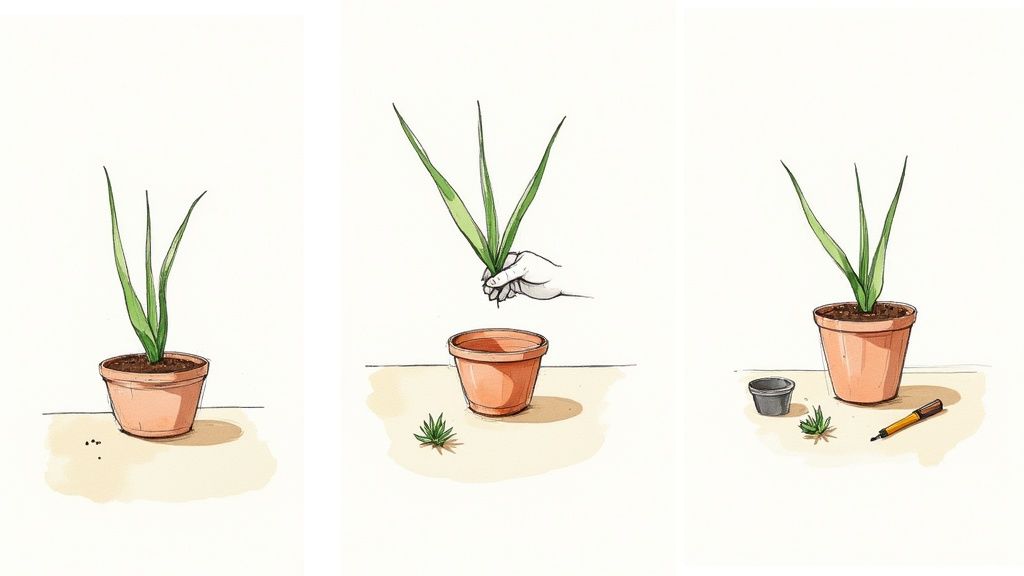
- Gently Remove the Mother Plant: Carefully ease the entire mother plant out of its pot. This gives you a much better view of where the pups are attached and lets you work without causing too much damage.
- Locate and Separate the Pup: Pick out a pup that looks ready and follow its connection down to the mother's root ball. Use your clean knife to make a decisive cut, making sure you take as many of the pup's own roots as you can.
- Let the Pup Callous Over: This is a vital step that's often skipped! Leave the separated pup in a dry, shady spot for 2-3 days. This allows the cut to dry out and form a callus, which acts like a scab and seriously reduces the risk of rot when you pot it.
- Pot Up Your New Plant: Grab your small pot and fill it with the succulent mix. Plant the calloused pup just deep enough so it can stand up on its own. Try not to bury it too deep, as that can also lead to rot.
- Withhold Water Initially: This might feel wrong, but don't water your newly potted pup for about a week. This encourages its roots to grow out in search of moisture, helping it get established much faster. After a week, you can give it its first light watering, using the 'drench and dry' method we talked about earlier.
Troubleshooting Common Aloe Vera Problems
Even the toughest plants hit a snag now and then, but don't worry—most aloe vera issues are surprisingly easy to sort out. This guide will walk you through the common problems an aloe vera plant in NZ might face, from our notoriously damp winters to the odd uninvited pest, so you can nurse your succulent back to full health.
Let's be honest: the number one problem for aloes in New Zealand is almost always water. Our climate, especially during the winter months from June to August, can be pretty damp. This makes overwatering a massive risk, leading straight to the most common aloe ailment of all: root rot.
Diagnosing and Treating Root Rot
Root rot is the silent killer of so many succulents. It happens when the soil stays soggy for too long, essentially suffocating the roots and inviting fungus to the party. The signs can be subtle at first, often showing up as soft, mushy, or yellowing leaves right at the base of the plant.
If you even suspect root rot, you need to act fast. Here’s a simple rescue plan:
- Get it out: Gently slide your aloe out of its pot. Try to brush away as much of that old, wet soil as you can.
- Inspect the roots: Healthy roots should be firm and white or a light tan colour. Rotted roots are the opposite – they'll be black, mushy, and might even smell a bit funky.
- Trim the damage: Using a clean, sharp knife or secateurs, carefully snip off all the rotten bits. Be ruthless here, as any rot you leave behind can spread.
- Repot with fresh soil: Pop your aloe into a new pot with fresh, well-draining succulent mix. It's really important that this soil is dry to give the healthy roots a chance to breathe and recover.
- Hold the water: Don't even think about watering it for at least a week. This gives the trimmed roots time to heal before they have to deal with moisture again.
Solving Common Leaf Issues
Think of your aloe's leaves as a health gauge; they give you clear signals when something isn't right. Paying attention to changes in their colour and feel will help you figure out what's wrong in no time.
- Yellowing Leaves: This is often the first sign of overwatering. It can also point to a lack of nutrients, so if you're sure your watering is on point, a single dose of half-strength liquid fertiliser in spring could do the trick.
- Brown or Reddish Leaves: That's your aloe getting a bit of a sunburn. It means the plant is getting too much direct, harsh sunlight. Just move it to a spot with bright, indirect light, and it should get its lovely green colour back.
- Soft, Mushy Leaves: Mushy leaves are a classic symptom of too much water and often go hand-in-hand with root rot. Stop watering immediately and check how damp the soil is deep down in the pot.
Here's the key takeaway for aloe care: when in doubt, don't water. These desert plants are built to handle drought far better than they can handle sitting in a puddle.
Dealing with Common Kiwi Pests
While they're generally pretty pest-resistant, your aloe might occasionally get some unwelcome visitors, particularly mealybugs. These are tiny, white, cotton-like insects that love to hide in the cosy spots at the base of the leaves, where they suck the sap out of your plant.
Luckily, getting rid of them is simple. Just dip a cotton bud in a bit of rubbing alcohol and dab it directly onto the pests. This dissolves their waxy coating and sorts them out instantly without harming your aloe. For a bigger infestation, a gentle spray of neem oil is also really effective.
Still Got Questions About Your Aloe?
Even the most seasoned Kiwi gardeners have questions now and then. We get it. Here are a few of the most common queries we hear about growing aloe vera here in Aotearoa.
Can I Keep My Aloe Vera Outside All Year Round?
That really comes down to your local climate. If you're lucky enough to live in a frost-free pocket of the country—think Northland, Auckland, or the coastal Bay of Plenty—your aloe will probably be perfectly happy outdoors all year. These spots have the mild winters aloes love.
For almost everywhere else, though, winter frosts are the enemy. If you’re in Canterbury, Otago, or the central North Island, you'll need to keep your aloe in a pot. That way, you can whisk it indoors or into a sheltered spot during the coldest months (usually June to August) to keep it safe from frostbite.
Here's a great Kiwi rule of thumb: if your lemon trees need frost protection, your aloe vera definitely will. Treat it like a treasured guest and bring it inside until the frost risk has passed in spring.
How Often Should I Be Fertilising My Aloe?
With aloe vera, less is always more. They aren't greedy plants, and feeding them too much can actually do more harm than good, leading to weak, leggy growth instead of a robust, happy plant.
If you feel it needs a boost, a balanced liquid fertiliser diluted to half-strength is your best bet. Give it a feed just once during its main growing season in spring, around September or October. Don't even think about fertilising in autumn and winter; the plant is resting and won't be able to use the extra nutrients.
Is the Gel From My Plant Actually Safe to Use?
The gel from the true aloe, Aloe barbadensis miller, is legendary for soothing minor burns and skin irritations. But before you start snapping off leaves, there are a few things to keep in mind.
First and foremost, you have to be 100% certain that your plant is the real deal, Aloe barbadensis miller. Not all aloes are created equal, and some aren't safe for topical use.
When you go to harvest, always pick a thick, mature outer leaf. Crucially, you need to avoid the yellowy latex layer just under the skin—it can be a nasty irritant. If you're in any doubt about what kind of aloe you have, or if you have sensitive skin, it’s always best to play it safe and leave it be.
Ready to add a beautiful aloe to your collection? Find the perfect healthy Jungle Story aloe vera and a huge range of other stunning plants over at junglestory.co.nz.