Yes, you absolutely can grow Key limes here in New Zealand. Find them a sunny, sheltered spot, give them the right care, and these aromatic citrus trees will flourish in many parts of the country. Your reward? Uniquely zesty fruit, perfect for pies, drinks, and all sorts of dishes. This guide will walk you through exactly how to get it right.
What's the Big Deal With Key Limes, Anyway?
Ever had a proper Key lime pie and wondered what makes it so different from the usual lime-flavoured desserts? The secret is the fruit itself. The Key lime (Citrus aurantiifolia) is a world away from the common Persian limes you see in most Kiwi supermarkets.
Thinking they’re the same is like comparing a Gala apple to a Granny Smith. Sure, they're both apples, but the flavour, texture, and what you do with them are completely different.
The Key lime is smaller, rounder, and has a thinner skin that turns a yellowish-green when it's perfectly ripe. But the real magic is inside. It packs a more aromatic, intense, and zesty punch with a floral note that the big green limes just can't match. This unique flavour is exactly why it’s the hero ingredient in the dessert that made it famous.
A Subtropical Treasure for Your Own Backyard
For many Kiwi gardeners, the idea of growing a subtropical fruit might seem a bit ambitious. But here’s the good news: the Key lime tree is surprisingly adaptable. With a bit of smart planning, you can successfully grow this citrus gem right here at home.
Key limes love conditions that many parts of our country can offer:
- Plenty of Sun: They need long, sunny days to develop that signature flavour.
- A Sheltered Spot: Protection from harsh winds and nasty frosts is a must, especially in cooler areas.
- Well-Drained Soil: Like all citrus, they hate having ‘wet feet’, so good drainage is non-negotiable.
Managing soil is fundamental to successful gardening in New Zealand. Our soils often lean towards being acidic, a challenge farmers have been tackling for generations. To improve crop yields, ground limestone is frequently spread across farmland to balance the pH. You can learn more about the role of lime in NZ agriculture here and see how this large-scale practice mirrors the soil care you'll provide in your own garden.
Growing a key lime nz is about more than just planting a tree; it’s about bringing a genuine taste of the tropics to your own backyard. It's a hugely rewarding project that ends with you harvesting fruit with a flavour you just can't buy at the local shop. Whether you're dreaming of whipping up an authentic Key lime pie, garnishing a summer cocktail, or adding a zesty kick to a seafood dish, it all starts with one healthy tree. This guide is your complete roadmap to making that happen.
Creating the Perfect Climate and Soil Conditions
Key lime trees are sun-worshippers at heart, dreaming of the long, warm days that remind them of their subtropical home. To get one flourishing in your garden here in New Zealand, the game is to try and replicate those conditions as best you can. It’s a bit like being a real estate agent for your plant—location, location, location.
The sunniest, most sheltered spot on your property is prime real estate for a Key lime. Think about a north-facing wall that soaks up the heat during the day and gently radiates it back at night, creating a cosy little microclimate. This protection is absolutely vital, not just from those biting southerlies but especially from frosts, which can really knock these tender trees around.
Finding the Right Spot in New Zealand
New Zealand's climate is famously changeable, so your game plan for growing a Key lime will depend heavily on where you live. Gardeners in the upper North Island, from Northland down to the Bay of Plenty, will find it easiest to provide the warmth these trees crave.
But that doesn't mean the rest of us are out of luck. With a bit of clever placement, Key limes can do beautifully in sheltered spots in many other regions. It’s all about creating that warm microclimate.
- Warmest Regions (Northland, Auckland, Bay of Plenty): You’ve got the most flexibility here. Pick a spot with maximum sun and good air circulation to keep things fresh and healthy.
- Milder Regions (Waikato, Taranaki, Nelson): Make shelter your top priority. A spot protected from prevailing winds and frost pockets is a must. Planting near a house or a solid fence can make all the difference.
- Cooler Regions (Canterbury, Otago): Growing in a large container is often your best bet. This lets you move the tree to a protected area—like a covered deck or even indoors—during the coldest months from June to August.
To help you remember the essentials, here’s a quick reference table.
Key Lime Growing Conditions At-a-Glance for NZ Gardeners
| Factor | Ideal Condition | NZ-Specific Advice |
|---|---|---|
| Sunlight | 6-8 hours of direct sun daily | A north-facing spot is perfect for maximising sun exposure and warmth. |
| Shelter | Protection from strong winds & frost | Use walls, fences, or other plants as windbreaks. Cover with frost cloth in winter. |
| Soil Type | Free-draining, loamy soil | Amend heavy clay with compost and pumice to avoid 'wet feet'. |
| Soil pH | Slightly acidic (6.0–7.0) | Test your soil and adjust with garden lime (to raise pH) or sulphur (to lower pH). |
This table covers the big-ticket items, but getting the soil right is probably the most crucial part of the puzzle.
The Golden Rule: Avoiding 'Wet Feet'
If there’s one thing all citrus trees are fussy about, it’s their intense dislike for waterlogged soil. Key limes are no exception. They absolutely cannot stand having their roots sitting in soggy, wet ground—a condition we call 'wet feet'—which is a fast track to root rot.
Proper drainage is completely non-negotiable. Before you even dig a hole, check your soil. Heaps of Kiwi gardens, especially those on a clay base, tend to hold water. If you dig a test hole and it fills with water that just sits there for hours, you’ve got some work to do.
To get your Key lime off to the best start, you need to create a soil environment where water can move freely. This doesn't mean the soil should be bone dry, but it must let excess moisture escape so the roots can breathe.
To improve heavy soil, you’ll want to mix in organic matter and other goodies. This builds a better structure, creating the little air pockets that are so vital for healthy roots. Some of the best things to add are:
- Compost: Adds nutrients and builds great soil structure.
- Pumice: A lightweight volcanic rock that’s brilliant for creating drainage.
- Sand: Coarse sand helps to break up those dense clay particles.
If you’re new to creating the perfect foundation for your plants, it's worth learning about the components of a good blend. You can dive deeper into making the perfect potting mix and soil amendments with our detailed guide.
Getting the Soil Acidity Just Right
Beyond drainage, the soil's pH level—how acidic or alkaline it is—plays a massive role. Key limes, like most citrus, prefer a slightly acidic soil, ideally with a pH between 6.0 and 7.0. This is their sweet spot for taking up all the nutrients they need to thrive.
You can grab a simple pH testing kit from any garden centre to see where your soil is at. If it’s too alkaline (above 7.0), you can bring the pH down by adding elemental sulphur. If it’s too acidic (below 6.0), a sprinkle of garden lime will raise it.
It's actually the same principle our farmers use on a massive scale. They apply agricultural lime to pasture to correct natural soil acidity and boost growth. By adjusting the soil for your single Key lime tree, you're basically practising a fundamental Kiwi farming technique in your own backyard.
Planting Your Key Lime Tree in the Ground or a Pot
Right, this is the moment your Key lime journey really kicks off. You've scouted the perfect sunny, sheltered spot and prepped the soil. Now it's time to give your tree its forever home. For us Kiwi gardeners, there are two great ways to go: planting it straight into the garden or growing it in a container.
Which path you choose depends on your local climate, how much space you’ve got, and how much flexibility you need. Both methods can lead to a thriving, productive tree dripping with zesty limes, so let’s figure out which one is the right fit for you.
Planting Directly in the Garden
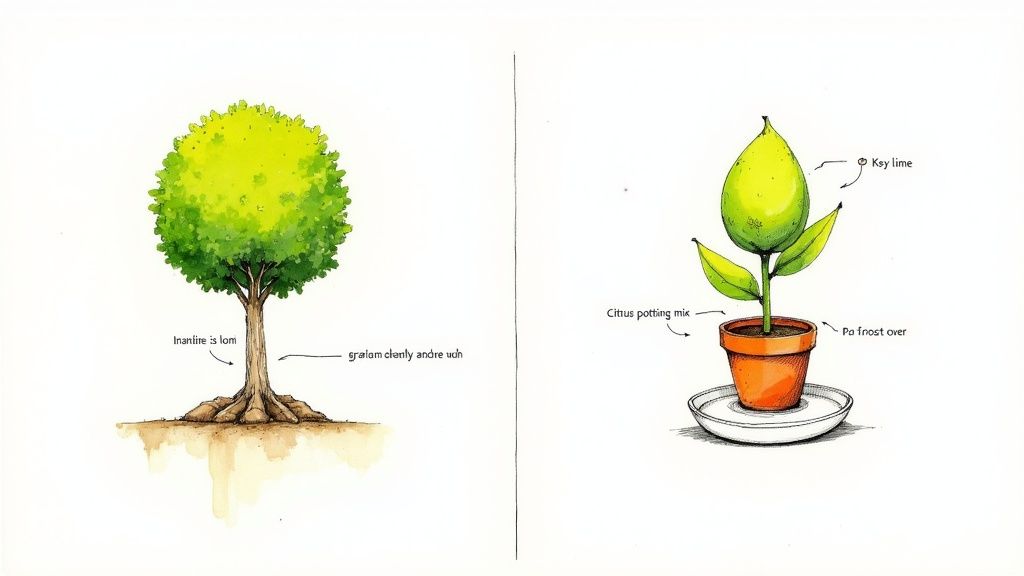
If you're lucky enough to live in the warmer parts of New Zealand—especially the upper North Island—planting your Key lime tree straight into the ground is an excellent choice. This allows it to stretch out and develop a deep, extensive root system, which makes it more resilient and often leads to a bigger, more fruitful tree down the track.
When you’re ready to plant, dig a hole that’s roughly twice as wide and just as deep as the pot it came in. Gently tease out any roots that are circling at the bottom of the root ball; this encourages them to grow outwards into their new home.
The most critical detail here is the graft union—that noticeable bump on the lower trunk where the Key lime was joined to the rootstock. Make sure this sits well above the soil line. If you bury it, you’re inviting rot and disease, so aim to have it at least 10-15 cm above the ground.
The Game-Changing Power of Pots
For a lot of Kiwi gardeners, particularly those in cooler regions or with less space, growing in a container is a total game-changer. Think of a pot as a portable microclimate that you’re in complete control of. You can shift it to catch the sun during the day, move it to a sheltered corner during a southerly blast, or even bring it inside to protect it from a nasty winter frost.
Choosing the right pot is your first step. Start with one that’s a bit bigger than its current home, something around 30-40 litres, to give the roots room to expand. And make sure it has plenty of drainage holes. If there’s one thing citrus trees hate, it’s having wet feet.
Next up, grab a top-quality, citrus-specific potting mix. These special blends are designed to provide the perfect balance of drainage, aeration, and nutrients that a key lime nz needs to thrive in a pot. Don't be tempted to use regular garden soil, as it compacts easily and can suffocate the roots. For more expert tips, check out our comprehensive guide on choosing the right plant containers in NZ.
Weighing Your Options
Deciding between the garden and a pot really comes down to your unique situation. One isn't automatically better than the other; it’s all about what suits your garden and your lifestyle.
| Method | Pros | Cons |
|---|---|---|
| In-Ground Planting | Can grow into a larger, more robust tree with a higher fruit yield. Becomes more drought-tolerant once established. Requires less frequent watering than potted plants. | Less mobile; cannot be moved to escape frost or bad weather. Requires careful initial soil preparation, especially in heavy clay. Not suitable for very cold or exposed climates. |
| Container Growing | Excellent for small spaces like balconies and patios. Can be moved to follow sunlight or brought indoors for frost protection. Full control over the soil medium. | Requires more frequent watering and feeding as nutrients leach out. The tree's ultimate size will be restricted by the pot. Needs to be repotted every few years. |
Ultimately, this decision frames how you'll care for your tree for years to come.
"A pot gives a gardener in a marginal climate the ultimate advantage: control. You can essentially give your Key lime a perfect day, every day, by moving it to the best possible spot."
This level of control is exactly why container growing has become so popular for subtropical fruit here in New Zealand.
The First Watering and Mulching
Whether you’ve planted in the ground or in a pot, these next steps are crucial. Once you’ve positioned your tree and backfilled it with soil, give it a thorough watering. This isn’t just to quench its thirst; it’s to settle the soil around the roots, get rid of any air pockets, and give your tree the absolute best start.
Give it a deep, slow soak until you see water pooling on the surface or running out of the pot's drainage holes. This initial drenching is vital.
Finally, apply a good layer of mulch, like bark chip or pea straw, around the base of the tree. Just be sure to keep it a few centimetres away from the trunk itself. Mulch is your garden's best mate—it helps hold in moisture, keeps the weeds down, and regulates the soil temperature, protecting the roots from the summer heat and winter chill. It’s a simple step that drastically reduces stress on your new Key lime, setting it up for a long and fruitful life.
Mastering Ongoing Care: Feeding, Watering, and Pruning
Once your Key lime tree is happily settled in its new home, the real relationship begins. The focus now shifts from planting to the simple, ongoing routines that will keep it healthy and, most importantly, productive. Think of it less as a list of chores and more as learning the language of your plant.
By figuring out its needs for food, water, and the occasional tidy-up, you can guide it to thrive through New Zealand's distinct seasons.
This consistent care is what turns a surviving tree into a flourishing one, absolutely laden with those aromatic limes. The secret is just paying attention and adapting to the seasonal shifts in our Southern Hemisphere calendar.
Fuelling Growth: A Feeding Schedule for Key Limes
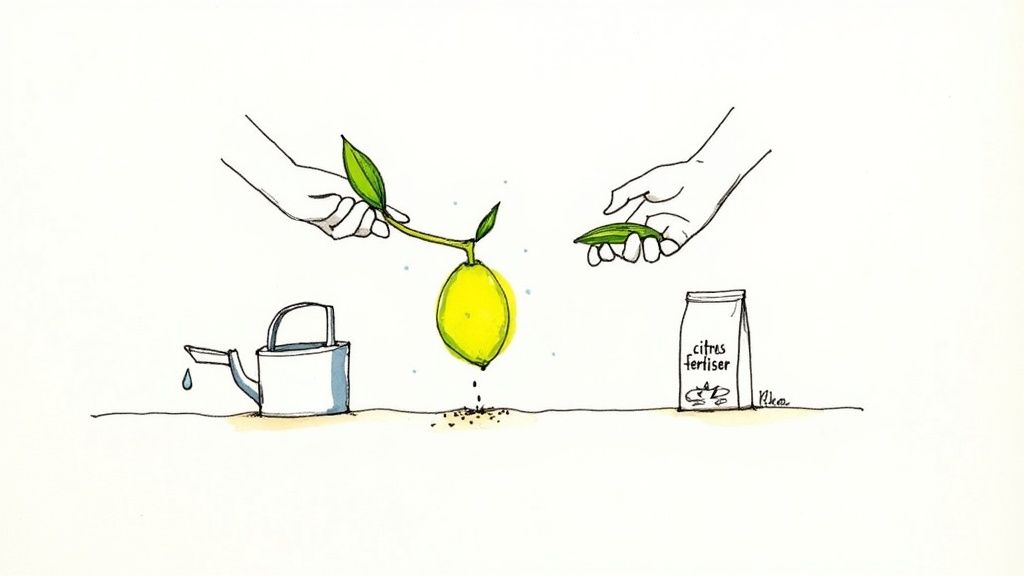
Key limes, like all their citrus cousins, are what we call ‘heavy feeders’. This just means they have a massive appetite, especially when they're putting energy into new growth and fruit. To keep your tree in top form, you’ll need to provide a steady supply of the right nutrients.
During the active growing season here in New Zealand—which kicks off in spring (September) and runs through to late summer (February)—a balanced citrus fertiliser is your best friend. These special formulas have the right mix of nitrogen for lush leaves, phosphorus for strong roots, and potassium for developing quality fruit.
A well-fed tree isn't just more productive; it's also far more resilient against pests and diseases. Think of regular feeding as building up your tree's immune system before problems even get a chance to start.
For the best results, stick to this simple routine:
- Early Spring (September): Give it the first feed of the season just as the weather warms up and you spot new growth.
- Early Summer (December): Add another boost to support the flowers and tiny young fruit that are forming.
- Late Summer (February): A final application helps the tree ripen its current crop and store up energy for the winter ahead.
Always follow the application rates on the fertiliser packet and remember to water it in well. This simple step helps the nutrients wash down to the root zone where the tree can actually use them.
Smart Watering: The Finger Test Method
One of the biggest mistakes gardeners make is watering on a rigid schedule. New Zealand's weather is just too changeable for a ‘water every Tuesday’ approach. A humid week in Auckland is a world away from a dry nor'wester blasting Canterbury.
The best way forward? Let the soil tell you what to do. The good old ‘finger test’ is the best way to check if your key lime nz needs a drink. Just push your index finger about 5 cm (a couple of inches) into the soil near the base of the tree.
If the soil feels dry at your fingertip, it’s time to water. If it still feels moist, hold off for another day or two. This simple trick works perfectly for trees in the ground and in pots, and it prevents the twin dangers of under-watering and over-watering (which leads to dreaded root rot).
When you do water, give it a deep, thorough soak. A light sprinkle only wets the surface and encourages weak, shallow roots. You want to drench the entire root zone, letting the water penetrate deep into the soil. For potted plants, water until you see it running freely from the drainage holes at the bottom.
Strategic Pruning for Health and Harvest
Pruning a Key lime tree doesn't have to be complicated. Your goals are simple: get rid of any dead or damaged wood, improve airflow through the canopy, and shape the tree to make harvesting easier. Good airflow is especially important in our often-humid climate, as it’s one of the best ways to stop fungal diseases from taking hold.
The best time to get the secateurs out is in late winter or early spring (around August). This is usually right after you’ve harvested the main crop but before the new spring growth really gets going. Pruning then ensures you aren't accidentally snipping off the branches that will give you next season's limes.
Just focus on these three simple tasks:
- Deadwood Removal: Snip off any branches that are obviously dead, broken, or look diseased. They’re not doing anything for the tree and can be an entry point for pests.
- Thinning Cuts: Look for branches that are crossing over each other or growing back into the centre of the tree. Removing a few of these opens up the canopy to more sunlight and air.
- Sucker Removal: Keep an eye out for any vigorous shoots growing from below the graft line on the main trunk. These ‘suckers’ come from the rootstock and will steal energy from the fruiting part of the tree. Remove them as soon as you see them.
Always use clean, sharp secateurs. A clean cut heals faster and is much less likely to get infected. A little annual trim is all a healthy Key lime really needs to stay in great shape.
Harvesting and Enjoying Your Homegrown Limes
This is the moment all that patience and care pays off—tasting the incredible flavour of your very own homegrown Key limes. After watching your tree grow, flower, and finally set fruit, the last step is knowing exactly when to pick them to capture that signature zesty punch at its absolute peak.
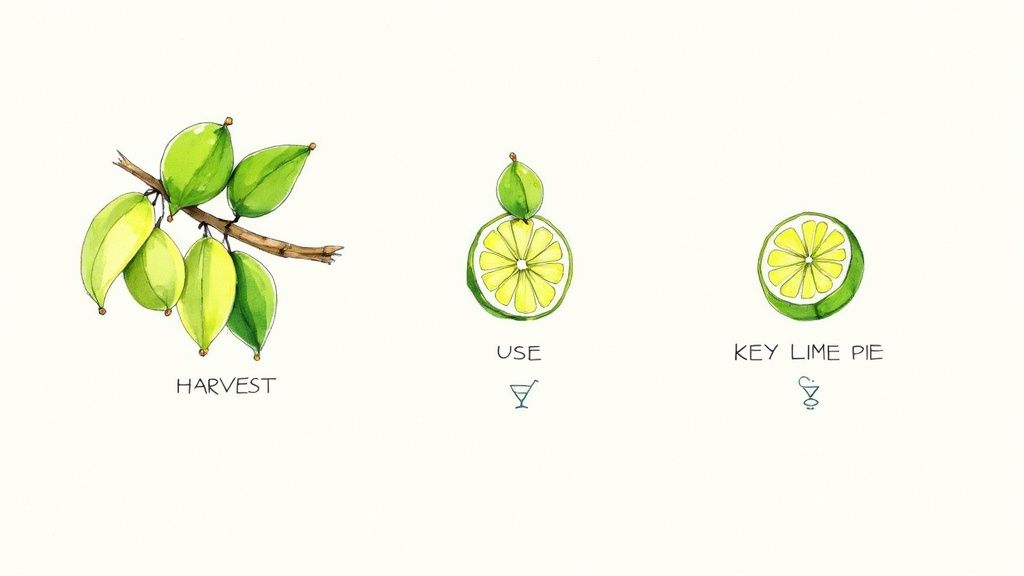
Unlike the big, dark green Persian limes you see at the supermarket, a ripe Key lime gives you different clues. They start off green, of course, but develop a distinct yellowish tinge as they ripen. Keep an eye out for fruit that’s lost its deep green lustre and is starting to show pale green or even yellow patches.
Knowing When to Pick Your Key Limes
Colour is a good place to start, but the feel of the lime is your most reliable guide. A perfectly ripe Key lime should feel slightly soft when you give it a gentle squeeze. It will also be surprisingly plump and heavy for its size, which is a great sign it’s full of that precious, aromatic juice.
The ultimate test, though, is the ‘twist and pull’. A ripe lime will come away from the branch with just a gentle twist. If you have to really yank at it, it’s not quite ready. Best to give it another week or two on the tree to fully develop its sugars and flavour.
Here in New Zealand, you can generally expect your main harvest to be ready during the cooler months.
- Main Fruiting Season: Typically from late autumn through winter, around May to August.
- Minor Crops: It’s not uncommon for happy, healthy trees to produce smaller crops at other times of the year, too.
This winter harvest window is perfect timing—it means you’ll have a bright, zesty taste of the tropics to liven up even the coldest Kiwi days.
From the Garden to the Kitchen
With a bowl of freshly picked limes on your bench, the real fun begins. The intense, floral flavour of a key lime nz grown in your own garden is something special, far superior to anything you can buy. It’s time to let that flavour shine.
Of course, the most famous use is the classic Key lime pie. The authentic recipe is surprisingly simple, relying on the clever chemical reaction between the acidic lime juice and sweetened condensed milk to create a rich, creamy custard.
The perfect Key lime pie filling is a masterful balance of tart and sweet. It’s traditionally made with just three core ingredients: Key lime juice, egg yolks, and sweetened condensed milk. Baked in a simple biscuit crust, it's a dessert that proves the best things are often the simplest.
But don’t stop there. The culinary uses for these zesty little gems are nearly endless and fit so well with Kiwi cuisine. Their bright flavour can elevate all sorts of dishes.
- Fresh Kaimoana: A squeeze of Key lime juice is the perfect finish for freshly grilled fish, scallops, or prawns. It’s also the essential ingredient in a zesty ceviche.
- Vibrant Marinades and Dressings: Whisk the juice with olive oil, garlic, and herbs for a brilliant marinade for chicken or a simple, flavour-packed salad dressing.
- Refreshing Drinks: From homemade cordials and sparkling limeade to classic cocktails like margaritas and mojitos, Key lime juice provides a superior aromatic kick.
Harvesting your own limes connects your gardening efforts directly to these delicious rewards, transforming your hard work into tangible, flavourful moments to share and enjoy.
Where to Find Your Key Lime Tree in New Zealand
Ready to get your hands on a Key lime tree? Finding a healthy, vigorous plant is the final, crucial piece of the puzzle. Luckily for us Kiwi gardeners, there are some great options for sourcing a quality tree that’s raring to go from day one. Your main goal is to find a trusted source that provides disease-free plants, giving you a massive head start.
Your local garden centre is often the first port of call. Both the big nationwide chains and smaller independent nurseries usually stock a decent range of citrus, and a key lime nz specimen is a pretty popular choice. The best part about this is you can get up close and personal, inspecting the plant yourself before you bring it home.
What to Look For in a Healthy Plant
When you’re picking out your tree, think of yourself as a plant detective. You're searching for specific clues that point to good health and a promising future. A bit of scrutiny now can save you a world of trouble down the track.
Here’s what to keep an eye out for in a top-quality tree:
- Glossy Green Leaves: The foliage should be a vibrant, healthy green. Steer clear of any plants showing yellowing leaves, brown spots, or tell-tale signs of pests like chewed edges or sticky residue.
- A Strong Graft Union: Find the knobbly bump on the lower trunk—that’s where the Key lime was grafted onto its rootstock. You want it to be fully healed, with no weeping, cracks, or signs of disease.
- Sturdy Structure: The main stem should feel strong, and the overall shape of the tree should look well-balanced.
- No Pests: Don't be shy! Carefully check the undersides of leaves and around any new growth for common citrus pests like sneaky aphids or scale insects.
Buying from a reputable source is the single most important decision you'll make. A healthy plant from a trusted nursery is already acclimatised to NZ conditions and is far more likely to establish quickly and produce fruit sooner.
Specialist Nurseries and Online Options
Beyond the usual garden centres, specialist citrus nurseries are absolute goldmines. These growers live and breathe citrus and can offer fantastic, expert advice tailored to your specific part of the country.
These days, buying plants online has also become a super convenient and reliable option. Reputable online stores like Jungle Story offer a curated selection of healthy plants delivered right to your doorstep. If you're new to the online plant world, our guide on how to safely buy plants online in NZ has some great tips for a smooth experience. No matter where you get it from, taking the time to choose the perfect tree is your first real step towards harvesting those amazing, homegrown limes.
Got Questions? We’ve Got Answers.
Even with the best advice, a few questions always seem to sprout when you're growing something for the first time. Here are some quick, clear answers to the most common queries we hear from Kiwi gardeners about getting a Key lime tree to thrive in their own backyard.
Can I Grow a Key Lime Tree From a Seed?
You technically can, but it’s probably not the shortcut to fruit you’re hoping for. A tree grown from a seed is a bit of a genetic lottery—it could take over seven years to mature, and even then, there's no guarantee the limes will have that classic, zesty flavour you're after.
For reliable results and a much faster harvest here in New Zealand, your best bet is always a grafted tree from a nursery. These plants are joined onto hardy rootstock that’s been specifically chosen for our local soils. This means you’ll likely see fruit within 2-3 years and have a much more resilient tree from day one.
Why Are the Leaves on My Lime Tree Turning Yellow?
Yellow leaves are your tree’s way of sending up a flare, letting you know something isn't quite right. Most often in NZ gardens, it’s a sign of a nutrient deficiency, usually a lack of nitrogen or magnesium. Thankfully, this is an easy fix with a regular feeding schedule.
Applying a balanced citrus fertiliser during the growing season (spring through late summer) will typically solve it. The other common culprit is improper watering—either too much or not enough. Do the finger test; the soil should feel moist but never waterlogged. This is especially important for a Key lime in a pot, as good drainage is critical for the roots to actually absorb those nutrients.
How Do I Protect My Key Lime From Frost?
This is a big one for many parts of New Zealand. Key limes really don't like the cold, and protecting your tree through the chilliest winter nights is crucial for its survival and long-term health.
If your tree is in a pot, the fix is easy: simply move it to a sheltered spot. A covered deck, carport, or even an unheated garage will do the trick on frosty nights. For trees planted in the ground, cover them with a layer of frost cloth. It’s best to drape it over a frame of some sort so the material doesn’t touch the leaves directly. A thick layer of mulch around the base also does wonders for insulating the roots. A little effort here goes a very long way.
By tackling these common issues head-on, you can navigate any growing pains and keep your tree healthy, productive, and ready to reward you with those uniquely zesty, homegrown limes.
Ready to start your citrus adventure and find the perfect Key lime tree for your garden? Explore the incredible selection from trusted New Zealand growers at Jungle Story. We make it easy to find healthy, high-quality plants and have them delivered right to your door.