Note: This guide uses Southern Hemisphere seasons—summer (December–February), autumn (March–May), winter (June–August) and spring (September–November).
Moringa NZ has earned its place in Kiwi gardens as the miracle tree. Gardeners across Aotearoa harvest its fresh leaves, pods and seeds to boost both health and flavour in their everyday recipes.
Discover How To Grow Moringa In NZ
Moringa oleifera punches above its weight with exceptional nutrient density and remarkable resilience. Imagine a plant that greets summer warmth like an old friend and barely bats an eyelid at light frosts in winter (June–August).
Its rapid growth and drought tolerance make it a natural fit for New Zealand’s varied climates. In this guide, we’ll stroll from basic botanical insights right through to advanced pruning and harvest techniques—arming you with everything you need to grow moringa confidently in your own backyard.
Guide Structure
- Botanical Profile: Leaf shape, flowers and pod anatomy
- Climate & Soil Requirements: Tailored to NZ’s distinct regions
- Step-By-Step Growing Advice: From seed sowing in spring (September) to seedling care over cooler months
- Health & Culinary Benefits: Local recipes for pesto, teas and powdered blends
- Sourcing Options: Jungle Story
Kiwi growers often share stories of Sunday afternoons whipping up vibrant green pesto or winter evenings sipping warming moringa leaf infusions. These case studies highlight how small patches of leafy trees can deliver daily nutrition and culinary flair.
By the end of this guide, you’ll move seamlessly from planting seeds to mastering pruning cycles and storing your harvest. Each step builds on the last, ensuring you develop both practical skills and a deeper appreciation for this remarkable tree.
Botanical Profile Of Moringa NZ
Moringa oleifera isn’t just another tree in New Zealand gardens. It settles in easily, its feathery leaves swaying in even the lightest breeze.
You’ll notice pinnate leaves arranged like tiny fans—each leaflet smooth and oval, filtering light like delicate lace. In winter (June–August), slender spikes of ivory blooms emerge, later giving way to pointed seed pods up to 30 centimetres long.
Below ground, a strong taproot plunges deep while a tangle of fine lateral roots forages for moisture. This dual system keeps moringa steady through dry spells and clay-heavy patches alike.
Here is a botanical snapshot from the Moringa oleifera page on Wikipedia:

The image highlights its lace-like foliage, the triangular pods dangling like suspended lanterns, and the neat floral clusters that define this remarkable species.
Comparison Of Propagation Methods
Deciding between seeds and cuttings is a choice of patience versus predictability. Here’s how they stack up:
-
Seed Sowing
• Germination in 1–2 weeks when sown in warm, well-drained soil
• Fresh growth is quick, though long-term vigour hinges on seed quality -
Cuttings
• Roots form in 4–6 weeks under sheltered, humid conditions
• Yields consistent plants with robust initial shoots
“Moringa’s rapid shoot growth acts like a green lighthouse guiding gardeners through seasonal shifts.”
In fact, fresh shoots can extend 30–50 centimetres in just one growing season—ideal for keen gardeners eager to see results.
Leaf Morphology And Growth Metaphor
Think of moringa’s leaves as nature’s sunshades—light enough to let gentle rays through, yet dense enough to fuel photosynthesis. Young plants shrug off light frosts in winter, while mature trees bounce back quickly after a cold snap.
This resilience makes moringa at home from Northland’s subtropical warmth to Otago’s cooler climes. Yet how you start it matters: seed-raised trees send roots deeper over time, whereas cuttings bulk up fast and shape a uniform canopy by year two.
Choosing Propagation Method
A few quick pointers before you begin:
- Select brown, fully dried seed pods for the best germination rates.
- Trim cuttings to around 30 cm—this length encourages swift, healthy rooting.
By tuning into these botanical details, you’ll help moringa thrive in New Zealand’s unique conditions.
Health And Culinary Benefits Of Moringa NZ

Moringa leaves, flowers and pods are a nutritional powerhouse in Kiwi kitchens. They slip seamlessly into breakfasts, lunches and snacks, boosting meals with a fresh green punch.
Across Aotearoa, Moringa NZ is earning its spot alongside cherished staples. Many home cooks are discovering the top superfood powder benefits for overall health and vitality.
Leaf powder shines with antioxidants and vitamin C, while the delicate flowers lend a subtle sweetness to teas. When lightly fried, the seed pods take on a bean-like charm—and pack plant-based protein for more filling dishes. Every slice of this tree offers a simple way to lift your daily nutrition.
Nutrient Profile Of Moringa Leaves
- 72% protein by weight in dried leaf powder—perfect for smoothies
- 20 vitamins and minerals, including iron for energy and calcium for strong bones
- A wealth of antioxidant compounds like quercetin to support your immune system
Brighten a green smoothie with a teaspoon of moringa leaf powder. Then balance its earthy edge by blending in kiwifruit or local berries.
Daily Cooking Ideas
- Stir 1 teaspoon of leaf powder into breakfast porridges or smoothies
- Pan-fry young seed pods with garlic, olive oil and a pinch of chilli flakes
- Steep dried moringa flowers in hot water for a fragrant, floral brew
Local cook Emma Turner transformed her classic potato soup by adding blended moringa leaves and a swirl of cream. The result was a vibrant green bowl that burst with extra vitamins—and her guests couldn’t get enough of its earthy flavour.
“Moringa leaf powder turned my everyday soup into a nutrient-dense delight,” says Emma, a Wellington home cook.
Herbalist Tips For Wellness
Herbalists around New Zealand often blend moringa with native manuka or kawakawa to aid digestion and ease stress. These mixes reflect our climate and traditional knowledge, yet anyone can recreate them at home.
Follow these simple steps:
- Dry freshly picked moringa leaves at 45 °C for six hours.
- Grind until fine powder using a small coffee mill or spice grinder.
- Sprinkle ½ teaspoon into morning oats or yoghurt for a gentle nutrient boost.
This approach locks in vitamin A and iron, ensuring you get the full benefits. Wellness coach Taika Smith suggests starting with one teaspoon daily, then adjusting to taste and effect. Beginners should sample small amounts to gauge tolerance and avoid any digestive upset.
By treating moringa as both food and remedy, you can tap into its goodness without relying on complex products.
Climate and soil needs follow.
Climate And Soil Requirements For Moringa NZ
Moringa is surprisingly adaptable to New Zealand’s patchwork of microclimates. From Northland’s subtropical warmth to Marlborough’s cooling breezes, each region tells its own growing story.
Northland enjoys long frost-free stretches, while Otago braves the odd winter snap. Those temperature quirks directly shape root strength and leaf size.
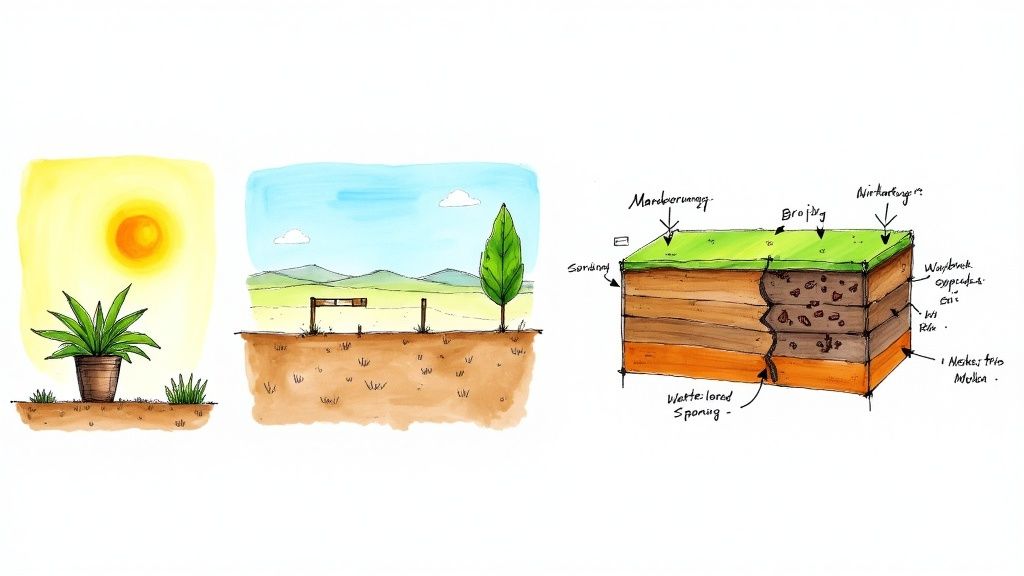
The ideal bed for moringa sits at pH 6.3–7.0, a sweet spot for nutrient uptake. Free-draining earth behaves like a comfortable mattress—roots can stretch and breathe without drowning.
“Well-drained soil acts like a comfortable mattress, supporting healthy moringa roots through both dry spells and sudden downpours.”
Heavy clay or waterlogged patches, by contrast, act like a sponge that suffocates. A 5–7 cm layer of organic mulch restores balance—improving structure and holding just the right amount of moisture.
Climate And Soil Comparison For Moringa NZ
To pinpoint the best location for your moringa, compare soil and climate across key regions below.
| Region | Soil Type | pH Range | Drainage | Frost Risk |
|---|---|---|---|---|
| Northland | Sandy loam | 6.3–6.8 | Excellent | Low |
| Bay of Plenty | Volcanic loam | 6.4–7.0 | Good | Low |
| Waikato | Clay loam | 6.3–6.9 | Moderate to good | Moderate |
| Marlborough | Alluvial loam | 6.5–7.0 | Excellent | Moderate |
| Otago | Stony silt loam | 6.2–6.7 | Fair | High |
Use this snapshot to match your garden’s pH, drainage and frost exposure with the region that suits your moringa ambitions.
Frost Risk Management
In cooler spots like Otago, sudden frosts can nip young shoots. Keep a close watch on the overnight forecast so you’re never caught off guard.
- Cover saplings with horticultural fleece when temperatures hit 2 °C.
- Apply extra mulch at planting to insulate roots against the cold.
- Wait until after the last spring frost (September–November) before any major pruning.
These simple moves slash the chances of frost scorch and speed up spring recovery.
Site Selection And Wind Protection
A sheltered nook behind a fence or hedge does wonders for moringa saplings. A good windbreak stops southerly blasts from snapping tender branches.
- Position young trees behind a 50–70 cm high wind barrier.
- Deploy shade cloth during scorching summer afternoons.
- Stake taller plants early to prevent a wind-induced lean.
Moringa thrives on sun but appreciates a touch of afternoon shade in high summer (December–February). Water deeply once or twice a week—shallow daily sprinkles encourage shallow roots.
With the right spot, well-draining soil and smart wind protection, your moringa will reward you with healthy growth and a bounty of leaves.
Step By Step Growing Advice For Moringa NZ
Growing moringa in New Zealand feels a bit like guiding a young family through childhood. Each stage brings its own joys and challenges, from the very first sprouts to a canopy of vibrant green leaves.
In the nursery phase, seedlings behave like toddlers—fragile and eager for the right balance of warmth, light and moisture. Once they mature, these trees become more resilient, yet still benefit from thoughtful pruning to keep them healthy and productive.
Key Phases of Moringa NZ Cultivation
- Seed Treatment
- Nursery Care
- Field Planting
- Seasonal Maintenance
- Pest Monitoring
Seed Treatment And Germination
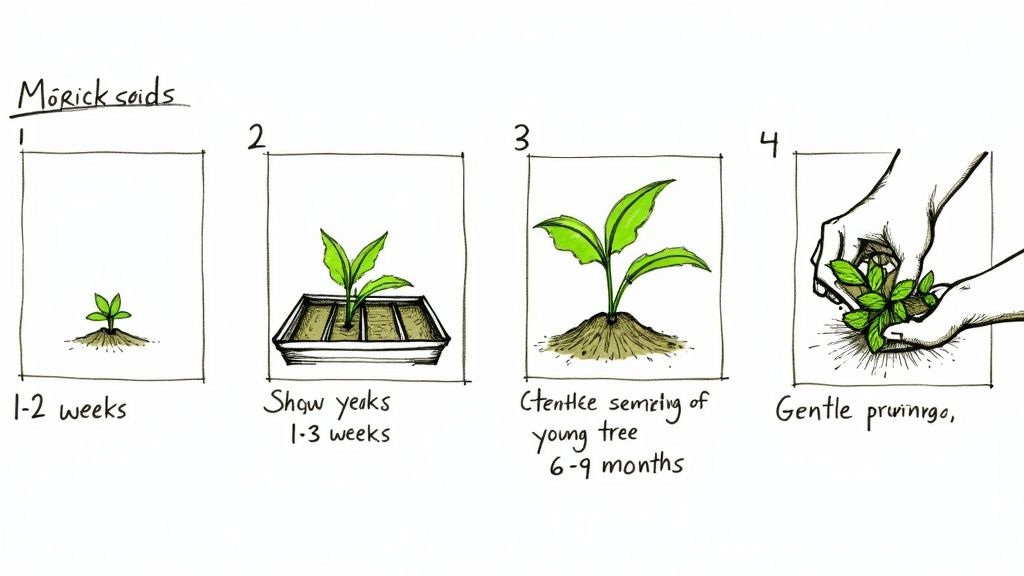
To kick things off, soak your moringa seeds in lukewarm water for 12 hours. This softens the hard outer shell, allowing moisture to reach the embryo and trigger germination.
Next, sow the seeds in a sterile, well-drained tray and maintain an ambient temperature of 20–25 °C. Within 1–2 weeks, you should see tiny green shoots breaking through the soil.
Let’s take a quick look at how your moringa progresses over time:
Moringa Growing Stages And Timeframes
| Stage | Duration | Key Actions |
|---|---|---|
| Germination | 1–2 weeks | Soak seeds, sow in trays, maintain warmth |
| Nursery | 6–8 weeks | Harden off seedlings for sun and wind |
| First Harvest | 6–9 months | Prune branches, harvest young shoots |
This table offers a clear roadmap from that very first sprout to leaves ready for your kitchen or pantry.
Nursery Care And Transplanting
By 6–8 weeks, your seedlings should stand 15–20 cm tall and sturdier than before. When you’re ready to move them outdoors, follow these steps:
- Dig planting holes about 30 cm apart and enrich each with compost and grit.
- Lift seedlings gently, keeping soil around the roots intact.
- Place each plant in its hole, backfill, then firm the soil around the stem.
- Water thoroughly and spread a 2–3 cm layer of mulch to lock in moisture.
These simple measures help your young trees settle in with minimal shock. Check out our Pandan NZ guide for detailed steps and tips.
Seasonal Maintenance And Pest Monitoring
In the warmer months (December–February), give moringa a deep watering once a week—and adjust if there’s an extended dry spell. When temperatures dip toward 2 °C, cover vulnerable plants to fend off frost.
- Prune lightly every 3 months to encourage fresh, vigorous shoots.
- Inspect foliage weekly for aphids or caterpillars.
- Treat minor infestations with organic neem oil or insecticidal soap.
“Regular pruning is like a health check for your moringa tree, encouraging stronger growth and leaf production.”
Keep an eye on soil moisture, sun exposure and wind impact. You can begin harvesting young shoots and leaves from around 6–9 months after sowing. Simply cut branches just above a pair of leaf nodes to invite new growth. Store fresh leaves in airtight containers in the fridge for up to a week.
By following these steps, you’ll master each stage of moringa NZ cultivation and enjoy a steady supply of nutritious, homegrown greens.
Sourcing And Buying Moringa NZ
Hunting down top-quality moringa in New Zealand can feel a bit like prospecting for gold. You click through countless grower sites and marketplaces, only to wonder if what arrives is the real deal.
That’s where Jungle Story steps in. By connecting Kiwi gardeners with trusted suppliers, they streamline the journey from seed to powder—making sure your order lands safely on your doorstep.
Comparing Moringa Suppliers
-
Local Growers
Fresh seasonal picks, often with lower shipping fees. Stock levels can swing with the weather and harvest cycles. -
Certified Suppliers
Hold up strict organic credentials, backed by third-party lab reports and clear paperwork. -
Jungle Story Imports
Bring in rarer moringa varieties with upfront pricing, fast nationwide dispatch and a satisfaction promise.
Don’t be swayed by the lowest dollar figure alone. Always ask for lab certificates to verify purity and potency before investing in premium powders or extracts.
New Zealand’s moringa market is on track for a 5% compound annual growth rate through 2035. This boost comes from robust organic farming standards and planned updates to the Australia New Zealand Food Standards Code—read more on AgriFutures.
Supplier Vetting Checklist
- Provenance of Seeds or Leaves
Trace the farm location, note the growing methods and check the harvest date. - Extraction Method Details
Look for cold-pressed, solvent-free processes to preserve nutrients. - Packaging Integrity
Ensure you get airtight, light-blocking pouches with tamper-evident seals.
“Working directly with growers offers both fresher supply and deeper transparency into cultivation practices.”
Building a rapport at local farmer markets or community planting days can score you better rates and a steady source of fresh leaves and bulk seeds.
You might also be interested in our guide on buying plants online NZ for more tips on sourcing rare species and negotiating bulk orders.
Tips For Bulk Purchases
- Estimate Seasonal Usage
Calculate how much you’ll use each season to avoid excess going stale. - Request Sample Packets
Check colour, aroma and taste before committing to large quantities. - Custom Milling & Packaging
Ask about different grind sizes and pouch formats for flexibility. - Storage & Shelf Life
Factor in ideal storage conditions when planning big orders.
Case Study Local Café Supplier
In Wellington, Green Leaf Café locks in 50kg of organic moringa powder each month from a certified local grower. This partnership keeps their specials menu well-stocked with peak-fresh ingredients.
By picking suppliers carefully and nurturing grower relationships, Kiwi gardeners can count on consistent, high-quality moringa right through the seasons.
FAQ On Growing And Using Moringa NZ
Q: How Do I Choose Between Seed And Cutting Propagation?
Seeds are like a marathon runner: they take their time but reward you with a strong, deep root system. In warm, free-draining soil, expect germination in 1–2 weeks and witness the long-term benefits of a robust root network.
Cuttings, on the other hand, are the sprinters of the growing world. They tend to root in just 4–6 weeks and give you a uniform crop of trees faster—ideal if you’re impatient for a reliable harvest.
Q: What’s The Ideal Season For Sowing Moringa In The Southern Hemisphere?
Think of soil temperature as your moringa’s morning coffee—it needs at least 20 °C to kickstart germination. In New Zealand, that usually means sowing seeds in spring through to early summer (September to December), once the last frost has said its goodbye.
For cuttings, wait until mid-spring. That extra buffer helps saplings avoid those unpredictable late-season cold snaps.
Cooking With Fresh Moringa Leaves
Fresh moringa is a breeze in the kitchen. Simply strip off any tough stems and give the leaflets a quick rinse under cold running water.
Then toss them straight into salads or wilt them lightly. If you’re keen on that brilliant green hue, plunge them into boiling water for about 30 seconds—it’s like a spa treatment that locks in colour.
Storing Leaf Powder For Peak Freshness
- Use an airtight, light-blocking jar.
- Stash it in a cool, dark pantry at around 15–20 °C.
- Aim to use your powder within 6 months for the richest flavour and nutrient punch.
“Proper storage can preserve up to 80% of moringa’s antioxidants for months,” says one seasoned NZ herbalist.
These simple steps mean you’ll enjoy that fresh, earthy goodness all year long.
Avoiding Frost And Pests
Q: How Can I Shield Moringa From Frost Or Pests?
When overnight temperatures dip below 2 °C, drape young plants in horticultural fleece—it’s like a cosy blanket against the cold. Check for aphids every week and spritz with organic neem oil at the first sign of tiny invaders.
Drying Fresh Moringa Leaves At Home
Q: Can I Dry Fresh Moringa Leaves At Home?
Absolutely. Lay clean leaves in a single layer on a mesh tray and set your dehydrator (or oven) to 45 °C. After 4–6 hours, they’ll snap crisp and ready for storage.
Once cooled, tuck them into airtight jars. Grind just before use, and you’ll savour the truest moringa flavour.
These FAQs should have you well on your way to growing, cooking and preserving nutrient-packed moringa right here in New Zealand. Enjoy experimenting—and don’t forget to share your tips!
Order your moringa supplies from Jungle Story at Jungle Story