Step aside, ornamental flowers—there's a plant that's as stunning in the garden as it is useful in the kitchen. We're talking about roselle hibiscus, famous for its vibrant, ruby-red calyces. These aren't the petals themselves, but the fleshy, bud-like casings that pop up after the flower has bloomed. It's these tangy treasures that are harvested for incredible teas, jams, and cordials.
Why Roselle Hibiscus Belongs in Your NZ Garden

Imagine a plant that pulls double duty, offering striking good looks and a flavourful harvest for your pantry. That's the magic of roselle hibiscus (Hibiscus sabdariffa), a remarkable species that delivers far more than just pretty flowers.
You might think its tropical origins make it a fussy choice for Kiwi gardeners, but that's often not the case. Roselle actually thrives as a fast-growing annual in New Zealand's temperate climate, especially in the warmer, frost-free parts of the country. It's best to think of it less like a delicate showpiece and more like a productive seasonal crop, not unlike your tomato or courgette plants.
A Plant with Purpose
What really sets roselle hibiscus apart is just how versatile it is. The part you harvest—that deep crimson calyx—has a unique tartness, a flavour that sits somewhere between cranberry and raspberry. This makes it an absolute gem in the kitchen.
For centuries, cultures all over the world have used it to create:
- Refreshing Teas: Often called 'sorrel' or 'zobo', the dried calyces brew into a stunning ruby-red infusion. It's brilliant served hot or chilled over ice.
- Tangy Jams and Jellies: The seed pods contain natural pectin, which helps your preserves achieve that perfect set.
- Flavourful Cordials and Syrups: This makes a fantastic base for cocktails and mocktails, or even just mixed with a splash of sparkling water.
Growing roselle is about more than just gardening; it's about cultivating an experience. You get to follow the journey from a tiny seed to a bountiful harvest, ending with delicious, homemade treats to share and enjoy.
Thriving in New Zealand's Climate
While not native to our shores, roselle hibiscus has found a happy home in the gardens of Kiwi enthusiasts and small-scale growers. It’s usually grown as an annual shrub and can shoot up to around 1.5 metres in a single season, provided it gets a warm, sunny spot that's sheltered from frost. For more local insights, check out these rosella and raspberry gardening tips.
This guide will walk you through everything you need to know to successfully grow this incredible plant, turning a corner of your garden into a source of both beauty and flavour.
Your Planting Blueprint for Roselle in New Zealand
Getting roselle hibiscus to thrive in New Zealand really boils down to two things: timing and location. Give your plants the right start, and you're setting the stage for a fantastic, productive season. This blueprint will walk you through the essentials, from picking the perfect spot in your garden to getting your seeds happily settled in.
Think of your roselle plant as a sun-worshipper that absolutely hates having wet feet. Your main mission is to find a spot that satisfies these two critical needs. A place that gets at least six to eight hours of direct, bright sunlight each day is completely non-negotiable.
This sun exposure is the engine that drives its growth and, most importantly, the development of those beautiful crimson calyces. Without enough light, you'll likely end up with leggy plants and a disappointing harvest.
Choosing and Preparing the Perfect Spot
Once you’ve scouted out a sunny patch, it’s time to look down and assess the soil. Roselle hibiscus demands well-draining soil to avoid root rot, a common problem in heavy, waterlogged ground. The ideal soil is loose, slightly acidic, and rich in organic matter, giving the roots plenty of room to stretch out.
If you’re working with heavy clay soil, which is common across many parts of New Zealand, you’ll need to amend it. Digging in generous amounts of compost or well-rotted manure does wonders for improving both the soil structure and its nutrient content. Don't skip this step—it makes a world of difference.
Before you plant, it's also a great idea to clear the area of any weeds. They'll only compete with your young roselle seedlings for precious water and nutrients. A clean, well-prepped bed gives your plants a strong, competition-free start.
The Ideal Planting Timeline for Kiwi Gardeners
Timing is everything, especially with a heat-loving annual like roselle. Nailing the timing according to New Zealand's seasons is crucial for a successful harvest. You've got two main options for getting your plants started.
Starting Seeds Indoors
For gardeners wanting a head start, particularly in regions with shorter growing seasons, starting seeds indoors is the way to go.
- When to Start: Begin sowing your seeds in small pots or seed trays in late winter, around late August.
- What You Need: Use a quality seed-raising mix. If you're keen to give your seedlings the best possible environment, it’s worth learning what makes up a great indoor potting mix.
- The Process: Plant seeds about 1 cm deep, keep the soil moist but not soggy, and place them somewhere warm and sunny, like a windowsill or a greenhouse.
Sowing Seeds Directly Outdoors
If you live in a warmer, frost-free part of the country like Northland or Auckland, you can sow seeds directly into your prepared garden bed.
- When to Sow: Wait until all danger of frost has passed. This is typically from late September through October.
- Soil Temperature: The key is to wait for the soil to warm up, as roselle seeds need that warmth to germinate properly.
- The Method: Sow seeds about 1-2 cm deep and water gently. Keep the area consistently moist until you see the first sprouts emerge.
A simple rule of thumb for direct sowing is to plant your roselle seeds at the same time you would plant your tomato seedlings. This usually ensures the soil is warm enough and the risk of a late frost has diminished.
For a clearer picture, here's a seasonal guide to help you plan your roselle journey in New Zealand.
Roselle Hibiscus Growing Calendar for New Zealand
| Time of Year (Southern Hemisphere) | Gardening Task | Key Considerations |
|---|---|---|
| Late Winter (Late Aug) | Start Seeds Indoors | Use a heat mat for faster germination. Keep seedlings in a warm, sunny spot. |
| Early Spring (Sep-Oct) | Direct Sow Outdoors / Transplant | Wait until the soil has warmed up and all frost risk has passed. Harden off indoor seedlings before planting out. |
| Late Spring (Nov-Dec) | Thin Seedlings & Mulch | Thin to final spacing. Apply a layer of organic mulch to retain moisture and suppress weeds. |
| Summer (Jan-Feb) | Watering & Feeding | Water regularly, especially during dry spells. Apply a balanced liquid fertiliser every 4-6 weeks. |
| Early Autumn (Mar-Apr) | First Harvest | Calyces are ready about 3 weeks after flowers appear. Harvest regularly to encourage more production. |
| Mid-Late Autumn (Apr-May) | Final Harvest & Seed Saving | Harvest all remaining calyces before the first frost. Leave a few pods on the plant to dry for seed saving. |
This calendar provides a general timeline, but always pay attention to your local climate and weather patterns.
Spacing Your Plants for Success
Whether you're transplanting indoor-grown seedlings or thinning out sprouts you've sown directly, proper spacing is vital. Overcrowding your plants is a recipe for trouble, as it restricts airflow and can encourage fungal diseases.
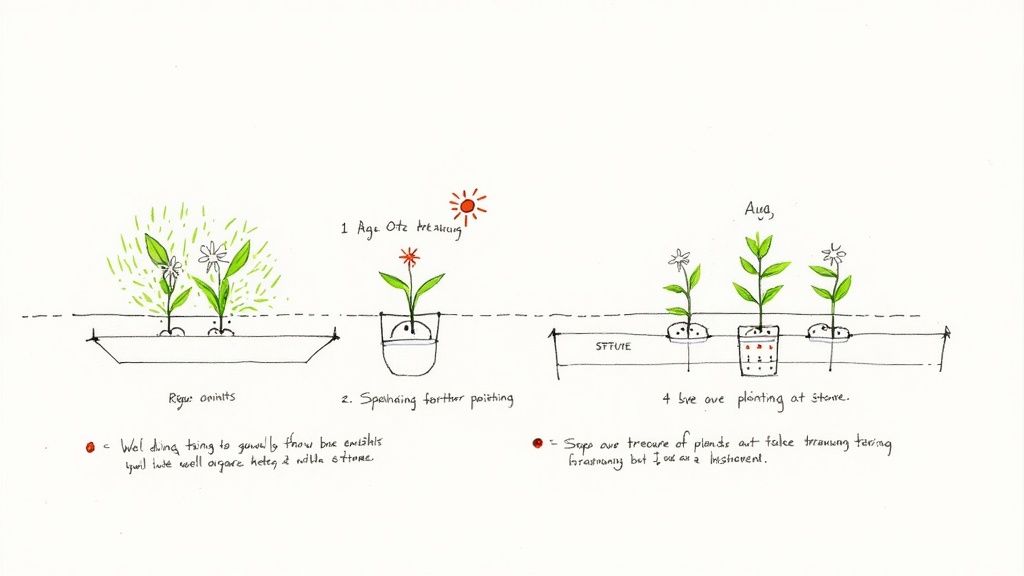
Aim to space your roselle hibiscus plants at least 90 cm to 1 metre apart in all directions. This might seem like a huge gap when they're tiny, but these plants grow quickly into bushy shrubs. Giving them ample room ensures each plant gets enough sunlight, water, and nutrients to flourish. Good air circulation also helps keep the foliage dry, which is your best defence against common garden ailments and a key step towards a bountiful harvest.
Essential Care for a Bountiful Roselle Harvest
Once your roselle hibiscus is happily settled in the garden, your job shifts from planting to nurturing. It's this consistent, thoughtful care that takes a small seedling and turns it into a thriving shrub, absolutely loaded with those beautiful crimson calyces we're all after.
Getting these details right isn't tricky, but it will make a world of difference to your harvest.
The single most important thing to master is watering. Roselle loves consistent moisture, especially during the peak heat of a New Zealand summer from December to February. But, and this is a big but, it absolutely hates having "wet feet." Soil that's constantly waterlogged is a fast track to root rot, which can kill the plant.
Think of it like a damp sponge, not a soaking wet bog. Your goal is to keep the soil evenly moist but never saturated. A good way to check is to poke your finger into the top few centimetres of soil—if it feels dry, it's time for a good, deep drink at the base of the plant. Try to keep the leaves dry.
Nurturing Growth With the Right Nutrients
Just like water, food is essential. Roselle hibiscus is a hungry plant, and feeding it regularly fuels its vigorous growth and, most importantly, encourages it to produce heaps of calyces.
The key is to give it the right kind of food. You'll want a balanced liquid fertiliser that's low in phosphorus. Fertilisers high in phosphorus tend to push the plant to produce more flowers, but it's the calyces we want to harvest, not just the short-lived blooms. We're aiming for lush growth and plenty of fleshy calyces.
If you want to dive deeper into choosing the right plant food, our guide on the best fertiliser for vegetables is a great read, as a lot of the same ideas apply here. Feeding your roselle every three to four weeks during the main growing season should keep it perfectly happy and productive.
The Power of Pinching for a Bushier Plant
Here’s one of the best tricks for a massive roselle harvest: pinching. It's a simple technique where you remove the very top growing tip of the plant when it's about 30-40 cm tall. It might feel wrong to snip off new growth, but trust me, the results are fantastic.
By pinching out that central stem, you force the plant to redirect its energy outwards into side branches. Instead of one tall, leggy stalk, you get a much bushier, stronger shrub. More branches mean more places for calyces to form, which dramatically increases your final yield.
It’s a tiny bit of effort for a huge reward, turning a single stem into a multi-branched powerhouse.
Mulching to Beat the Summer Heat
Lastly, don't underestimate the value of a good layer of mulch, especially under the harsh New Zealand sun. Spreading a generous layer of organic mulch around the base of your roselle plants is a total game-changer.
Here's why it works so well:
- Moisture Retention: Mulch acts like a blanket over the soil, slowing down evaporation. This means you water less, and your plants get a more stable supply of moisture.
- Weed Suppression: It smothers out weeds that would otherwise pop up and compete with your roselle for water and nutrients.
- Soil Health: As organic mulches like pea straw, lucerne, or compost break down, they slowly feed the soil, improving its structure and fertility over time.
It’s a simple step that protects your plants during the hottest months, cuts down on your garden chores, and helps build a healthier garden ecosystem.
Harvesting and Propagating for Next Season

After months of nurturing your roselle hibiscus, the moment you’ve been waiting for has finally arrived. As the days cool down in New Zealand’s autumn, typically from March to May, it’s time to start gathering those prized ruby-red calyces.
The actual flowers are pale and fleeting, lasting just a single day. The real prize is what they leave behind: the fleshy, crimson pod known as the calyx, which swells up around the developing seeds. This is the part you're after.
Knowing When to Harvest Your Roselle Hibiscus
Harvesting roselle isn’t a one-and-done job; it's more of an ongoing process. Once your plants start producing, you’ll want to check them every few days to catch the calyces at their absolute peak. Picking regularly also encourages the plant to keep flowering, which means a longer harvest for you.
You'll know a calyx is ready when:
- It looks firm, plump, and has a rich, deep crimson colour.
- It's about 2-3 cm across.
- It feels slightly waxy and solid when you gently squeeze it.
If you leave them on the plant too long, the calyces get woody and lose that signature tart flavour. The trick is to pick them while they’re still tender and bursting with tangy goodness.
Step-by-Step Guide to Harvesting Calyces
The process itself is wonderfully simple and satisfying. All you need is a clean, sharp pair of secateurs or scissors to avoid damaging the branches.
- Spot a Ripe Calyx: Look for those tell-tale signs of ripeness—deep colour, a firm feel, and a good size.
- Make a Clean Snip: Hold the stem right behind the base of the calyx and snip it off cleanly, leaving just a tiny bit of stem attached.
- Collect with Care: Gently place your harvest into a basket or bowl. The calyces can be a bit delicate, so try not to pile them too high, which can cause bruising.
- Repeat Regularly: Keep doing this every two or three days throughout autumn until the first frosts hit, which signals the end of the plant’s growing season.
A common mistake is waiting for the calyx to feel soft. That's actually a sign it's past its prime. You want a crisp, firm texture, almost like picking a fresh apple.
Propagating Roselle by Saving Seeds
One of the best things about growing roselle is how easily you can create a self-sustaining patch. By saving seeds from your healthiest plants, you can guarantee a free supply for next spring, year after year.
This process starts near the end of the harvest season. Instead of picking every last calyx, you’ll need to intentionally leave some of the best-looking ones on the plant to fully mature.
Selecting and Preparing Pods for Seed Saving
Choose a few pods from your most productive and vigorous plants. Let these selected pods stay on the stems long after you’d normally harvest them. You want them to turn from red to brown and become dry and brittle to the touch.
Here’s how to gather and store your future garden:
- Let the Pods Dry on the Plant: Wait until the pods are completely dried out. You should be able to hear the seeds rattling inside when you shake the stem.
- Harvest the Seed Pods: Snip off the entire dried pod. Bring them inside to a dry, sheltered spot to keep moisture from causing any mould.
- Extract the Seeds: Carefully crack open the brittle, brown pods over a bowl. Inside, you’ll find several small, dark, kidney-shaped seeds. Sift them out from the dried pod fragments.
- Dry and Store: Spread the seeds out on a plate or paper towel and let them air dry for another week just to be sure all the moisture is gone. Once they're totally dry, pop them into a labelled paper envelope or a small glass jar and store them in a cool, dark, and dry place.
Properly stored roselle hibiscus seeds can stay viable for at least two years, giving you plenty of time to plant, share with friends, and continue the cycle next season.
Bringing Roselle into Your Kitchen and Apothecary

This is where the real magic happens. After weeks of nurturing your plants, you’ve finally brought your basket of vibrant, crimson jewels inside. It’s time to turn that beautiful harvest of roselle hibiscus into a treasure trove of flavours and wellness for your kitchen and home apothecary.
The first step is a simple but crucial one: separating the calyx—the part you'll actually use—from the inner seed pod. It’s a bit like hulling a strawberry; you’re after the fleshy, flavourful outer layer, not the hard centre.
A small paring knife works perfectly for this. Just slice off the very bottom of the calyx, and the firm green seed pod should pop right out with a gentle push. Once you get into a rhythm, you’ll have a bowl full of ruby-red petals in no time.
Crafting Delicious Roselle Creations
With your calyces prepped and ready, a whole world of culinary adventure opens up. Roselle’s flavour is often described as a delightful cross between cranberry and raspberry—it's tart, tangy, and incredibly refreshing. This unique taste profile makes it wonderfully versatile in the kitchen.
Here are a few classic ways to enjoy your harvest:
- Brewing Iconic Roselle Tea: This is probably its most famous use. Known as 'sorrel' in the Caribbean or 'zobo' in Nigeria, this deep-red infusion is delicious hot or cold. Simply steep a handful of fresh or dried calyces in boiling water for 5-10 minutes, then sweeten to your liking.
- Making Tangy Jam or Jelly: Roselle is a jam-maker's dream because its seed pods contain natural pectin. If you boil the pods separately in a little water, you create a natural setting agent for your jam.
- Creating a Refreshing Cordial: A simple syrup infused with roselle calyces makes a stunning, concentrated cordial. Mix it with sparkling water for a homemade soda, or use it as a vibrant base for cocktails and mocktails.
When you’re cooking with roselle, using the right gear matters. You might want to check out guides on choosing healthy and safe cooking pans to make sure your creations are as pure as possible.
The Nutritional Powerhouse Within
Beyond its amazing taste, roselle hibiscus is absolutely packed with nutritional benefits that have made it a staple in traditional medicine for centuries. It’s more than just a pretty flower; it’s a genuine superfood growing right in your backyard.
That vibrant red colour is a dead giveaway. This deep hue comes from anthocyanins, which are powerful antioxidants that help protect your body's cells from damage. It’s also famously rich in Vitamin C, making roselle tea a fantastic choice for supporting your immune system, especially during the colder months.
But the goodness doesn't stop there. Research shows other parts of the plant are incredibly nutritious too. For example, roselle leaves contain significant amounts of magnesium, ranging from 365 to 555 mg per 100 grams, and phosphorus, with levels between 125 and 645 mg per 100 grams.
Think of each roselle calyx as a tiny, natural capsule of wellness. It’s a plant that not only delights the taste buds but also actively contributes to your health, connecting your garden directly to your well-being.
Roselle in Your Home Apothecary
The connection between roselle and health runs deep. For generations, it's been used in traditional remedies around the world to support everything from digestion to cardiovascular health. This historical wisdom is now being explored by modern science, which is starting to validate many of these long-held beliefs.
Its diuretic properties are well-known, helping the body flush out excess fluids. Many people also turn to roselle hibiscus tea to help maintain healthy blood pressure and cholesterol levels, making it a gentle, natural addition to a heart-healthy lifestyle.
Whether you're brewing a simple tea to soothe a cold or exploring its broader wellness applications, incorporating roselle into your routine is a simple way to embrace natural health. If you're passionate about growing beneficial plants, you might also enjoy our other guides on growing herbs in New Zealand. Hopefully, this has inspired you to see your harvest not just as food, but as a source of both flavour and vitality.
Common Roselle Problems and How to Fix Them
Even the most seasoned gardeners run into a few hiccups now and then. Think of this as your troubleshooting guide for growing roselle hibiscus here in New Zealand. Once you know what to look for, you'll find most issues are surprisingly easy to sort out, often with just a small tweak to your care routine.
Let's dive into the common challenges and get your plants back on track.
Pesky Pests and How to Deal With Them
Roselle is a pretty tough plant, but its tender new growth can sometimes attract unwanted guests. Aphids are the usual suspects. You’ll find these tiny critters clustered on young stems or hiding under leaves, sucking the life out of the plant.
If you spot them early, a good, strong blast of water from the hose is often all it takes to send them packing. For a more stubborn infestation, a simple homemade soap spray or a store-bought organic insecticide will do the trick without harming your plants or the good bugs in your garden.
Keeping Common Diseases at Bay
The biggest threat to a roselle hibiscus plant isn't a bug, but a disease that comes from a bit too much kindness—root rot. This fungal problem is almost always caused by overwatering or planting in heavy, clay-like soil that just doesn't drain. The roots simply can't cope with being waterlogged.
The golden rule for preventing root rot is simple: let the soil dry out a bit between waterings. It’s always better to underwater slightly than to overdo it. Good drainage is your plant’s best friend.
If you think you have a case of root rot, you’ll need to act fast. Gently check the roots; if they’re brown and mushy, you've got a problem. Make sure the plant is in a well-draining spot and cut back on watering immediately.
Sorting Out Environmental Stress
Roselle hibiscus is a true sun-worshipper and absolutely hates the cold. While many parts of New Zealand are perfect for it, an unexpected late spring or early autumn frost can spell disaster. If a frost is on the cards, cover your plants overnight with a frost cloth or even just an old sheet to keep them protected.
Another common frustration is a plant that’s all leaves and no calyces. If you’re not seeing those beautiful crimson pods, it's usually down to one of two things:
- Not Enough Sun: Your plant needs a solid six to eight hours of direct sun every day to start producing calyces.
- The Wrong Fertiliser: Too much nitrogen will give you lush, leafy growth but no fruit. Switch to a balanced fertiliser with less nitrogen to encourage a fantastic harvest.
Your Roselle Questions Answered
Got questions about growing roselle? You're not alone. Here are some of the most common queries we get from Kiwi gardeners, with straightforward answers to help you get started.
Can Roselle Survive a New Zealand Winter?
In most of New Zealand, the answer is a simple no. Roselle hibiscus is a true tropical plant and is very frost-tender, meaning the first proper frost of autumn will knock it back for good. That's why we almost always grow it as a fast-growing summer annual, letting it complete its whole life cycle in one glorious season.
If you happen to live in the truly frost-free, northernmost parts of the North Island, you might see it survive a very mild winter. Even then, you'll get the best results by starting fresh from seed each spring.
How Long Does Roselle Take to Mature?
Roselle is surprisingly quick off the mark. Once you've sown the seeds, you can expect to see the first flowers popping up in about three months. The real prize—the calyces—are ready to pick roughly three weeks after the flowers have dropped off.
So, if you plant your seeds in October, you could be harvesting your first tangy calyces from late February or March, and keep going right until the cold weather finally calls time.
Is All Hibiscus Edible?
This is a really important one to get right—definitely not all hibiscus is edible. The specific variety you're after for making those delicious teas, syrups, and jams is Hibiscus sabdariffa, which we know as roselle. The big, showy ornamental hibiscus flowers (Hibiscus rosa-sinensis) common in Kiwi gardens are not the ones you want to be eating.
Always be 100% certain you are growing Hibiscus sabdariffa before you consume any part of the plant. Stick with this variety to safely enjoy its unique, tangy flavour.
Can I Grow Roselle in a Pot?
You absolutely can! Roselle takes beautifully to growing in large containers. This is a fantastic option if you're short on garden space or live in a cooler part of the country where you need to chase the sun. A pot gives you the freedom to move it to the warmest, most sheltered spot you have.
Just be sure to pick a generous container—at least 40-50 litres is ideal to give the roots plenty of room to spread out. And, of course, make sure it has excellent drainage holes, as roselle hates having wet feet.
At Jungle Story, we have the seeds and plants to get your own incredible edible garden underway. Explore our collection and bring the vibrant taste of roselle hibiscus home. Find your next gardening adventure at https://junglestory.co.nz.