Growing fruit trees in NZ is one of life’s great pleasures, but success really does start before you even pick up a spade. If you match the tree to your specific climate and backyard conditions, you're setting yourself up for years of incredible homegrown harvests. Let's walk through how to choose the perfect tree for your garden, so it doesn't just survive, but truly thrives.
Choosing the Best Fruit Trees for Your NZ Garden
There's something magical about the idea of starting your own home orchard. That vision of picking sun-warmed apples or juicy peaches right off the branch is what gets most of us started. But to make that dream a reality, you need to make smart choices from the get-go, beginning with the right tree for your unique spot in Aotearoa.
New Zealand’s climate is famously diverse, stretching from the almost subtropical warmth of Northland right down to the crisp, frosty winters of Otago. A lemon tree that goes gangbusters in Kerikeri would have a very hard time in Queenstown, and a cherry tree that needs a deep winter freeze won't even think about fruiting in the far north. Getting your head around your local climate is the first, and most crucial, step.
Understanding Your Climate and Chill Hours
The secret to matching a tree to your region often boils down to a concept called 'chill hours'.
Think of it as a mandatory winter nap for certain types of fruit trees. These guys, mainly your stonefruit and pipfruit, need a certain number of hours below about 7°C during winter (June - August). This cold period is essential for them to break dormancy properly and burst into flower and fruit come spring.
For instance, many of the best apple and cherry varieties are right at home in places like Central Otago because the region reliably delivers the long, cold winters they crave. On the flip side, warmer spots like Auckland or the Bay of Plenty are perfect for low-chill stonefruit or subtropicals that don't need that deep freeze.
Here’s a rough guide to the main fruit families and where they generally do best in NZ:
- Pipfruit (Apples and Pears): These are pretty versatile, but many of the classics like 'Braeburn' apples need a decent winter chill. This makes regions like Hawke's Bay, Nelson, and Tasman ideal.
- Stonefruit (Peaches, Plums, Apricots, Cherries): These are total sun-worshippers that also need a distinct winter chill. Central Otago is the heartland for them, but you can find varieties with lower chill needs that will do well further north.
- Citrus (Lemons, Oranges, Mandarins): Frost is the enemy of citrus. They absolutely thrive in the warmer, sunnier parts of the North Island, particularly Northland, Gisborne, and the Bay of Plenty.
- Subtropicals (Feijoas, Kiwifruit, Avocados): These are the superstars of warmer New Zealand gardens. They perform brilliantly in the top half of the North Island where frosts are rare.
To make this a bit easier, here’s a quick-reference table to help you match popular fruit trees with the right regions across the country.
NZ Regional Climate Guide for Popular Fruit Trees
This table gives you a starting point for figuring out what will likely grow well where you live. Always double-check with your local nursery for varieties specifically suited to your town or even your suburb, as microclimates can make a big difference.
| Fruit Type | Best Suited Regions (North to South) | Key Considerations (e.g., Chill Hours, Frost Tolerance) |
|---|---|---|
| Apples | Waikato, Hawke's Bay, Nelson, Tasman, Canterbury, Otago | High chill requirement for most commercial varieties. Late frost can damage flowers. |
| Pears | Similar to apples: Hawke's Bay, Nelson, Tasman | Needs good winter chill. Some varieties are prone to fire blight in humid areas. |
| Peaches & Nectarines | Hawke's Bay, Central Otago | High chill requirement. Prone to leaf curl in wetter regions; needs good air circulation. |
| Plums | Waikato, Hawke's Bay, Canterbury, Otago | Varying chill needs; Japanese plums suit warmer areas, European plums need more cold. |
| Cherries | Central Otago, Marlborough | Very high chill requirement. Needs dry conditions during flowering and harvest to avoid splitting. |
| Apricots | Central Otago, Hawke's Bay | Needs a cold winter but warm, dry spring. Early flowering makes them vulnerable to frost. |
| Lemons & Limes | Northland, Auckland, Bay of Plenty, Gisborne | Frost-tender. Needs a warm, sheltered spot. 'Meyer' lemons are more cold-tolerant. |
| Oranges & Mandarins | Northland, Gisborne, Bay of Plenty | Hate frost. Require plenty of sun and heat to sweeten the fruit properly. |
| Feijoas | Throughout the North Island, Nelson, Marlborough | Very hardy but fruit best with some winter chilling. Tolerates a wide range of soils. |
| Avocados | Northland, Bay of Plenty | Extremely frost-sensitive, especially when young. Requires free-draining soil and shelter from wind. |
Remember, this is a guide. With the right variety and a bit of clever placement in your garden, you can often push these boundaries.
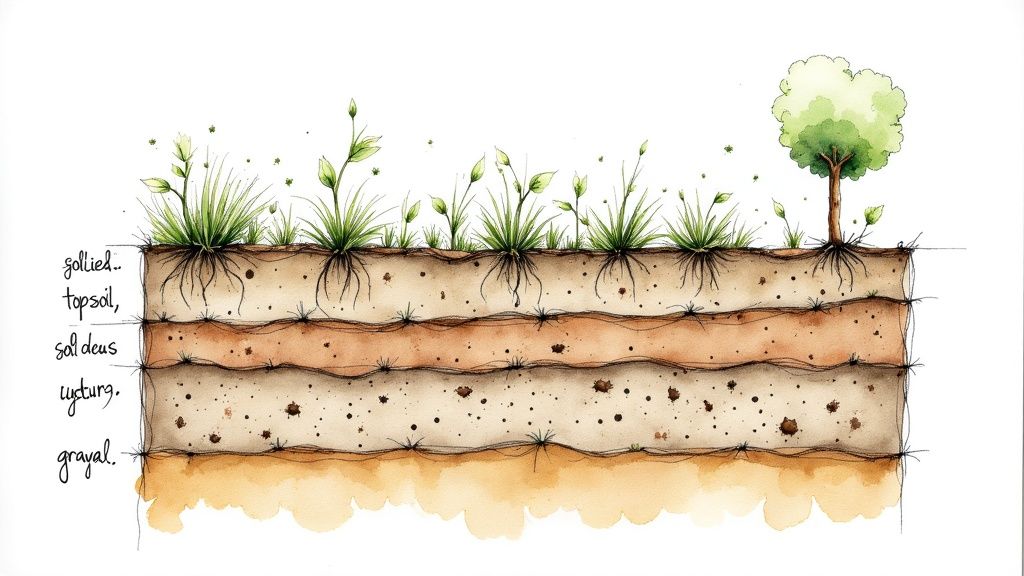
Assessing Your Own Backyard
Beyond your region, your own garden has its own unique microclimate. Before you race off to the garden centre, spend some time just watching your space.
Where is the sunniest spot? Most fruit trees need at least six hours of direct sunlight a day to have any chance of producing well. What's your soil like? Is it heavy clay or sandy? And how much room can you realistically give a growing tree? If you're gardening on a small urban plot, don't despair—a dwarf variety grafted onto a special rootstock can give you a massive harvest in a tiny footprint.
This whole process of careful selection is exactly what drives success in New Zealand's world-class horticulture industry. For example, Māori-owned horticulture land covers about 5,715 hectares. Kiwifruit dominates in the climates where it thrives, generating an estimated NZ$228.5 million in revenue. Apples are also a huge contributor, bringing in around NZ$11.5 million from 212 hectares. It’s a powerful demonstration of how choosing the right crop for the right place is absolutely vital. You can explore more about the impact of Māori in horticulture with this detailed report.
How to Plant Your Fruit Tree for Lasting Success
Giving your fruit tree the best possible start is probably the most important thing you can do to guarantee its future health and a bountiful harvest. Think of it less like a chore and more like tucking your new tree into a well-made bed for a long, productive life. A successful planting day truly lays the foundation for everything to come.

This process starts before you even pick up a spade. When you're at the garden centre, scout for a tree with a healthy, straight trunk and a nicely balanced shape. Pay close attention to the graft union—that noticeable bump on the lower trunk where the fruiting variety was joined to its hardy rootstock. It should look fully healed and be free of any damage. A strong, clean graft union is a great sign of a well-cared-for tree.
Preparing the Perfect Planting Spot
Once you've brought your tree home, it's time to get its new spot ready. Good planting technique begins with the right gear. Make sure you have your essential gardening tools, like a sturdy spade and gloves, to prepare the soil and handle your new tree safely.
Here’s a simple, step-by-step guide to get it right:
-
Soak the Roots: First things first, give your tree a good drink. If it’s in a pot, submerge the whole thing in a bucket of water until the air bubbles stop rising. For bare-root trees, an hour or two of soaking will do the trick.
-
Dig a Wide Hole: This is where many gardeners go wrong. You want the hole to be twice as wide as the root ball, but no deeper. A wide hole is key because it encourages the roots to spread outwards into the surrounding soil, creating a solid anchor for the tree.
-
Enrich the Soil: Mix the soil you dug out of the hole with a generous amount of quality compost or well-rotted manure. This creates a nutrient-rich environment that will fuel the tree's initial burst of growth.
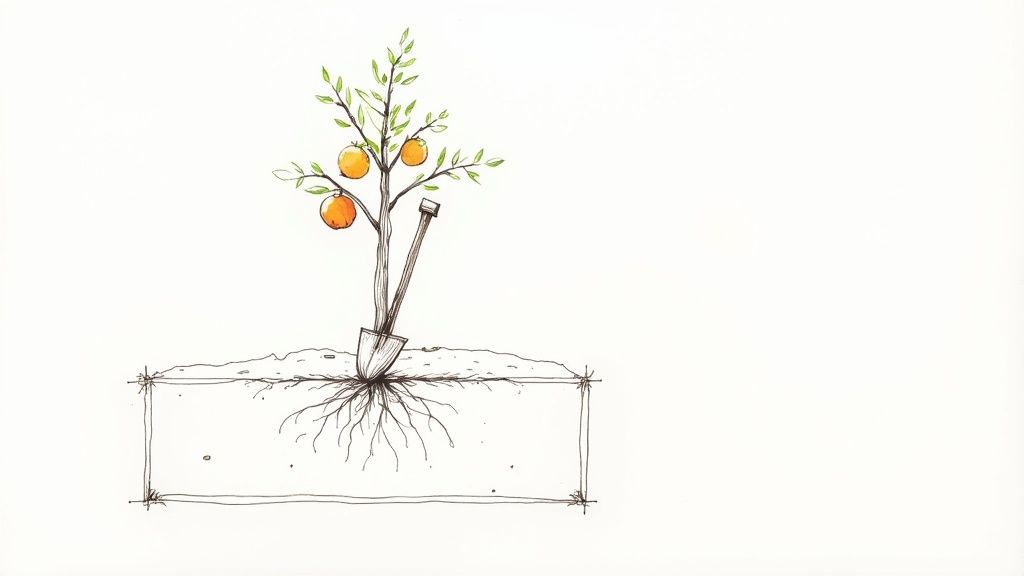
Setting Your Tree in Place
Positioning the tree correctly in the hole is absolutely critical. Your goal is to plant it at the exact same depth it was growing in its nursery pot or bag.
Crucial Tip: Always keep the graft union well above the final soil level. If you bury this bump, the top part of the tree can grow its own roots. This completely bypasses the benefits of the rootstock (like keeping the tree a manageable size) and makes the tree vulnerable to collar rot.
Gently place your tree in the centre of the hole. Lay a straight edge, like your spade handle, across the top of the hole to double-check that the top of the root ball is level with the surrounding ground.
Now, backfill the hole with your enriched soil mix. As you go, gently firm it down with your hands to get rid of any large air pockets. Air pockets are bad news; they can cause the roots to dry out and die.
After planting, create a small mound of soil in a ring around the base of the tree. This forms a "watering well" that funnels water directly to the root zone where it's needed most. Give the tree a deep watering—a full bucket should do it—to help the soil settle.
Finally, apply a layer of mulch, like bark chip or pea straw, around the base, but be sure to keep it from touching the trunk itself. This simple step helps the soil retain moisture and keeps the weeds down. If you're looking to plant something a bit different, you might be interested in our guide on the unusual and delicious Finger Lime tree, which thrives in parts of NZ.
Your Seasonal Guide to Fruit Tree Care in NZ
Keeping a fruit tree happy and productive is a year-round job, but don't let that put you off. The work naturally follows the seasons, breaking down into a simple, logical rhythm. Once you understand this cycle, orchard care stops feeling like a daunting list of chores and becomes a series of timely, satisfying tasks. This guide is built specifically for our Kiwi climate, helping you give your trees exactly what they need, right when they need it.
Winter Tasks (June to August)
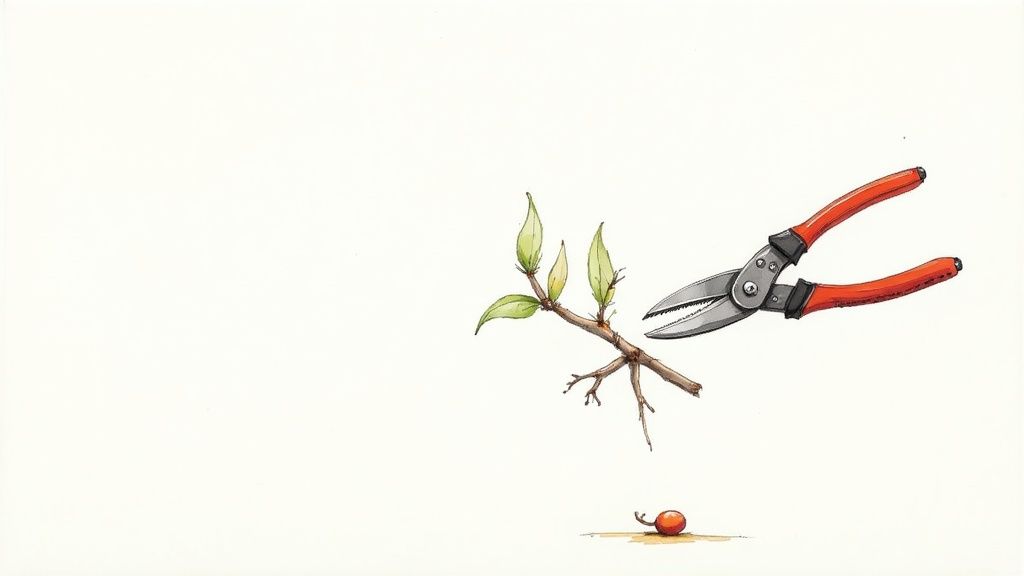
Winter here in New Zealand is downtime for your deciduous fruit trees. It's a period of rest and preparation. With the leaves gone and growth at a standstill, the tree’s skeleton is laid bare, making it the perfect time for the most important job of the year: dormant pruning.
Pruning in winter really sets the stage for the entire growing season. Your main goals are to:
- Create a strong framework: By taking out weak, crossing, or diseased branches, you encourage a sturdy structure that can actually hold a heavy crop without breaking.
- Improve air circulation: An open, airy canopy is your best defence against fungal nasties like brown rot and black spot.
- Increase sun exposure: Letting more sunlight hit the inner branches means better-ripened fruit with a far superior flavour come harvest time.
Winter is also the ideal time to plant new bare-root fruit trees. These are young trees sold without any soil around their roots, and they can only be safely planted while they're dormant.
Spring Awakening (September to November)
As the days get longer and the soil starts to warm up, your orchard explodes into life. Spring is a beautiful, busy season where the focus shifts from structure to the critical business of flowering and fruit set.
Your main job now is to support the tree through its blossom period. This is when pollination happens – the magic that turns all those flowers into fruit. Be really careful with sprays during this time; you want to avoid broad-spectrum insecticides that could harm our hardworking bees while they’re doing their thing.
Spring is also a time to be vigilant. As that tender new growth appears, so do the first pests and diseases. Keep a close eye out for common culprits like aphids on new shoots or the first tell-tale signs of leaf curl on your peach and nectarine trees. Catching things early always gives you the upper hand.
Summer Growth (December to February)
Summer is when your hard work really starts to show, as young fruit begins to swell on the branches. Your key tasks now are all about providing resources and protection to ensure a top-quality harvest.
Watering becomes crucial, especially during those dry spells we often get across New Zealand in summer. A deep, infrequent soak is so much better than a light daily sprinkle. It encourages the roots to grow deeper into the soil, making the tree more resilient.
Another vital summer job for apples, pears, and stonefruit is fruit thinning. I know it feels wrong to remove perfectly good-looking little fruits, but it’s one of the best things you can do for your tree.
By thinning clusters down to one or two of the strongest-looking fruit, you divert the tree's energy. This results in larger, healthier, and more flavourful fruit at harvest time, and it also prevents branches from becoming overloaded and snapping.
Finally, as fruit starts to colour up and ripen, you’ll need to protect your precious crop from birds. Netting is often the most effective way to make sure you get to enjoy the harvest, not the starlings.
Autumn Harvest and Preparation (March to May)
Autumn is the season of reward, a time to enjoy the literal fruits of your labour. But once the last apple or plum has been picked, the tree’s work might be done for the year, but yours isn’t quite finished.
After a long season of producing fruit, your tree will be hungry. A post-harvest feed with a balanced fertiliser helps it recover and build up energy reserves for the winter ahead. For fantastic long-term soil health, it's well worth learning how to compost at home to create a steady supply of nutrients.
This is also the time for a final garden clean-up. Raking up and getting rid of fallen leaves and fruit helps to remove overwintering pests and disease spores, giving your trees a much cleaner, healthier start next spring. This simple act of garden hygiene gets your orchard ready for its winter slumber, completing the annual cycle of care.
A Closer Look at New Zealand's Favourite Fruit Trees
Now that we've got the basics of climate, planting, and seasonal care under our belts, let's get to the fun part: meeting some of the beloved fruit trees that grace Kiwi gardens. Getting to know the personality of each variety—its flavour, its quirks, and what it asks of you—is the best way to choose a tree that will feel right at home in your backyard.
From world-famous apples born right here to uniquely Kiwi treasures, there’s a perfect match for every taste and every patch of land.
Pipfruit: The Apple and Pear Classics
Apples are, without a doubt, the cornerstone of the New Zealand home orchard. It’s hard to beat the satisfaction of picking your own. Varieties like 'Braeburn' and 'Royal Gala', both with proud Kiwi origins, are famous around the globe for that perfect crisp texture and a brilliant balance of sweet and tart.
These trees really need a decent winter chill to set fruit properly, which makes them a fantastic choice for regions like Hawke's Bay, Nelson, and Canterbury. One key thing to remember is that most apple varieties aren't self-fertile. This just means you'll need to plant a suitable polliniser partner nearby to guarantee a good crop, so always check the plant label for its recommended mates.
Pears, like the ever-popular 'Conference' or 'Williams' Bon Chrétien', have similar needs. They love a sunny, sheltered spot with soil that drains well, and they also need a friend for cross-pollination. A well-cared-for apple or pear tree isn't just a plant; it's a long-term investment that will reward you for decades to come.
Stonefruit: Sun-Kissed Summer Delights
Close your eyes and think of a Kiwi summer. Chances are, you’re picturing biting into a juicy, sun-warmed peach. Stonefruit—we’re talking peaches, nectarines, plums, and apricots—are the very taste of summer. They absolutely adore heat and sunshine, which is exactly why Central Otago has become the heartland of commercial stonefruit growing in New Zealand.
While they need a definite winter chill, many modern varieties have been bred specifically for home gardens in slightly warmer climates. A big challenge, especially in wetter parts of the country, is the fungal disease leaf curl, which can make the leaves look crinkled and distorted in spring. Planting in a spot with great air circulation and using a protective copper spray in winter makes all the difference.
Good news for those with smaller gardens: most peaches and nectarines are self-fertile. Many plum varieties, however, will need a polliniser.
A special mention has to go to the fig, a Mediterranean favourite that grows exceptionally well in many parts of NZ. Unlike your typical stonefruit, figs have some unique needs but can be surprisingly productive. For a deeper dive, check out our guide on how to successfully grow fig trees in NZ.
Kiwifruit: Our National Icon
You can't talk about fruit in New Zealand without talking about kiwifruit. While you might picture them on sprawling commercial orchards, they can be a rewarding—if slightly ambitious—project for the home gardener with enough space for a sturdy support structure.
The kiwifruit industry is a massive success story. In a recent season, direct returns shot past NZ$3 billion for the first time, with Zespri exporting a record-breaking 200 million trays to meet huge global demand. This just goes to show the incredible potential of growing fruit in New Zealand's unique climate.
For the home grower, here are the key things to know:
- Green varieties: The classic 'Hayward' is tangy and has that familiar fuzzy skin.
- Gold and Red varieties: These are generally sweeter, have smoother skin, and are often less vigorous growers.
- Pollination: This is the big one. Kiwifruit plants are either male or female, so you must plant at least one of each for pollination to happen.
Citrus and Subtropical Favourites
Head to the frost-free zones of the North Island, and a whole different range of fruit trees comes into its own. Citrus trees—lemons, mandarins, and oranges—thrive in the warmth, giving you a welcome harvest through the cooler months. The 'Meyer' lemon is a superstar because it’s more cold-tolerant than other varieties and fruits like crazy.
And finally, the feijoa. This hardy South American native has become a true Kiwi icon. Tough, resilient, and relatively pest-free, feijoas are one of the easiest fruit trees a New Zealand gardener can possibly grow. They produce their aromatic green fruit in autumn, filling a perfect gap in the harvest calendar. While some varieties are self-fertile, planting two different types will always give you a much heavier crop.
Managing Common Orchard Pests and Diseases
A thriving fruit tree is a resilient one, but even the most pampered trees will eventually face off against pests and diseases. The secret to a bountiful harvest isn't about wiping out every single bug; it's about fostering a balanced garden ecosystem. This mindset is called Integrated Pest Management (IPM), and it’s all about prevention and gentle solutions first, saving the heavy hitters for when you really need them.
Think of yourself as a proactive guardian of your orchard's health, not a reactive firefighter. By creating a healthy environment from the get-go, you give your trees the natural strength to fend off many of the common problems we see in New Zealand gardens.
Prevention First: Good Orchard Hygiene
Your first and most effective line of defence is surprisingly simple: good old-fashioned garden hygiene. Pests and disease spores absolutely love to bunker down for winter in fallen leaves and rotten fruit, just waiting for spring to reinfect your trees.
A thorough autumn clean-up can work wonders. By raking up and getting rid of all the leaf litter and old fruit from around the base of your trees, you break this lifecycle. It’s a single act that robs pests of their winter hideouts and can dramatically cut down the problems you’ll face next season.
Identifying Common NZ Pests
Knowing your enemy is half the battle. In New Zealand, a handful of common culprits cause most of the headaches for backyard orchardists. Keeping a keen eye out helps you spot them early before they can really dig in.
- Aphids: These tiny, sap-sucking critters love to swarm on fresh, tender spring growth, causing leaves to curl and distort.
- Codling Moth: This is the classic "worm in the apple." The moth lays its eggs on young fruit, and the hatching caterpillars burrow straight to the core.
- Leaf-roller Caterpillars: These little green caterpillars web leaves together for protection while they chew on the foliage and scar the skin of your precious fruit.
- Scale Insects: Look for small, hard bumps on stems and leaves. These pests suck the sap out of your tree, weakening it over time.
For commercial growers, pest control is a whole different ball game. Export rules around pests like the Light Brown Apple Moth (LBAM) can add serious costs. There’s a constant effort by NZ exporters to get LBAM reclassified to ease these financial pressures and stay competitive. You can get a sense of the balance between pest control and export economics in this report.
Tackling Common Diseases
Besides pests, fungal diseases are another regular visitor, especially in our more humid regions. Catching the signs early is crucial.
Brown rot is a real menace for stonefruit like peaches and plums, turning fruit into a fuzzy, rotten mess right on the branch. Black spot leaves ugly, scab-like marks on the leaves and fruit of apples and pears. The best way to manage both is to improve air circulation with smart pruning and to apply a protective copper spray while the trees are dormant over winter.
Keep in mind, sometimes discoloured leaves point to a nutrient problem, not a disease. For example, if your citrus tree is looking a bit off-colour, our guide on why lemon tree leaves might be turning yellow can help you play detective.
Your Go-To Guide for Organic Pest Control
Dealing with pests doesn't have to mean reaching for harsh chemicals. There's a whole toolkit of organic and low-impact options that can keep your orchard healthy and your fruit spray-free. The key is knowing which pest you're dealing with and what works best to deter them.
Below is a quick-reference table for some of the most common troublemakers you'll find in New Zealand gardens and how to manage them the natural way.
Common NZ Fruit Tree Pests and Organic Solutions
| Pest | Fruit Trees Affected | Identification Signs | Recommended Organic Control Method |
|---|---|---|---|
| Aphids | Apples, Peaches, Plums, Citrus | Tiny green, black, or grey insects clustered on new growth and under leaves. Sticky "honeydew" residue. | Spray with a solution of soapy water or neem oil. Encourage beneficial insects like ladybugs. |
| Codling Moth | Apples, Pears, Quince, Walnuts | Small entry holes in fruit, often with frass (caterpillar droppings). Tunnelling to the core. | Use pheromone traps to disrupt mating. Wrap tree trunks with corrugated cardboard bands to trap pupating larvae. |
| Leaf-roller Caterpillar | Most fruit trees, especially stonefruit and pipfruit | Leaves rolled or webbed together. Chewed foliage and scarring on the fruit surface. | Manually remove and squash webbed leaves. For larger infestations, use a Bacillus thuringiensis (Bt) spray. |
| Scale Insects | Citrus, Pipfruit, Stonefruit | Small, hard, shell-like bumps on stems, branches, and leaves. Can cause yellowing leaves and dieback. | During the dormant season, spray with horticultural oil. For active infestations, scrub them off with a brush or use neem oil. |
| Bronze Beetle | Pipfruit, Stonefruit, Berries | Adult beetles chew "shotgun" holes in leaves and can scar young fruit. | Lay a sheet under the tree in the early morning and shake the branches; beetles will fall and can be collected. |
| Pear & Cherry Slug | Pears, Cherries, Plums | Slimy, black, slug-like larvae that skeletonise leaves by eating the surface tissue. | Dusting leaves with wood ash or lime can deter them. A forceful spray of water or a soap spray is also effective. |
This table is a great starting point, but remember that the best defence is a healthy, diverse garden that invites in the good guys—the predators that will do most of this work for you!
A Progressive Response Plan
When you do spot a problem, always start with the gentlest method first and only escalate if needed.
The IPM Philosophy: Start with culture (hygiene), move to physical controls (traps), then biological (predators), and only use chemical intervention as a last resort. This protects the beneficial insects—your ladybugs and lacewings—that are your greatest allies in the garden.
Here’s a simple, step-by-step approach to follow:
- Encourage Predators: Plant flowers like alyssum, phacelia, and calendula around your trees. They are magnets for beneficial insects that prey on pests.
- Use Physical Barriers: Pheromone traps are great for disrupting the codling moth lifecycle. Fine-gauge netting can protect your ripening fruit from both bugs and hungry birds.
- Apply Organic Sprays: If an infestation starts to get out of hand, turn to low-impact organic sprays. Neem oil and horticultural oils are fantastic—they work by suffocating smaller pests like aphids and scale without leaving harmful residues.
- Time Your Sprays: This is critical. Always apply sprays in the late evening. By then, the bees are back in their hives, and you’ll avoid the risk of the sun burning the oil-coated leaves.
Got Questions About Growing Fruit Trees in NZ?
Starting your fruit tree journey in New Zealand is a fantastic adventure, but it's totally normal to have a few questions before you start digging. We get asked a lot of the same things by fellow Kiwi gardeners, so we've put together some answers to help you get started with confidence.
How Long Until My New Fruit Tree Gives Me Fruit?
Patience is definitely a gardener's best friend! The wait for that first juicy harvest really depends on the type of tree you've picked out and its size when you plant it.
As a general rule, dwarf varieties tend to get a move on a bit faster. A dwarf apple or pear tree, for example, might surprise you with a handful of fruit within just 2-3 years. Stonefruit like peaches and nectarines are also pretty quick off the mark, sometimes giving you a taste in their second year.
For most standard-sized trees, you’re probably looking at a wait of about 3-5 years for a decent crop. Citrus trees usually land somewhere in the middle, around 2-4 years. Just remember, those first few years are all about the tree building a strong, healthy root system—that's the foundation for decades of fruit to come. A small first harvest is a great sign your tree is settling in nicely.
Do I Need More Than One Tree for Pollination?
That’s a brilliant question, and the answer is: it depends entirely on the variety.
Lots of fruit trees are 'self-fertile', which means they can produce fruit all by themselves. Most peaches, apricots, feijoas, and many citrus varieties fall into this easy-care group.
However, plenty of others are 'self-sterile' and need a different variety of the same type of fruit planted nearby for cross-pollination to happen. This is the case for most apples, pears, sweet cherries, and many plums. Think of it as needing a compatible partner to set fruit.
Always check the plant label before you buy. It’ll tell you exactly what the tree needs and often suggest specific 'polliniser' partners that work well. If you're tight on space, go for a self-fertile variety or a clever 'family tree' that has a few different varieties grafted onto one trunk.
When’s the Best Time to Prune Fruit Trees in NZ?
Getting your pruning time right is key to a healthy, productive tree, and the timing is specific to our New Zealand seasons.
For most pipfruit (apples, pears) and stonefruit (plums, peaches), the main structural prune happens in winter (June-August) when the tree is dormant. With no leaves in the way, you get a clear view of the tree's structure, making it the perfect time to shape it for good spring growth.
There are a few important exceptions, though. Some stonefruit, especially apricots and cherries, are better off being pruned in late summer (February-March), right after you’ve picked all the fruit. Pruning in this warmer, drier weather helps stop nasty fungal diseases like Silver Leaf from infecting the cuts. A light summer trim on any tree can also be a good idea to improve airflow and let more sunlight reach the ripening fruit.
Can I Grow Fruit Trees in Heavy Clay Soil?
Yes, you absolutely can! Heavy clay soil can be a bit of a challenge because it holds a lot of water and gets compacted easily, but with the right prep, you can definitely succeed. The idea isn't to replace your soil, but to improve its structure.
Here’s the trick: when you plant, dig a hole that’s much wider than usual, but no deeper. Mix the clay you dug out with heaps of organic matter, like good quality compost. A bit of gypsum mixed in can also work wonders to help break up those dense clay particles.
Planting the tree on a slight mound is another great technique. This lifts the root ball just above the surrounding ground, helping keep its roots out of the waterlogged zone during our wet winters. When you're at the garden centre, ask if they have trees on rootstocks known to handle heavier soils—they can make a real difference.
At Jungle Story, we're here to help you at every stage of your gardening adventure. From picking the perfect tree to getting the right tools and advice, we connect you with trusted New Zealand sellers to help your home orchard thrive. Explore our incredible range of plants and gardening supplies today at https://junglestory.co.nz.