Pruning your fruit trees is all about making smart, selective cuts to get rid of wood that's dead, damaged, or just not pulling its weight anymore. Doing this while the tree is dormant over winter is the key, as it kickstarts vigorous new growth in spring and helps you shape the tree for better sun exposure and airflow.
Why Pruning Is Your Tree's Best Friend
Stepping into the garden with a pair of secateurs can feel a bit intimidating, I get it. But learning how to prune fruit trees is genuinely one of the most rewarding skills you can pick up.
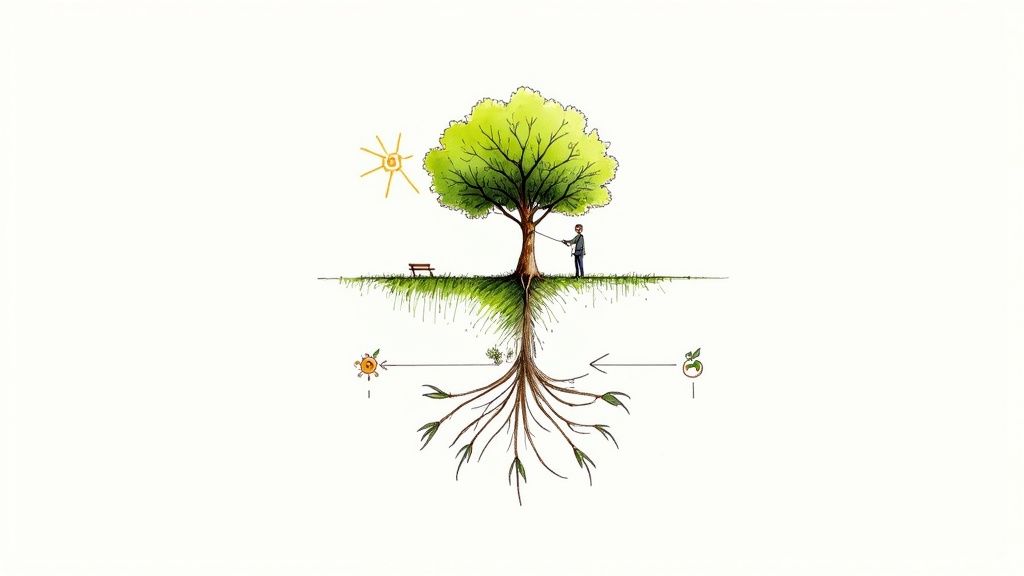
Think of it less as a harsh haircut and more like a helpful conversation with your tree. You’re simply guiding its energy towards what matters most: producing delicious, healthy fruit for years to come. In New Zealand's unique climate, a few well-placed cuts can make all the difference.
Building a Strong and Healthy Framework
The first goal of pruning is to create a strong, open structure. A well-pruned tree has a solid framework of branches that can actually hold the weight of a heavy crop without snapping under the pressure. This is a big deal for backyard favourites like apples, plums, and peaches.
By snipping out weak, crossing, or awkwardly angled branches, you’re telling the tree exactly where to put its energy—into developing a robust and balanced shape. It’s a proactive move that prevents damage down the line and helps your tree live a long, productive life.
Boosting Fruit Production and Quality
It's no secret that pruning has a direct impact on both how much fruit you get and how good it tastes. When you thin out a crowded canopy, you’re letting sunlight penetrate deeper into the tree, reaching all that developing fruit.
More sunlight means better colour, higher sugar content, and more flavourful fruit. It's a simple equation: good light exposure equals a superior harvest.
Removing old, unproductive wood also encourages the growth of new fruiting spurs, which means you'll get a consistent supply of fruit, season after season. It’s amazing how a good winter prune can totally transform a tree’s output. For more ideas on what to grow, check out our guide on selecting the best fruit trees for your NZ garden.
Preventing Pests and Diseases
A dense, tangled mess of branches creates a shady, damp environment—the perfect breeding ground for fungal diseases and unwanted pests.
Strategic pruning opens everything up, improving air circulation throughout the tree. This helps the leaves and branches dry off much faster after it rains, which is a simple but effective way to reduce the risk of common problems.
A good rule of thumb is to regularly remove the 'Three Ds'—any wood that is dead, damaged, or diseased. This is just basic garden hygiene, and it stops potential issues in their tracks before they can spread.
When it comes to pruning, when you do it is just as crucial as how you do it. This couldn't be more true for fruit trees. Getting the timing right means you're working with the tree's natural rhythm, setting it up for a strong recovery and, hopefully, a bumper crop.
For most of our deciduous fruit trees here in New Zealand—I’m talking apples, pears, plums, the usual suspects—the sweet spot for pruning is during their winter dormancy. This window typically runs from late autumn right through to late winter, which is roughly May to August, give or take, depending on where you are in the country.
Why Winter Pruning Is the Gold Standard
There’s a good reason why dormant pruning is the go-to for orchardists and home gardeners alike. First off, the tree is basically asleep. Its energy is tucked away down in the roots, so when you start snipping off branches, it’s far less of a shock to its system.
Second, the lack of leaves gives you a massive advantage. You can see everything! The tree’s entire structure is laid bare, making it a breeze to spot problems like crossing branches, weak joints, or those annoying branches that grow inwards and clog up the centre. This clarity lets you make smarter, more effective cuts.
The whole point of winter pruning is to build a strong, open framework that encourages a burst of healthy growth come spring. By clearing out the dead and misplaced wood during winter, you’re telling the tree exactly where to channel all that stored energy—into new shoots and, ultimately, more fruit.
Here in New Zealand, pruning in the colder months also helps sidestep many common pests and diseases, which are thankfully less active when it's chilly. Making clean cuts on trees like apples and peaches now will spur on strong growth next season and improve airflow through the canopy, a simple but vital step in preventing fungal problems. For a more detailed seasonal breakdown, you can learn more about local pruning best practices in Waikato.
The Role of Summer Pruning
While winter is definitely the main event, summer pruning has its place too. This is a much lighter, more surgical approach, usually done between December and February. It's not for heavy-duty structural work; think of it more as a mid-season tidy-up.
Summer pruning is brilliant for getting a handle on overly enthusiastic growth. You know those long, sappy shoots that bolt straight up from the main branches on apple and pear trees? Those are called water sprouts. They’re freeloaders—they don’t produce fruit and they crowd the canopy, blocking precious sunlight. A quick snip in summer sends the tree’s energy back to where it's needed: ripening the fruit that's already growing.
Here’s what I focus on for a summer trim:
- Whip off Water Sprouts: Clip these soft, green shoots right back to where they started.
- Rein in Vigorous Growth: Shorten any branches that are getting too long and messing with the tree’s overall shape.
- Let the Sun In: Thin out just enough leafy growth to allow sunlight to hit the developing fruit. This really helps with colour and flavour.
A word of caution: don't get carried away. Taking off too much leaf cover in summer can lead to sunburn on the fruit and bark. It’s a light touch, a gentle tidy-up, not a full renovation.
To help you keep track, here's a quick reference calendar for some of our common backyard fruit trees.
New Zealand Seasonal Pruning Calendar for Common Fruit Trees
This table gives a general guide for pruning times in a Southern Hemisphere climate like ours. Remember to adjust based on your specific microclimate—if you're in a warmer part of the country, your seasons might start a little earlier.
| Fruit Tree Type | Primary Pruning Season (Dormant) | Secondary Pruning Season (Light/Corrective) | Key Objective |
|---|---|---|---|
| Apples & Pears | Late Winter (July-August) | Summer (Dec-Feb) | Shape the framework, encourage fruit spurs. Remove water sprouts in summer. |
| Peaches & Nectarines | Late Winter/Early Spring (August) | Summer (after harvest) | Open the centre (vase shape), remove old wood, manage size. |
| Plums & Apricots | Late Summer (after fruiting) | Avoid deep winter pruning | Minimise disease risk (Silver Leaf), shape the tree, remove dead wood. |
| Cherries | Late Summer (after fruiting) | Lightly, if needed | Control size, improve air circulation, avoid winter cuts to prevent disease. |
| Citrus (Lemon, Orange) | Spring (after frost risk) | Any time to remove dead/damaged wood | Remove deadwood, thin canopy for light, maintain a manageable size. |
| Feijoas | Late Spring (after fruiting) | Lightly, if needed | Improve light penetration, thin out crossing branches for better fruiting. |
By mastering both winter and summer techniques, you can keep your fruit trees in top-notch condition—healthy, well-shaped, and incredibly productive year after year.
Your Essential Pruning Toolkit
Having the right tools for the job doesn’t just make your life easier; it's fundamental to the health of your fruit trees. I’ve seen it time and again—using blunt, unsuitable, or dirty gear leads to ragged cuts that heal poorly and, even worse, can spread diseases from one plant to another.
Investing in a few quality items and keeping them in top nick is one of the best things you can do for your orchard.
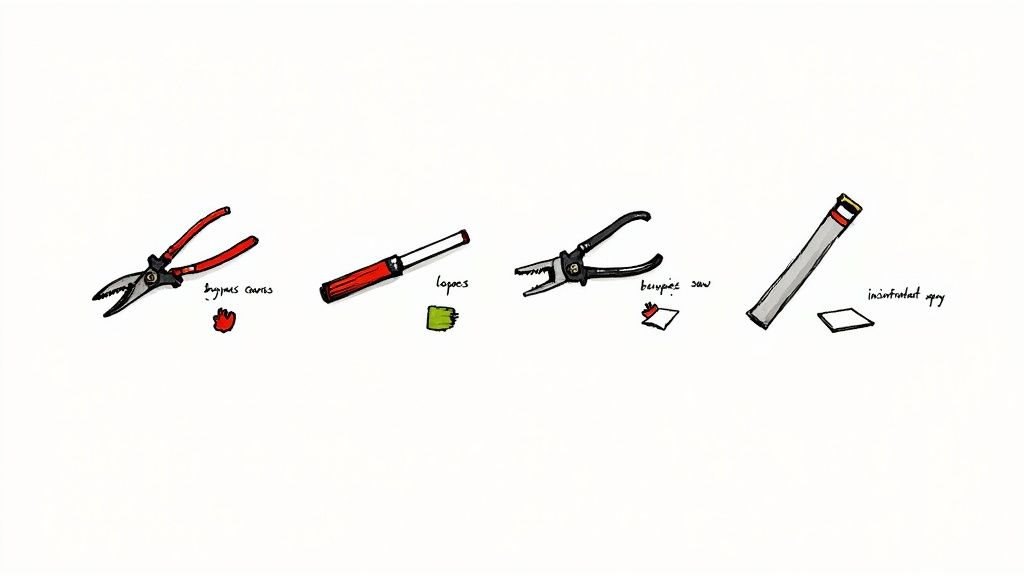
Think of your toolkit as having three core members. For the small stems and delicate work, a good pair of secateurs is your best friend. When you hit something a bit too chunky for them, you'll need the extra grunt of loppers. And for those larger, established branches, a sharp pruning saw is non-negotiable.
The Three Must-Have Tools
You don't need a massive pruning arsenal, but what you have needs to be effective. If you focus on getting these three key tools, you can handle almost anything your backyard throws at you.
-
Bypass Secateurs: These are the real workhorses. They're perfect for making clean, precise cuts on live branches up to about 2 cm thick. They work just like scissors, with one blade bypassing the other to make a clean slice that minimises damage and helps the tree heal faster.
-
Bypass Loppers: Think of these as secateurs on steroids. Their long handles give you the leverage you need for thicker branches, typically from 2 cm up to 5 cm in diameter. They use the same clean-cutting bypass action, which is vital for live wood.
-
Pruning Saw: When a branch is just too thick for your loppers, it’s time to bring out the pruning saw. These are designed with coarse teeth that cut aggressively on the pull stroke, making quick, clean work of mature wood without tearing the bark.
A quick but crucial tip: always choose bypass pruners and loppers over the anvil type for live wood. Anvil pruners have a single blade that crushes against a flat surface, which can damage the delicate cells of a living branch. This slows down healing and practically invites disease in. Save the anvil pruners for deadwood only.
Keeping Your Tools Clean and Sharp
This is the part so many gardeners overlook, but it's arguably the most critical. Sharp tools make clean cuts, and clean tools prevent the spread of nasty pathogens. Before you start, and especially when moving between trees, take a moment to sanitise your gear.
You don't need anything fancy—a simple solution of methylated spirits or diluted bleach (one part bleach to ten parts water) is all it takes. Just give the blades a quick wipe down. This simple habit can stop the transfer of diseases like silver leaf, which can be devastating for stone fruit trees.
Sharpening your tools at least once a year is also a must-do, usually just before the main winter pruning season kicks off. A sharp blade glides through wood, leaving a smooth surface. A dull one tears and rips, creating a ragged wound that’s far more likely to get infected. Look after your tools, and they'll help you make every cut a healthy one.
Getting to Grips with the Main Pruning Cuts

You don't need to be a master horticulturalist to prune a fruit tree effectively. Honestly, it all comes down to a few basic types of cuts and knowing when to use them. Once you can spot what needs to go and how to remove it cleanly, you're most of the way there.
It all starts with a simple but crucial principle: the ‘Three Ds’. Before you even think about shaping the tree or encouraging new growth, your first job is always a good tidy-up.
Start with the Three Ds
Think of the Three Ds as your non-negotiables for any pruning session. This is the clean-up phase, and it’s absolutely vital for the tree's health. You need to scan the tree and remove any wood that is:
- Dead: This stuff is usually easy to spot. It's often dry, brittle, a different colour, and won't have any live buds. Dead branches do nothing for your harvest and can invite pests and diseases in.
- Damaged: Look for any branches that are broken, cracked, or have major bark damage. Maybe a storm snapped a limb, or something has rubbed against it. Damaged wood is weak, won't heal properly, and is just a liability.
- Diseased: Diseased wood might have cankers (which look like sunken, discoloured patches of bark), odd growths, or signs of fungus. Getting this out promptly is the best way to stop the problem from spreading.
Tackling the Three Ds first clears out the clutter. It makes it so much easier to see the tree’s healthy structure, which helps you make better decisions for the rest of your pruning.
Thinning Cuts vs. Heading Cuts
With all the unhealthy wood gone, you can now focus on the tree's shape and structure. This is where two main types of cuts come into play: thinning cuts and heading cuts. Knowing the difference is what will get you the results you’re after.
A thinning cut removes an entire branch right back to where it started—either at the main trunk or a bigger limb. You’re taking the whole thing out, right from its base.
Thinning cuts are your best friend for opening up the canopy. By taking out whole branches, you let more air and sunlight get deep inside the tree. This is a game-changer for ripening fruit and keeping diseases at bay.
On the other hand, a heading cut just shortens a branch. You cut it back to just above a healthy, outward-facing bud. This kind of cut wakes up the buds just below it, encouraging the branch to get bushier and denser.
For most established fruit trees, you’ll be making thinning cuts most of the time to keep that open, productive shape. Heading cuts are more for young trees to help establish a good framework or to fill in a sparse area.
Making the Perfect Cut
Where you cut is just as important as what you cut. A good cut heals quickly, but a bad one can lead to disease or branches dying back.
For a thinning cut, look for the branch collar. It's that slightly swollen, wrinkly bit of bark where the branch joins a larger limb. You want to cut just outside this collar—don't leave a long stub, but don't cut into the collar itself. The collar has special cells that will seal the wound nice and fast.
When you’re making a heading cut, the angle is key. Aim for a 45-degree angle about 6 mm above an outward-facing bud. The cut should slope away from the bud, so rainwater runs off instead of pooling and causing rot.
Removing Unproductive Growth
Finally, keep an eye out for two types of growth that just drain the tree’s energy without giving you any fruit: suckers and water sprouts.
- Suckers are those super-vigorous shoots that pop up from the root system or the very bottom of the trunk. Whip them off as soon as you spot them, cutting them as flush as you can.
- Water sprouts (or watershoots) are the fast-growing vertical shoots that often appear on older, horizontal branches. Just like suckers, they don’t produce fruit and just crowd the canopy, blocking precious light. Thin them out completely.
The logic behind strategic pruning shows up in other areas of horticulture, too. For example, research in New Zealand forestry found that pruning young Pinus radiata to remove lower branches led to better quality timber with fewer knots. It's a similar idea—thinning your fruit tree canopy lets light and air in, which means better fruit and less disease. You can read more about those forestry pruning findings if you're curious. These skills are also handy for other fruit-bearing plants, as you'll see in our guide to growing and caring for fig trees in NZ.
Shaping Your Trees for a Bountiful Harvest
Great pruning is so much more than just a series of cuts; it’s about having a vision for your tree. You're the architect here, guiding its growth over several years to build a strong, productive, and beautiful structure. Think of it as training your tree for greatness.
This long-term mindset is what turns a tangled young sapling into a reliable source of incredible fruit, year after year. For most of us with home orchards here in New Zealand, there are two main shaping systems that really stand out. Each one is perfectly suited to different types of fruit trees.
The Open Centre or Vase Shape for Stone Fruits
If you're growing stone fruits—peaches, nectarines, plums, or apricots—the open centre (or vase) shape is what you're aiming for. Picture a wine glass: a short trunk that splits into three to five main branches, all reaching outwards and upwards.
The whole point of this shape is to let sunlight flood right into the centre of the tree. Stone fruit needs maximum sun exposure to develop its best colour and flavour, and this open structure makes sure every single piece of fruit gets a healthy dose. It also creates brilliant air circulation, which is a massive help in preventing brown rot and other fungal diseases that stone fruits are often prone to.
You'll want to establish this shape while the tree is young. A common practice is to head the young tree back to about 70-80 cm high after you've planted it. From the new shoots that appear, you’ll pick three or four strong, well-spaced branches to become your main scaffold limbs and get rid of the rest. That's your foundational 'vase' sorted.
As the tree gets older, your yearly pruning will be all about maintaining that open centre. This means snipping off any vigorous shoots that try to grow inwards and thinning out congested areas to keep the canopy from getting too crowded.
The Central Leader System for Apples and Pears
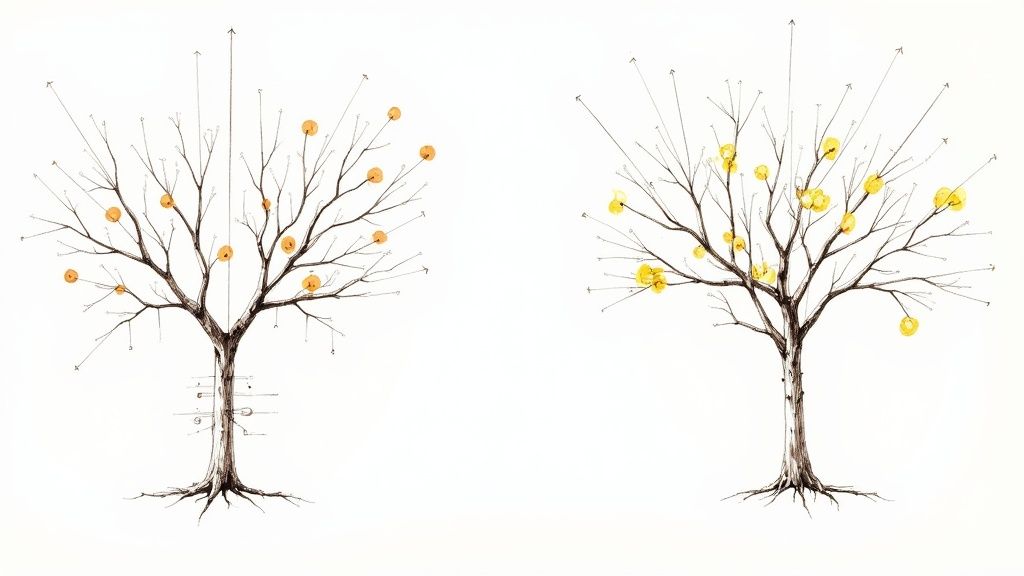
For pip fruits like apples and pears, the central leader system is the classic, time-tested approach. This method encourages a strong, dominant central trunk (the leader) with layers of branches, called scaffolds, spiralling around it. The final result looks a bit like a Christmas tree—wider at the bottom and tapering up to a point.
This structure is incredibly strong and super efficient. The tiered branches guarantee that even the lower limbs get plenty of sunlight, which means you get good fruit developing all over the tree, not just at the very top. That strong central trunk also provides fantastic support, helping to stop branches from snapping under the weight of a heavy crop.
To create a central leader, you start with a young, unbranched tree, often called a whip. You’ll head it back after planting to encourage side branches to form. Over the next few years, you’ll select well-spaced scaffold branches that spiral around the leader, aiming for a new tier of branches every 40-60 cm or so up the trunk.
A critical part of maintaining this shape is making sure the leader stays dominant. If a side branch starts to get ambitious and compete with the leader for height, you need to shorten it or remove it entirely to keep the tree’s structure clear and strong.
Addressing Common Structural Problems
No tree grows perfectly, so part of your job as a pruner is to spot and correct issues before they turn into major headaches. One of the most common problems I see is weak, V-shaped branch junctions. These narrow angles, where a branch grows almost parallel to the trunk, create a weak point with included bark. They're notorious for splitting under the weight of fruit or during a big storm.
Ideally, you want a branch angle between 45 and 60 degrees from the main trunk. This creates a really strong, supportive connection.
- For young trees: If you spot a branch forming a tight, narrow angle, you can use branch spreaders (little pieces of wood with a notch at each end) to gently push the branch into a wider, stronger position while it's still young and flexible.
- For older trees: If a branch already has a weak V-shaped union, it's often best to just remove the weaker of the two competing stems. This one preventative cut can save the tree from a devastating split down the track.
Training your trees is definitely a commitment, but the payoff is immense. A well-shaped tree isn't just more productive and healthier; it's also much easier to manage and harvest from. These principles apply across many fruit-bearing plants. For instance, you can use similar logic when learning how to trim feijoa trees to boost their structure and yield.
For larger orchards or commercial operations looking to maximise their yields, exploring advanced tools like agriculture GPS tracking solutions can offer new ways to manage farm operations for a more bountiful harvest. By shaping your trees with intention from a young age, you set the stage for decades of incredible fruit.
Right, the cuts are done and you've stepped back to admire your handiwork. But the job isn't quite finished. What you do next is crucial for helping your fruit tree heal properly and push all that fresh energy into a strong recovery—and eventually, a bumper crop.
Your main focus now switches to water. You've just removed a fair bit of wood and foliage, and that changes how the tree manages its hydration. Consistent watering is absolutely vital for helping those wounds heal and fuelling the new flush of growth you’ll see in spring.
Managing Water and Nutrients
A freshly pruned tree is basically spring-loaded, ready to burst into growth as soon as the weather warms up. To give it the best shot, you want to keep the soil around its base consistently moist, but never waterlogged. This is especially important given New Zealand’s famously unpredictable climate, where a dry spell can roll in right after a week of rain.
Giving the tree a good, deep watering once a week during dry patches is far more effective than a light daily sprinkle. This encourages the roots to grow deeper into the soil, building a much more resilient tree. A layer of quality compost or mulch spread around the base (just make sure it’s not touching the trunk) is also a brilliant way to lock in that moisture and slowly release nutrients.
This isn't just a "nice-to-do"; it's backed by local research. Water stress can seriously reduce the number of fruiting buds a tree develops after pruning, which has a direct impact on your harvest. One study on New Zealand orchards showed that for optimal bud retention, irrigation needs could be anywhere from 0 to 371 mm a year, depending on the region and soil. It really highlights that critical link between pruning and hydration. You can read more in this research on rootstock survival and irrigation effects.
A question I get asked all the time is about using pruning paint or sealant on the cuts. The modern thinking on this is a firm "no". Trees have an incredible natural ability to compartmentalise and heal their own wounds. Sealing them up can actually trap moisture, creating the perfect damp environment for fungal diseases to take hold. You end up doing more harm than good.
Tidying Up Your Prunings
So, what about that pile of branches on the ground? Good garden hygiene is the final piece of the puzzle. If you spotted any signs of disease on the wood you removed—things like cankers or fungal spots—it is absolutely crucial not to compost it. The best thing to do is burn it or pop it in your green waste bin to stop any pathogens from spreading around your garden.
On the other hand, healthy, disease-free branches are a fantastic resource. If you have a chipper, you can shred them down into a brilliant mulch for your garden beds. It's a great way to enrich your soil and complete the natural cycle.
A Few Common Pruning Questions
Even with a solid guide, it’s normal to have a few questions when you’re standing there, secateurs in hand, wondering if you’re about to do the right thing. Let’s tackle some of the most common queries that pop up for Kiwi gardeners.
First off, how much is too much? A good rule of thumb I always stick to is never removing more than one-third of the tree's total canopy in one go.
If you’re dealing with an old, overgrown tree that hasn't seen a pair of loppers in years, it's tempting to go hard. Don't. You're far better off spreading that major renovation work over two or three seasons. Taking too much off at once can seriously shock the tree, leading to a wild panic-flush of weak, watery shoots instead of the strong, fruiting wood you’re after.
Should I Use Pruning Paint on the Cuts?
In nearly all situations, the answer is a simple no. It’s a bit of an old-school practice, and modern thinking is that trees are remarkably good at healing themselves.
Sealing a fresh cut can actually do more harm than good by trapping moisture against the wood. This creates the perfect damp, dark environment for fungal diseases to set up shop. The best thing you can do is make a clean cut just outside the branch collar and let the tree’s natural defence systems kick in.
For routine pruning, just let the tree heal itself. A clean, well-placed cut is your best tool for encouraging a quick recovery and preventing infection. The tree knows how to compartmentalise the wound on its own.
What’s the Difference Between a Thinning Cut and a Heading Cut?
Getting your head around this is fundamental to shaping your tree properly.
A thinning cut is when you remove an entire branch right back to where it started—either on a larger limb or the main trunk. This is what you’ll do most of the time. It’s perfect for opening up the canopy to let that crucial light and air in, and it doesn't trigger that chaotic burst of regrowth.
A heading cut, on the other hand, is just shortening a branch by cutting it back to a bud. This tells the buds just below your cut to wake up and sprout, which makes the tree bushier. While useful in some specific cases (like shaping a very young tree), for most established fruit trees, thinning cuts are your go-to for maintaining a healthy, productive structure.
Once you're done, you'll have a fair bit of debris to handle. It's worth looking into easy and legal methods for garden waste disposal, and don't forget that composting the smaller cuttings is a fantastic way to feed your soil.
At Jungle Story, we're passionate about helping you grow a thriving garden. From robust fruit trees to the perfect tools for the job, explore our curated collection to start your journey. Find everything you need at https://junglestory.co.nz.