There’s nothing quite like the feeling of stepping into your own garden to pick fresh, sun-ripened fruit straight from the branch. This guide is all about making that dream a reality for gardeners right across New Zealand. Growing fruit trees in NZ is so much more than a hobby—it’s a rewarding way to connect with the seasons and enjoy incredibly flavourful, healthy food from your own backyard.
Your Guide to a Thriving Kiwi Backyard Orchard
Whether you’ve got a sprawling lifestyle block or a small urban garden, there’s a fruit tree for you. It’s not just about the harvest, either. It’s about the simple satisfaction of nurturing a small sapling and watching it become a productive part of your home’s ecosystem.
Think of this guide as your trusted companion. We’ll walk you through everything you need to know, from the ground up, turning that patch of lawn into a fruitful and deeply rewarding home orchard. We're here to give you practical, proven advice every step of the way, helping you grow with confidence.
What to Expect From This Guide
This isn't just another list of instructions; it's a complete roadmap designed specifically for the unique growing conditions we have here in Aotearoa. We get the challenges Kiwi gardeners face, from our wildly diverse regional climates to the specific pests that seem to love our favourite trees as much as we do.
Here’s a sneak peek at what we’ll cover to get you started:
- Choosing Wisely: We'll demystify tricky concepts like "chill hours" and help you pick a tree that will thrive in your local climate, whether you're gardening in the subtropical North or the crisp, cool South.
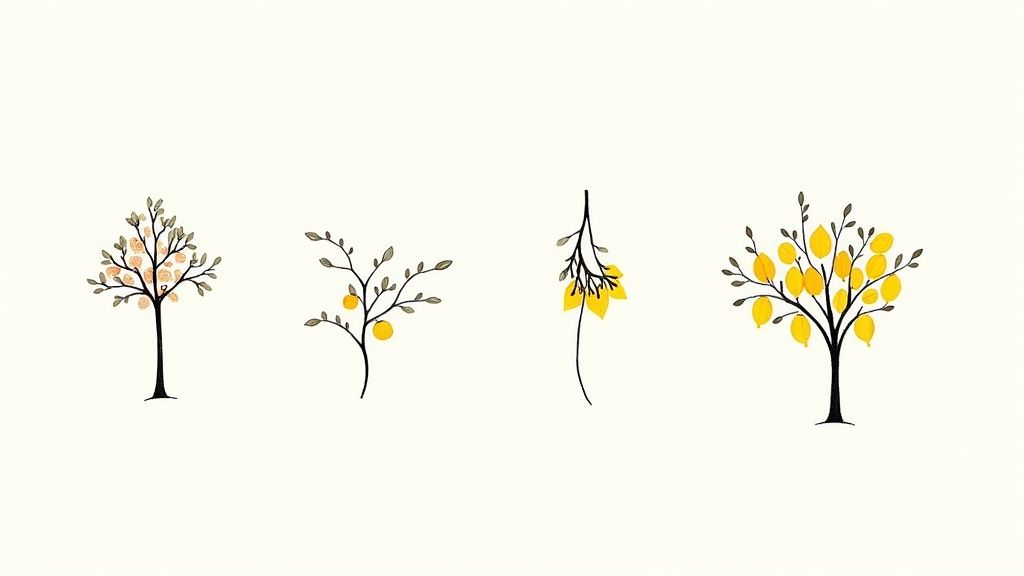
- Planting for Success: You'll get a step-by-step planting playbook for New Zealand's favourite fruit trees, including apples, feijoas, and lemons, to make sure your tree gets the best possible start in life.
- Seasonal Care: We've created a year-round schedule that breaks down essential tasks for each season, from winter pruning (June-August) to summer watering (December-February).
- Solving Common Problems: Find simple, effective solutions for common Kiwi garden headaches like curly leaf on peach trees, codling moth in apples, and brown rot on your precious stone fruit.
Think of a healthy tree like you would a healthy person. A well-cared-for tree, with good "nutrition" from the soil and proper "exercise" through pruning, is naturally more resilient to pests and diseases. It’s all about creating a strong foundation for long-term health.
By focusing on these key areas, you'll learn how to work with nature, not against it. You'll understand why we do certain things at specific times of the year in New Zealand and how to tweak your approach for your garden's unique spot. Right then, let’s get our hands dirty.
Right, let's get one thing straight. The real secret to a garden overflowing with fruit isn't some mystical green thumb. It's about playing matchmaker—pairing the right tree with your specific corner of New Zealand. A happy tree is a productive one, and that happiness begins with feeling at home in your local climate. Get this part right, and you're setting the stage for years of healthy growth and bountiful harvests.
Think of it this way: you wouldn't expect a tūī to thrive in the open ocean. It belongs in the native bush. In the same way, a subtropical feijoa that loves the mild, humid winters of Northland would simply give up in a frosty Central Otago winter. Every fruit tree has a built-in climate preference, a set of conditions it’s hardwired to not just survive, but flourish in.
Understanding Your Climate and Chill Hours
Before you get carried away dreaming of specific apple varieties, you need to get to grips with your garden's climate. The most critical, and often misunderstood, factor here is something called chill hours.
Think of chill hours as a deciduous fruit tree's mandatory winter holiday. It's the total number of hours a tree (like an apple, pear, or plum) needs to be exposed to cold temperatures—typically between 0°C and 7°C—while it's dormant. This deep "sleep" is a vital reset button that prepares it to burst into flower and produce fruit come spring.
If a tree doesn't get enough of this winter chill, its internal alarm clock just won't go off correctly. This can cause a whole host of problems you really want to avoid:
- Spotty or weak budding: Flowers might show up late, all in a confused rush, or sometimes not at all.
- Poor fruit set: Even if you do get flowers, they might fail to develop into actual fruit.
- Lack of vigour: The tree can look weak and struggle for energy all season long.
This is exactly why a classic 'Granny Smith' apple, which needs a lot of chill hours, is a superstar in the colder parts of the South Island but a complete flop in a warm Auckland backyard. On the flip side, a low-chill peach variety will be perfectly happy up north but could have its delicate spring blossoms zapped by a late frost down in Canterbury.
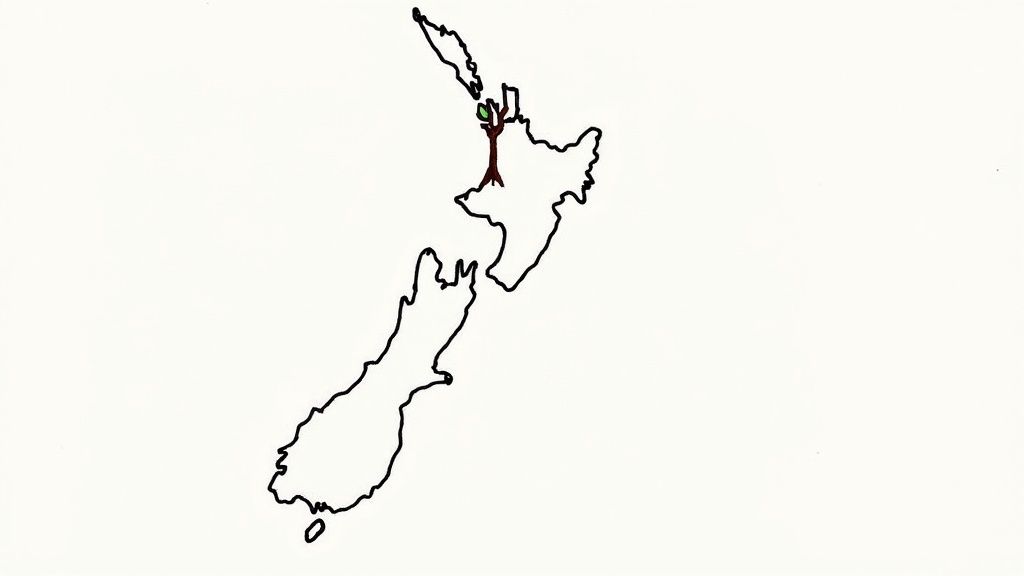
Matching Fruit Trees to New Zealand Climate Zones
To help you get started, we've put together a quick reference guide. New Zealand's unique geography creates several distinct climate zones, each perfect for different kinds of fruit. While your own backyard will always have its unique microclimate, this table is a fantastic starting point for finding the perfect fruit trees NZ has to offer.
Matching Fruit Trees to New Zealand Climate Zones
| Climate Zone | Best Suited Fruit Trees | Key Considerations |
|---|---|---|
| Warm/Subtropical North (Northland, Auckland) | Citrus, Feijoas, Persimmons, Low-Chill Peaches & Nectarines, Avocados | High humidity can increase fungal risks. Look for varieties bred for warmth that need very few chill hours. |
| Mild Temperate (Waikato, Bay of Plenty) | Kiwifruit, Apples, Pears, Plums, most Stone Fruit, Lemons | A very versatile zone supporting a huge range. Good air circulation is key to combat dampness. |
| Cooler Temperate (Lower North & Upper South) | Apples, Pears, Cherries, Apricots, Plums | Frost protection might be needed for early-flowering trees. Choose varieties with moderate chill hour needs. |
| Cold/Alpine (Central Otago, Canterbury) | High-Chill Apples, Pears, Cherries, Apricots | This is prime stone fruit and apple country! These areas provide the deep winter chill these trees crave. |
This table gives you a general idea, but the next step is to put on your detective hat and get to know your own patch of land.
Assessing Your Own Backyard
Beyond the regional climate, you need to investigate the microclimate of your own garden. Spend a bit of time observing your property and figure out the answers to these crucial questions:
- Where does the sun hang out? Most fruit trees need at least six hours of direct sun each day to ripen fruit properly. Track the sun's path over your garden for a day, paying close attention to where it falls in winter.
- Is there shelter from the wind? That relentless southerly can be brutal, damaging blossoms and stunting a young tree's growth. Planting near a fence, hedge, or the side of the house can offer vital protection.
- How's the drainage? No fruit tree likes having "wet feet." A simple test is to dig a hole and fill it with water. If it takes hours to drain away, you've got drainage issues. You'll need to either improve the soil structure or consider planting on a raised mound to avoid root rot.
By thinking through your regional climate and the specific conditions in your backyard, you're shifting from just guessing to making a smart, informed choice. You’re not just buying a tree; you're welcoming a new, long-term member into your garden family. Your job is to make sure it has everything it needs to feel right at home from day one.
How to Plant Your Fruit Trees for Success
You’ve chosen the perfect tree for your climate, and now it’s time for the exciting part: getting your hands dirty. Giving your new tree its forever home is a huge moment. Planting it properly is about more than just digging a hole; it’s about setting the stage for decades of healthy growth, strong roots, and, of course, delicious fruit. Getting these first steps right is the single most important thing you can do to ensure your tree thrives.
The best time to plant most deciduous fruit trees in NZ—like apples, pears, and plums—is when they’re dormant. This window usually falls between May and August, when the ground is cool and moist. Planting in late autumn or winter lets the tree’s root system get established without the stress of supporting leaves, giving it a powerful head start for spring.
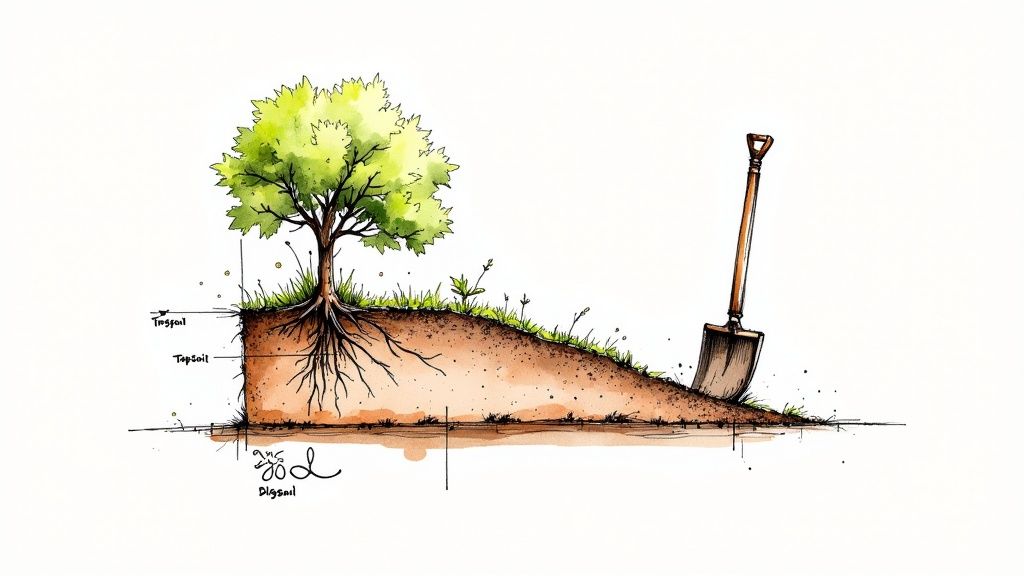
Preparing the Planting Site
Before you even grab the spade, take a moment to prepare the ground. Think of it as making a comfortable bed for your new tree to settle into. A little effort now pays off massively later.
Start by clearing a one-metre diameter circle of any grass or weeds. These opportunistic competitors will steal precious water and nutrients from your young tree's developing roots. A great low-effort trick is to lay down a layer of cardboard and cover it with mulch to suppress weeds for the long haul.
Next, it's time to dig. The goal is a hole that is roughly twice as wide as the root ball of your tree, but no deeper. A common mistake is digging too deep. This can cause the tree to sink over time, burying the graft union, which can be fatal.
There's an old gardening saying: dig a $10 hole for a $5 tree. It’s a great reminder that the effort you put into preparing the soil and digging a wide, welcoming hole is far more valuable than the cost of the plant itself. It's a true investment in your tree's future.
The Step-by-Step Planting Process
With your site prepped, you’re ready for the main event. Following these steps will ensure your tree is positioned correctly for stable, healthy root growth.
-
Check the Depth: Place the tree (still in its bag or pot) into the hole. Lay a spade handle or another straight edge across the top. The soil mark on the tree’s trunk, which shows its original depth in the nursery, should be level with or just slightly above the straight edge. Adjust the soil at the bottom of the hole if you need to.
-
Tease the Roots: Gently slide the tree out of its container. If the roots are tightly coiled in a spiral (a condition known as being 'root-bound'), you must carefully tease them out. Use your fingers to loosen the roots, encouraging them to spread outwards into the new soil. This is a critical step to prevent the tree from strangling itself as it grows.
-
Position and Backfill: Place the tree in the centre of the hole and make sure it's standing straight from all angles. Start backfilling with the original soil you dug out. Don’t be tempted to add heaps of fertiliser into the hole itself, as this can burn the delicate new roots.
-
Firm and Water: As you fill the hole, gently firm the soil down with your hands or feet to get rid of any large air pockets. Once it's full, create a small, raised ring of soil around the outer edge to form a watering basin. Give the tree a thorough watering—at least one full watering can should do the trick. For more in-depth advice, check out our comprehensive plant care guides.
The Crucial Finishing Touches
After planting, applying a layer of mulch is non-negotiable. A 5-10 cm layer of organic material like bark chips, pea straw, or well-rotted compost spread over the cleared circle works wonders. Mulch helps hold in soil moisture, keep weeds down, and regulate the soil temperature. Just be sure to keep the mulch a few centimetres away from the trunk itself to prevent collar rot.
The resilience of New Zealand’s fruit-growing sector is remarkable. Even after the devastation of Cyclone Gabrielle in 2023, the apple industry is showing strong signs of recovery. For the 2024/2025 season, the planted area is forecasted to increase to 11,100 hectares, with production expected to hit 560,000 metric tons, thanks to innovative farming and a positive weather outlook.
Finally, resist the urge to prune your new tree heavily right away. It needs all its existing branches and leaves to generate energy for root growth. A small tip prune for shape might be okay, but save any major pruning until the following winter.
Your Seasonal Guide to Fruit Tree Care
Once your tree is happily settled in the ground, your job shifts from planter to caretaker. A fruit tree’s needs aren't set in stone; they change right along with the Kiwi seasons. Getting in sync with this natural rhythm is the real secret to turning tree care from a long list of chores into a simple, satisfying routine.
Thinking seasonally means you can give your tree what it needs, right when it needs it. This proactive approach helps you grow a healthier, more resilient tree that’s better at fighting off pests and diseases. The end result? A much more generous harvest.
Let’s break down the year into a straightforward care schedule.
Winter Care (June – August)
For deciduous fruit trees in NZ, winter is a time for rest and preparation. As the leaves drop and the tree goes dormant, it’s the perfect moment for two crucial jobs: pruning and a good clean-up.
Pruning during dormancy is best because you can see the tree's entire structure without any leaves getting in the way. Your main goals are to improve airflow and let more sunlight in, snip off any dead or diseased wood, and shape the tree for future growth and easy picking. A well-pruned tree is a happy, healthy tree.
This is also the time for a critical 'clean-up' spray. After you’ve finished pruning and raked up all the fallen leaves and old fruit from around the base, a dormant oil or copper spray is a must.
Think of a winter clean-up spray as a deep clean for your tree. It takes care of overwintering fungal spores and pest eggs hiding in the bark. This simple step helps prevent problems like peach leaf curl and apple scab before they even get a chance to start, resetting your tree’s health for the spring.
Spring Awakening (September – November)
As the weather warms up, your fruit trees will burst back to life. Spring is a season of incredible growth, but it’s also when your tree is most vulnerable. Your main tasks are to protect that delicate new growth and deal with the first wave of pests.
Late frosts are a real threat in many parts of New Zealand and can wipe out a whole season's worth of blossoms in a single night. If frost is on the forecast, cover your smaller trees with frost cloth or even an old sheet. Just make sure to secure it before dusk and take it off in the morning once the risk has passed.
Spring is also when pests like aphids start to show up. Keep a close watch on new shoots and the undersides of leaves. Often, a strong jet of water from the hose is all you need to knock them off. For more stubborn infestations, an organic insecticidal soap or neem oil can work well, but always spray in the evening to avoid harming helpful insects like bees. For more tips on managing common garden issues, feel free to explore the advice in our plant blogs.
Summer Growth (December – February)
Summer is all about supporting your tree as it works hard to grow and ripen its fruit. With long, sunny days, your focus should be on smart watering and fruit thinning.
Consistent moisture is essential for plump, juicy fruit. Instead of light, frequent sprinkles, give your trees a deep, thorough soaking once or twice a week, depending on how much rain you're getting. This encourages the roots to grow deep and is much more effective. Applying a thick layer of mulch is also a great way to help the soil hold onto that moisture.
It might feel wrong, but removing some of the young fruit is one of the best things you can do. This is called thinning, and it just means picking off some of the small fruitlets to give the others more room and resources. The benefits are huge:
- Larger, better-quality fruit: The tree’s energy goes into fewer fruits, making them bigger and tastier.
- Prevents broken branches: A super heavy crop can easily snap branches.
- Promotes annual fruiting: It helps stop the tree from getting into a biennial cycle (fruiting only every other year).
Autumn Harvest and Preparation (March – May)
Autumn is the season of reward, but your work isn’t quite over when you've picked the last fruit. Now it’s time to enjoy your bounty and help your tree get ready for its winter nap.
As you harvest, be sure to pull off any shrivelled, diseased fruits (sometimes called "mummies") still clinging to the branches, as these can carry fungal spores. After the harvest is done, it's a great time to give your tree a feed with a balanced fertiliser to replenish the energy it used up.
Finally, as the leaves start to change colour and fall, make sure to rake them up. This simple act of garden hygiene is especially important if you’ve had any issues with fungal diseases, as it removes a major source of reinfection for the next year and sets your tree up for another successful cycle.
Solving Common Problems with Your Fruit Trees
Even with the best care, fruit trees in New Zealand can sometimes hit a rough patch. Don't panic. The real trick is learning to spot the early signs of stress, pests, or disease before a small hiccup turns into a major headache. This guide is your troubleshooting toolkit, built to help you diagnose and deal with the most common issues Kiwi gardeners face, so you can get back on the path to a fantastic harvest.
Interestingly, many problems, especially those pesky fungal diseases, can be stopped in their tracks with one simple practice: smart pruning. It's a common misunderstanding that pruning is just about hacking back branches to control size. In reality, it's one of the most important things you can do for your tree's long-term health.
Picture a tree with a thick, messy canopy of branches. It's like a damp, crowded room with all the windows shut tight. Air can't flow, and sunlight can't get in. This creates the perfect dark, humid breeding ground for fungi like brown rot and black spot to thrive.
A well-pruned tree with an open, airy structure lets the breeze and sun filter through. This natural ventilation helps leaves and fruit dry off quickly after rain, making it incredibly difficult for fungal spores to get a foothold. It's one of the most powerful, organic preventative steps you can take.
Diagnosing and Treating Common Kiwi Fruit Tree Issues
When trouble does pop up, figuring out exactly what you're dealing with is the crucial first step. Let's walk through some of the most frequent culprits in New Zealand gardens and how to handle them, always starting with organic and low-chemical options first.
Pesky Peach Leaf Curl
If you're growing peaches or nectarines, you’ve probably met this frustrating fungus. It makes the leaves thicken, pucker, and turn a blotchy reddish colour before they shrivel and drop, which can seriously weaken the tree.
- The Problem: Caused by the fungus Taphrina deformans, which cleverly hides out in the tree's bark and bud scales over winter. When spring brings its classic cool, wet weather, the spores infect the new leaves just as they emerge.
- The Solution: With leaf curl, prevention is everything because there's no cure once the leaves are infected. Your most important job is to apply a copper-based fungicide spray while the tree is dormant. In NZ, this usually means spraying in late winter (around August) as the buds start to swell but before they burst open. For extra insurance, a second spray in autumn after the leaves have fallen is a great idea.
The Dreaded Codling Moth
The codling moth is public enemy number one for apple and pear growers—it's the reason you find a grub munching on the core. The tiny larva burrows into the young fruit, has a feast, and then exits, leaving you with ruined, inedible fruit.
- The Problem: The adult moth lays its eggs on or near the fruit in late spring. Once hatched, the larvae tunnel their way inside.
-
The Solution: This one requires a few different tactics working together.
- Pheromone Traps: Hang these in your trees in spring (September/October). They attract and trap the male moths, which both reduces breeding and helps you see when they're most active.
- Corrugated Cardboard Bands: A simple but effective trick. Wrap bands of cardboard around the tree trunk. When the mature larvae look for a place to pupate, they'll crawl into the corrugations. You can then just remove and destroy the bands.
- Organic Sprays: If you have a bad infestation, sprays containing neem oil or spinosad can help. Timing is key—spray after the blossoms have fallen and reapply based on the product's instructions.
Managing Fungal Rots and Other Diseases
Fungal diseases are a constant battle in many parts of New Zealand, especially in humid regions. Your first and best line of defence is just good old-fashioned garden hygiene.
Brown Rot on Stone Fruit
This fungus is a heartbreaker. It causes blossoms to wilt and fruit to develop soft brown spots that quickly get covered in a fuzzy, greyish mould. Infected fruit often shrivels into a "mummy" and hangs on the tree.
Always remove and destroy any mummified fruit you see clinging to the branches during your winter prune. These are little spore factories, just waiting to reinfect your tree next season. Rake up and get rid of all fallen leaves and fruit from around the base of the tree. Critically, do not add any of this diseased material to your home compost bin.
Companion planting can also play a supporting role in creating a healthier garden. While it won't cure a disease, planting aromatic herbs near your trees can help confuse and deter some pests. By layering these defences—pruning, hygiene, and smart treatments—you give your trees the absolute best shot at a long and fruitful life.
Got Questions About Growing Fruit Trees in NZ? We’ve Got Answers.
Starting a home orchard is a brilliant journey, but let's be honest, it can feel a bit daunting. To help you get your hands dirty with confidence, we've pulled together some of the most common questions we hear from fellow Kiwi gardeners.
There’s a real movement towards growing your own kai, and it's not just about that incredible home-grown flavour. It's also a smart way to get ahead of rising grocery bills. With supply chain hiccups and soaring costs, that backyard apple tree is looking better than ever. The consumer price index for fruit in New Zealand actually climbed by an estimated 4.9% in 2023-2024, and that trend isn't slowing down. You can get the full picture by checking out this report on fruit pricing trends.
When Is the Best Time to Plant in New Zealand?
For most of the classic deciduous fruit trees in NZ—think apples, pears, and plums—the sweet spot for planting is during their winter sleep. This dormant period, roughly from May through to August, is ideal. The cool, damp soil gives the roots a chance to spread out and get settled without the pressure of having to support leaves and new growth.
But for evergreens like citrus and feijoas, you'll want to take a different approach. It’s much better to wait until all danger of frost has passed. Planting them in spring (September or October) gives them a gentle, warm start, letting them settle in properly before the full heat of summer kicks in.
How Long Until I Actually Get Fruit?
Ah, the big question! Patience is definitely part of the gardening game, but you might be harvesting sooner than you think. How long it takes really comes down to the type of tree you've chosen and its size when you plant it.
- Dwarf Varieties: These are your speedsters. They can often produce a small crop within just 2-3 years of planting.
- Stone Fruit: Peaches, nectarines, and plums are also pretty quick off the mark, usually fruiting within 2-4 years.
- Apples and Pears: These classics take a little more time to get established, typically needing 3-5 years before you see a reliable harvest.
Remember, giving your tree the best possible start—good soil, consistent watering, and the right food—is the fastest way to get it to fruiting.
Think of a young tree like an athlete in training. For the first few years, it's all about building core strength—a strong root system and a solid branch structure. Pushing it to produce fruit too early is like asking a young runner to tackle a marathon. It's far better to let it build a sturdy foundation for a long, productive life ahead.
Do I Need More Than One Tree for Pollination?
This is a fantastic question and one that catches a lot of new gardeners out. The short answer is: it depends on the tree.
Many modern fruit varieties have been bred to be 'self-fertile', which means a single tree can produce fruit all on its own. Easy peasy.
However, a lot of others are 'self-sterile'. These trees need a different, compatible variety planted nearby for cross-pollination. Bees and other insects are the true heroes here, carrying pollen from one tree's flowers to the other, which is what triggers fruit development.
Here’s a quick guide:
- Often Self-Fertile: Most peaches, nectarines, apricots, and many feijoa varieties.
- Often Need a Pollinator: Most apples, pears, plums, and cherries.
Always, always double-check the plant label when you buy your tree. It will tell you if a pollinating partner is required and usually lists which other varieties will do the job.
Ready to plant your own backyard orchard? At Jungle Story, we link you up with New Zealand's best growers, offering a huge selection of fruit trees perfect for any Kiwi garden. Explore our marketplace and find your perfect tree today.