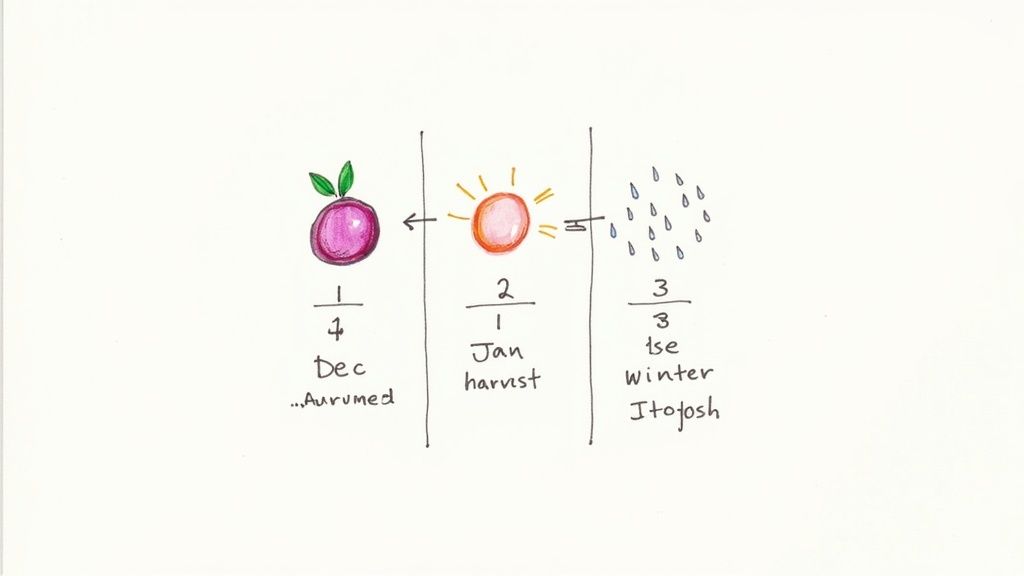
Here in New Zealand, the best time to get your secateurs out for your plum trees is in the late summer, generally from December through to February, right after you’ve finished harvesting. Timing is everything, and pruning in summer is your best defence against Silver Leaf disease, a nasty fungal infection that just loves our damp, cold winters.
Getting your pruning right does more than just sidestep disease; it's the key to encouraging vigorous, healthy growth and, of course, a bigger haul of juicy plums.
Why Bother Pruning Your Plum Trees?
The thought of taking sharp tools to your beloved tree can feel a bit full-on, but for us Kiwi gardeners, it’s one of the most impactful jobs you can do. This isn't just a simple trim. Pruning a plum tree is a calculated craft that shapes its entire future—from its health and the quality of its fruit to how long it will live. It’s less about making it look tidy and more about partnering with the tree's natural growth habits.
At its heart, pruning is pretty straightforward. You're basically telling the tree where to focus its energy. By making smart cuts, you encourage it to put its efforts into growing amazing fruit, not just more leaves and branches.
The Main Goals of Pruning Plums
Here’s what you’re trying to accomplish with each cut:
- Get More Fruit: Plums grow on wood that's between one and three years old. Pruning stimulates the tree to grow fresh new wood, which means you'll have a steady supply of fruit-producing branches for years to come.
- Let the Air and Sun In: A crowded, tangled mess of branches creates a dark, damp home that’s a perfect breeding ground for fungal diseases like Brown Rot and that dreaded Silver Leaf. By thinning out the canopy, you let air circulate and sunlight reach the centre of the tree—a simple but incredibly effective way to keep it healthy.
- Build a Strong Frame: A well-pruned tree has a solid, open structure that can actually hold the weight of all that fruit without branches snapping. This is a big deal for heavy-cropping Kiwi favourites like 'Santa Rosa' and 'Black Doris', which can really load up.
A Proven Kiwi Strategy
This isn't just backyard wisdom; the results are clear on a national scale. Looking back at data from New Zealand's Ministry for Primary Industries, you can see a direct link between better pruning habits and bigger harvests. Back in 1990, the country produced about 800 tonnes of plums. Fast forward to 2020, and that number jumped to over 1,200 tonnes—a massive 50% increase. A huge part of that success comes down to the widespread shift to late summer pruning and smarter disease control. You can discover more about the impact of pruning techniques on local fruit production.
Once you get your head around these core ideas, you’re no longer just hacking at branches. You're actively shaping a healthier tree and setting yourself up for a much more satisfying harvest from your own orchard.
Getting the Right Tools for the Job
Before you even think about making that first cut, it’s worth taking a moment to get your gear sorted. Using the right tools is genuinely one of the biggest factors in keeping your plum tree healthy and productive.
Sharp, clean tools make for clean cuts that heal over quickly, which is exactly what you want to minimise the risk of disease. On the flip side, blunt or rusty blades can tear at the wood, leaving ragged wounds that are an open invitation for nasty infections.
Your core toolkit for pruning plum trees here in NZ doesn’t have to be massive or expensive, but every item should be good quality and, most importantly, well looked after.
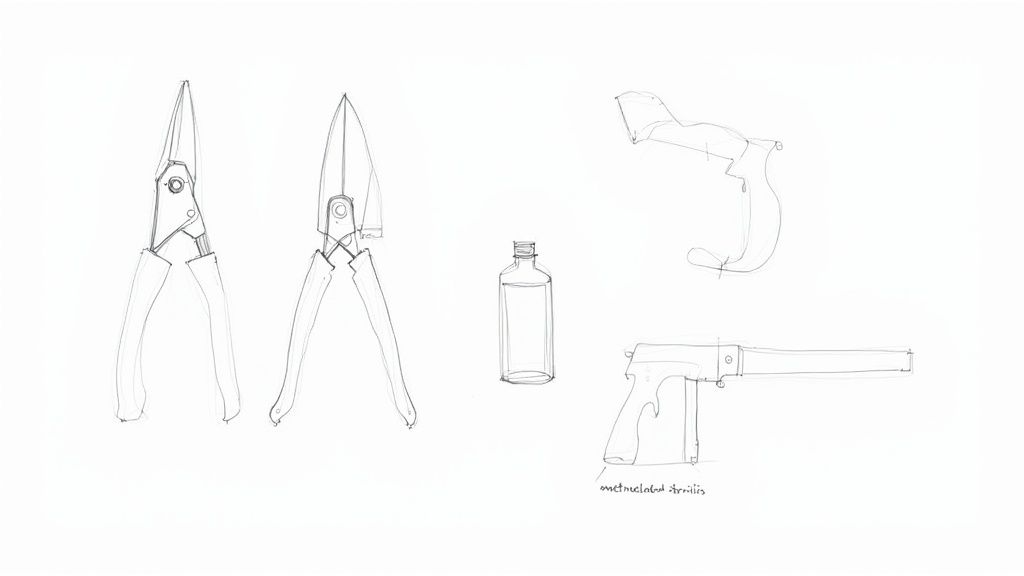
The Essential Trio
Here's a quick look at the non-negotiables you should have in your shed.
| Your Essential Plum Tree Pruning Toolkit | ||
|---|---|---|
| Tool | Best For | Key Feature |
| Secateurs (Hand Pruners) | Small branches up to thumb-thickness. | Bypass style – two curved blades sweep past each other for a clean, scissor-like cut. |
| Loppers | Branches up to 5 cm thick that are out of easy reach. | Long handles provide extra leverage and reach into the centre of the tree. |
| Pruning Saw | Branches too thick for loppers. | Cuts on the pull stroke, giving you better control and preventing the blade from jamming. |
These three tools will handle just about any pruning task your plum tree throws at you. For the bigger stuff, make sure you have some reliable handsaws on hand before you get started.
Keep Them Clean, Keep Them Sharp
This part is just as crucial as the tools themselves. It’s incredibly easy to spread diseases like Silver Leaf from one tree to another—or even from one branch to another—on dirty blades. It’s such a simple step, but it makes a world of difference.
After every pruning session, give your tools a proper clean. If you're cutting away diseased wood, it's absolutely vital to sterilise your blades between every single cut to stop the infection from spreading.
Sterilising is easy. Just wipe down your blades with a cloth soaked in methylated spirits or a diluted bleach solution (one part bleach to ten parts water). This tiny bit of effort is one of the most effective ways to protect your plum trees and ensure all your hard work pays off.
The Best Time to Prune Plums in New Zealand
When it comes to pruning plum trees here in New Zealand, timing is everything. It's not like many other fruit trees you might tackle in the middle of winter. With plums, getting the timing wrong can lead to a world of heartache and expose your tree to one of the nastiest diseases in our climate.
The golden rule for pruning plum trees in NZ is simple: get it done in late summer, sometime between December and February. The sweet spot is right after you’ve picked that last, glorious plum for the season. Following this one piece of advice is your single greatest defence against the destructive fungal disease, Silver Leaf.
Silver Leaf (Chondrostereum purpureum) absolutely loves the cool, damp conditions of a classic New Zealand winter. Its airborne spores are at their peak during these months (June to August), just waiting to find a way into your tree through fresh pruning wounds. Once it's in, you'll see that tell-tale silver sheen on the leaves, and it can eventually kill off entire branches.
Why Late Summer is the Ideal Pruning Window
Pruning in late summer just makes sense because you're working with the tree's natural rhythm. Your plum tree is still full of life and growing vigorously, which means it can heal those pruning cuts incredibly fast. It basically callouses over the wounds before any nasty fungal spores get a chance to move in.
On top of that, the number of airborne Silver Leaf spores plummets in the warm, dry air of summer compared to the wet winter months. It's a simple, proactive strategy that drastically reduces your tree’s risk of infection and it's what the pros do all over the country.
A 2018 survey by the New Zealand Horticulture Export Authority found that 78% of commercial growers in the North Island and 65% in the South Island prune immediately after harvest. It's a cornerstone of disease management in our unique climate. You can learn more about professional fruit tree pruning guides to see how the experts approach it.
Are There Any Exceptions to the Summer Rule?
While summer is definitely the main event for pruning, there are a couple of situations where you might need to make a cut at other times of the year.
Key Takeaway: Always aim to complete the main structural pruning of your plum tree after harvesting in summer. Winter pruning should be strictly limited to avoid creating entry points for Silver Leaf disease during its peak season.
-
Newly Planted Trees: If you’ve just planted a young tree, it can benefit from an initial shaping cut right when it goes in the ground, which might be winter. This first snip is just to establish a good basic framework and encourage low branching. The risk is lower because the tree is small and the cuts are few, but it’s still there.
-
Urgent Damage Removal: If a branch snaps in a winter storm, it's far better to make a clean cut to remove the damaged part straight away than to leave a ragged, torn wound. If you have to do this, it’s a good idea to apply a pruning sealant to any large cuts for an extra layer of protection.
By lining up your pruning schedule with the seasons, you give your plum tree the best possible chance to heal up, fight off disease, and pour all its energy into producing another bumper crop next year.
How to Make the Right Pruning Cuts
Okay, you’ve got your tools cleaned and sharpened, so let's get down to business. Making the right cut is part technique, part instinct, but the goal is always the same: create an open, healthy tree that gets plenty of light and air. For most plum varieties we grow here in New Zealand, that means aiming for a classic open-centre or 'vase' shape.
https://www.youtube.com/embed/YLYolsTjmKs
This shape is your best defence against a dense, tangled mess of branches, which is basically an open invitation for the fungal diseases that thrive in our humid climate. But before you even think about shaping, the first job is always a good clean-up.
Starting with the Three Ds
Before you get carried away with the grand vision, start with the absolute basics. This is the easiest part of the job and it gives your tree an immediate health boost. You're looking for the ‘three Ds’:
- Dead Wood: This stuff is pretty obvious. It's often darker, brittle, and has no green cambium under the bark. It’ll often snap right off.
- Diseased Wood: Keep an eye out for cankers (which look like sunken, discoloured patches of bark), odd-looking growths, or the dreaded silvery sheen of Silver Leaf. When you find it, you need to be ruthless—cut back well into healthy wood, at least 15 cm below any sign of trouble.
- Damaged Wood: This is anything that's broken, cracked from a southerly blast, or rubbing against another branch. Branches that rub create wounds, and those wounds are perfect entry points for nasty diseases.
Getting rid of all this stuff first clears the decks. It gives you a much better look at the tree’s real structure and what you’ve got to work with.
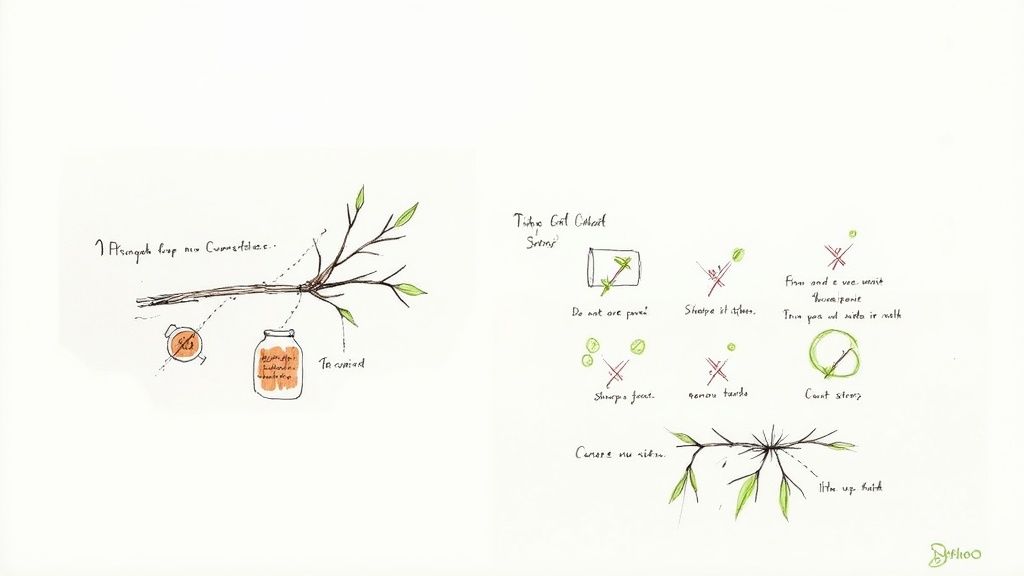
Thinning Cuts Versus Heading Cuts
With the junk wood gone, you'll be using two main types of cuts. Knowing when to use each one is what separates a good prune from a hack-job.
A thinning cut is when you remove an entire branch right back to where it started—either on a bigger limb or the main trunk. This is your go-to move for opening up the tree, improving airflow, and letting that precious sunlight hit the fruit. Think of it as decluttering.
A heading cut, on the other hand, is when you just shorten a branch, usually cutting it back to just above an outward-facing bud. This wakes up the buds just below the cut and makes the tree grow bushier. You won’t use this as much on a mature plum, but it’s absolutely essential for training a young tree.
Expert Tip: Every time you make a cut, angle it at about 45 degrees, sloping away from the bud. This is a small detail with a big payoff—it lets rainwater run right off instead of pooling and causing rot. Aim to make your cut about 5-6 mm above the bud.
Directing Growth and Managing Shoots
Every single cut you make sends a message to the tree about where to grow next season. By cutting back to a bud that faces outwards, you’re literally telling the tree to send its energy and new growth outwards, away from the crowded centre. It’s how you constantly reinforce that open vase shape we’re after.
As you work, you’ll also spot a couple of rogue growths that need to go:
- Water Shoots: These are the super vigorous, straight-up vertical shoots that rocket out of the main branches. They look impressive, but they’re all leaf and no fruit, just sucking up energy and clogging the canopy. Take them right out with a thinning cut.
- Suckers: These are the shoots popping up from the rootstock right at the base of the trunk. They've got to go. They're stealing nutrients from the part of the tree you actually want to grow.
This disciplined approach works wonders on the vigorous Japanese plum varieties popular across New Zealand. Cultivars like 'Santa Rosa' and 'Burbank' have been orchard mainstays for ages, and their energetic growth absolutely demands an annual prune to keep them productive. In fact, orchards that stick to a late summer pruning schedule have seen fruit size increase by 25-30% and disease reduce by 15%.
If you'd like a broader look at these techniques, have a read of our complete guide on how to prune fruit trees. Nailing these foundational cuts is your ticket to a healthier tree and a much bigger harvest come summer.
Shaping Young Plum Trees for Future Success
The first few years of a plum tree’s life are your golden opportunity to build a strong, productive structure that will pay you back for decades. Get this early shaping right, and you'll make all future maintenance easier while setting the stage for heavy, healthy harvests.
Our goal here is the classic open-centre or 'vase' shape, which is absolutely perfect for plums in the New Zealand climate. This open framework lets sunlight and air right into the canopy, which is the secret to ripening fruit properly and dodging pesky fungal diseases. We're aiming to select three or four strong, well-spaced branches to become the main 'scaffold' of the tree—the foundation of its adult shape.
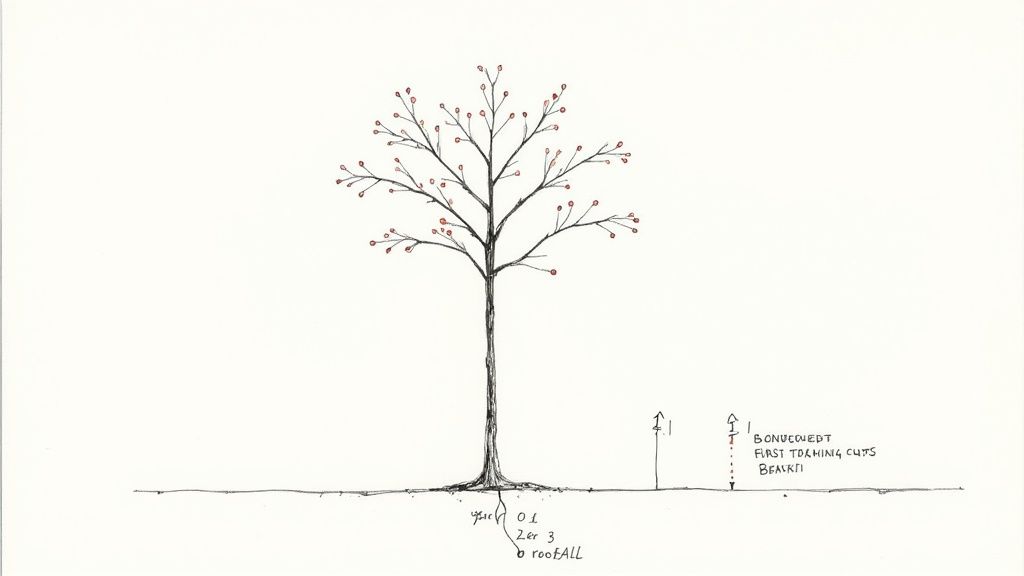
The First Cut at Planting Time
Believe it or not, your shaping work begins the moment that new tree goes in the ground. For a bare-root tree planted in winter, this first cut is non-negotiable. It feels wrong, I know, to chop a brand-new tree, but it's probably the most important cut you'll ever make.
Pick a height where you want the main branches to start—around waist-high is a good rule of thumb for easy harvesting down the track. You'll want to cut the main central stem (the leader) down to this height, making your slice just above a healthy-looking bud. This is a heading cut, and it forces the tree to send out new shoots from the lower buds. This is how you create that low, branching structure needed for a strong vase shape.
This first chop at planting time is all about sending a clear message to the tree. You're telling it to forget about shooting for the sky and instead focus its energy on building a strong, multi-branched framework closer to the ground.
Pruning in Years Two and Three
Come the first summer after planting, your little tree will have pushed out several new shoots. Now it’s time to start refining the structure and picking your winners.
- Select Your Leaders: Choose three, or at most four, of the strongest shoots that are spaced evenly around the trunk. Ideally, you want ones growing outwards at a nice, wide angle (around 45 degrees) from the main stem. These are your future primary limbs.
- Remove the Competition: Prune off all the other shoots, cutting them back cleanly to the main trunk. Get rid of any weak, spindly growth and anything growing downwards or straight into the centre of the tree.
- Encourage Branching: Now, shorten your chosen scaffold branches by about one-third of their new growth. Make each cut just above an outward-facing bud. This encourages them to branch out and continue building that open, vase-like form.
You’ll continue this follow-up pruning in the second and third summers. Each year, just shorten the new growth on your main scaffold limbs by about one-third and snip out any competing branches that are growing inwards or crossing over another.
This simple, proactive approach is the key. It prevents weak branch unions and a crowded canopy, paving the way for a beautifully shaped, easy-to-manage tree. For more tips on getting started, our overview of growing fruit trees in NZ is a great resource.
Post-Pruning Care and Common Mistakes to Avoid
Once you’ve made that final cut, your job isn't quite done. What you do immediately after pruning is what sets your plum tree up for a speedy recovery and helps it fight off disease.
First things first: a thorough clean-up is non-negotiable. Leaving pruned branches and fallen leaves lying around is like putting out a welcome mat for pests and fungal spores. Rake it all up and get rid of it. If any of the wood looked diseased, make sure it doesn't end up in your compost heap.
With the area clean, a bit of nourishment will go a long way. Pruning is a shock to the system for a tree, and a good feed helps it bounce back and fuel all that new growth you want to see. A layer of quality mulch and a balanced fertiliser will help top up its energy reserves.
To Seal or Not to Seal Pruning Cuts
Here in New Zealand, the debate over using pruning paint or sealant is a big one, mostly because of the constant threat of Silver Leaf disease. For small cuts, say less than the width of your thumb, it’s best to leave them be. The tree is perfectly capable of sealing those wounds on its own.
But for any larger cuts—anything over a few centimetres across—applying a sealant is just a sensible precaution. A pruning wound is an open door for airborne fungal spores, and slapping on a sealant right after you cut creates a crucial physical barrier while the tree gets on with healing.
For Kiwi gardeners, using a wound dressing on major cuts is pretty standard practice. It's an extra line of defence against Silver Leaf, which can be absolutely devastating to plum trees in our climate. Get it on straight away to give those spores no time to settle in.
Costly Mistakes Kiwi Gardeners Often Make
Knowing what not to do is just as important as mastering the right techniques. If you can avoid these common slip-ups, you’ll save yourself a lot of headaches and keep your plum tree happy and productive.
1. Over-Pruning in One Go
It’s easy to get a bit carried away, but hacking off more than one-third of the canopy at once can send the tree into shock. This usually triggers a panic response, leading to a flush of weak, unproductive growth like water shoots.
2. Leaving Stubs Behind
When you take off a branch, always cut it cleanly back to the main limb or trunk, just outside the raised 'branch collar'. Leaving a little stub sticking out stops the wound from healing over properly, creating the perfect entry point for rot and disease.
3. Ignoring Your Tools
Using blunt secateurs or saws doesn’t cut wood; it crushes and tears it. These ragged wounds heal slowly and are far more likely to get infected. Just as bad is forgetting to sterilise your blades between cuts—it’s one of the fastest ways to spread diseases around your garden.
Putting in a little effort after you prune ensures all your hard work pays off. A bit of attention now means a healthier tree and a much better harvest come summer. For another way to boost your tree's health, discover the benefits of using a seaweed fertilizer in NZ.
Your Plum Pruning Questions, Answered
Even the most seasoned Kiwi gardener can have a moment of hesitation, secateurs in hand, standing in front of a plum tree. It's perfectly normal. To help you make that first cut with confidence, we've put together clear answers to the most common questions we hear.
Can I Prune My Plum Tree in a New Zealand Winter?
This is a big one, and the short answer is no. We strongly advise against pruning plum trees during our classic Kiwi winter, from about June through to August.
When you prune in the cool, damp weather, the open wounds are a prime target for Silver Leaf disease. This nasty fungal infection loves those conditions and can cause serious, sometimes fatal, damage to your tree. The safest window for pruning plum trees in NZ is late summer (December to February), just after you've enjoyed the last of your harvest. The tree is still full of life and can heal cuts quickly, and the risk of airborne spores is much, much lower.
How Do I Know Which Branches to Cut?
It can look like a tangled mess, but there's a simple starting point that makes the job far less intimidating. Just focus on the three 'Ds':
- Dead Wood: Anything that's obviously dead, brittle, and lifeless. It snaps easily.
- Diseased Wood: Look for cankers, weird growths, or that tell-tale silvery sheen of Silver Leaf. Always cut well back into healthy, green wood.
- Damaged Wood: Any branches that are cracked, broken from a storm, or rubbing hard against another branch.
Once you've cleared out the obvious problem branches, you can step back and look at the tree's overall shape. Now, you can thin out any branches growing inwards towards the tree's centre. Your goal is that classic open, vase-like shape which lets sunlight and air get to all the fruit. A good rule of thumb? Never remove more than one-third of the tree's branches in one go.
Don't overthink it. If a branch is dead, diseased, damaged, or crossing another, it's got to go. Get those out of the way first. It suddenly becomes much clearer what needs to be done to shape the tree properly.
Do I Need to Paint Over Pruning Cuts?
For small cuts—say, anything thinner than your thumb—you can leave them be. The tree can handle healing those smaller wounds all on its own without any help.
However, if you've had to make a larger cut, applying a pruning sealant is a smart move in our New Zealand climate. It acts as a physical barrier, stopping Silver Leaf spores from getting into the fresh wound while the tree heals itself. If you're going to use a sealant, slap it on immediately after you make the cut for the best protection.
At Jungle Story, we're passionate about helping Kiwi gardeners succeed. From robust fruit trees to essential garden tools and expert advice, we have everything you need to cultivate your dream garden. Explore our extensive collection and start your growing journey today at https://junglestory.co.nz.