Step into the fascinating world of finger limes, an exotic fruit that's earned the fitting nickname 'citrus caviar'. This Australian native is quickly finding its way into Kiwi gardens and kitchens, shifting from a niche bush food to a sought-after ingredient for high-end restaurants and adventurous home cooks alike.
Why Kiwi Gardeners Are Buzzing About Finger Limes
Picture a citrus fruit that, instead of squirting juice, releases a stream of tiny, pearl-like vesicles. That's the magic of the finger lime (Citrus australasica). These little pearls pop in your mouth with a burst of tangy flavour, a world away from your standard lime.
Inside, the fruit is packed with these individual juice sacs that look just like glistening caviar. It's this incredible texture and zesty pop that has chefs and foodies across New Zealand so excited.
The ‘citrus caviar’ adds a touch of class to seafood, gives salads a zesty lift, and puts a surprising twist on desserts and cocktails. But their appeal isn't just limited to the kitchen.
For Kiwi gardeners, finger limes are an exciting, rewarding challenge. They're slow-growing, thorny shrubs or small trees that bring a uniquely exotic feel to any garden. The promise of a gourmet harvest makes them a standout choice for anyone wanting to grow something truly different.
From Aussie Bush Food to Gourmet Staple
Long valued by Aboriginal communities in Australia as a source of food and hydration, the finger lime has only recently made its debut on the global culinary stage. Here in New Zealand, its rise over the last decade has been hard to miss. While they hail from the subtropical rainforests of Australia, they're now being cultivated more and more across Aotearoa.
This botanical drawing perfectly captures the fruit's distinctive, elongated shape and the jewel-like pearls packed inside its thin skin.

This unique internal structure is what sets finger limes apart from every other citrus, and it's easy to see how they got their 'citrus caviar' name.
The real magic of the finger lime lies in its texture. Each tiny pearl is a self-contained explosion of tart, citrusy flavour, completely transforming the way we think about and use limes in our food.
Most of our local production is happening in the warmer parts of the North Island, especially in places like Northland and Auckland. It's mostly a small-scale affair, with passionate growers focusing on top-quality fruit for farmers' markets, specialty food stores, and restaurants rather than mass production.
If you're keen to learn more about this prickly business, you can discover more insights about finger lime cultivation in NZ. Consider this guide your starting point for getting these incredible plants thriving right here in New Zealand.
Choosing The Best Finger Lime Variety For Your Garden
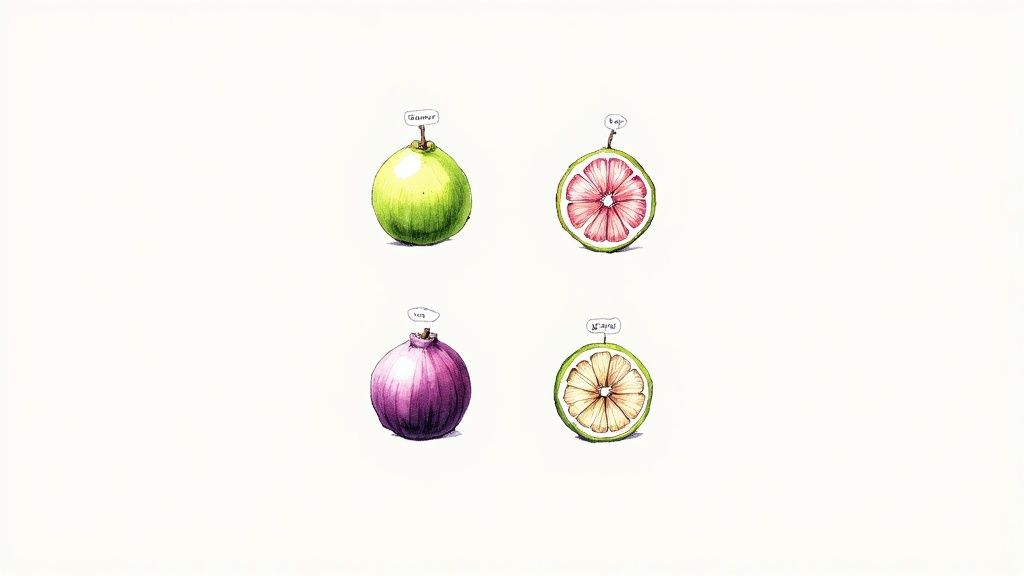
The first step to a brilliant harvest is picking the right plant. It’s a bit like choosing between a Granny Smith and a Royal Gala apple—each finger lime variety brings its own unique colours, flavours, and even growth habits to the table. Think about what you really want from your tree. Are you dreaming of a specific caviar colour for cocktails, or do you need a compact plant for a pot on the deck? Answering that will point you to the perfect match for your Kiwi garden.
The sheer diversity within Citrus australasica is incredible. Skin colours can be anything from a vibrant green or sunny yellow to a deep, moody purple, brown, or almost black. That outer peel is often a clue to the treasure inside: the vesicles, or 'citrus caviar', might be translucent yellow, pale green, or a show-stopping brilliant pink or ruby red.
But it’s not all about looks. Each variety has a distinct flavour profile. Some are intensely tart and zesty, just like a classic lime, while others surprise you with more subtle, herbaceous, or even slightly sweet notes. This amazing variety is exactly what makes growing finger limes in NZ so rewarding for home cooks and gardeners.
Key Varieties Available in New Zealand
While Australia is home to countless cultivars, only a select few have really proven themselves in New Zealand's unique climate. You'll usually find them grafted onto hardy rootstocks like Trifoliata or Flying Dragon. This gives them a huge advantage, helping them grow with more vigour and handle our cooler conditions far better than they would on their own roots.
To help you get started, here’s a quick rundown of what you’ll likely find at local nurseries.
Popular Finger Lime Varieties in New Zealand
Choosing the right cultivar can feel overwhelming, but this table breaks down the most common options available in New Zealand. Use it to match a variety's unique traits to what you're looking for in your garden and in the kitchen.
| Variety Name | Skin Colour | Vesicle ('Caviar') Colour | Flavour Profile | Best Suited For |
|---|---|---|---|---|
| Emerald | Green | Light Green / Yellow | Sharp, classic lime | General purpose, dressings, drinks |
| Crimson Tide | Dark Brown / Black | Deep Red / Pink | Intense, tangy, robust | Cocktails, desserts, visual impact |
| Pink Ice | Green / Brown | Pale Pink | Aromatic, slightly milder | Seafood, salads, elegant garnishes |
| Yellow | Yellow | Clear / Pale Yellow | Bright, zesty, clean | Fish dishes, sparkling water, sorbet |
Remember, this is just a starting point. The exact colour and flavour can vary slightly depending on the growing season and climate, but it’s a great guide for what to expect.
Growth Habits and Plant Form
It’s also worth thinking about the physical shape of the plant. Some finger limes grow as bushy shrubs, which can get quite dense and thorny—making harvest time a bit of a prickly affair. Others are sold as 'standard' trees, where they're grafted onto a single tall trunk.
A standard tree has a more open, weeping shape. Not only does this look elegant in a garden or pot, but it also makes picking the fruit much easier, as the limes hang down where you can actually reach them.
If you’re planning on growing in a pot, a standard tree is almost always the best choice. For a better idea of what might suit your garden and your plate, it’s worth browsing the full range of finger lime plants available in New Zealand to find your perfect citrus caviar experience.
Finding The Perfect Spot For Your Finger Lime Tree
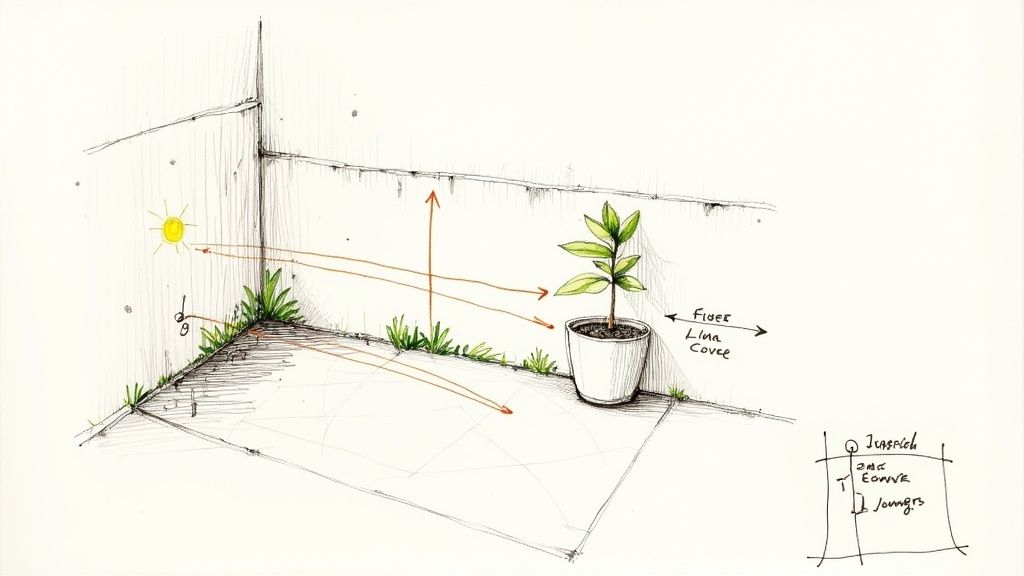
Getting a finger lime to thrive in your garden starts way before you even think about digging a hole. It all comes down to location, location, location. These subtropical gems from Australia have a few non-negotiables, and picking the right spot from the get-go is probably the single most important thing you can do for a healthy, fruit-bearing tree.
Your finger lime is looking for a home that’s warm, sunny, and protected from the worst of the weather. In their native rainforests, they grow as understorey plants, so they love at least six hours of direct sun but appreciate a bit of dappled shade in the harsh late afternoon. A north-facing spot up against a wall or a fence is often the perfect real estate—the structure provides shelter from wind and radiates heat back onto the plant, creating a cosy microclimate.
And that protection is crucial. Those blustery Kiwi winds can easily shred the delicate leaves and knock off young fruit. But the real enemy? Frost. Young trees are especially vulnerable, so a sheltered spot isn't just a nice-to-have; it's essential for getting them established.
Understanding Your Climate And Frost Protection
New Zealand's weather is a mixed bag, from the balmy north to the chilly south, and this has a huge impact on how you should grow your finger lime. You’ll need to tailor your approach to your local conditions.
-
Northern Regions (Northland, Auckland, Bay of Plenty): You guys have it easiest. You can pretty much plant straight into the garden in a sunny, sheltered position. Frosts are usually light, but it's still a good idea to cover young trees with frost cloth for their first couple of winters just to be safe.
-
Central and Lower North Island (Waikato, Taranaki, Wellington): Frost becomes a much bigger deal here. You need to hunt down the warmest, most protected nook in your garden—think courtyards or right up against a north-facing house wall. Planting in a large pot is a brilliant strategy, as it lets you shuffle the tree into a more sheltered spot over winter.
-
South Island (Nelson, Marlborough, Canterbury, Otago): Unless you're in a very mild coastal spot, growing in a big pot or container is the way to go. This gives you the option to bring the plant inside—into a conservatory, greenhouse, or onto a covered deck—through the coldest months from June to August, avoiding frost damage entirely.
For those in cooler regions, growing in a pot isn't a compromise; it's just smart gardening. If you're going the container route, check out our guide on the top plants for outdoor pots in NZ for more ideas.
Preparing The Perfect Soil Foundation
Once you've scouted the location, it's time to look down. Finger limes aren't terribly fussy about soil, but they have one deal-breaker: excellent drainage. They absolutely hate having 'wet feet', and waterlogged soil is a one-way ticket to root rot.
The dream soil for a finger lime is a fertile, well-draining loam that’s slightly acidic, with a pH somewhere between 5.5 and 6.5. This setup lets the roots breathe and soak up nutrients without drowning.
If you’re working with heavy clay, common in many parts of New Zealand, you’ll need to put in some prep work. Dig a hole at least twice as wide and deep as the plant's root ball. Then, mix in heaps of compost and something gritty like pumice or coarse sand to open up the soil structure and improve drainage. Planting on a raised mound can also be a game-changer, lifting the roots out of the soggy winter ground.
If you're growing in a container, make your life easy and use a premium potting mix designed for citrus. These mixes are perfectly balanced for aeration and nutrients, giving your finger limes NZ plant the best possible head start.
How to Plant and Care for a Thriving Tree
Once you’ve found the perfect spot, it’s time for the exciting part—getting your finger lime into the ground. A bit of care and attention at this stage really sets your tree up for a healthy, productive life, giving it a chance to establish strong roots before its first Kiwi winter rolls around.
The best time to plant is easily spring or early summer, which in New Zealand means anywhere from September through to December. This window gives the soil time to warm up and lets your tree settle in with plenty of mild weather to get growing. Try to avoid planting in the peak of a hot, dry summer or when the ground is cold and soggy in winter.
Step-by-Step Planting Guide
Planting a finger lime is pretty straightforward, whether it’s going into a garden bed or a large pot. The key is to be gentle with the root ball and get the positioning right from the very beginning.
-
Dig the Right-Sized Hole: Your hole needs to be at least twice as wide and just as deep as the container the plant came in. All that loosened soil around the edges gives the new roots plenty of room to spread out.
-
Position the Plant: Carefully ease the tree out of its nursery pot, trying not to disturb the roots too much. Pop it in the centre of the hole. Here’s the crucial bit: make sure the top of the root ball is level with the surrounding soil. Planting it too deep is a recipe for collar rot down the track.
-
Backfill and Settle: Fill the hole back in with your amended soil. Gently firm it down around the roots to get rid of any big air pockets, but don’t stomp on it and compact the soil.
-
Water Thoroughly: Give your newly planted tree a really good, slow soaking. This helps settle the soil properly around the roots and provides a much-needed drink as it transitions to its new home.
-
Stake for Support: Young trees, especially the grafted ones, will thank you for being staked. It gives them stability against our classic Kiwi winds, stops them from developing a lean, and protects that all-important graft union from snapping.
Essential Watering and Feeding Routines
Consistent care in the first couple of years is what makes all the difference. Your watering and feeding habits will directly influence how well your tree grows, its overall health, and eventually, how much fruit you get.
Finger limes need regular, deep watering, especially when they're young and during the critical flowering and fruiting seasons. The aim is to keep the soil consistently moist but never waterlogged. A deep soak encourages the roots to grow downwards, which makes the tree far more resilient during dry spells.
Once they're established, they're surprisingly drought-tolerant, but a good watering during a hot, dry summer will definitely lead to a better harvest.
A good way to think about it is like filling a reservoir. A quick sprinkle only wets the surface, but a long, slow soak fills the soil's 'reservoir' deep down where the roots need it most. This is what helps the plant get through the dry patches.
To fuel all that growth, a regular feeding schedule is essential. Grab a balanced citrus fertiliser and follow the instructions on the packet. A great routine for finger limes in NZ is to feed every three months, starting in spring (September) and continuing through to early autumn (March). Hold off on fertilising during the coldest winter months when the tree is dormant.
Pruning for Shape and Harvest
Unlike many other fruit trees in NZ, finger limes don’t need a major annual haircut. In fact, getting too scissor-happy can actually reduce your harvest, as the fruit grows on last season's wood. The main goals are just to maintain a decent shape and let some air in.
A light trim after you've harvested the fruit in autumn is usually all it takes. Just focus on these simple tasks:
- Remove the Three Ds: Snip out any wood that is Dead, Damaged, or Diseased.
- Improve Airflow: Thin out any dense, crossing branches in the centre of the tree. This lets light and air circulate, which is a great way to prevent fungal problems.
- Manage Rootstock Shoots: On grafted trees, keep a sharp eye out for any shoots growing from below the graft union (that noticeable bump on the lower trunk). These need to be removed immediately, as they'll just sap energy from the main tree.
By following these simple planting and care steps, you're giving your finger lime everything it needs to become a healthy, productive, and truly rewarding addition to your garden.
Harvesting And Using Your Homegrown Citrus Caviar

After months of patiently tending to your tree, this is the moment every gardener lives for—the harvest. But unlike a lemon or an orange, a finger lime plays its cards close to its chest. It doesn't give you big, obvious signals that it's ready, so knowing when to pick is a subtle art that comes down to sight, touch, and a bit of gardener's intuition.
The main harvest season for finger limes in NZ generally kicks off in autumn and runs into early winter, usually between April and June. Of course, this can shift a bit depending on where you are in the country and which variety you're growing. The fruit develops on last season's growth, so don't be disheartened if your first few harvests are on the small side. Production will definitely ramp up as the tree gets older.
Knowing When To Pick Your Fruit
The secret to a perfect harvest is learning to spot a few small but important changes in the fruit. A ripe finger lime will feel plump and full to the touch, and you’ll notice the skin’s colour deepening. A green variety, for example, might take on a slightly yellowish hue, while the darker types will become richer and more uniform in colour.
But the most reliable indicator? That’s what I call the 'snap test'. Gently take a fruit in your hand and give it a slight twist. If it's ready, it will detach from the stem with a clean, satisfying snap. If you find yourself having to tug or pull hard, it needs a little more time on the tree. Simple as that.
Simple Steps For A Successful Harvest
Gathering your citrus caviar is pretty straightforward, but you’ll want to respect those notorious thorns. It’s always a good idea to pop on a pair of gloves to save your hands from getting scratched up.
- Look and Feel: Start by scanning the tree for fruit that looks plump and has reached its full, mature colour.
- The Gentle Twist: Pick a promising-looking lime and give it that gentle twist. If it comes away easily, it's ripe and ready.
- Work Methodically: Make your way around the tree, testing fruits as you go. They rarely ripen all at once, so plan on harvesting over several weeks.
Once they’re picked, your finger limes store incredibly well. They'll last for several weeks just chilling in the fridge. Thanks to their unique structure, they also freeze beautifully. You can pop them in the freezer whole or squeeze out the vesicles into small containers, ready for a burst of citrus flavour whenever you need it.
Unleashing Your Culinary Creativity
Now for the really fun part. Using your homegrown citrus caviar is an experience in itself. Just slice the fruit in half lengthwise and give it a gentle squeeze—out spill the tiny, jewel-like pearls, ready to completely transform whatever you’re making.
The real magic of finger limes is their texture. It’s the way the little vesicles pop in your mouth, releasing that zesty juice, that adds a sensory dimension you just can't get from a regular lime. It elevates both the flavour and the look of your food.
The culinary uses are practically endless. That bright, acidic pop is a perfect match for seafood—think fresh oysters, grilled fish, or prawns. They also add a surprising and delightful crunch to salads, salsas, and even your classic guacamole.
But don't stop there. Finger lime caviar looks spectacular in drinks, adding a visual flair and a burst of flavour to cocktails, mocktails, or a simple glass of sparkling water. For dessert, try scattering the pearls over a cheesecake, pavlova, or a creamy pannacotta for a zesty, gourmet finish that is guaranteed to impress your guests.
Solving Common Pest And Disease Issues In NZ
Even though finger limes are pretty tough cookies, they aren't completely bulletproof against the pests and diseases that bother other citrus trees in New Zealand gardens. But don't worry—most issues are small-fry and easily sorted with a bit of forward-thinking.
A healthy, well-fed, and properly watered tree is always your best line of defence. Stressed plants are like an open invitation for pests, so keeping your tree happy is step one.
The usual suspects you might run into are sap-sucking insects. These tiny critters feed on the plant's juices, which weakens it over time. They often leave behind a sticky mess called honeydew, which then encourages sooty mould to grow. While this black fungus isn't directly harmful, it can coat the leaves and block sunlight, slowing down photosynthesis.
Just keeping a regular eye on your tree means you can spot these problems before they turn into a full-blown infestation. Make a habit of checking under the leaves and along the stems—that's where these pests love to hang out.
Identifying And Managing Common Pests
In the Kiwi garden, a few familiar faces are likely to pop up on your finger lime. Knowing who’s who is the first step to getting rid of them without reaching for the heavy-duty chemicals.
-
Aphids: You’ll find these small, soft-bodied insects clustered on new shoots and flower buds. They suck the sap and can make new growth look twisted and sad. Often, a good, strong blast of water from the hose is all it takes to send them packing.
-
Scale Insects: These look like tiny, hard bumps stuck to the stems and leaves. They’re masters of disguise and have a waxy shell that protects them from predators and some sprays.
-
Citrus Leafminer: This one’s easy to spot. It leaves silvery, squiggly trails inside the leaves as the larvae tunnel through. While it looks a bit messy, the damage is mostly cosmetic and rarely causes real harm to a mature tree.
For most of these sap-suckers, a horticultural oil spray applied in late winter or early spring works a treat. The oil smothers the pests and their eggs. Just be sure to follow the packet instructions and avoid spraying in the full heat of the day, as this can burn the leaves.
A healthy garden is a living ecosystem. By encouraging beneficial insects like ladybirds and lacewings—which absolutely love to munch on aphids and scale—you can create a natural, self-sustaining pest control system right in your own backyard.
Preventing Fungal Diseases
Besides pests, the main disease to watch for with finger limes in NZ is root rot, specifically Phytophthora. This nasty soil-borne fungus absolutely loves heavy, waterlogged conditions and can be fatal for citrus trees.
The number one prevention method is to ensure your tree is planted in soil with excellent drainage from day one. If you're dealing with heavy clay soil, it’s vital to amend it with plenty of compost and grit or, even better, plant your finger lime on a raised mound. For trees in pots, always use a top-quality potting mix and make sure the container has heaps of drainage holes.
For a smarter, more environmentally friendly way to handle garden intruders, it's worth looking into the principles of Integrated Pest Management (IPM). This approach is all about long-term prevention, using a mix of techniques to keep pests under control with minimal impact. By staying vigilant and creating a healthy environment, you’ll keep your finger lime tree thriving and trouble-free for years to come.
Common Finger Lime Questions
Even with the best guide, a few questions always crop up when you’re getting your hands dirty with a new plant. Here are some of the most common queries we get from Kiwi gardeners, with straightforward answers to help you grow your finger limes with confidence.
How long will it take for my finger lime to fruit?
This is where a little patience pays off. If you've bought a grafted finger lime from a good nursery here in New Zealand, you can expect to see your first small harvest within 2-3 years of planting it out.
From there, the harvests will get bigger and better as the tree settles in, usually hitting its stride around the five-year mark. A word of caution: growing from seed isn't the way to go if you're after fruit. It can take more than a decade to mature, and there's no guarantee the fruit will be any good.
Can I grow a finger lime in a pot if I live somewhere cold?
You absolutely can! In fact, growing in a large pot is the perfect solution for gardeners in cooler spots like Canterbury, Otago, or other inland areas prone to heavy frosts. It gives you total control.
When the winter chill sets in from June to August, you can simply move the pot to a sheltered spot—think a covered deck, a greenhouse, or even indoors next to a sunny window. This simple move protects your plant from those damaging frosts that can easily knock back a young tree.
The secret to success with potted finger limes comes down to two things: a big enough pot (15-20 litres is a good start) and a quality potting mix made for citrus. Drainage is non-negotiable, so make sure your pot has plenty of holes.
Why are my finger lime's leaves turning yellow?
Yellowing leaves (chlorosis) usually signal one of two things: a nutrient issue or a drainage problem. For citrus in New Zealand, the most common culprits are a lack of nitrogen or magnesium.
But before you reach for the fertiliser, check the soil. Finger limes hate having "wet feet," and waterlogged roots can't take up nutrients, which also leads to yellow leaves. Have a dig a few centimetres down; if the soil is soggy instead of just damp, drainage is likely your problem.
If the drainage seems fine, it's probably a nutrition issue.
- Nitrogen deficiency: This usually shows up as a uniform yellowing across the whole leaf, especially on the older ones.
- Magnesium deficiency: You'll often see a distinct inverted 'V' shape of yellow at the tip of the leaf, while the base stays green.
To sort it out, feed your tree with a balanced citrus fertiliser during the growing seasons (spring and summer). If you suspect a magnesium problem, a dose of Epsom salts (magnesium sulphate) dissolved in water is a great quick fix to bring back that lovely deep green colour.
Ready to grow your own citrus caviar? At Jungle Story, we put you in touch with trusted Kiwi growers who have a fantastic range of healthy, grafted finger lime trees. Take a look through our collection to find the perfect variety for your garden. Discover your ideal plant at https://junglestory.co.nz.