If you've ever grated a knob of ginger into a stir-fry, you know its fiery, pungent kick. But what if I told you there's another ginger out there, one that's less about heat and more about a delicate, zesty crunch?
Meet myoga ginger. Forget the knobbly root – with myoga, the prize is the unopened flower bud that pushes up from the soil. It's a true gourmet ingredient, offering a sophisticated, refreshing zing that's miles away from common ginger.
What on Earth Is Myoga Ginger?
Think of myoga as ginger’s elegant, milder cousin. Its flavour is a beautiful dance of zesty ginger notes with the crisp, clean taste of a spring onion and a subtle herbaceous brightness. It doesn't punch; it elevates.
This unique profile is why it's so prized in Japanese cooking. You'll find it shaved paper-thin over noodle bowls, tossed into salads, or dropped into miso soup at the last minute for an aromatic lift and a delightful, crisp texture.
To get a clearer picture, it helps to see how it stacks up against the ginger we all know.
Myoga Ginger vs Common Ginger at a Glance
This quick comparison should help you immediately tell the difference between myoga and the common ginger (Zingiber officinale) you're used to seeing at the supermarket.
| Feature | Myoga Ginger (Zingiber mioga) | Common Ginger (Zingiber officinale) |
|---|---|---|
| Part Eaten | Unopened flower buds and young shoots | Fleshy rhizome (root) |
| Flavour Profile | Mild, zesty, herbaceous, with a hint of onion | Pungent, spicy, peppery, and sharp |
| Texture | Crisp, tender, and juicy | Fibrous and firm |
| Main Use | Garnish, salads, pickles, soups | Cooking base, spice, tea, baking |
| Appearance | Small, teardrop-shaped buds with a pinkish hue | Knobbly, beige-skinned root |
As you can see, they’re worlds apart in how they're used in the kitchen. Myoga is a finishing touch, while common ginger is often a foundational flavour.
A Perfect Fit for Kiwi Gardens
For gardeners here in New Zealand, myoga is a real gem. It's not just a foodie's dream; its lush, tropical-looking leaves make a stunning groundcover for those tricky, shady spots where nothing else seems to thrive.
- Hardy & Low-Effort: It’s a tough perennial that absolutely loves New Zealand's temperate climate, happily settling into shaded, woodland-like conditions.
- Looks and Taste: You get the best of both worlds – gorgeous ornamental foliage and a unique, gourmet harvest from its flower buds.
- A Rare Flavour: Growing your own myoga gives you access to a flavour you’ll struggle to find at the local supermarket, letting you bring authentic Japanese culinary flair right into your home.
Interestingly, myoga isn't exactly new to Aotearoa. It was actually developed here as an export crop for the Japanese market, where demand for its edible buds is always high. Research from the New Zealand Agronomy Society back in the early 90s explored the best ways to grow it in our local conditions, especially in shady areas.
Myoga is one of those special plants that beautifully bridges the gap between the garden and the kitchen. It asks for little more than a shady corner and, in return, gives you a flavour that’s both exotic and refreshingly crisp.
If you're curious about expanding your palate further, exploring these essential spices from around the world is a great next step. It helps put unique flavours like myoga into a global context and shows how a single ingredient can completely transform a dish.
Bringing Myoga into Your Kitchen
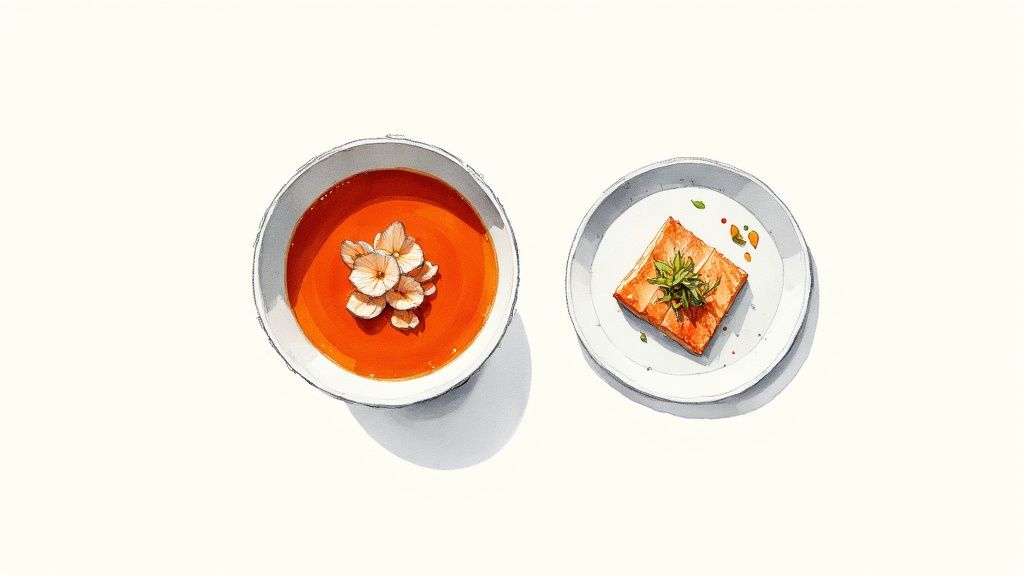
Once you’ve harvested those beautiful myoga buds, the real fun begins. Their flavour is unlike anything else – zesty, herbaceous, with a subtle spicy kick that’s a world away from standard ginger. The best way to think of myoga is not as a background spice, but as a final flourish, a bright, crisp exclamation mark on your favourite dishes.
A huge part of its magic is the texture. Sliced thinly, it has a fantastic crunch that doesn't go soggy, adding a refreshing contrast to everything from soft noodles to grilled fish. Unlocking that incredible aroma, however, is all about the prep.
Preparing Myoga for Maximum Flavour
The classic Japanese method is to slice the buds paper-thin, either into fine slivers or delicate rings. This maximises the surface area and lets that distinctive floral, zesty scent really come alive.
- Rinse and Trim: Give the buds a gentle wash under cool water and just trim off the very base if it looks a bit tired.
- Slice Finely: This is the most important step. Grab your sharpest knife and slice the myoga as thinly as you possibly can.
- Soak Briefly (Optional): For an extra-crisp texture, you can pop the slices into iced water for a few minutes. Just make sure to pat them completely dry afterwards.
The real secret to myoga ginger is how it brightens up a dish without overpowering it. Unlike its fiery cousin, myoga brings a subtle freshness, making it an incredibly versatile garnish.
This delicate yet refreshing profile has made myoga a prized ingredient in high-end restaurant kitchens. Its cultivation in New Zealand supports this specialised demand, with research into its potential as an export crop dating back to the early 1990s. As you can see from its journey to NZ, the combination of its culinary and ornamental appeal continues to drive its popularity.
Traditional Japanese Uses
In Japan, myoga is a beloved yakumi—a condiment or garnish used to add a final burst of flavour and texture. It really shines when used raw or added right at the very end of cooking.
- In Soups: A few slivers of raw myoga dropped into a steaming bowl of miso soup just before serving adds an incredible aroma and a crisp bite.
- With Noodles: It’s a classic partner for cold soba or somen noodles, often mixed into the dipping sauce for a perfectly refreshing summer meal.
- On Grilled Dishes: Sprinkled over rich, grilled fish, chicken, or tofu, thinly sliced myoga cuts through the fat with its clean, sharp flavour.
Modern Kiwi Kitchen Ideas
While its roots are firmly in Japan, myoga feels right at home in the New Zealand kitchen, especially during our late summer and autumn harvest. Its zesty character is a brilliant match for our local ingredients and laid-back cooking style.
- Summer Barbecues: Try shredding myoga finely over grilled lamb chops or steak. It adds a surprising, herbaceous lift that’s just fantastic.
- Kiwi-Style Slaw: Toss slivers of myoga into a simple coleslaw with crisp apple and fennel for an extra layer of crunch and zing.
- Homemade Pickles: Pickling myoga buds is a wonderful way to preserve your harvest. They become wonderfully crisp and tangy—perfect for adding to salads, sandwiches, or your next cheese platter.
How to Grow Myoga Ginger in New Zealand
Growing myoga ginger in New Zealand is an absolute joy, mainly because our temperate climate is a perfect match for this unique plant. Unlike most things in the vege patch that demand full sun, myoga actually prefers the shade. This makes it a fantastic solution for those tricky, darker spots in the garden where nothing else seems to thrive.
The key to success is to think like a myoga plant and recreate its happy place: a cool, damp, sheltered spot that feels a bit like a forest floor.
Choosing the Perfect Location
Getting the location right from the start is the most important step you'll take. Myoga is a true shade-lover and direct sun will scorch its beautiful, lush leaves. Just picture the understorey of a native forest, and you're on the right track.
- Shade is Essential: You're looking for a spot that gets dappled sunlight at most. Think about planting it under the canopy of deciduous trees, along the cooler, south-facing side of your house, or in any sheltered corner that stays out of the direct sun.
- Moisture is a Must: Myoga loves soil that stays consistently moist, but it hates having wet feet. Find a part of the garden that naturally holds a bit of dampness without turning into a bog.
- Shelter from Wind: Those tall, elegant leaves can get battered by strong winds. A spot behind a hedge, a fence, or other larger plants will give it the protection it needs.
This love for shade and moisture makes myoga ginger an amazing choice for underplanting. It quickly forms a dense, attractive groundcover that naturally suppresses weeds and adds a touch of the tropics to your garden. For more ideas on filling out those green spaces, check out our guide on growing tropical plants in NZ.
Preparing the Soil for Planting
Myoga isn't super fussy, but it truly excels in soil that's packed with organic matter. A well-prepped garden bed gives the rhizomes the perfect playground to spread out and produce a bumper crop of those delicious buds. Your mission is to create a soil that’s loose, fertile, and drains well.
Start by clearing the area of any weeds and rocks. Then, work in generous amounts of compost, well-rotted manure, or leaf mould. This does more than just add nutrients; it improves the soil structure, helping it hold onto moisture while letting any excess water drain away freely.
The perfect soil for myoga should feel like a damp sponge – moist but never sodden. Nailing this balance is the secret to preventing rhizome rot while ensuring the plants have enough water during their big growth spurt.
Soil pH is another piece of the puzzle. Myoga is happiest in slightly acidic to neutral soil, somewhere in the 6.0 to 7.0 range. Getting this right can make a big difference. If you want to dive deeper, this guide is great for mastering soil pH in your garden.
Planting Your Myoga Rhizomes
The ideal time to get your myoga in the ground here in New Zealand is during its dormant phase in late winter or early spring—think July through to September. Planting then gives the rhizomes a chance to settle in and get established before the big spring rush of growth.
Here’s a simple play-by-play for planting:
- Get Good Rhizomes: Start with firm, healthy-looking rhizomes. You can usually find them at specialised nurseries or trusted online suppliers like Jungle Story.
- Plant Shallow: Dig trenches or individual holes about 5-8 cm deep. No need to go too far down.
- Position Them Right: Lay the rhizomes flat in the trench. If you can see any little buds or 'eyes', make sure they're pointing upwards.
- Give Them Space: They need room to spread out. Space the rhizomes about 20-30 cm apart. It might look a bit sparse at first, but they’ll fill in the gaps to form a thick clump surprisingly fast.
- Tuck Them In: Gently cover the rhizomes with your prepared soil, pat it down lightly, and give the whole area a good watering to settle everything in.
Watering and Feeding Routines
Consistent moisture is the name of the game, especially through the main growing season in spring and summer. You never want the soil to dry out completely. During hot, dry spells, you might need to water every few days to keep that perfect damp-sponge feel.
A native of the humid, shaded mountain slopes of Japan, China, and Korea, myoga ginger has adapted incredibly well to New Zealand. It's impressively frost-tolerant down to -16°C, which allows it to flourish in many of our climate zones far better than its ginger cousins. This hardiness has even helped it become a successful export crop, especially for the high-end Japanese market.
When it comes to feeding, a little boost at the start of the season goes a long way. As new shoots begin to appear in early spring, apply a balanced organic fertiliser. A top-dressing of fresh compost or a splash of a seaweed-based liquid feed will give your plants all the encouragement they need for a healthy, productive season.
Caring for Your Myoga Patch Through the Seasons
Once your myoga ginger has settled into its new home, looking after it is less of a chore and more of a simple, satisfying rhythm that flows with the New Zealand seasons. This is a wonderfully resilient perennial that asks for very little.
A few timely jobs throughout the year are all it takes to keep your patch healthy, productive, and looking lush for years on end. Think of it as a gentle conversation with your plants – knowing what they need each season is the key to a bumper harvest of those delicious buds.
Spring and Summer Care
As the soil finally warms up in spring (September to November), you'll spot the first vibrant green shoots of myoga pushing their way up. This is the plant's big growth phase, so your job is to provide consistent moisture and a bit of food to fuel the journey.
Come summer (December to February), the foliage will be at its peak, creating a dense, almost tropical-looking canopy. It’s crucial to keep the soil consistently damp now, as the plant is busy storing up energy for the flower buds that will appear towards the end of the season.
Here’s how to keep things humming along during these active months:
- Mulch, Mulch, Mulch: In late spring, lay down a thick blanket of organic mulch – leaf mould, pea straw, or good compost are perfect. This is your best friend for keeping moisture in the soil, weeds out, and the roots cool.
- Water Well: Don't let the soil dry out, especially during those scorching, dry spells. A deep, thorough watering once or twice a week is far better than a quick daily sprinkle.
- Give it a Feed: A light feed in early spring gives the plants a brilliant kick-start. A balanced organic fertiliser is ideal. If you want a great option, you can learn more about seaweed fertilizer in NZ; its gentle, nutrient-rich formula is perfect for myoga.
Your main job on the pest front is keeping an eye out for slugs and snails. They absolutely love the damp, shady conditions myoga thrives in. Check for them regularly, especially after a bit of rain, and use your preferred method to deal with them, whether that’s beer traps or pet-safe slug bait.
Autumn and Winter Wind-Down
As we head into autumn (March to May), the real magic begins. This is when you'll be harvesting those tasty myoga buds. You'll notice the plant's energy has shifted from growing leaves to producing these little culinary treasures.
Later in autumn, as the weather cools right down, the leaves will naturally start to yellow and die back. Don't panic! This is just a normal part of its lifecycle as it prepares to go dormant for the winter (June to August).
- Tidy Up the Foliage: Once the leaves have completely yellowed and flopped over, you can chop them back to ground level. This tidies up the patch and removes hiding spots for pests over winter.
- Add a Winter Blanket: If you’re in a colder part of New Zealand, adding a fresh layer of mulch over the dormant patch is a great way to give the rhizomes some extra frost protection.
- Plan Ahead: Winter is the perfect time to think about next year. If your myoga patch is getting a bit crowded, you can mark out the area you want to divide in late winter.
Propagating Your Myoga Patch
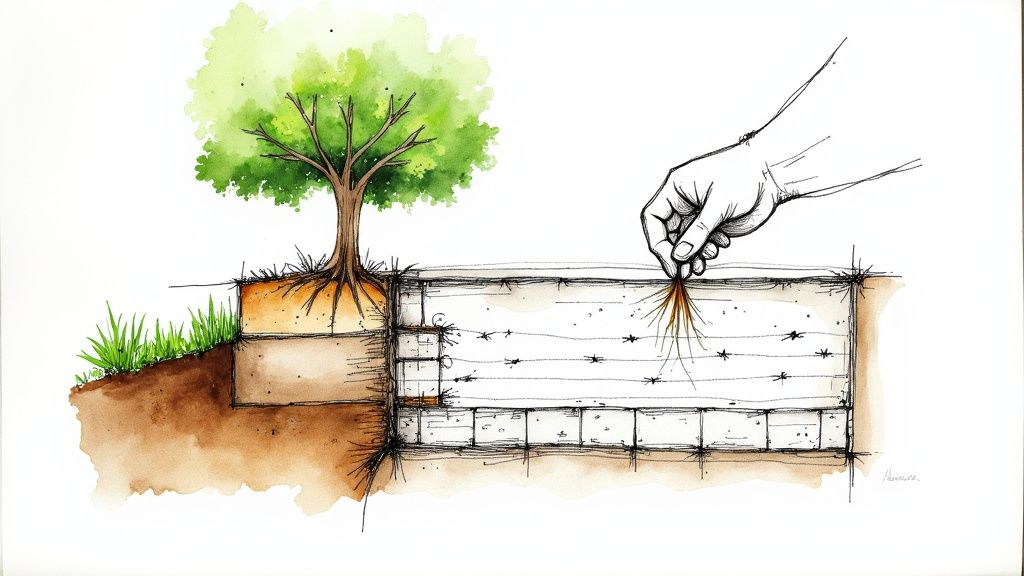
One of the best things about myoga is just how easy it is to make more of it. You propagate it by simply dividing the rhizomes. The ideal time to do this in New Zealand is late winter (July and August), while the plant is still dormant and just before the new spring growth kicks off.
- Lift a Clump: Gently use a garden fork to lift a section of rhizomes from the edge of your patch. Try not to spear them!
- Divide and Conquer: You can usually just break the rhizomes apart with your hands. If it’s a bit tough, a clean, sharp knife will do the trick. Just make sure each new piece has at least a few 'eyes' or growth buds on it.
- Replant Straight Away: Pop your new divisions straight into another shady, moist spot, following the same planting steps you did originally.
This simple job not only gives you more plants to expand your own patch or share with friends, but it also helps keep the original clump healthy and productive.
Harvesting and Storing Your Myoga Buds
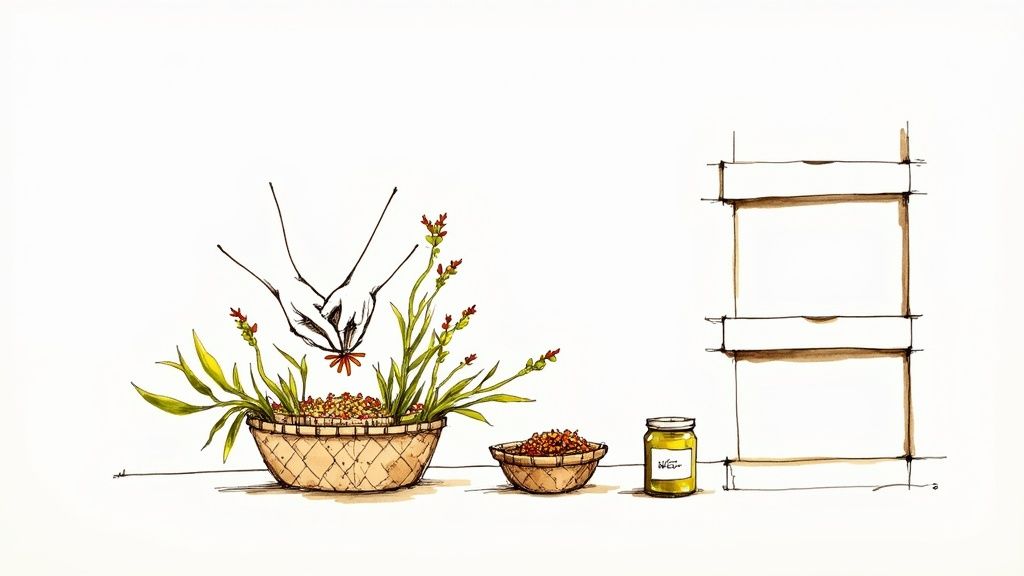
After months of patient care, the most exciting part arrives: the harvest. This is your chance to collect those unique, zesty flower buds. It's less of a chore and more like a treasure hunt, searching for the plump little buds that hold all that incredible flavour.
Timing is the key. You need to catch them just before the delicate flower inside decides to make an appearance.
Here in New Zealand, the main harvest window for myoga opens in late summer and runs through autumn, usually from about February until April. The plants will tell you when they're ready. You just need to get down low, gently part the foliage near the base of the stems, and have a look.
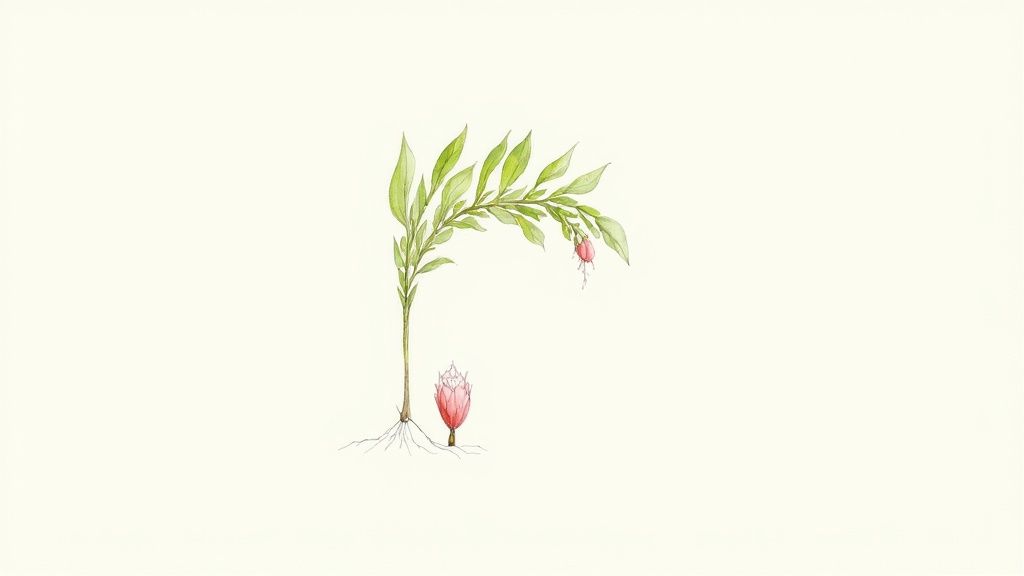
What you're searching for are small, teardrop-shaped buds poking up through the soil and mulch. They should be firm, compact, and a lovely pale pinkish-white. Think of them as tiny jewels hiding just under the surface.
The Gentle Art of Picking Myoga
Once you’ve spotted the perfect bud, picking it is incredibly easy and satisfying. The goal is simple: remove the bud without disturbing the rhizomes underground. All it takes is a gentle touch.
You've got a couple of easy options:
- The Snap Method: Firmly grasp the bud right at its base where it emerges from the soil and give it a quick, sideways snap. It should break off cleanly with a satisfying little crunch.
- The Cut Method: If you'd rather be a bit tidier, use your fingers to clear away a little soil from the base and snip it off with a sharp knife or a pair of secateurs.
Work your way through the patch, taking only the buds that are ready. It's much better to harvest a little bit, often. This encourages the plant to keep sending up new buds throughout the season. Remember to check your patch every few days, because once the flower emerges, the bud is past its culinary best.
The real charm of harvesting myoga is its simplicity. No special tools are needed—just a keen eye and a gentle hand. It's a truly rewarding way to connect directly with the unique flavours growing in your own garden.
Keeping Your Harvest Fresh
Myoga buds are at their absolute best when they're fresh, delivering that crisp texture and zesty aroma we love. But with a few simple tricks, you can easily make them last longer in the kitchen.
Short-Term Storage (Up to a week):
To keep them crisp in the fridge for about a week, wrap the unwashed buds in a slightly damp paper towel. Pop the bundle into a sealed container or a zip-lock bag and store it in your vegetable crisper. This keeps them hydrated without turning them soggy.
Long-Term Preservation (Months):
Pickling is the classic way to preserve myoga, and it’s surprisingly simple. All you need is a basic brine of rice vinegar, a touch of sugar, and a pinch of salt. Briefly blanch the buds, pack them into a sterilised jar, and pour the cooled pickling liquid over them. They’ll be ready to eat in a few days and will keep in the fridge for months, perfect for adding a tangy, crunchy kick to salads and meals all year round.
Where to Find Myoga in New Zealand
Keen to get your hands on this unique ingredient? Whether you're a gardener itching to start your own patch or a foodie on the hunt for fresh buds, sourcing myoga in New Zealand is getting easier. You just need to know where to look.
The journey starts with what you’re after. If you’re planning to grow it, you'll be searching for healthy rhizomes. If it’s tonight’s dinner you’re thinking about, then it's the fresh flower buds you need.
For the Gardener Sourcing Rhizomes
To get your myoga patch off to a flying start, finding a good, reliable supplier is everything. You're looking for rhizomes that are firm, healthy, and just waiting to spring to life.
- Specialised Nurseries: Your best bet is often nurseries that focus on edible or rare plants. They'll typically have myoga rhizomes available during the dormant planting season, which is late winter and early spring.
- Online Plant Marketplaces: This is often the easiest route. Here at Jungle Story, we take pride in connecting Kiwi gardeners with trusted sellers who offer top-quality myoga ginger rhizomes, so you know you're getting a healthy start.
- Community Swaps: Never underestimate the power of your local gardening community! Fellow plant lovers are often more than happy to share a few divisions from their own thriving clumps.
Getting plants delivered to your door has become a game-changer for many of us. For a few more pointers, check out our guide on how to safely buy plants online in NZ – it’s packed with helpful advice.
When your rhizomes arrive, give them a good look over. You want to see plump, firm pieces with obvious 'eyes' or growth buds. Steer clear of any that look shrivelled, feel soft, or show signs of mould, as they probably won't take off.
For the Foodie Hunting Fresh Buds
If cooking is your primary mission, finding fresh myoga buds is all about timing. It's a seasonal treat, harvested in late summer and autumn, so that's your window of opportunity.
From around February to April, keep your eyes peeled at local farmers' markets. The stalls that specialise in interesting or Asian greens are a great place to start. You’ll also have good luck at the larger Asian grocery stores and specialty food shops in cities like Auckland, Wellington, and Christchurch.
Because it’s still a bit of a niche ingredient, availability can be hit-or-miss. Don't be shy—it always pays to ask your local grocer if they can get some in for you.
Common Questions About Myoga Ginger
Even with a plant as straightforward as myoga, a few questions always seem to pop up. Whether you're trying to figure out a little quirk in your garden patch or just wondering how to best use your harvest, we've got you covered. Here are some of the most common queries from Kiwi gardeners, with simple, practical answers.
Is Myoga Ginger Invasive in New Zealand Gardens?
Not at all. While myoga ginger definitely spreads via its underground rhizomes to form a lovely, dense clump, it's not what you'd call invasive. Its growth is pretty polite and contained, nothing like the garden thugs such as running bamboo or mint.
Myoga is quite particular about its home, preferring shady, damp spots, so it’s highly unlikely to make a run for it and escape into the wild. In fact, its spreading habit is one of its best features. It makes a fantastic, lush groundcover for those tricky, shaded parts of the garden where other things struggle. If it does get a bit bigger than you’d like, just divide the patch every few years – it’s an easy job that keeps the plant healthy and productive.
Can I Grow Myoga Ginger in a Pot?
Absolutely! Myoga takes to container growing brilliantly. It’s a perfect solution if you’re short on space, have a patio garden, or just want to keep its spread completely under your control. This way, you get to be the boss of its environment.
For the best results, pick a pot that’s wide but not too deep – something around 40-50cm in diameter is ideal. This shape gives the rhizomes plenty of room to creep sideways, which is exactly how they like to grow. Fill it with a quality potting mix with plenty of compost mixed in, and make sure it has good drainage holes to stop the roots from getting waterlogged. Just remember, pots dry out much faster than garden beds, so you'll need to be on top of your watering game, especially during the warmer months.
Growing myoga in a pot is a fantastic way to enjoy its beautiful foliage and unique harvest, even on a small, shady balcony. Consistent watering is really the secret to happy container plants.
When Is the Best Time to Plant Myoga in New Zealand?
The perfect time to get myoga rhizomes in the ground here in New Zealand is during their winter dormancy, so late winter or early spring. Try to aim for a window between July and September.
Planting during this cooler, damper time of year gives the rhizomes a chance to settle in and get established before they burst into growth in spring. This head start allows the plant to build up enough energy over the season to give you a great crop of flower buds the following late summer and autumn. It's best to steer clear of planting in the heat of summer, which can put a lot of stress on the new plants.
What Part of the Myoga Plant Do You Eat?
This is where myoga really differs from the ginger you’re used to buying at the supermarket. The part you eat is the unopened flower bud, which pokes up right out of the soil, usually at the base of the leafy stems. The buds are a beautiful pale pink and white colour, with a crisp, tightly layered texture.
You don’t eat the rhizome (the root) of myoga; all the flavour is packed into those amazing buds. As a bonus, the tender young shoots that pop up in spring are also considered a delicacy in Japan, where they're often treated a bit like asparagus.
Ready to add this unique and easy-care edible to your shady garden spots? At Jungle Story, we connect you with trusted New Zealand sellers offering high-quality myoga rhizomes to get your patch started. Explore our marketplace and find the perfect plants for your garden today at https://junglestory.co.nz.