Think of building a terrarium as creating a tiny, self-contained world in a jar. It’s a bit like being a landscape artist, but on a miniature scale. You're layering specific materials—a drainage base, a filtration layer, and the right soil—to build a thriving, self-sufficient garden for small plants.
Your Guide to Crafting a Miniature Ecosystem
Welcome to the wonderful world of terrariums. For Kiwis looking to bring a slice of Aotearoa's unique natural beauty indoors, there's no better way. This guide is your starting point, walking you through everything you need to know to create a miniature garden that doesn’t just look stunning, but actually flourishes.
Consider this your creative launchpad. Once you grasp the basics, you can design and build a living piece of art that’s completely your own. It's an incredibly rewarding hobby that fits perfectly with the growing Kiwi passion for sustainable, small-space gardening. Before you know it, you'll have a beautiful, low-maintenance feature that’s a real conversation starter.
What Exactly Is a Terrarium?
Before you start grabbing jars and soil, it’s worth understanding what a terrarium really is. It’s so much more than just a plant in a glass container; it's a carefully balanced, miniature ecosystem.
The whole concept was an accidental discovery back in 1827 by a British doctor, Nathaniel Ward. He was trying to protect his delicate ferns from London's smoggy, polluted air. By sealing them in a glass case, he inadvertently created a protected micro-environment where they thrived. This sparked a worldwide fascination with indoor gardening that’s still going strong today. If you're curious, you can find out more about the origins of these miniature worlds and how they became so popular.
You'll generally come across two main styles of terrarium, and your choice will shape the entire project.
- Closed Terrariums: These are sealed worlds, complete with a lid, perfect for plants that love high humidity. The container traps moisture, which then creates its own water cycle. You’ll see condensation form on the glass, which then drips back into the soil to be reabsorbed by the plants. It's pretty clever stuff.
- Open Terrariums: As the name suggests, these have no lid. They’re much better suited for plants that prefer drier conditions and good air circulation, like succulents and cacti. Because they're open to the air, they'll need more frequent watering than their sealed-in cousins.
Deciding between an open or closed terrarium is your first big step. This single choice dictates the container you’ll use, the plants you can grow, and how much hands-on care it will need. Think about your home’s environment and how much time you want to spend on maintenance—that will point you in the right direction.
Sourcing Your Terrarium Supplies in New Zealand
Before you can get your hands dirty building your miniature world, you’ll need to round up your supplies. Think of it like getting all your ingredients ready before you start cooking. The success of your terrarium really comes down to using the right layers to create a healthy, self-sustaining ecosystem. Luckily, finding everything you need across New Zealand is pretty straightforward.
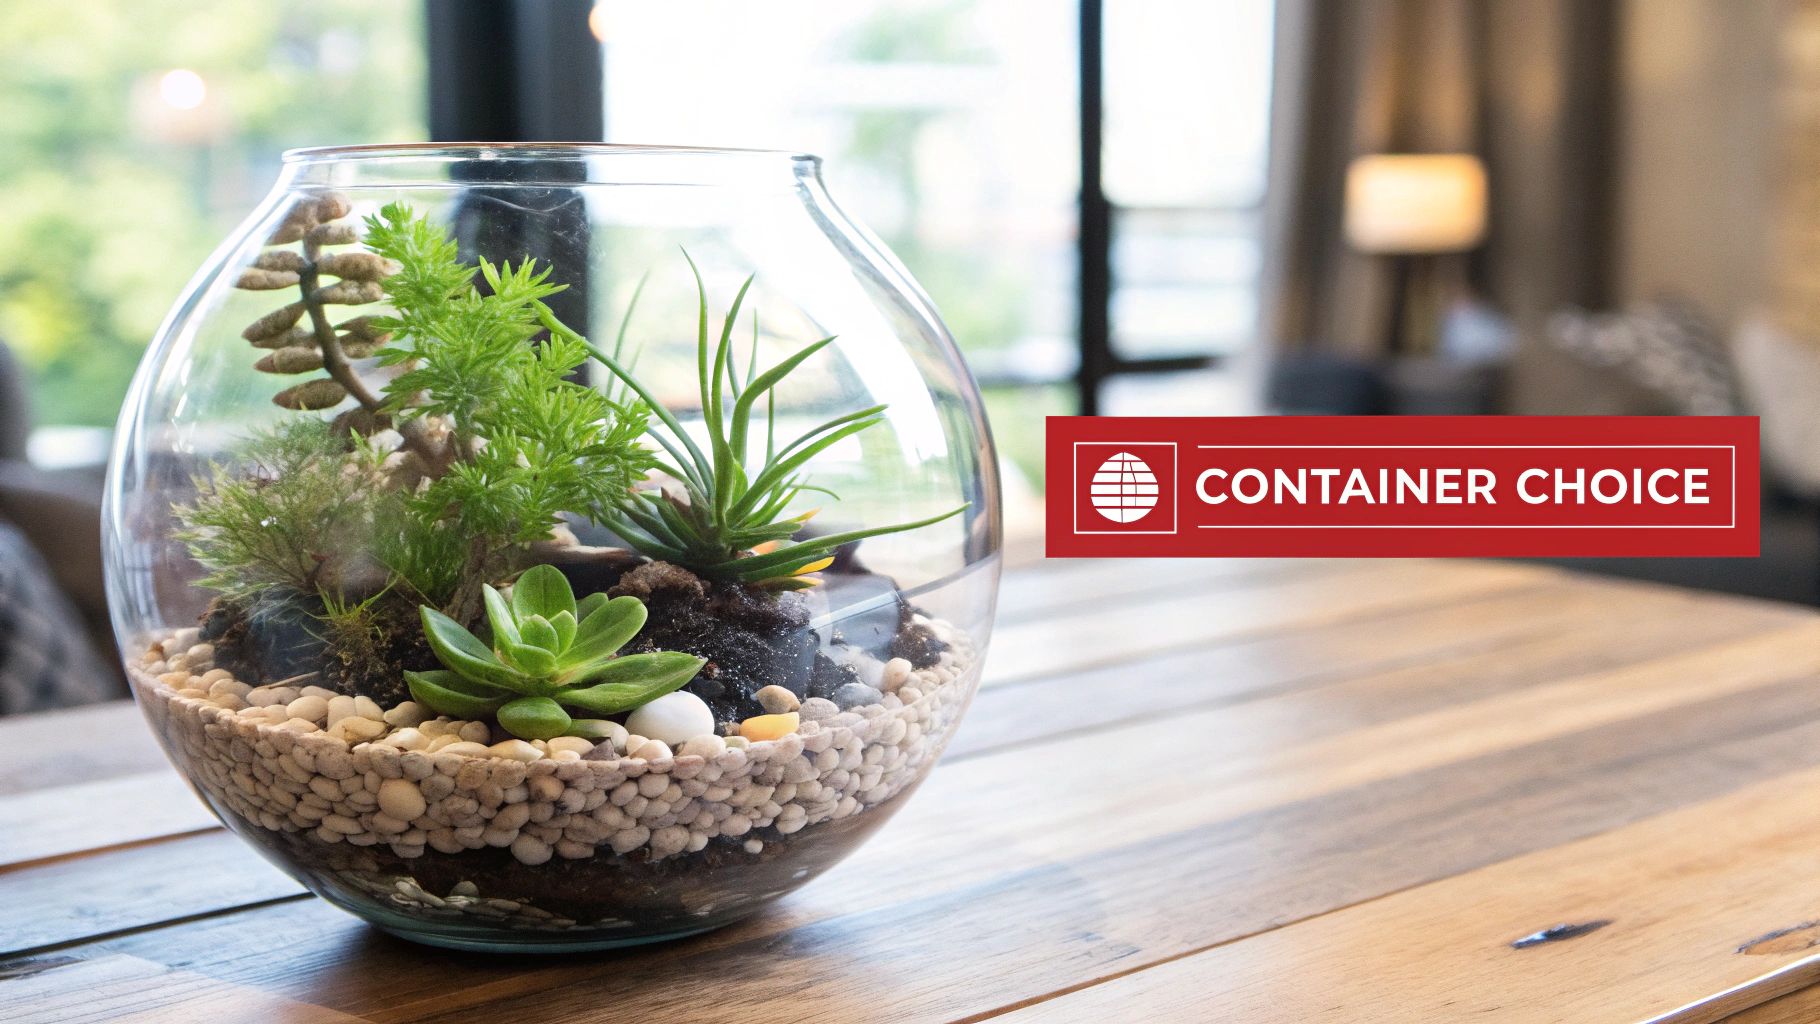
The first, and probably most exciting, part of the process is picking your container. This single piece of glass sets the stage for the entire look and feel of your project. Don't feel you have to buy something brand new; some of the most stunning terrariums are built in upcycled treasures.
- Op-shops and second-hand stores: These are absolute goldmines for unique glass. Keep an eye out for vintage cookie jars, big apothecary bottles, or even classic lolly jars.
- Garden Centres: Places like Mitre 10, Bunnings, and Palmers always have a dedicated selection of terrarium glass, often in sleek, modern designs.
- Specialised Homeware Stores: Don't forget to check shops like Kmart or The Warehouse. They often have affordable glass canisters and jars that are perfect when you're just starting out.
The Essential Terrarium Layers
Every layer you add has a job to do, working together to keep your little plants happy. It’s like building a house from the ground up. If you skip a layer—especially the drainage and filtration—you're setting yourself up for root rot and a very sad-looking terrarium.
Building a terrarium is an exercise in creating balance. Every single layer, from the stones at the bottom to the soil on top, plays a vital role in moisture management, aeration, and nutrient supply. This foundational structure is the key to a miniature garden that doesn't just survive, but truly thrives.
The foundation of any healthy terrarium is good drainage. Since your container doesn't have drainage holes, you need to create a space for extra water to collect so it isn’t suffocating the plant roots.
- Drainage Layer: Start with small stones, pebbles, or pumice at the bottom to form a reservoir for any excess water. You can find bags of decorative pebbles at most garden centres. For a local touch, you could even use finely washed gravel or small stones from a landscape supplier.
- Filtration Layer: Next up is a thin layer of activated charcoal. This is a step many beginners miss, but it's crucial. Charcoal acts as a natural filter, keeping the water clean and absorbing odours, which is especially important in a closed terrarium. You’ll find it at pet shops (in the aquarium section) or garden centres. A layer of sphagnum moss over the charcoal also works wonders to stop the soil from mixing into your drainage layer.
Finding the Right Soil
The last foundational piece is your growing medium. A common mistake is to just scoop up some soil from the garden—it’s usually too heavy and can bring in unwanted pests. What you really need is a sterile, well-draining mix designed for the type of plants you’ve chosen.
For most common terrarium plants, a good-quality indoor potting mix is a great starting point. I like to mix in a bit of perlite or pumice to boost aeration. If you're creating a desertscape with succulents, you’ll want a specific cacti and succulent mix that drains much faster.
You can get more specialised advice for different species from our extensive collection of plant care guides, which can help you create the perfect soil blend. Putting in this prep work ensures you’re not just planting, but cultivating a thriving miniature world.
Choosing the Right Plants for Your NZ Terrarium
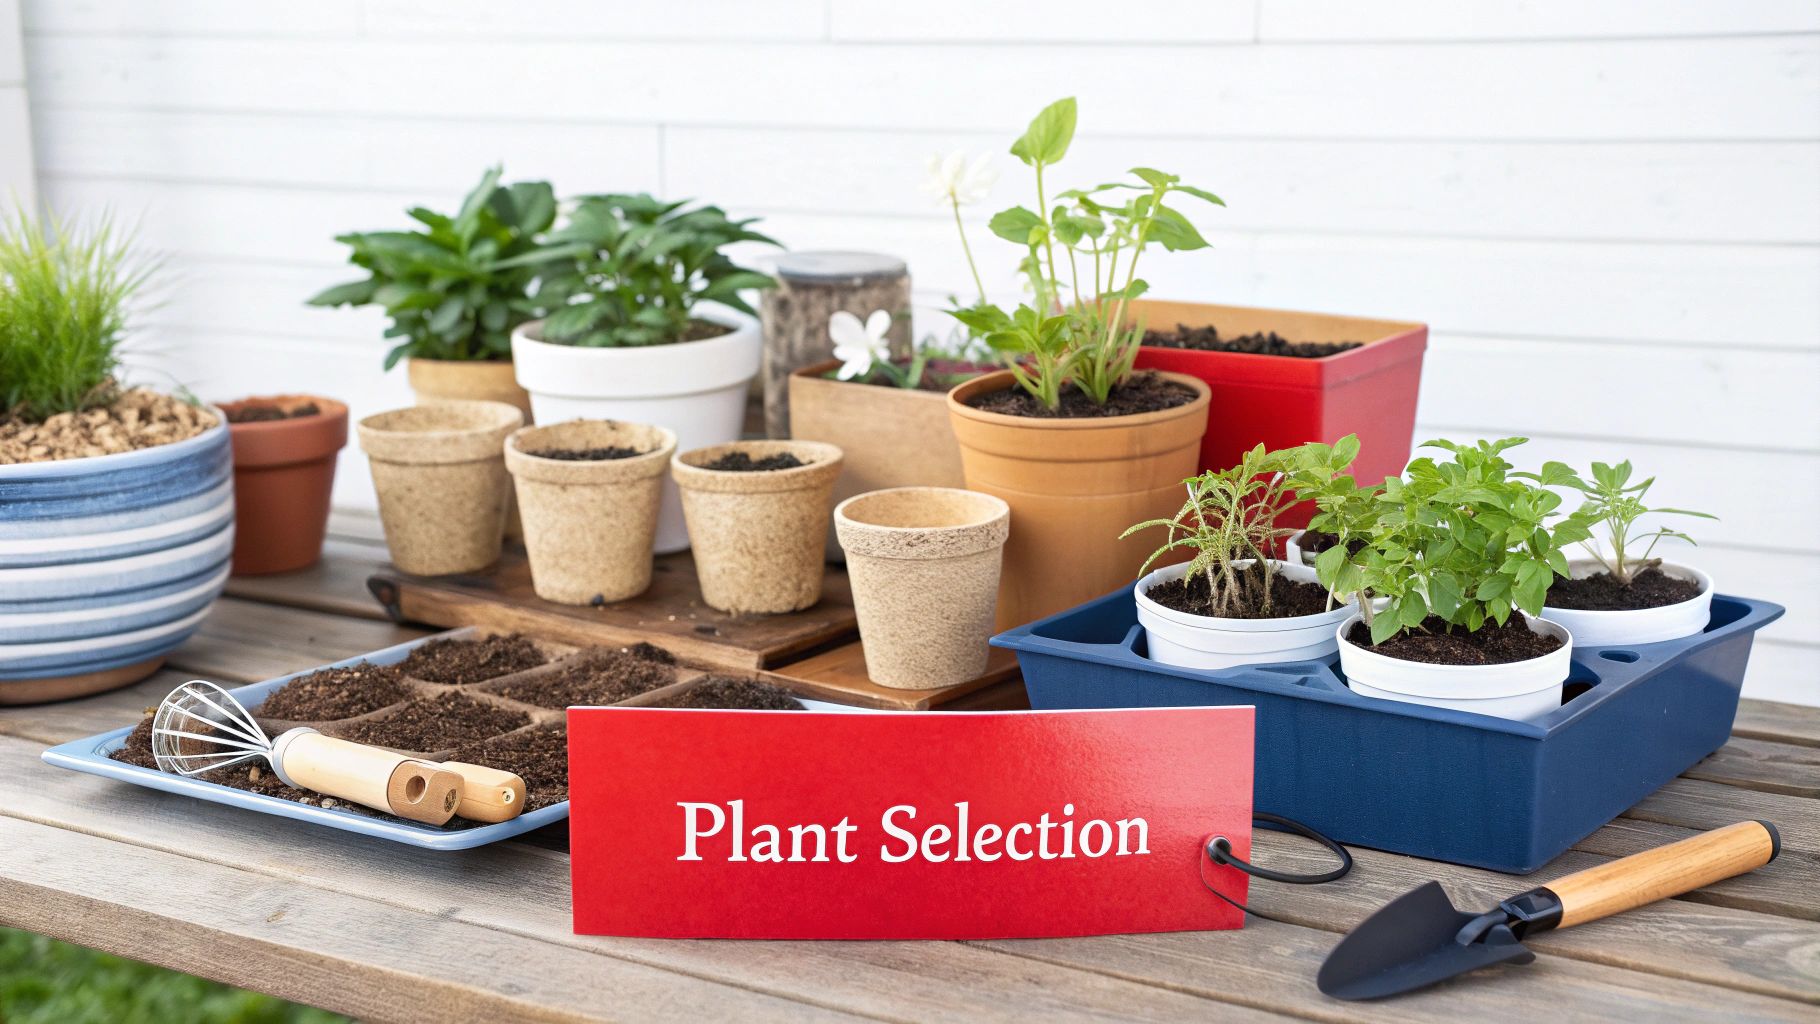 Okay, this is the fun part. Picking the plants is where your miniature landscape really comes alive, turning a simple glass container into a vibrant, living ecosystem. The secret here isn't just about what looks good, but about choosing plants that are happy living together. They need to share similar tastes in light, water, and humidity.
It all comes back to a crucial decision: did you build an open or a closed terrarium? This single choice dictates everything that follows. Matching your plants to their environment is the golden rule for a terrarium that doesn't just survive, but truly thrives.
Plants for High-Humidity Closed Terrariums
A closed terrarium is a little slice of the tropics. It creates a wonderfully humid, self-contained microclimate that’s just perfect for plants native to jungle floors. These species absolutely love moist air and gentle, indirect light. When you're at the garden centre, think small – you want plants that won’t get too big for their boots and outgrow the container in a few months.
Some fantastic options you can find right here in New Zealand include:
- Nerve Plants (Fittonia): Famous for their incredibly striking, colourful veins. Fittonias adore the high humidity a closed system provides. They stay nice and compact and come in beautiful shades of pink, red, and white.
- Polka Dot Plants (Hypoestes): Much like Fittonias, these plants bring a brilliant splash of colour with their speckled leaves. They're happiest in the consistent moisture of a sealed environment.
- Most Ferns: Many small fern varieties are perfect candidates. The delicate Maidenhair fern (Adiantum) is a classic beauty, but be warned – it demands consistently moist soil.
- Baby Tears (Soleirolia soleirolii): This is your secret weapon for creating a lush, dense carpet of green. It’s a brilliant groundcover for filling in the base of your terrarium.
For more inspiration, especially if you're working with a larger container, have a look at our list of great indoor houseplants. Many of them are well-suited to life under glass.
Plants for Low-Humidity Open Terrariums
Open-top terrariums are a completely different ball game. They’re designed for plants that need good airflow and prefer to keep their feet dry. Think about species from arid or breezy climates. Pouring water directly onto these types of plants is often a recipe for rot; they are far more sensitive to being overwatered.
One of the most common mistakes I see is people putting succulents into a sealed, humid terrarium. They will almost certainly rot. Open containers are essential because they allow the soil to dry out properly between waterings—exactly what these plants need.
Consider these options for your open-air design:
- Succulents and Cacti: The undisputed champions of the open terrarium. Varieties like Echeveria, Haworthia, and other small cacti are ideal. They store water in their leaves, look fantastic, and ask for very little in return.
- Air Plants (Tillandsia): These are truly fascinating. Air plants don't need any soil at all. You can just nestle them onto a piece of driftwood or a decorative stone. A light misting once a week or so is all they need to be happy.
A Plant Selection Guide for Your Terrarium
To make it even clearer, here’s a quick comparison of plants that work best for each terrarium style, including a few native gems. This should help you plan your shopping trip to the local garden centre.
Plant Selection Guide for Terrarium Types
| Plant Type | Ideal for Closed Terrarium (High Humidity) | Ideal for Open Terrarium (Low Humidity) | NZ Native Option |
|---|---|---|---|
| Ferns | Maidenhair Fern (Adiantum), Button Fern (Pellaea rotundifolia) | Not recommended | Hooker's Spleenwort (Asplenium hookerianum) |
| Foliage | Fittonia, Polka Dot Plant (Hypoestes), Peperomia | Not recommended | Small-leaf Coprosma varieties |
| Succulents | Not recommended | Echeveria, Haworthia, Sedum | Not typically used |
| Groundcover | Baby Tears (Soleirolia), Mosses | Not recommended | Native mosses, Dwarf Mondo Grass (Ophiopogon) |
| Accent | Small Calathea varieties, Jewel Orchids | Air Plants (Tillandsia), small Cacti | Small native orchids (Pterostylis) - for advanced keepers |
Remember, this is just a starting point. The real joy is in discovering what works for you and your unique creation. Don't be afraid to experiment a little!
Embracing Aotearoa with Native Flora
Why not create something truly unique by building a terrarium with New Zealand native plants? It’s a wonderful way to bring a piece of our local environment indoors. While finding tiny native species can sometimes be a treasure hunt, it’s worth it. Using them means you're creating something genuinely special and distinctly Kiwi.
For a native touch, keep an eye out for the delicate Hooker's Spleenwort (Asplenium hookerianum), a beautiful little fern that adapts well to terrarium life. You can also forage for native mosses and small groundcovers to add an authentic Aotearoa feel. The most important tip? Always double-check the plant's mature size to be sure it won't take over your entire miniature world down the track.
Assembling Your Miniature Garden Masterpiece
With your container and supplies ready to go, we get to the best bit: bringing your terrarium to life. This is where a pile of glass, dirt, and plants transforms into a living, breathing piece of art. Think of it less like following a strict recipe and more like sculpting a tiny world.
The foundation is everything. Nailing these first layers isn't just about making it look good; it's the secret to creating a healthy, self-sustaining ecosystem that stops your plants from getting waterlogged.
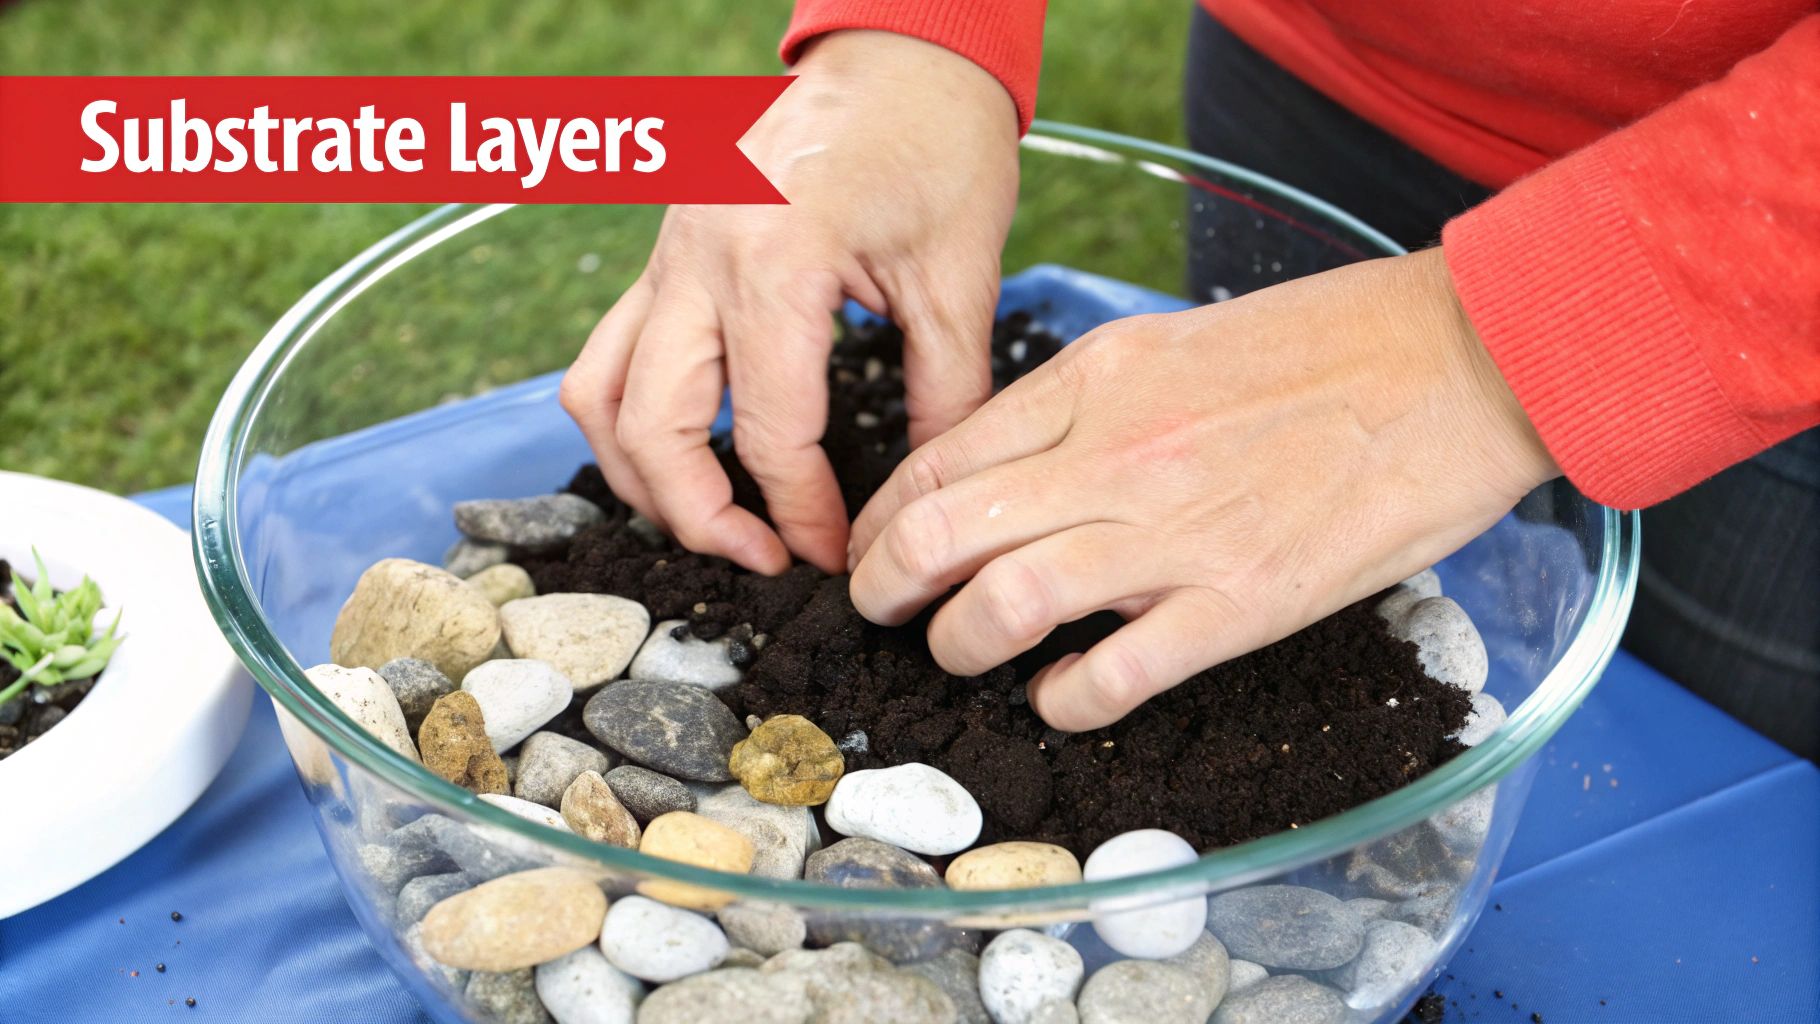
Building Your Foundation Layer by Layer
Grab your clean, dry container. The very first thing to go in is your drainage layer. Gently pour in your small stones or pumice to create a base roughly 2-3 centimetres deep. This creates a small reservoir where any excess water can safely drain away from your plant's roots, which is crucial for preventing rot.
Next up is your filtration barrier. Sprinkle a thin, even layer of activated charcoal right on top of the stones. This step is a game-changer, especially for a closed terrarium. It keeps the water clean and absorbs any musty odours, ensuring the whole environment stays fresh. After the charcoal, add a layer of sphagnum moss and press it down firmly. This stops the soil from washing down and clogging up your carefully constructed drainage system.
I always think of building a terrarium as an ecological experiment in a bottle. Every single layer, from the drainage stones to the charcoal filter, has a specific job in creating a balanced system where your plants can thrive. Take your time with this part—a solid foundation is the key to long-term success.
Finally, it's time for the potting mix. How much you add will depend on your plants, but you'll want a layer deep enough to comfortably hold their root balls. Keep it light and airy rather than packing it down. For a more natural, dynamic look, I like to mound the soil slightly higher at the back. This simple trick creates a real sense of depth and perspective in your little landscape.
Planting and Arranging Your Flora
Now for the delicate work. It helps to have a rough plan of where each plant will sit before you start digging. I find it’s always best to position your largest or "focal point" plant first and then arrange the smaller ones around it.
Using your fingers or a small spoon, make little wells in the soil for each plant. Gently slide the plant out of its nursery pot and give the roots a gentle tease if they’re tightly packed. To get plants into containers with narrow openings without making a mess, long tweezers or even chopsticks are your best friends. They give you the precision you need and help avoid dropping soil all over the leaves.
Once your plants are in, backfill with soil and gently pat it down around the base of each one to secure them in place. Be careful not to bury the plant's crown (where the stem meets the roots), as this can quickly lead to rot.
Adding the Finishing Touches
With your plants all settled in, you can start adding the personality. This is your chance to turn a simple planting into something truly captivating.
- Cover the Soil: A layer of sheet moss or some decorative pebbles over any exposed soil looks fantastic and helps lock in moisture.
- Create a Landscape: Add small pieces of driftwood for height or some smooth river stones to hint at a dry creek bed.
- Personalise It: This is where you can really make it yours. Tiny figurines, ceramic mushrooms, or even interesting pieces of pounamu can add a touch of whimsy and story to your creation.
The final step is all about getting creative. There are no hard and fast rules, so just have fun with it and arrange your decorative bits and pieces until you're happy with how your tiny green world looks.
Keeping Your Terrarium Ecosystem Happy and Healthy
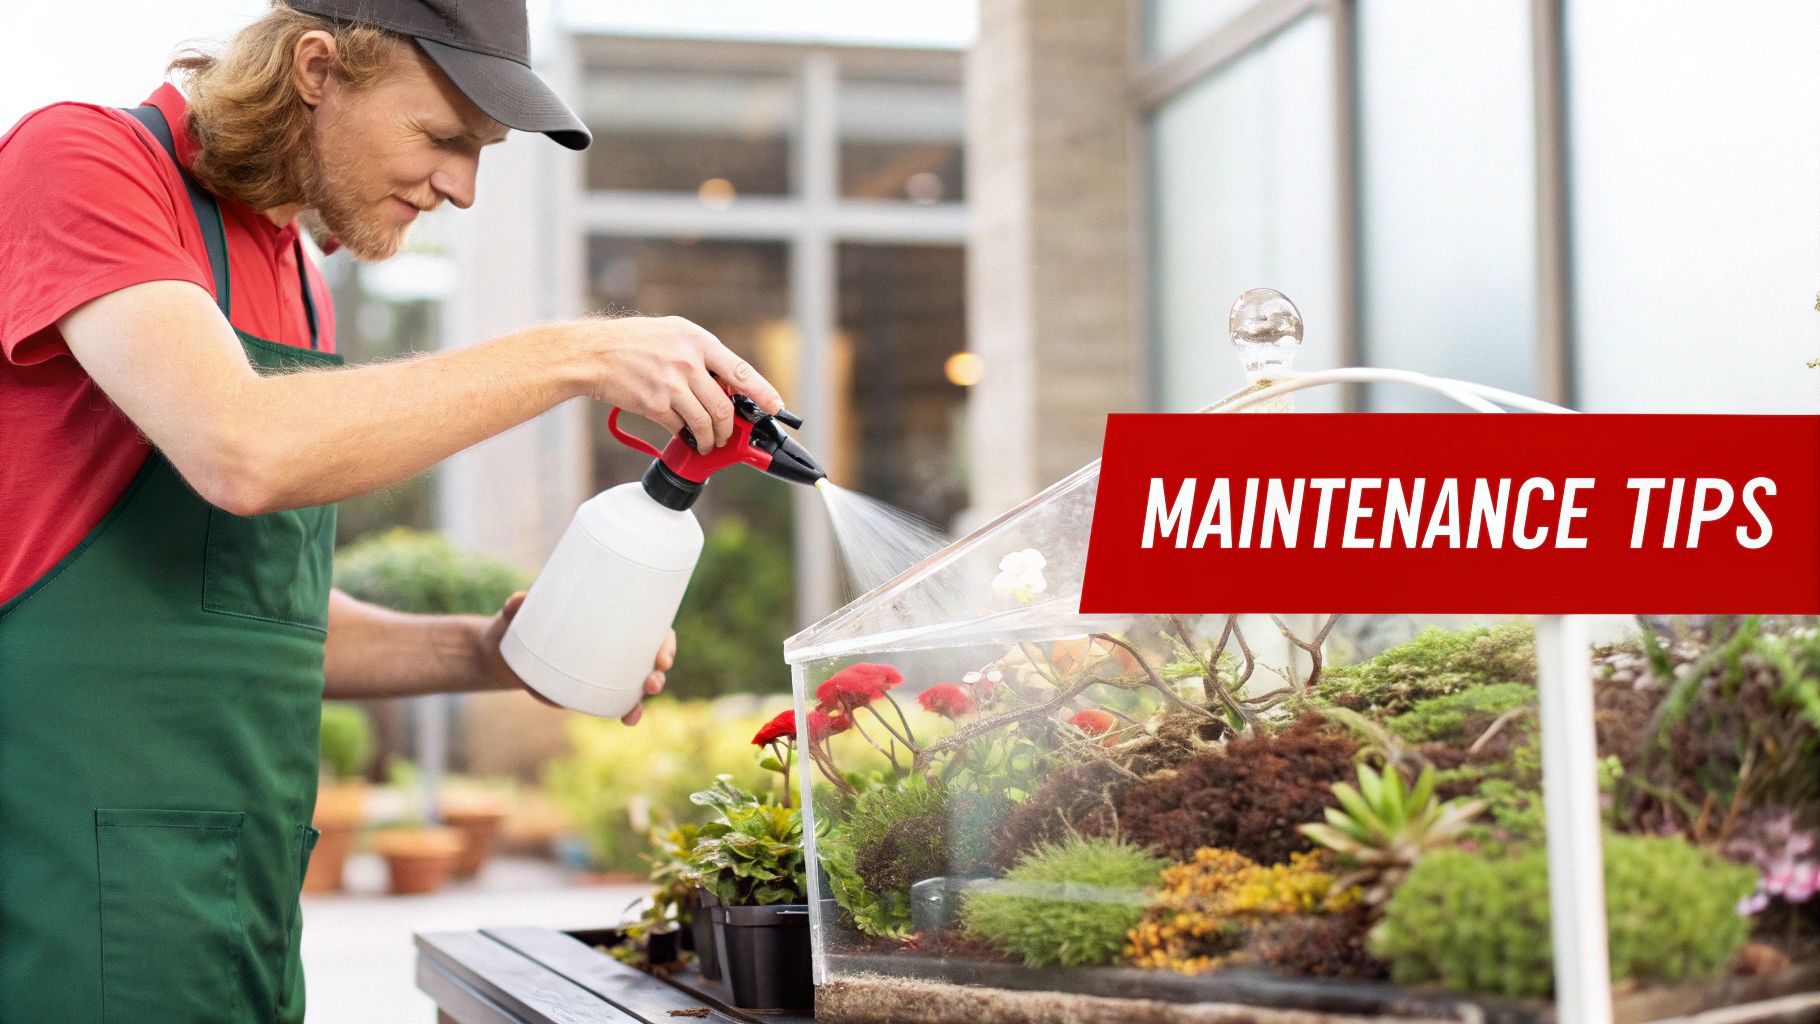
Alright, you've built your gorgeous little world in a jar. The next chapter is all about keeping it that way. Looking after a terrarium isn't a chore; it’s more like being the custodian of a miniature ecosystem. It requires a gentle hand and a bit of observation, making small tweaks to keep everything humming along perfectly.
The biggest learning curve is getting the water just right, and the rules change completely depending on whether your terrarium is open or closed. An open terrarium behaves more like a regular pot plant and needs a drink whenever the top few centimetres of soil feel dry. A closed terrarium, on the other hand, is a self-sustaining rain cycle and might only need a top-up a couple of times a year.
Getting the Water Balance Just Right
For a closed system, condensation is your guide. Seeing a light mist on the glass in the morning that clears up by the afternoon means you’ve hit the sweet spot. If the glass stays foggy all day, it's a sign things are a bit too damp inside. The fix is easy: just take the lid off for a few hours to let it air out.
If you go a few days without seeing any condensation at all, your terrarium is probably thirsty. Use a spray bottle or a pipette to add a little water directly onto the soil, trying to avoid drenching the leaves. My golden rule is to always err on the side of caution. You can always add a bit more water, but it's a real hassle to deal with a soggy, overwatered terrarium.
Your terrarium is a living system that communicates its needs. Pay attention to the subtle cues—the amount of condensation, the colour of the leaves, and the feel of the soil. Responding to these signs is the key to long-term success.
A Little Pruning and General Upkeep
Over time, your plants will grow and start to fill the space. A little trim here and there is all it takes to stop them from getting overcrowded, which also encourages them to grow bushier and healthier. Grab a small, clean pair of scissors and snip off any yellowing leaves or stems that are pressing up against the glass. This simple task does wonders for airflow and helps keep mould at bay.
You’ll also want to keep the inside of the glass clean. A soft cloth attached to a stick or a long pair of tweezers works a treat. This not only keeps your terrarium looking pristine but also ensures your plants are getting as much light as possible.
Occasionally, you might spot some unwanted guests like mould or fungus gnats. You can wipe away small patches of mould with a cotton bud dipped in a bit of diluted hydrogen peroxide. Pests are pretty rare in a well-maintained terrarium, but if they show up, you can look into introducing beneficial insects or using a terrarium-safe pest control method. If you’re growing carnivorous plants, we have some specialised advice in our guides on carnivorous plant care.
Common Terrarium Questions Answered
Even after you’ve put the finishing touches on your miniature world, it's completely normal for a few questions to pop up. Building a terrarium is one thing; learning how to troubleshoot it is a whole other skill. Here are some of the most common queries we get from fellow Kiwi terrarium enthusiasts, with straightforward answers to help your little ecosystem thrive.
One of the biggest worries for new terrarium parents is dealing with those pesky little fungus gnats. These tiny, annoying flies are drawn to damp soil and decaying organic bits and pieces, which can make a humid terrarium their dream home. If you spot them buzzing around, don't panic. The first thing to try is simply letting your terrarium dry out a bit. Just leave the lid off for a day or two to disrupt their life cycle.
For a more hands-on approach, you can pop in a small piece of a yellow sticky trap, which you can find at any garden centre. The adult gnats are drawn to the bright colour and get stuck. Of course, prevention is always the best strategy. Using sterile potting mix right from the start is your best defence against accidentally introducing them in the first place.
Finding the Perfect Spot and Managing Mould
Figuring out where to place your terrarium in your New Zealand home is a crucial step. The right light can make all the difference. Most terrarium plants are happiest in bright, indirect light, so a spot near a window that doesn't get hit with harsh, direct sun is usually perfect. You'll want to be mindful of our strong Kiwi sun, especially in summer, as it can easily scorch the delicate leaves right through the glass.
A classic mistake is putting a terrarium on a windowsill that gets blasted with intense afternoon sun. The glass acts like a magnifying glass, which can quickly overheat and literally cook your plants. Take some time to watch the light in your chosen spot throughout the day before you commit.
What if you notice some fuzzy white stuff growing on the soil? That’s mould, and it’s usually a sign of two things: too much moisture and not enough air circulation. It’s a common issue, especially in new closed terrariums that haven’t quite found their equilibrium yet.
To sort it out, you can take these simple steps:
- Remove It: Grab a cotton bud and gently wipe away any visible mould.
- Boost Airflow: Leave the lid off for a day, or even two. This will help the environment dry out a little and improve air circulation.
- Bring in the Clean-Up Crew: For a fantastic long-term solution, think about adding springtails. These tiny invertebrates are a terrarium's best friend, feasting on mould and decaying matter to keep your little ecosystem sparkling clean.
Watering and Plant Health
"How often should I really water my closed terrarium?" This is a question we hear all the time. The honest answer is: very rarely. A healthy, balanced closed terrarium creates its own little rain cycle.
You want to see a light mist of condensation on the glass, particularly in the mornings. If it’s constantly fogged up and dripping, it's too wet. If it’s bone dry for several days on end, it probably needs a few light sprays of water. The goal is a self-sustaining system, not a swamp.
Ready to start your own miniature garden? At Jungle Story, we have everything you need, from beautiful containers and essential supplies to a huge range of perfect terrarium plants. Explore our collection and bring a piece of living art into your home. Visit us at https://junglestory.co.nz.