Thinking about growing an olive tree indoors? It’s a fantastic idea. With their elegant, silvery-green leaves and graceful shape, an olive tree brings a touch of Mediterranean calm right into your living room. It's a real statement plant, no doubt about it, and while it asks for a little more attention than your average houseplant, the payoff is a stunning, living piece of art.
Bringing Mediterranean Style Indoors
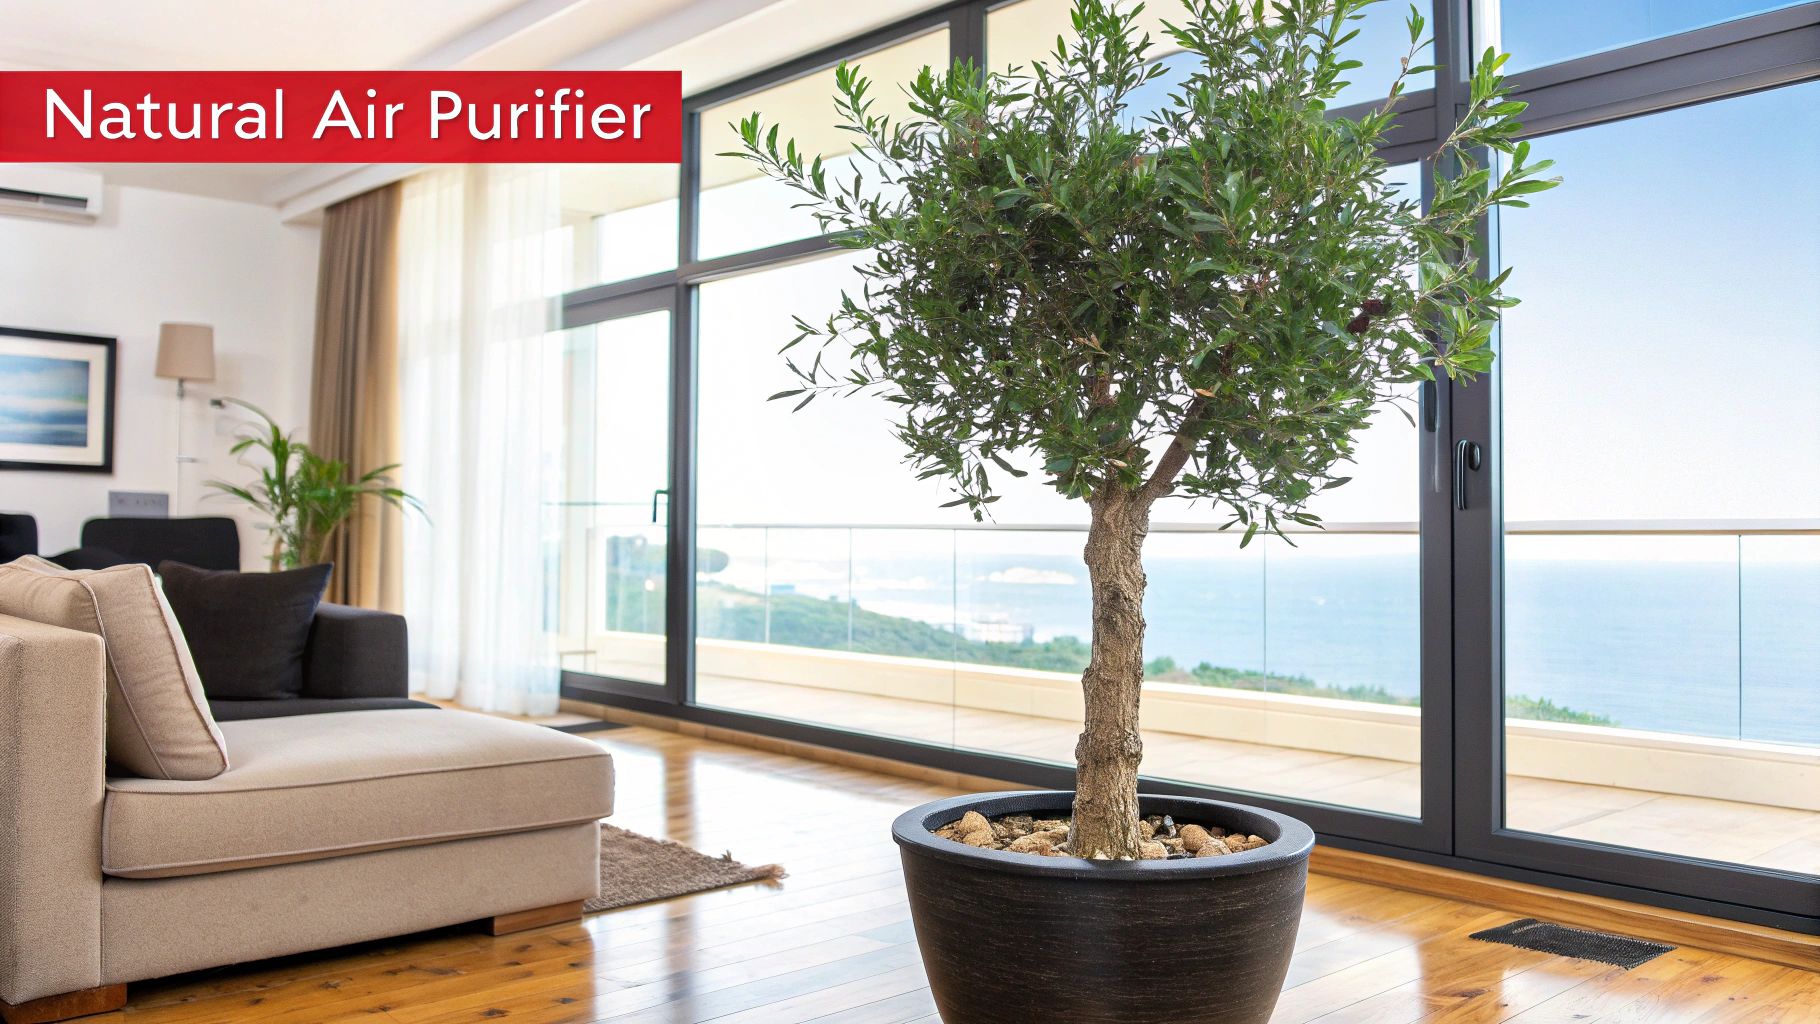
There’s a reason you’re seeing the elegant, silver-leafed olive tree pop up in so many stylish Kiwi homes. It’s easy to fall for them. The airy branches and soft, muted green tones add a sense of classic charm that’s hard to beat. An indoor olive tree isn't just another pot plant; it’s a living sculpture that can anchor a corner, beautifully frame a window, or bring a touch of nature to a minimalist space.
But for many of us, the appeal is deeper than just looks. There’s something deeply satisfying about nurturing a little piece of the Mediterranean right here in New Zealand. It connects you to ancient traditions, even if it's just one tree in a pot. If you’re looking for something a bit different from the usual Fiddle Leaf Figs and Monsteras, an olive tree offers a unique and rewarding journey. For more ideas on what else grows well inside, check out our guide on other great indoor houseplants that thrive in NZ.
The Rise of the Indoor Olive Tree in New Zealand
This isn't just a fleeting trend. New Zealand already has a healthy outdoor olive industry—we're talking around 310,000 trees in commercial groves—but bringing them indoors is a movement that's really gaining traction. More and more homeowners are discovering the joy of growing these trees purely for their ornamental beauty, with the off-chance of a tiny harvest being a lovely little bonus.
Growing an olive tree inside your NZ home comes with its own set of rules, mainly because you're essentially creating a custom microclimate. Your success really boils down to getting three things right:
- Sunlight: These trees are absolute sun-worshippers. You need to find them the brightest spot you have, ideally near a north-facing window where they can soak up 6+ hours of direct sun a day.
- Watering Discipline: This is where most people go wrong. Overwatering is the number one killer of indoor olive trees. They come from a dry climate and need their soil to dry out completely between waterings.
- The Right Variety: Not all olive trees are happy living in pots. Look for a dwarf or slow-growing variety, like the 'Arbequina' or 'Frantoio', as they are much more manageable indoors.
To make things a bit easier, here’s a quick checklist to keep you on track.
Indoor Olive Tree Care Checklist for NZ Homes
Here’s a quick-reference table to nail the essentials for keeping your olive tree happy in a typical New Zealand home.
| Care Factor | NZ-Specific Recommendation |
|---|---|
| Light | Place by a north-facing window for 6-8 hours of direct sun. Rotate the pot weekly. |
| Watering | Water thoroughly only when the top 5-7 cm of soil is completely dry. Less in winter (June-August). |
| Soil | Use a high-quality, free-draining potting mix. Adding perlite or sand improves drainage. |
| Humidity | Standard NZ home humidity is fine. They don't need extra misting. |
| Temperature | Keep in a spot with stable temperatures, away from cold draughts or heat pumps. |
| Fertiliser | Feed with a balanced liquid fertiliser once a month during spring and summer (September-February). |
Getting these basics right from the start is the key.
Mastering these core elements really sets you up for success. It’s not just about keeping the plant alive; it’s about helping it thrive and become a beautiful, long-lasting feature in your home.
How to Select the Perfect Olive Tree
Walking into a garden centre and being met with rows of beautiful plants can feel a bit overwhelming. When it comes to picking an indoor olive tree, knowing what to look for really does make all the difference. It's the key to bringing home a healthy, thriving plant rather than a future problem.
First things first: not all olive trees are suited to life inside. Many are bred for commercial groves, meaning they grow way too big and fast for a pot in your living room. The trick is to seek out specific dwarf varieties or those known for being naturally more compact.
This isn't just about choosing a plant that looks good on the day. It’s about setting yourself up for success with a resilient, well-structured tree that’s already in great shape. A healthy start is everything.
Choosing the Right Olive Variety for Indoors
Here in New Zealand, there are a few standout varieties that take particularly well to life in a container. Your choice can affect everything from the tree's final size to its chances of fruiting. And while getting any olives is a bonus, choosing a self-fertile variety boosts your odds if you can give it the right environment.
Here are a few of my top picks for Kiwi homes:
- Arbequina: This is probably the most popular choice for an indoor olive tree, and for good reason. It's naturally on the smaller side with a lovely, slightly weeping shape. It’s also self-pollinating, so with enough sun and a bit of a winter chill, you might be rewarded with a few small olives.
- Picual: Another brilliant self-fertile option. 'Picual' is celebrated for its vigour and adaptability, which makes it quite forgiving in a pot. Its leaves are a gorgeous deep green, offering a slightly different look from the classic silvery 'Arbequina'.
- Frantoio/Paragon: Often sold as 'Paragon' in New Zealand, this Italian variety is another robust, self-fertile choice. It's a strong grower but takes incredibly well to pruning, which lets you easily keep it at a manageable size and shape indoors.
A quick heads-up: even a "dwarf" olive tree will still want to grow. The label just means it has a more manageable size, usually topping out around 1.8 metres indoors, instead of the 6+ metres it could hit outside. Regular pruning is going to be your best friend.
Your Pre-Purchase Inspection Checklist
Once you've narrowed it down to a variety, it’s time to get your hands dirty and play plant detective. Please don't just grab the first one you see! Taking five minutes to give a plant a proper once-over can save you from accidentally introducing pests or diseases to your other houseplants. It's the same careful approach we advise in our detailed Fiddle Leaf Fig care guide.
What to Look For
- Healthy Leaves: Foliage should look vibrant, whether it's silvery-grey or a deep green. Steer clear of trees with lots of yellowing, brown, or crispy leaves. A couple of damaged leaves from being moved around is fine, but widespread problems are a bad sign.
- Pest Check: This one is non-negotiable. Look closely at the undersides of leaves and where they join the stem. You’re scanning for tiny webs (spider mites), little brown or white bumps (scale), or any sticky residue (honeydew, a classic sign of pests).
- Strong Structure: Find a tree with a sturdy, straight main trunk and branches that are well-spaced. Pass on any that look spindly, weak, or lopsided. A good structure from the get-go makes pruning down the track so much easier.
- Root Health: You can get clues about the roots without yanking it from the pot. Check the drainage holes. A few fine roots poking out is normal, but a thick, tangled mess means the plant is seriously root-bound and stressed. On the flip side, if the whole plant wobbles in its pot, it might be a new potting and not well-established.
- No Signs of Rot: Gently press on the top of the soil. It shouldn't feel sopping wet or smell musty. Soil that's constantly waterlogged at the garden centre can be a warning sign for root rot.
Choosing your indoor olive tree should be a fun and exciting process. By picking a suitable variety and giving it a thorough health check, you're not just buying another plant—you're investing in a stunning living feature for your home.
Creating the Ideal Indoor Environment

The secret to a thriving indoor olive tree is making it feel right at home, even though it's thousands of kilometres from its native Mediterranean shores. It’s all about cleverly recreating those sunny, arid conditions right inside your New Zealand house. This isn't as tricky as it sounds; it just takes a little thought about where you put it and how you set it up.
Think of this as building the perfect foundation for your tree. Getting the light, pot, and soil sorted from the very beginning will save you a world of trouble down the line and set your beautiful plant up for a long, healthy life. This is where you can make the biggest difference.
Pinpointing the Perfect Spot
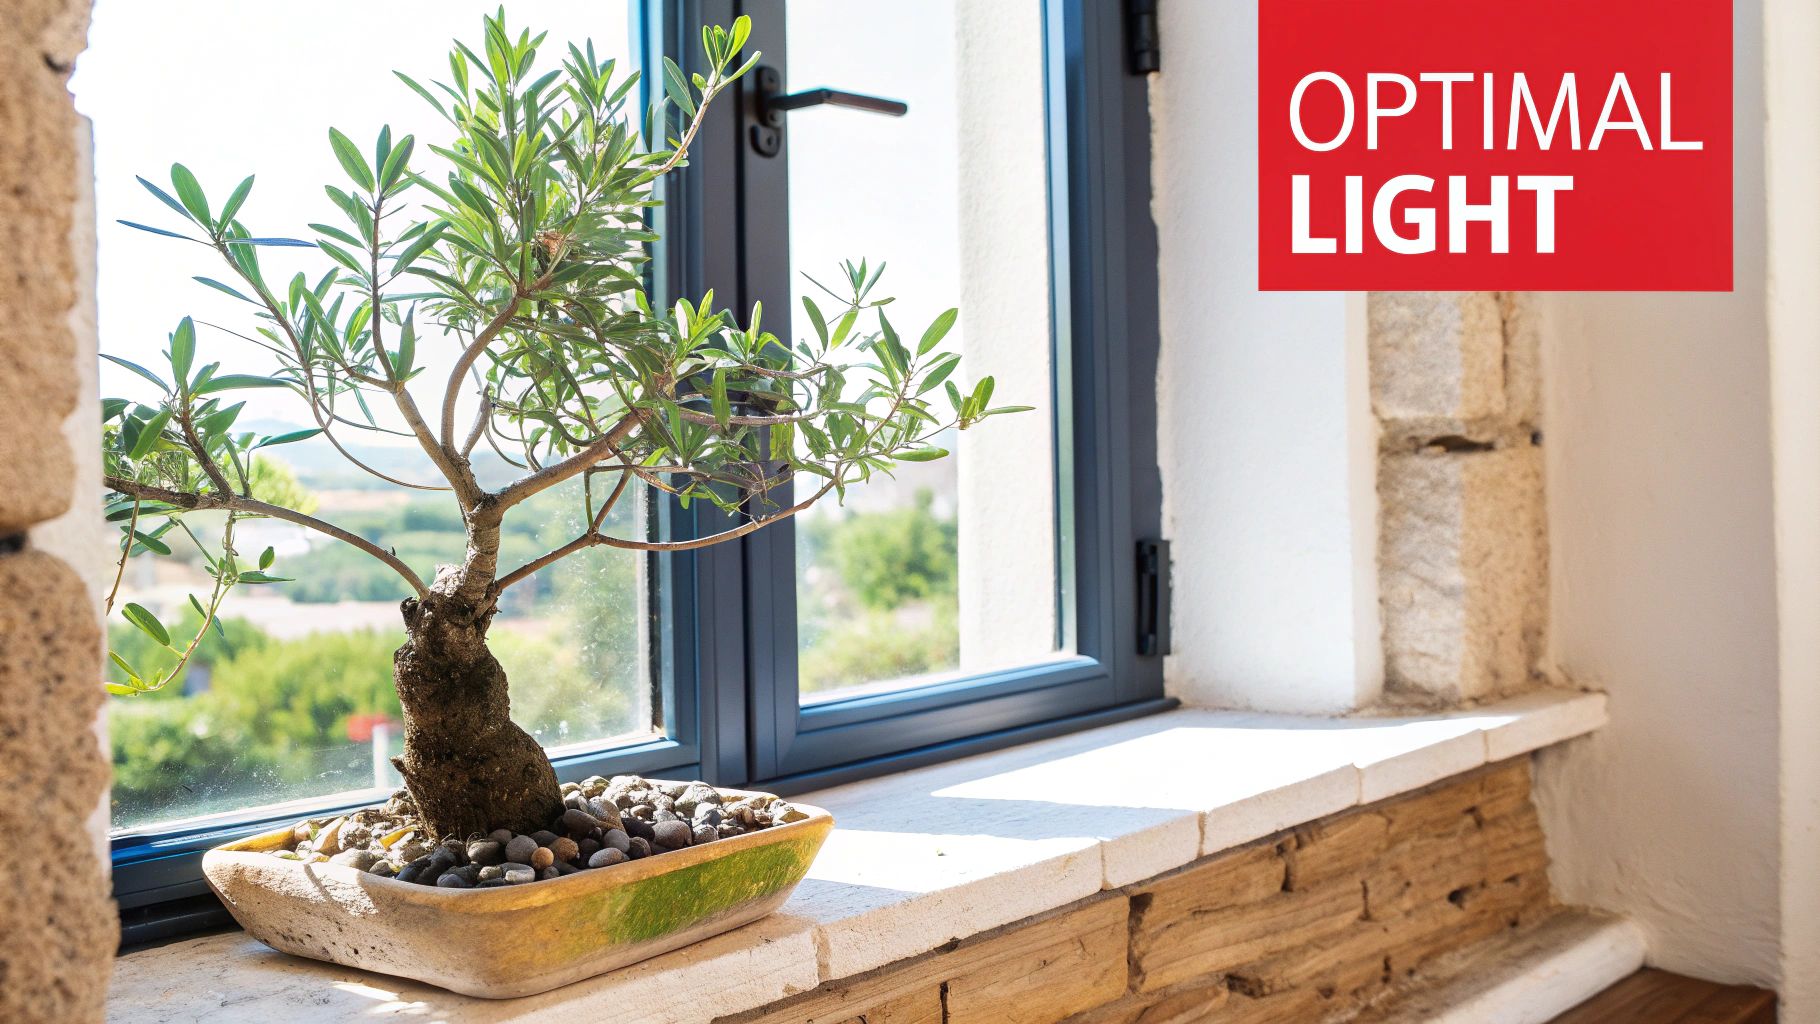
Light is, without a doubt, the single most important factor for an indoor olive tree. These plants are true sun-worshippers and will quickly let you know if they're not getting enough. They're basically solar-powered—the more direct sun you can give them, the happier they’ll be.
Here in New Zealand, that means a north-facing window is your absolute best bet. This spot offers the most consistent and direct sunlight all day long, mimicking the intense light they're used to. If you have a sunny space near a north-facing sliding door or window, claim it for your olive tree immediately.
It’s a good idea to give your tree a quarter turn every week or so. This simple trick ensures all sides of the plant get their share of sunlight, which promotes even growth and stops it from leaning dramatically towards the light.
What If You Don't Have a North-Facing Window?
Don't despair if your home doesn't have the ideal sunny spot. An east-facing window is the next best thing, giving your tree lovely, bright morning sun. A west-facing window can also work, but you’ll need to keep an eye out for leaf scorch during the intense heat of a Kiwi summer afternoon.
If your light situation is genuinely poor, you can always supplement with a grow light. Modern LED grow lights are energy-efficient and can provide the full-spectrum light your olive tree needs to thrive, even through our often-grey winters. It's a small investment that can make a huge difference.
Key Takeaway: Aim for a minimum of six hours of direct sunlight every day. Anything less, and you'll likely see slow growth and thinning leaves. For these Mediterranean beauties, good light is simply non-negotiable.
Choosing the Right Pot and Soil
Once you've scouted the perfect location, the next crucial step is getting the potting situation right. An olive tree's roots are incredibly susceptible to rot, so excellent drainage isn't just a suggestion—it's a must.
The best pot for your indoor olive tree will be one made from a porous material like terracotta or unglazed ceramic. These materials let moisture evaporate through the sides of the pot, helping the soil dry out more evenly between waterings. Most importantly, whatever pot you choose, it must have at least one large drainage hole at the bottom.
When it comes to size, resist the temptation to put a small tree in a massive pot. This only leads to a large volume of soil staying wet for far too long, which is a recipe for root rot. Choose a pot that is only about 5 cm wider in diameter than the nursery pot it came in.
Creating a Gritty Soil Mix
Standard potting mix straight from the bag is usually too heavy and holds far too much moisture for an olive tree. You need to create a blend that mimics the gritty, well-draining soil of the Mediterranean.
A perfect, easy-to-make mix for your indoor olive tree is:
- Two parts high-quality potting mix
- One part perlite or pumice
- One part coarse sand or fine horticultural grit
This mixture provides enough organic matter for nutrients but allows water to drain away freely, preventing the soil from becoming a soggy mess. Adapting olive cultivation for indoor Kiwi environments really comes down to this kind of precise water management. Research into olive water management backs this up, showing just how critical it is for the roots to have access to oxygen and not sit in water, especially during key growth phases.
This proactive approach to creating the ideal environment—from sunlight to soil—is what separates a struggling plant from a stunning feature piece in your home.
Mastering Your Watering and Feeding Routine

Without a doubt, figuring out the right watering routine is the single biggest challenge for anyone new to indoor olive trees. If you get this right, you're more than halfway to success. The most common mistake I see is people showing their trees a bit too much love with the watering can. These plants hail from arid climates and absolutely despise having constantly damp soil, a condition often called 'wet feet'.
Let's break it down. The golden rule here is the 'drench and dry' method. This means you give the tree a thorough watering until you see it running freely from the drainage holes. But then—and this is the crucial part—you let the soil dry out significantly before you even think about watering again. This simple cycle is your best defence against the dreaded root rot and gives the roots the oxygen they need to breathe and thrive.
How to Know When to Water
First things first: never water on a fixed schedule. A once-a-week routine just doesn't work because it fails to account for changes in light, temperature, or the seasons. Instead, you need to become a bit of a soil investigator. The most foolproof method is to grab a wooden skewer or chopstick and stick it deep into the pot, at least halfway down.
Pull it out and take a look. If it comes out clean and dry, it’s watering time. If you see damp soil clinging to it, hold off for a few more days and check again. The top few centimetres of soil can be really deceptive, feeling dry to the touch while the lower root zone is still damp. That's why checking deep is so important.
You'll also get a feel for the weight of the pot. A dry pot is noticeably lighter than a freshly watered one. After a few cycles, you’ll be able to pick it up and know instantly if it's time for a drink.
Remember this: It is always, always better to slightly underwater an olive tree than to overwater it. They are remarkably drought-tolerant and will forgive you for being a day or two late, but they won't recover easily from the damage of root rot.
Feeding Your Indoor Olive Tree
While olive trees aren't what you’d call exceptionally hungry plants, they definitely need nutrients to support that beautiful, silvery foliage and strong growth, especially when their roots are confined to a pot. A simple feeding plan is all it takes to keep your tree looking its best.
The best time to fertilise is during the active growing season. Here in New Zealand, that runs from spring (September) right through to the end of summer (February). During this stretch, feeding your tree once a month is perfect. Once autumn and winter roll around, the tree’s growth slows right down, so you should stop fertilising completely to let it have a well-deserved rest.
A balanced liquid fertiliser is the ideal choice. Look for one with a balanced N-P-K (Nitrogen-Phosphorus-Potassium) ratio to provide all the essential macronutrients. To avoid any risk of fertiliser burn, always water your plant thoroughly first, then apply the diluted fertiliser to the already damp soil. You can find more tips on picking the perfect product in our comprehensive guide to choosing an indoor plant fertiliser.
Adjusting Care for NZ Seasons
It’s crucial to adapt your watering and feeding routine to our distinct New Zealand seasons. The long, bright days of summer mean your tree is in full growth mode and will need more frequent watering. In contrast, the shorter, often gloomier days of winter are a signal for it to rest, and its water needs will drop dramatically.
This seasonal rhythm is something our commercial olive growers know all too well. We see it in the harvest numbers; after a peak production of 270,000 litres in 2021, output fell sharply due to poor weather. Excessive rainfall in some regions and drought in others showed just how sensitive these trees are to their water levels.
To make things easier, I've put together a simple schedule to guide your care throughout the year in the Southern Hemisphere.
Seasonal Care Guide for Indoor Olive Trees in NZ
| Season (Southern Hemisphere) | Watering Frequency | Feeding Guide | Key Action |
|---|---|---|---|
| Spring (Sept - Nov) | Increase as days lengthen and growth resumes. Check every 7-10 days. | Begin monthly feeding with a balanced liquid fertiliser. | This is the time to wake your tree up after its winter rest. |
| Summer (Dec - Feb) | At its highest. Check soil moisture every 5-7 days, especially in hot weather. | Continue feeding once a month. | Support peak growth and foliage production. |
| Autumn (Mar - May) | Gradually reduce as days shorten. Go back to checking every 10-14 days. | Stop all fertilising by the end of March. | Prepare the tree for its winter dormancy. |
| Winter (Jun - Aug) | At its lowest. Water very infrequently, only when pot is almost fully dry. | Do not feed. The tree is resting. | Prevent root rot during the cold, low-light months. |
By learning to read the signs your tree gives you and making these small adjustments with the seasons, you'll quickly master the routine and keep your indoor olive tree thriving for years to come.
Pruning for a Healthy and Beautiful Shape
Taking a pair of shears to your lovely olive tree might feel a bit intimidating at first, but it doesn't have to be. Trust me, pruning is one of the most rewarding things you can do for your indoor olive tree. It’s not just about keeping it from taking over your living room; it’s essential for encouraging strong health, good airflow, and sculpting that classic, elegant shape we all want.
Think of it less as a drastic haircut and more like a strategic tidy-up. With just a few snips, you can guide your tree to grow stronger, look fuller, and stay healthy for years to come. A well-pruned tree is genuinely a happy tree.
The Best Time to Prune in New Zealand
When it comes to pruning, timing is key. You want to make your cuts just before the plant enters its main growing season. This way, it can heal quickly and pour all its energy into developing beautiful new growth.
Here in New Zealand, the perfect time to prune your indoor olive tree is in late winter or very early spring. That usually means sometime between late July and early September. Pruning then is like a wake-up call, spurring on vigorous new shoots just as the days get longer and the sun starts to feel stronger. Try to avoid any big pruning jobs in autumn or the middle of winter, as the tree is dormant and won't bounce back as effectively.
The Two Key Types of Pruning Cuts
When you get your shears out, you’ll mainly be making two kinds of cuts. Each has a specific job, and knowing the difference is the secret to shaping your tree like a pro.
- Thinning Cuts: These are all about boosting airflow and letting light into the plant's centre. A thinning cut means removing a whole branch right back to where it started—either at the main trunk or a bigger branch. This opens up the canopy, which helps prevent pests and diseases that love crowded, stuffy conditions.
- Heading Cuts: Use these when you want to encourage a bushier, fuller look. A heading cut involves shortening a branch instead of removing it entirely. You simply snip it back to just above a healthy leaf or node. This tells the plant to send out new shoots from below the cut, creating a much denser shape.
By using a mix of these two methods, you get total control over your tree's health and its looks. You can thin out the inside for good health, then use heading cuts on the outside branches to create that beautiful, compact silhouette.
A Pro Tip: Always, always use sharp, clean pruning shears. I give my blades a quick wipe with rubbing alcohol before I start and between cuts, especially if I'm removing any iffy-looking branches. It’s a simple habit that stops you from accidentally spreading any potential problems around the plant.
What to Look For and What to Remove
Knowing what to cut is just as important as knowing how. Before you start, take a step back and have a proper look at your tree from every angle. Your goal is to create a balanced shape and get rid of anything that isn't helping the plant thrive.
Here’s your checklist for what to trim off:
- Dead, Damaged, or Diseased Wood: This is priority number one. These branches are usually pretty obvious—they’ll be brown, brittle, and have no leaves. Get them out of there. They're just dead weight and can be an open door for pests and diseases.
- Crossing or Rubbing Branches: Look for any branches that are growing into each other and rubbing. Over time, this friction creates a wound that's prone to infection. Pick the weaker or more awkward-looking of the two and snip it off.
- Inward-Growing Branches: You want all your tree’s energy pushing outwards to create that lovely, open shape. Any branches growing back towards the middle of the tree are working against that and should be removed.
- Suckers and Water Sprouts: Keep an eye out for "suckers"—those super-fast shoots that pop up from the base of the trunk. Also, look for "water sprouts," which are thin, vertical shoots that sometimes appear on the main branches. Both steal energy from the rest of the tree, so prune them off as soon as you spot them.
Pruning your olive tree should be a satisfying and creative job. Start slowly, and remember you can always take more off, but you can’t stick branches back on. With every snip, you’re helping create a healthier, more beautiful plant that will be a feature in your home for a long time.
Your Indoor Olive Tree Questions Answered
Even with the best intentions, growing an indoor olive tree can throw you a few curveballs. Every Kiwi plant owner runs into questions along the way, so don't worry if you hit a snag.
Here are our answers to some of the most common challenges we hear about. Think of it as a quick troubleshooting guide to keep your beautiful tree happy and thriving.
Why Are the Leaves on My Olive Tree Turning Yellow?
Seeing yellow leaves can be a bit startling, but take a breath—it’s usually an easy fix. More often than not, this is a classic sign of overwatering.
Olive trees really can't stand having constantly damp soil, a problem often called ‘wet feet’. Their roots need air, and when the soil is soggy, they can't breathe, which leads to yellowing leaves. Before you even think about watering again, check the soil. Push a wooden skewer or your finger down at least 5-7 cm. If you feel any dampness at all, hold off.
While watering is the number one culprit, a few other things common in NZ homes could be the cause:
- A sudden cold draught: Is your tree near a door or an open window? Olive trees hate sudden drops in temperature, especially during our cooler months.
- Not enough sun: If the lower, older leaves are yellowing, your tree might be dropping them to conserve energy because it’s not getting enough bright, direct light.
- Nitrogen deficiency: If you haven’t fertilised in a while (and it’s the growing season from September to February), uniform yellowing could be a sign it's hungry for some nutrients.
Can My Indoor Olive Tree Actually Produce Olives in NZ?
The short answer? Yes, it’s possible, but it’s a real challenge inside a Kiwi home. I wouldn't count on it.
To trigger flowering and fruit production, an olive tree needs to go through a winter chill period. This means a couple of months (usually June-August) where the temperature sits consistently between about 2°C and 10°C. It’s this cold snap that signals the tree to produce flower buds for spring.
Achieving that inside a warm, centrally heated house is tough. If you're determined to give it a go, you'll need:
- A self-pollinating variety like 'Arbequina' or 'Frantoio'.
- A spot with at least 6-8 hours of direct, unfiltered sun every single day.
- A way to create that winter chill—perhaps in a sheltered, unheated porch or conservatory.
For most of us, it’s best to simply enjoy the stunning foliage and architectural shape of an indoor olive tree. If you do get any olives, consider them a delightful and unexpected bonus!
What Are Common Pests on Indoor Olive Trees in NZ?
Bringing a plant indoors is great for avoiding many outdoor pests, but it can create a perfect environment for others. The main troublemakers you’re likely to find on an indoor olive tree are scale insects and spider mites. Checking your plant regularly is the best way to catch them early.
Scale insects look like tiny, brown, shell-like bumps stuck firmly to the stems and under the leaves. They are sap-suckers and can be quite stubborn.
How to Treat Scale: If you only see a few, dip a cotton bud in rubbing alcohol and dab each one to kill and remove it. For a bigger infestation, a thorough spray with a commercial neem oil solution or insecticidal soap works wonders.
Spider mites are almost impossible to see with the naked eye. The first clue is usually fine, silky webbing under the leaves or where the leaf joins the stem. They love the dry air common in many New Zealand homes.
How to Treat Spider Mites: These pests hate humidity. Start by giving your plant a good shower, using the water pressure to physically knock them off. Follow up with a meticulous spray of insecticidal soap or neem oil, making sure to cover every surface, especially the undersides of the leaves.
How Often Should I Repot My Olive Tree?
How often you repot really depends on the tree’s age and how fast it's growing. A young, vigorous tree might need a new pot every 1-2 years. A more mature, established tree can happily stay put for 3-5 years or even longer.
Don't repot on a schedule; look for the signs. It's time for a new home when you see:
- Roots poking out of the drainage holes.
- The soil drying out super fast, meaning you have to water much more often.
- Growth has completely stalled during the growing season.
When you do repot, only go up one pot size, which is about 5-10 cm wider in diameter. This prevents the roots from sitting in a huge amount of soil that stays wet for too long. The best time to do this in New Zealand is in spring (September or October), just as the tree starts its active growth phase. Always use a fresh, high-quality potting mix with excellent drainage.
Ready to bring the timeless elegance of an indoor olive tree into your home? At Jungle Story, we connect you with New Zealand's best growers, offering a beautiful selection of healthy, high-quality plants delivered right to your door. Start your growing journey with us today.