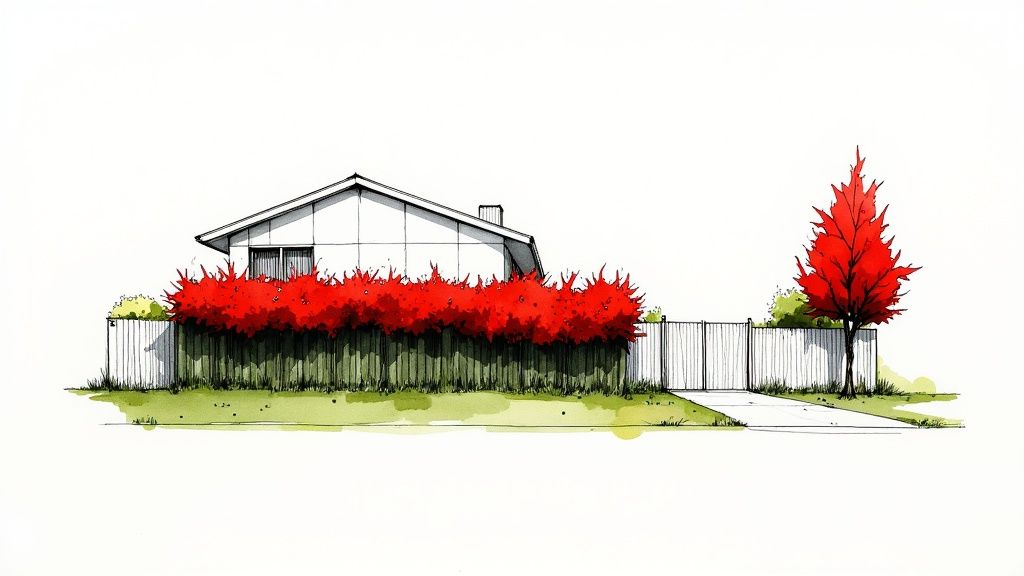
Picture this: a living fence that blazes with fiery red new growth before settling into a deep, glossy green. That’s the magic of Photinia Red Robin, a true cornerstone of modern New Zealand landscaping. It's the go-to for a fast-growing, evergreen solution that delivers both privacy and stunning good looks.
Why Red Robin Hedges Are a Game-Changer for Kiwi Gardens
A Photinia Red Robin isn't just a boundary marker; it's a dynamic, living feature that brings structure, colour, and life to your property. For Kiwi gardeners aiming to create a private backyard sanctuary or simply boost their home's street appeal, this plant is often the first and best choice. It’s a reliable performer that thrives in New Zealand's varied climate, making it a stunning addition to almost any garden.
The secret to its popularity lies in its incredible versatility. This isn't some static green wall. It’s an ever-changing backdrop that puts on a vibrant show with the seasons. In this guide, we'll walk you through everything you need to know to cultivate a perfect, thriving hedge that will be the envy of the neighbourhood.
The Allure of Year-Round Colour
One of the most captivating things about a Photinia Red Robin hedge is its dramatic seasonal colour shift. In spring, the new growth bursts forth in a brilliant, fiery red, creating a spectacular contrast against the older, glossy green foliage. This initial flush of colour gradually deepens to a rich bronze before settling into a sophisticated dark green for summer.
This cycle guarantees your garden never has a dull moment. Unlike deciduous hedges that can look sparse and bare in winter, the Photinia remains a lush, evergreen screen all year, providing constant privacy and a solid green structure.
A well-maintained Photinia hedge does more than just mark a boundary. It wraps your garden in a feeling of enclosure and seclusion, turning it into a genuine private retreat. It becomes a beautiful, living backdrop that makes all your other plants and flowers really pop.
More Than Just a Pretty Face
Beyond its striking looks, Photinia Red Robin ticks a lot of practical boxes, which is why it’s such a favourite among New Zealand homeowners. Its dense, bushy growth habit makes it an excellent choice for several jobs:
- Privacy Screening: It quickly forms a thick, solid barrier, effectively shielding your property from the street and nosy neighbours.
- Wind and Noise Reduction: A mature hedge acts as a natural buffer, softening strong winds and muffling ambient noise to create a more peaceful garden space.
- Low-Maintenance Structure: Once it's established, a regular trim is all it needs to keep its shape and, more importantly, encourage that flush of vibrant red new growth.
These practical benefits, combined with its undeniable good looks, are exactly why it has become such a staple in garden design. For more inspiration on how to use hedges in your garden, check out our guide on unique landscaping ideas in NZ and see just how versatile this plant can be.
The Best Reasons to Choose Photinia Red Robin
Choosing the right hedge is a big deal for any homeowner. It’s an investment in your property's privacy, security, and overall look. So, what makes Photinia Red Robin the standout choice for so many Kiwi gardeners? It’s more than just that first incredible burst of red; this plant offers a rare mix of rapid growth, year-round reliability, and stunning visual interest that few others can touch.
Let’s get into the practical advantages that have made Photinia Red Robin such a garden workhorse across New Zealand.
Before we dive deep, here’s a quick overview of what makes this plant a superstar in NZ gardens. This table summarises its key features and why they matter for creating a beautiful, functional hedge.
Photinia Red Robin at a Glance
| Attribute | Detail | Benefit for NZ Gardeners |
|---|---|---|
| Growth Rate | Fast, approx. 30-40 cm per year | Quickly establishes privacy and screening, often within 2-3 years. |
| Mature Height | Up to 4m untrimmed; easily kept at 1-3m | Versatile for various hedge heights, from low borders to tall screens. |
| Foliage | Evergreen with vibrant red new growth | Provides year-round colour and interest, unlike deciduous hedges. |
| Hardiness | Frost and wind tolerant | Thrives in a wide range of NZ climates, from Northland to Otago. |
| Sunlight | Full sun to partial shade | Adaptable to different garden spots, performing well in most aspects. |
| Maintenance | Low to moderate; requires pruning 1-2 times a year | Easy to manage with a simple pruning schedule to keep it dense. |
This table gives you the headlines, but the real story is in how these attributes come together to solve common garden challenges with style.
A Living Screen That Grows With You
Waiting years for a hedge to fill in is frustrating, especially when you’re after a bit of privacy. Photinia gets it. It grows vigorously, quickly forming a dense screen that can turn an exposed yard into a private retreat in a surprisingly short time.
But it’s not just about speed; it’s about effective coverage. The plant naturally wants to grow into a thick, bushy form, creating a proper barrier that does more than just block the view. It’s also a fantastic windbreak, sheltering more delicate plants and making your garden a calmer, more pleasant place to be. A mature hedge even helps to muffle neighbourhood and traffic noise, adding another layer of peace to your outdoor space.
The best part? Because it’s evergreen, that privacy and protection doesn’t vanish in winter. While other hedges drop their leaves and leave you exposed, Photinia provides a reliable, living screen 365 days a year. Your garden stays your sanctuary, no matter the season.
A Year-Round Spectacle of Colour
While the evergreen foliage provides a constant backdrop, the real magic of Photinia Red Robin is its seasonal transformation. It’s like having four different hedges in one.
- Spring: As things warm up from September, the hedge absolutely erupts with a flush of brilliant, scarlet-red new leaves. It’s a breathtaking sight that screams the growing season has begun.
- Summer: Those fiery red tones slowly mature, softening to a rich bronze before finally settling into a deep, glossy green—a perfect, sophisticated backdrop for summer flowers.
- Autumn: As the days cool down, you’ll often get another, slightly more mellow, flush of reddish growth, adding a final splash of colour before winter sets in.
- Winter: All through the colder months, the deep green leaves hold on tight, providing essential structure and life when much of the garden is asleep.
This constant evolution means your garden boundary is never static or boring. It’s a living feature that changes with the seasons, keeping your landscape engaging and beautiful all year.
Hardy and Resilient Across New Zealand
New Zealand’s climate is all over the map, from the subtropical warmth of Northland to the hard frosts of Central Otago. A good hedge needs to handle whatever is thrown at it. Photinia’s adaptability is one of its greatest strengths, making it a solid choice for gardens right across the country.
Its popularity in towns and cities is no accident. Photinia × fraseri 'Red Robin' has become an iconic plant in places like Auckland, where its resilience allows it to thrive. Its growth rate of around 30-40 cm per year is perfect for creating privacy screens that can reach up to 4 metres if left to their own devices, suiting suburban gardens perfectly. You can learn more about its widespread use in Aotearoa’s landscapes over on Biotanz.
Planting Your Red Robin Hedge for Success
Bringing home your first Photinia Red Robin is an exciting moment. You're not just buying plants; you're starting the journey to create a living, breathing wall for your garden. Getting them in the ground properly is without a doubt the most crucial step to ensure they take root quickly and grow into the dense, healthy hedge you're picturing.
This is your practical roadmap to laying the perfect foundation.
We'll walk you through everything from picking the right size plants to giving them the best possible start in their new home. With the right technique, you'll be well on your way to a stunning hedge that thrives for years.
Choosing Your Plants: Size Matters
When you start shopping around, you'll notice Photinia sold in various sizes, often called 'grades'. Your choice here really comes down to a classic trade-off: budget versus speed.
-
Smaller Grades (e.g., PB5 bags or 1-litre pots): These are the young guns. They're much kinder on the wallet, which is a huge plus if you're planting a long boundary. They do require a bit more patience, though, as they'll need a few seasons to really fill out and gain height.
-
Larger Grades (e.g., PB18 bags or 10-litre pots and bigger): Think of these as the 'instant hedge' option. They're more mature, often already over a metre tall. While they cost more upfront, they give you significant privacy and visual impact from day one.
In New Zealand, there's a huge appetite for these larger grades. Nursery data often shows that established photinia red robin hedge plants over a metre tall sell out by May. It's a clear sign that Kiwis are looking for fast-growing, immediate screening solutions.
The Best Time to Plant in New Zealand
Timing is everything when you want to help your new hedge settle in with minimal stress. Here in New Zealand, you've got two golden windows for planting: autumn and spring.
Autumn (March to May) is hands-down the best time. The soil is still warm from the summer sun, which is perfect for encouraging new root growth, but the blistering heat has backed off. Planting in autumn gives your hedge the whole cool, damp season to get its roots established before facing the stress of next summer.
Spring (September to November) is your next best bet. The ground is warming up, and there's usually plenty of rain to support a flush of new growth. Just be aware you'll need to be on top of your watering through that first summer to make sure the young roots don't dry out.
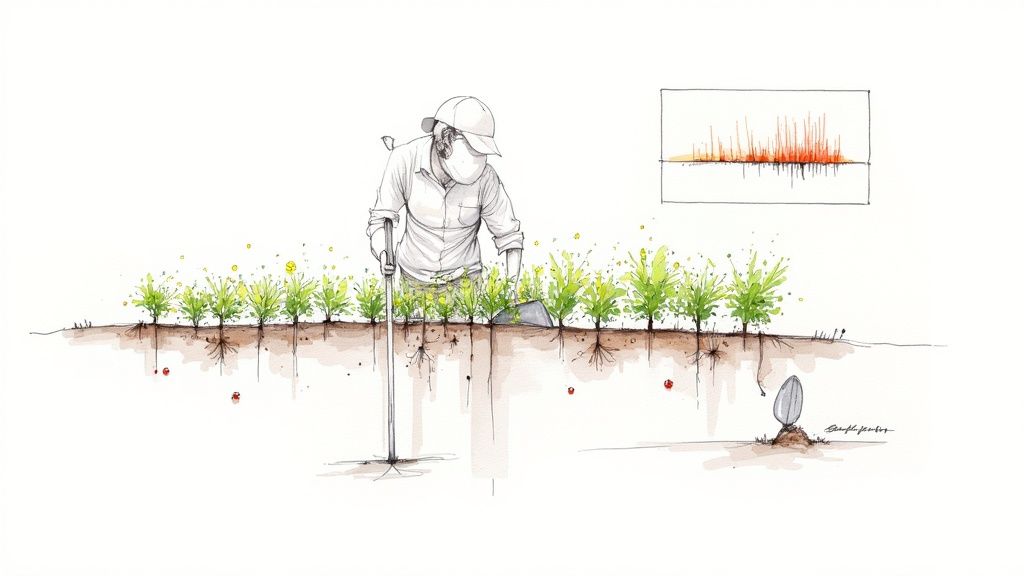
Your Step-by-Step Planting Guide
Planting a hedge is a bit different from popping a single shrub in the ground. You're aiming for a straight, consistent line, so a trench is the way to go.
-
Prepare the Site: First things first, clear the entire area of weeds and grass. Then, grab two stakes and a string line to mark out a perfectly straight line for your hedge. This simple trick is the secret to avoiding a wonky result later on.
-
Dig the Trench: Along your string line, dig a trench that's at least twice as wide and just as deep as the plant's root ball. This gives the roots plenty of loosened soil to explore and expand into.
-
Improve the Soil: Don't skip this step! It’s vital. Mix a generous amount of good quality compost and some sheep pellets into the soil you dug out. This enriches the soil, improves its structure, and gives your plants the nutrients they need for a flying start.
-
Set the Spacing: For that classic, dense Photinia hedge, aim to space your plants 60cm to 100cm apart. Spacing them closer (60-80cm) will create a thick screen much faster. If you're on a tighter budget with a long stretch to cover, you can go wider (up to 1m), but it will take longer to fill in.
-
Planting Depth: Place each plant in the trench. The goal is to have the top of its root ball sitting perfectly level with the surrounding ground. Planting too deep is a common mistake and can cause the main stem to rot.
-
Backfill and Water: Gently push your enriched soil back into the trench, firming it down around the base of each plant to get rid of any air pockets. As soon as you're done, give the entire hedge a really deep, thorough soaking.
Finally, lay down a nice layer of mulch (bark or wood chips work great) around the base of your new hedge. This is a game-changer for holding in moisture, keeping weeds down, and protecting the roots. If you're exploring other quick-growing options, have a look at our guide to the best fast-growing hedges in NZ.
How to Prune for a Thick and Vibrant Hedge
Once your Photinia hedge is established, pruning becomes your most powerful tool. It’s the secret to turning a simple row of shrubs into a dense, lush, and vibrant living wall. Think of it less as a chore and more like a regular haircut; each trim encourages your hedge to grow back thicker, fuller, and with that spectacular fiery red growth you love.

Without a regular trim, a Photinia hedge can get leggy and sparse at the bottom, with all the exciting new growth happening way up at the top. A smart trimming schedule lets light and air into the whole plant, promoting dense foliage from top to bottom and keeping your hedge healthy and well-shaped.
The New Zealand Pruning Calendar
Getting the timing right is crucial if you want to maximise that flush of red. Here in New Zealand, our seasons give us the perfect schedule.
-
Late Winter / Early Spring (Late August - September): This is when you'll do your main structural prune for the year. Trimming just before the new spring growth kicks off channels all the plant's energy into producing a massive burst of those brilliant red shoots. It's your chance to really define the hedge's shape and size.
-
Summer (Late January - February): After the first big show of red has matured to green, a light trim in summer will tidy things up. It can even stimulate a second, smaller flush of red growth. Just try to avoid pruning in the peak of summer heat to prevent scorching the fresh cuts.
Pruning isn't just about control; it's about stimulation. Every cut you make sends a signal to the plant to push out new shoots from dormant buds below, which is exactly how you get that thick, impenetrable screen.
Pruning Techniques for Every Situation
Not all trims are created equal. The technique you use depends on how old your hedge is and what you’re trying to achieve. A light trim keeps things neat, while a harder prune can bring a neglected hedge back from the brink.
If you're keen to understand the principles of shaping plants, you'll find some great advice in our guide on how to prune fruit trees, as many of the same concepts apply here.
The Maintenance Trim for Bushiness
This is your go-to "haircut" for an established, healthy hedge. The goal is simply to encourage that dense, bushy growth and keep it in shape.
- Shear the Top: Start by trimming the top of the hedge to your ideal height. Using a string line stretched between two stakes is a great trick for a perfectly level finish.
- Taper the Sides: Trim the sides, making sure the base is slightly wider than the top. This classic "A" shape is key because it allows sunlight to reach the lower branches, stopping them from going bare.
- Encourage Colour: Lightly tip-pruning the new growth after it has faded from red to green will often kickstart another vibrant display.
The Rejuvenation Prune for Overgrown Hedges
If you've inherited a tall, woody, or gappy hedge, don't despair. A hard prune can work wonders, but it does require a bit of courage!
The best time for this is late winter. You’ll need to drastically reduce both the height and width, cutting back into the older, thicker wood by up to one-third. It will look pretty severe at first, but this tough love stimulates strong new growth from the base, eventually creating a much denser, healthier hedge.
Supporting Growth After Pruning
Pruning puts a demand on the plant's energy reserves. To help it bounce back and get the best results, you need to give it the right care straight after a trim.
After any significant prune, give your hedge a good, deep watering and apply a balanced, slow-release fertiliser around the base. This replenishes nutrients and gives the plants the fuel they need to push out that incredible new growth. Photinias are famously resilient here in New Zealand, typically growing 30 to 40 centimetres a year and responding exceptionally well to this kind of care.
Solving Common Photinia Problems in NZ
Even a tough, reliable plant like Photinia Red Robin can run into the odd spot of bother. The good news? Most issues are pretty easy to spot and sort out, especially here in New Zealand's generally kind climate. Think of this as your go-to troubleshooting guide, helping you catch and manage any setbacks before they turn into real problems.
From fungal spots to a few unwanted visitors, a little bit of knowledge goes a very long way. If you know what to look for, you can act fast and keep your hedge looking its absolute best.
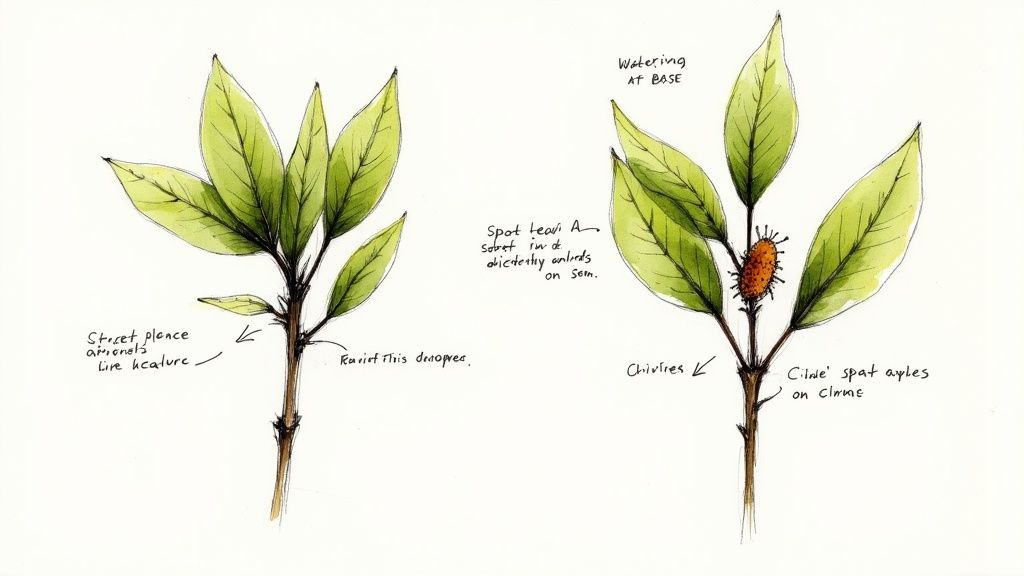
Tackling Photinia Leaf Spot
If you start seeing purple or brown spots on your hedge's leaves, especially during damp, humid weather, you're almost certainly looking at Photinia leaf spot. It's a common fungal issue that loves moisture and often pops up where there’s not a lot of air moving through the plant. It might look a bit alarming, but it's rarely a serious threat and is very manageable.
The best defence is always a good offence. A few simple tweaks to how you care for your hedge can make a massive difference.
- Improve Airflow: Remember how we talked about pruning your hedge into a slight 'A' shape? This lets more air and light get to the inner leaves, helping them dry off much quicker after it rains.
- Water Wisely: Try to avoid watering the leaves. A soaker hose at the base of the plants is ideal, or just water them directly by hand. Keeping the foliage dry makes it a much less welcoming home for fungal spores.
- Clean Up Debris: Make sure to rake up any fallen leaves from around the base of the hedge. These can harbour spores over winter, just waiting to reinfect the plant in spring.
If you already have an infection, just snip off the worst-affected leaves and pop them in the bin, not the compost. For a more stubborn case, a copper-based fungicide spray can help get things under control, particularly during those persistently wet spells in spring and autumn.
Dealing with Common Garden Pests
Photinia Red Robin is pretty pest-resistant, but like any plant, it can occasionally attract sap-sucking insects. The two you’re most likely to come across on your photinia red robin hedge plants are aphids and scale insects.
It's worth remembering that a healthy garden often looks after itself. A small number of pests will attract beneficial insects like ladybirds and lacewings, which are your own little pest control army. The goal is management, not total eradication.
Identifying and Managing Unwanted Visitors
Catching these pests early is the key to stopping them in their tracks. A quick look-over while you're out with the hose or the shears is usually all it takes.
-
Aphids: These are tiny, pear-shaped critters that tend to cluster on the tender new red growth. Often, a good blast of water from the hose is enough to send them packing. If they're a bit more stubborn, a simple insecticidal soap spray is a great low-impact solution.
-
Scale Insects: These look like little hard bumps on the stems and the undersides of leaves, so they can be a bit tricky to spot. You can often just scrape them off with a fingernail. For a bigger infestation, applying horticultural oil during winter will help smother any overwintering insects and their eggs.
By just keeping an eye out and using these simple, targeted fixes, you can easily keep your Photinia hedge healthy and looking fantastic for years to come.
Your Red Robin Hedge Questions Answered
Even the most thorough guides can leave you with a few lingering questions. It's only natural! This last section tackles the common queries we hear from gardeners all across New Zealand about their Photinia 'Red Robin' hedges. Think of it as a quick go-to for solving those practical little issues that pop up along the way.
Is Red Robin Poisonous to Pets or People?
It pays to be a bit cautious here, yes. After the white flowers in spring, the plant produces small, berry-like fruits (called pomes) which are considered poisonous to people and animals, including dogs, cats, and livestock. They can cause an upset stomach if eaten.
The leaves also contain cyanogenic glycosides, which can be toxic if consumed in large amounts. But honestly, the leaves are quite tough and leathery, so most pets won't give them a second glance. The good news is that actual cases of poisoning are incredibly rare. Still, it's always smart to keep an eye on curious pets and small children, especially when the fruits are out.
How Fast Will My Hedge Actually Grow?
Photinia ‘Red Robin’ is a famously vigorous grower—it’s a huge part of its appeal! In decent conditions anywhere in New Zealand, you can realistically expect your hedge to put on between 30cm and 60cm a year.
A few things will nudge that growth rate up or down:
- Soil Quality: Rich, well-drained soil that's full of organic goodies is like rocket fuel for these plants.
- Sunlight: Hedges soaking up the full sun tend to grow faster and produce far more vibrant red new growth than those in part shade.
- Watering: Getting the watering right, especially in the first couple of years, is key to establishing a strong root system that can support all that lush top growth.
With a bit of care, you can have a dense, 1.8-metre-high privacy screen in as little as three to five years.
Can I Grow Red Robin in a Pot?
Absolutely! Photinia 'Red Robin' is surprisingly adaptable and does brilliantly in large pots or containers. This makes it a fantastic choice for screening off a patio, bringing a splash of colour to a balcony, or greening up a decked area where you can't plant in the ground.
For the best results, go for a big, sturdy container—at least 50cm wide and deep—to give the roots plenty of room to move. Use a top-quality potting mix and make sure the pot has plenty of drainage holes. Just remember, potted plants dry out much faster than garden plants, so you'll need to be on top of watering, especially through the hot summer months.
A potted Photinia will really appreciate a feed with a slow-release fertiliser each spring. This just tops up the nutrients in its limited soil. A light trim after the red flush has faded will also keep it looking sharp and compact.
Why Is My Hedge Losing Its Lower Leaves?
Seeing your hedge go a bit thin and "leggy" at the bottom is a common problem, and the culprit is almost always a lack of light. It often happens when a hedge is trimmed into a perfect rectangular box, which allows the wider top to shade out the lower branches.
The fix is to adopt that classic "A-shape" pruning style we talked about earlier. By keeping the base of the hedge just slightly wider than the top, you let sunlight reach the foliage all the way down to the ground. This simple change encourages dense, leafy growth from top to bottom, stopping that bare-ankled look in its tracks. In severe cases, a hard prune back in late winter can also shock the plant into producing fresh new growth from the base.
Will My Hedge Attract Birds?
Oh, absolutely. A dense Photinia hedge can be a wonderful magnet for birdlife in your garden. While it isn't a native NZ plant, it provides two things many of our smaller birds desperately need: shelter and protection.
The thick, evergreen foliage is a perfect safe house from predators like cats or bigger, bossier birds. You’ll often see small birds like silvereyes and fantails using the hedge as a safe "corridor" to zip around the garden, darting in and out of its cover. While the berries aren't great for mammals, some birds will happily have a nibble. By providing this kind of habitat, your hedge becomes a really valuable part of a bird-friendly garden.
Ready to create your own vibrant, living fence? Jungle Story offers a fantastic selection of healthy, top-grade Photinia Red Robin hedge plants, ready for nationwide delivery. Start building your beautiful hedge today