Picture this: you step out into your garden and are greeted by the huge, impossibly vibrant flowers of a tropical hibiscus. This guide is your complete roadmap to making that a reality. We're here to demystify the art of growing these symbols of paradise, right here in New Zealand.
With a bit of know-how, success is well within your grasp.
Bringing a Touch of the Tropics to Your Garden
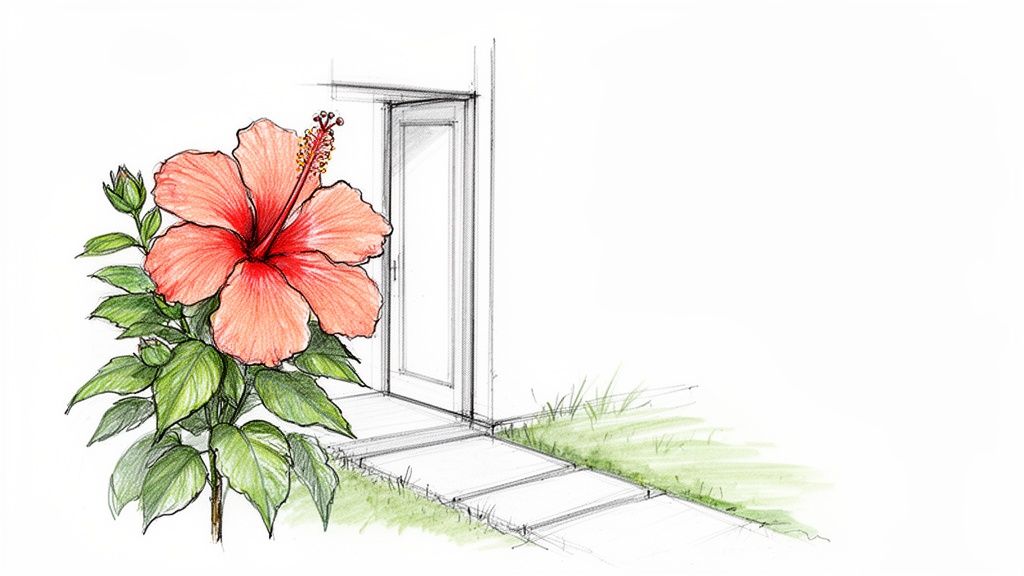
The tropical hibiscus (Hibiscus rosa-sinensis) isn't just another plant; it's a statement piece. Its large, flamboyant flowers can instantly turn a patio, balcony, or garden bed into your own personal oasis. For so many Kiwi gardeners, these plants bring back feelings of warmth, holidays, and faraway places, making them a truly special addition to any outdoor space.
Don't fall for the myth that they're too difficult to manage in our climate. Yes, they need a bit of specific care—especially when it comes to frost in cooler regions—but their seasonal beauty is a reward that makes the effort totally worthwhile. The journey starts with understanding their unique needs, beginning with what sets them apart from their hardier cousins.
Unpacking the Diversity of Hibiscus
A huge part of the tropical hibiscus's charm is its breathtaking variety. As a member of the diverse Malvaceae family (which also includes plants like okra and cotton), Hibiscus rosa-sinensis has been bred into an incredible array of forms.
Originally from Asia and the Pacific Islands, these plants boast an amazing range of flower sizes. Some are a modest five centimetres across, while others are true dinner-plate-sized blooms reaching up to an astonishing 30 centimetres in diameter.
This diversity carries through to the plants themselves. Some cultivars stay compact, maybe only growing about 30 centimetres over several years, which makes them perfect for pots. Others can grow into substantial shrubs, reaching heights of 4.5 metres in the right garden spot. It's this remarkable adaptability that has made them a cornerstone of gardening in New Zealand and around the world.
What Makes Them So Captivating
Beyond their impressive size, it’s the sheer spectrum of colour that truly sets tropical hibiscus apart. Cultivars are available in thousands of combinations, covering pretty much every colour you can think of, except for a true blue or black. From fiery reds and sunset oranges to the softest pinks and crisp whites, there's a hibiscus to suit any garden style.
This guide will show you how to harness all that beauty. We’ll cover the foundational knowledge you need for a truly rewarding growing experience. By exploring the essentials of care, you'll be well-equipped to help your chosen plant thrive.
For more inspiration on creating a lush, vibrant outdoor space, check out our guide on growing other tropical plants in NZ.
How to Choose the Right Hibiscus for Your NZ Garden
Finding the perfect tropical hibiscus is easily the most exciting part of starting your journey. Think of it like choosing a new pet—you want a plant whose needs and personality are a perfect match for your home. For us Kiwi gardeners, that means thinking about your local climate, the space you have, and, of course, which incredible flower colours you're dreaming of.
New Zealand’s climate varies so much, from the balmy north to the crisper south, so there’s no single ‘one-size-fits-all’ hibiscus. A variety that’ll flourish in a Kerikeri garden might need the cosy shelter of a pot on a Christchurch patio. This guide will walk you through the most popular types you'll find here, helping you pick a plant that's set up for success from day one.
Let's get you ready to walk into a nursery, look past the initial dazzle of the flowers, and confidently choose a plant that will genuinely thrive in your garden.
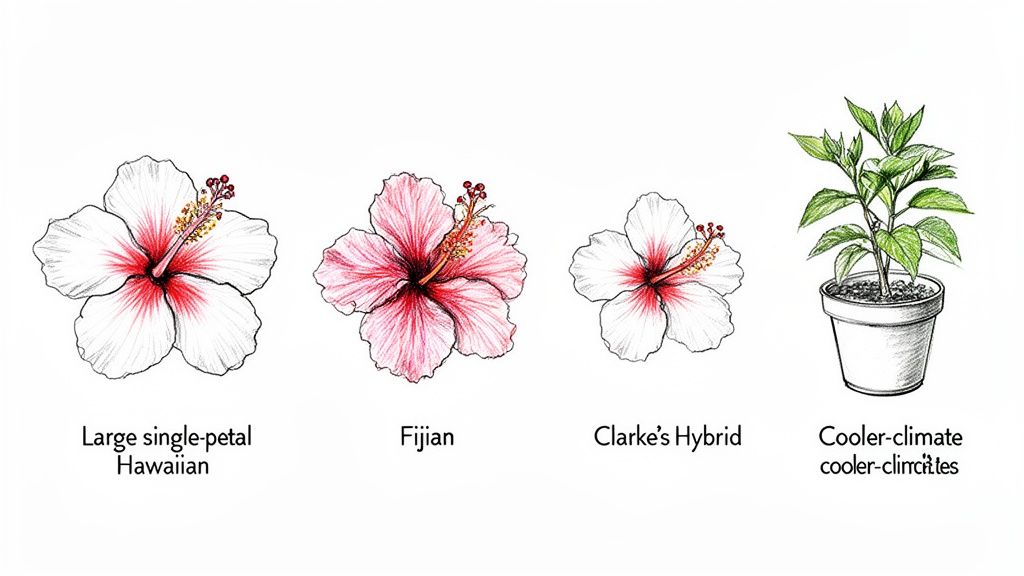
The Bold and Beautiful: Hawaiian Varieties
Hawaiian hibiscus are the undisputed superstars of the flower world. We're talking about massive, often multi-coloured blooms that can easily be the size of a side plate. These are the flowers that literally stop you in your tracks with their incredible size and dazzling colour patterns.
But, all that glamour comes with a catch. Hawaiian varieties are typically smaller shrubs and they're quite sensitive to the cold. They demand the warmest, most sheltered, and sunniest spot you can possibly give them.
If you're gardening in the upper North Island, you're in luck—providing these conditions is much easier. For everyone else, it’s best to treat them as treasured container plants. That way, you can whisk them away to a protected spot when winter's chill sets in.
The Prolific and Hardy: Fijian Cultivars
If the Hawaiian types are the high-fashion models, then the Fijian hibiscus are the reliable, ever-working stars of the garden. Their flowers are generally a bit smaller and come in solid, vibrant colours like rich reds, sunny yellows, and blazing oranges. Their real strength, though, is their sheer flower power and toughness.
Fijian cultivars are known for their vigorous growth and for pumping out an unbelievable number of flowers all through the warmer months. They are noticeably hardier than their Hawaiian cousins, which means they can handle a much wider range of Kiwi conditions.
A key advantage of Fijian hibiscus is just how robust they are. They form dense, attractive shrubs with glossy green leaves, making them fantastic for hedges, screens, or simply creating that lush, tropical vibe.
This resilience makes them a more forgiving and versatile choice for most of us, delivering a constant splash of colour from late spring right through to autumn.
A True Kiwi Innovation: Clarke's Hybrids
New Zealand's unique climate has spurred on some brilliant local innovation. Over the years, growers have worked to select varieties tailored to our diverse conditions. The biggest breakthrough came from Jack Clarke's breeding programme, which crossed Fijian and Hawaiian hibiscus to create hybrids specifically suited to places like Auckland. You can read more about the development of hibiscus for NZ conditions to see how they came about.
These hybrids really do offer the best of both worlds:
- Large, Colourful Flowers: They get the impressive flower size and exciting colour combos from their Hawaiian parentage.
- Vigorous Growth: From their Fijian side, they inherit a strong growth habit and much-improved hardiness.
Clarke's Hybrids are a fantastic choice if you want that huge 'wow' factor bloom but need a plant that’s better adapted to our changeable weather. They hit that perfect sweet spot between spectacular beauty and practical, low-fuss gardening.
Hibiscus Variety Comparison for New Zealand Gardens
To make it even easier, here’s a quick-reference table to help you compare the main types at a glance. Think about your garden's specific conditions and what you want from your plant as you look through it.
| Variety Type | Flower Size & Frequency | Hardiness | Best NZ Region/Use Case | Growth Habit |
|---|---|---|---|---|
| Hawaiian | Huge, plate-sized flowers. Less frequent blooms. | Tender. Needs frost-free, warm, sheltered spot. | Upper North Island in-ground; pots/patios elsewhere. | Smaller, often leggy shrub. |
| Fijian | Medium-sized flowers. Blooms prolifically. | Hardy. More tolerant of cooler temps and wind. | Most NZ regions. Excellent for hedges & screening. | Vigorous, dense, bushy shrub. |
| Clarke's Hybrid | Large, colourful flowers. Good blooming frequency. | Moderately Hardy. A good middle-ground option. | North Island & warmer coastal areas. Feature plant. | Strong, bushy growth. |
Hopefully, this gives you a clearer picture. Choosing the right type from the start is the key to a long and happy relationship with your hibiscus.
The Four Pillars of Hibiscus Care
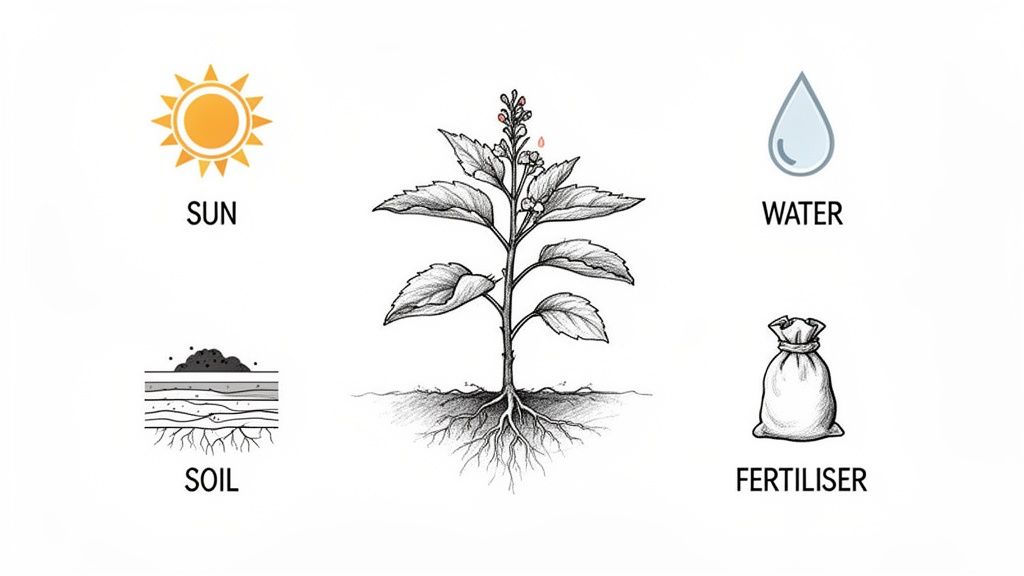
If you want to see what a tropical hibiscus can really do, it all comes down to four key things. Think of it like a recipe: get the balance right between sunlight, water, soil, and fertiliser, and you’ll be rewarded with a healthy plant absolutely covered in stunning blooms.
This isn't about getting bogged down in complicated science. It's simply about tuning into what your plant needs as it navigates New Zealand's seasons. Let’s break each pillar down so you can build a simple, effective care routine that works.
Pillar One: Sunshine and Light
At their core, tropical hibiscus are total sun-worshippers. Plenty of light is non-negotiable if you want lots of flowers. They need at least six hours of direct sunlight every day to power the production of those massive, colourful blooms.
For most of us here in New Zealand, a north-facing spot that catches that lovely morning sun is the sweet spot. This gives them the energy they need without the punishing heat of the late afternoon.
That said, be a bit careful with the intense Kiwi summer sun, especially in the warmer parts of the country. While they love the light, a scorching afternoon can stress the leaves and cause flowers to wilt. If your sunniest spot gets hammered late in the day, a little protection—like the dappled shade from a bigger tree or even a screen—can make a world of difference.
Pillar Two: The Art of Watering
Watering is where things can go wrong for a lot of new hibiscus owners. The aim is to keep the soil consistently moist, but never, ever soggy. A good way to think about it is like a wrung-out sponge: it’s damp, but not dripping.
Getting this balance right is so important because hibiscus roots are quick to rot if left sitting in water. Through the main growing season in spring and summer, you’ll probably find yourself watering every few days, especially if your plant is in a pot.
The easiest way to check is the old-fashioned finger test. Just poke your finger about five centimetres into the soil. If it feels dry, it’s time to give the plant a proper soak until you see water running out the drainage holes. When autumn and winter roll around, the plant’s growth slows right down, so you’ll need to cut back on watering, letting the soil dry out more between drinks.
Pillar Three: Soil and Drainage
Good drainage is your best mate when it comes to preventing root rot. Tropical hibiscus need a soil that’s full of organic goodies but, crucially, drains really well. Your average garden soil is usually too heavy and holds on to too much water for their liking.
You’re looking for a soil structure that lets any excess water drain away fast, while still holding enough moisture for the roots to drink.
- In Garden Beds: Before you plant, dig in a generous amount of compost or well-rotted manure. This will improve both the nutrient levels and the soil structure.
- In Containers: Start with a top-quality, free-draining potting mix. To make it even better, mix in some perlite or pumice to help keep it light and airy.
A well-draining soil mix is your safety net against overwatering. It gives you a much bigger margin for error and makes sure the roots get the oxygen they need to stay healthy.
Pillar Four: Feeding for Flowers
The last piece of the puzzle is food. Hibiscus are hungry plants, especially from spring through summer, but they’re also a bit picky. Their dietary needs are quite different from most other flowering shrubs.
They absolutely love a fertiliser that’s high in potassium (K) but low in phosphorus (P). Potassium is the key ingredient for fuelling those incredible flowers and keeping the whole plant strong. On the flip side, too much phosphorus can actually be toxic to hibiscus, stopping them from growing properly and blocking them from absorbing other vital nutrients.
Time your feeding schedule with the New Zealand seasons. Begin applying a good liquid or slow-release fertiliser in spring when you see new growth starting. Keep it up regularly through summer, following the directions on the packet. As soon as the weather cools in autumn, stop feeding. This lets your plant know it’s time to wind down for a winter rest.
A Practical Guide to Growing Hibiscus in Pots
For anyone with a smaller garden, a balcony, or for those in cooler parts of New Zealand, growing tropical hibiscus in containers is the perfect solution. It gives you complete control over their environment and allows you to move them to a sheltered spot when winter frosts threaten. But pot life, as any seasoned gardener knows, comes with its own set of rules.
Think of potted hibiscus as elite athletes—they need a bit more attention to perform at their peak. They dry out faster, burn through nutrients more quickly, and rely entirely on you for everything they need. With a few key strategies, though, you can easily create a thriving potted paradise on your deck or patio.
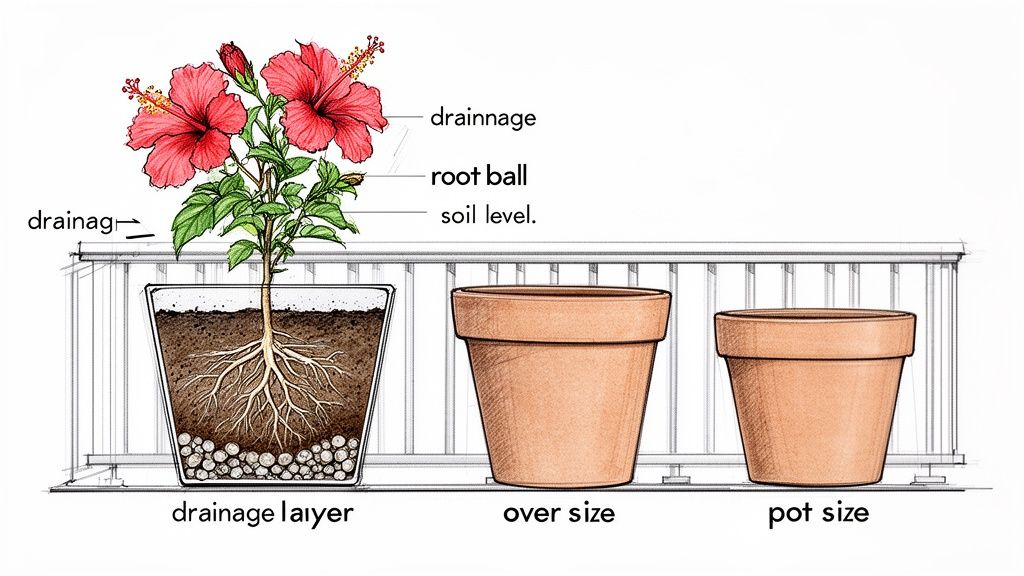
Choosing the Right Home
First things first, you need to select the right pot. It’s tempting to put a small plant into a huge container to save yourself a job later, but this can actually lead to disaster. A pot that’s too large holds a massive amount of soil that stays wet for too long, creating the perfect soggy conditions for root rot.
A good rule of thumb is to choose a pot that is only about 5-10 centimetres wider in diameter than the plant's current one. This gives the roots just enough room to expand without leaving them swimming in excess moisture. And, of course, make sure any pot you choose has plenty of drainage holes—this part is non-negotiable.
When growing hibiscus in pots, especially for convenience or if you anticipate periods away, using self-watering containers can be an excellent move for consistent moisture. You’ll also want a premium, free-draining potting mix. Whatever you do, avoid using garden soil, which is far too heavy and compacts easily in pots, effectively suffocating the roots.
Watering and Feeding Potted Hibiscus
Because their root zone is confined, potted hibiscus need more frequent watering and feeding than their garden-grown counterparts. In the heat of summer, you might need to water your plant daily, especially on those hot, windy days. Always check the top few centimetres of soil first; if it feels dry to the touch, give it a thorough soak until water runs freely from the bottom.
This constant watering flushes nutrients out of the potting mix, so regular feeding during the growing season is absolutely vital to keep those flowers coming.
- Frequency: Apply a liquid fertiliser high in potassium every two to three weeks from spring right through summer.
- Adjustment: Taper off feeding in autumn and stop completely over winter when the plant is dormant.
Keeping a consistent routine is key. Irregular watering and feeding are the main sources of stress for potted hibiscus, often leading to annoying issues like yellowing leaves or bud drop. Treat them well, and they will reward you with an endless show of blooms.
Knowing When to Repot
Eventually, your hibiscus will outgrow its home. You’ll know it’s time to repot when you spot roots sneaking out of the drainage holes or when the plant seems to dry out almost immediately after watering. Repotting is best done in early spring, just as new growth starts to kick in.
Choose a new pot that is the next size up. Gently tease out the roots, trim any that are circling the root ball, and settle it into the new container with fresh, high-quality potting mix. Water it in well to get rid of any air pockets, and your tropical hibiscus will be ready for another season of spectacular growth.
For more ideas on what to grow, explore our guide to the best plants for outdoor pots in NZ.
Your Year-Round Hibiscus Care and Pruning Plan
To get the absolute best out of your tropical hibiscus, you need to get on its schedule. Plants run on an annual rhythm, a cycle dictated by the sun and the seasons. When you line up your care routine with their natural calendar, you give them exactly what they need, right when they need it. The result? A much stronger plant and a truly spectacular show of flowers.
For us gardeners in New Zealand, this means we have to work with the Southern Hemisphere's timeline. Forget any advice you see from the northern half of the world; your hibiscus is tuned into our spring, summer, autumn, and winter. Mapping out a year-round plan takes all the guesswork out of it, turning hibiscus care into a simple, deeply rewarding routine.
This seasonal approach is all about working with your plant instead of against it. Get this right, and you're setting the stage for a breathtaking floral display.
Spring Awakening (September to November)
As the days stretch out and the soil slowly warms up, your hibiscus starts to stir from its winter rest. This is a crucial window for giving it the energy it needs for the massive growth spurt ahead. Think of it as serving your plant a power-packed breakfast after a long sleep.
Your first job is to give it a high-quality, slow-release fertiliser that’s rich in potassium but low in phosphorus. This provides a steady trickle of nutrients to fuel all that fresh new growth. This is also the perfect time to make your main pruning cuts as new shoots begin to appear, which helps shape the plant for the upcoming season.
Summer Showtime (December to February)
Summer is when your tropical hibiscus hits its peak. The plant is in full-on growth mode, pouring all its energy into producing those magnificent, vibrant flowers. Your job during these months is to be its support crew, making sure it has everything it needs to keep the show going strong.
Consistent watering is your number one priority, especially during those scorching hot, dry spells. Keep a close eye on your plants—the ones in pots are especially thirsty and can dry out in just a few hours on a hot day.
Here are your key jobs for summer:
- Deadhead Old Flowers: Regularly pinch or snip off spent blooms. This not only tidies up the plant but, more importantly, stops it from wasting energy making seeds. All that power gets redirected into making more flowers instead.
- Keep it Hydrated: Water deeply and regularly. You're aiming to keep the soil consistently moist, but never soggy or waterlogged.
- Go on Pest Patrol: Warm weather can bring out pests like aphids. Check the undersides of leaves and the tips of new growth every week or so, and deal with any unwelcome visitors before they turn into a real problem.
Autumn Wind-Down (March to May)
When the days get shorter and the nights start to cool, your hibiscus gets the signal to slow down. The plant is naturally shifting gears to prepare for the cooler months. Your care routine should mirror this change by gradually easing off.
Start by watering less often, letting the soil dry out a bit more between drinks. It's also vital to stop all fertilising by the end of March. Feeding your hibiscus now would just encourage a flush of soft new growth that would be easily scorched and damaged by the first frosts.
Think of autumn as the plant’s cool-down lap. By cutting back on water and food, you’re sending a clear message: it's time to toughen up and get ready for a winter rest, not start a new growth spurt.
This prep work is essential for giving your hibiscus the strength it needs to cruise through winter and bounce back with vigour in the spring.
Winter Pruning for Future Flowers
The single most important job for late winter or very early spring is the annual prune. I know it can feel a bit scary to take the shears to your beloved plant, but trust me, it’s the best thing you can do to guarantee a fantastic display of flowers. Hibiscus bloom on new growth, so a good prune stimulates the exact wood that will carry the next season's blooms.
The main goal is to create an open, vase-like shape. This allows light and air to get into all parts of the plant, which not only means more flowers but also helps keep pests and diseases away.
Here’s a simple way to prune:
- Clean it Up: Start by cutting out any branches that are dead, broken, or crossing over each other.
- Cut it Back: Trim back the main, healthy branches by about one-third of their length.
- Use Angled Cuts: Always make your cuts on a slight angle, about 5 mm above a bud that's facing outwards. This encourages the new shoot to grow out, not in, maintaining that nice, open shape.
This annual reset builds a strong, well-shaped framework that will support a magnificent flush of new, flower-bearing growth as soon as spring arrives.
Troubleshooting Common Hibiscus Pests and Problems
Even the most well-tended hibiscus can hit a snag now and then. Don't worry, it happens to all of us. Think of this section as your personal plant first-aid guide, helping you figure out what’s going on and how to get your plant back to its vibrant, happy self.
The real trick is to catch these things early. A quick weekly once-over, especially under the leaves and around new growth, can stop a small problem from turning into a full-blown plant emergency.
Identifying Common Pests
A few little critters love tropical hibiscus just as much as we do. Fortunately, they’re usually easy to manage if you know what you’re looking for.
- Aphids: You’ll find these small, pear-shaped insects huddled together on new stems and flower buds. They suck the sap, which can weaken the plant. Often, a sharp spray of water from the hose is all it takes to send them packing.
- Spider Mites: These guys are tiny and tough to spot, but their tell-tale sign is fine, silky webbing under the leaves. They love hot, dry weather and cause a stippled, bronze look on the foliage.
- Whitefly: If you gently shake a branch and a little cloud of white insects flutters up, you’ve got whitefly. Just like aphids, they feed on sap, leading to yellowing leaves that may eventually drop off.
For any of these pests that just won't quit, an organic horticultural oil is your best friend. You can learn more about using neem oil for plants in our detailed guide — it’s a fantastic starting point for tackling pests the natural way.
Dealing with Common Diseases
Hibiscus diseases are less common than pests, and the good news is they’re almost always linked to environmental conditions. That means they are highly preventable.
Root rot is public enemy number one, and it's nearly always caused by too much water or soil that just doesn’t drain properly. If your plant is wilting even though the soil feels wet, and its lower leaves are turning yellow, suspect root rot. The only real fix is to gently repot it into fresh, well-draining soil, making sure to trim off any brown, mushy roots you find.
You might also spot sooty mould, a black, dusty-looking fungus. It grows on the sticky "honeydew" left behind by pests like aphids and whitefly. While the mould itself isn't directly harming the plant, it looks messy and can block sunlight. The solution is simple: get rid of the pests, and the sooty mould will go away on its own.
The Mystery of Yellow Leaves
"Why are my hibiscus leaves turning yellow?" It’s the question we hear most often. A yellow leaf is basically your plant's way of telling you it's stressed, but figuring out the why takes a bit of detective work.
Think of a yellow leaf like a warning light on your car's dashboard. It doesn't tell you the exact problem, but it signals that something needs your attention.
Here are the most common culprits to check:
- Watering Issues: This is a big one. Both overwatering and underwatering can trigger yellow leaves. Stick your finger into the soil – is it soggy or bone dry? You're aiming for that sweet spot of consistently moist, but never waterlogged, soil.
- Nutrient Deficiency: If the new leaves are yellow but the veins are still green, it might be an iron or magnesium shortage. If it's the older, lower leaves yellowing, it could be a lack of nitrogen. A good quality, balanced fertiliser should sort this out.
- Sudden Environmental Changes: Did you just move your hibiscus? A sudden change in light, temperature, or humidity can shock the plant, causing it to drop a few leaves while it adjusts to its new home. Just give it a little time to settle in.
Common Hibiscus Problems and Solutions
Feeling a bit lost? This quick-reference table can help you pinpoint the issue and find the right solution to get your hibiscus thriving again.
| Symptom | Potential Cause | Recommended Solution |
|---|---|---|
| Yellow leaves | Over/under-watering, nutrient deficiency, or sudden environmental shock. | Check soil moisture and adjust watering. Apply a balanced fertiliser. Allow time to acclimatise after moving. |
| Fine webbing under leaves | Spider mites. | Increase humidity. Wipe leaves with a damp cloth or spray with horticultural oil like neem oil. |
| Sticky residue on leaves | Aphids, whitefly, or scale (honeydew). | Identify and treat the pest with a strong spray of water or horticultural oil. |
| Black, sooty powder on leaves | Sooty mould growing on honeydew. | Treat the pests causing the honeydew; the mould will then disappear. |
| Buds drop before opening | Stress from inconsistent watering, temperature fluctuations, or pests. | Ensure consistent watering and stable temperatures. Check for pests like thrips or aphids inside the buds. |
| Wilting, even with wet soil | Root rot due to overwatering or poor drainage. | Repot into fresh, well-draining soil immediately. Trim away any dead or mushy roots. |
Hopefully, this gives you the confidence to tackle any issue that comes your way. A healthy plant is a resilient one, and with a little attention, your hibiscus will bounce back beautifully.
Your Tropical Hibiscus Questions Answered
Let's finish up by tackling a few of the most common questions we hear from Kiwi gardeners about growing tropical hibiscus. Consider this your go-to cheat sheet for troubleshooting and keeping your confidence high as the seasons change.
How Can I Get More Flowers on My Hibiscus?
If you're wondering how to get an explosion of blooms, the answer usually lies in a few key areas. First and foremost, these plants are sun-worshippers. They need at least six hours of direct sun every single day to really put on a show.
Next, think about food. During the main growing season in spring and summer, a regular feed with a fertiliser high in potassium but low in phosphorus is just what they need. Consistent watering is also a big one – try not to let the plant dry out completely between drinks. And finally, a good tidy-up prune in late winter or early spring encourages that fresh new growth where all those gorgeous flowers will appear.
Can I Grow a Tropical Hibiscus Indoors in New Zealand?
Absolutely, you can! This is actually a brilliant way to see them through the winter, especially if you live in one of the colder parts of the country.
To keep it happy inside, find the absolute sunniest spot in your house, which is almost always a north-facing window. You'll notice it needs less water than when it was outside, so always do the finger test on the soil before watering. Indoor air can get quite dry, so a light misting now and then really helps. Just be sure to keep an eye out for pests like spider mites, which can sometimes pop up when plants are brought indoors.
Moving a tropical hibiscus inside for the winter is a fantastic way to protect it. Just remember to give it as much light as possible to keep it healthy until it can return outside in the spring.
Why Are Flower Buds Dropping Before They Open?
Ah, the dreaded bud drop. This is a classic sign your hibiscus is feeling a bit stressed out. The most common culprit is inconsistent watering – both letting it get bone dry and keeping it waterlogged can trigger it. Sudden swings in temperature or not enough sunlight are also high on the list of suspects.
The goal is to keep the soil consistently moist but never soggy. Protect your plant from chilly draughts or sudden, intense heatwaves. If you’ve just moved it, a bit of bud drop can simply be the plant adjusting to its new home, so a little patience might be all that's needed.
Feeling inspired to add a touch of the tropics to your garden? At Jungle Story, we connect you with trusted local sellers offering a stunning range of tropical hibiscus and everything else you need to create your dream green space. Explore our collection and start your growing journey today at https://junglestory.co.nz.