Picking the best cherry tree for your garden in New Zealand can feel like a massive decision, but it really just boils down to two things: your local climate and whether you have space for one tree or two.
For most of us with a typical Kiwi backyard, a self-fertile variety like 'Lapins' or 'Stella' is the easiest way to go. You only need one tree to get a fantastic crop of sweet summer cherries. These are popular for a reason – they grow well in many parts of the country, from sunny Hawke's Bay right down to Central Otago.
Choosing the Right Cherry Tree for Your NZ Garden
The path to a bucketful of homegrown cherries starts long before you even think about digging a hole. It all begins with picking the right tree for your specific spot in New Zealand. This isn't just about flavour; it's a practical choice that will make or break your tree's health and how much fruit you get.
New Zealand's climate is incredibly varied. A cherry that thrives in the cold, dry winters of Alexandra might really struggle with Auckland's humidity. A one-size-fits-all approach just doesn’t work here.
Sweet vs Sour Cherries: What’s the Difference?
Your first big decision is whether you want sweet cherries (Prunus avium) or their tart cousins, the sour cherries (Prunus cerasus). This choice is all about what you plan to do with your harvest.
-
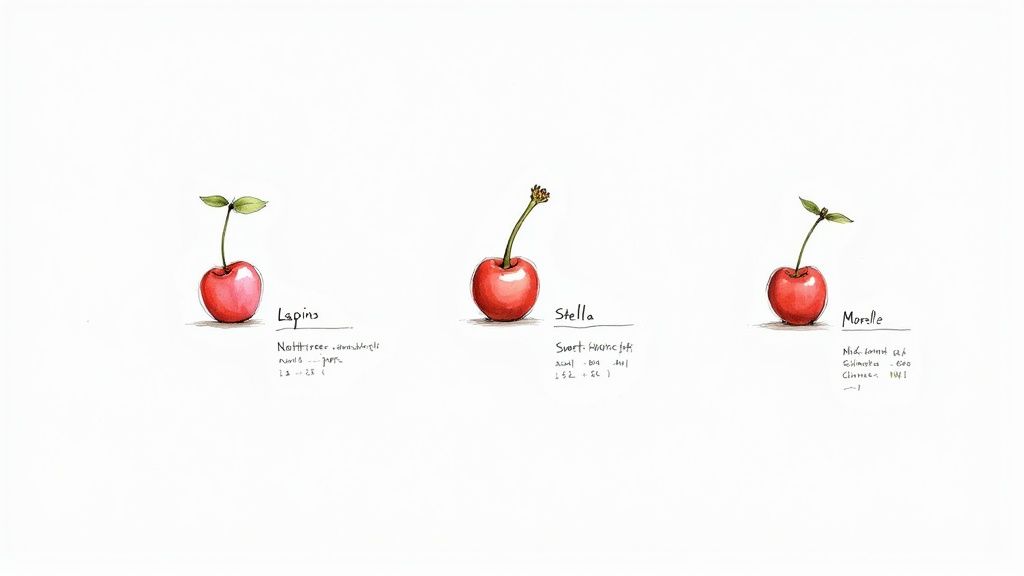
Sweet Cherries: These are the ones you dream of eating straight from the branch – big, juicy, dark-red or blush-coloured fruit. Think of popular varieties like 'Lapins', 'Stella', and 'Dawson'. If you want cherries for snacking, tossing in salads, or showing off in a summer dessert, this is what you’re after.
-
Sour Cherries: Often called cooking or pie cherries, varieties like the famous 'Morello' have a sharp, tangy flavour that transforms into something incredibly rich and delicious when cooked. They are the absolute best for pies, jams, and sauces. You probably wouldn't eat them by the handful, but their value in the kitchen is second to none.
The Pollination Puzzle: Self-Fertile vs Cross-Pollination
Honestly, this is the most critical bit for new cherry growers. Getting this wrong means you could end up with a lovely, leafy tree that never gives you a single cherry.
Many of the older, traditional cherry varieties need a different, compatible cherry tree planted nearby to act as a pollination partner. Bees do the hard work, transferring pollen from one tree to the other, which is what allows the fruit to form.
For most home gardeners, though, space is a luxury. That’s where self-fertile varieties come in – they are the perfect solution. These clever trees can pollinate themselves, meaning you only need one plant to get a bumper crop.
Key Takeaway: If you only have room for a single tree, you absolutely must choose a self-fertile variety. The most common and reliable options in New Zealand include 'Lapins', 'Stella', and 'Sweetheart'. Making this one choice right from the start saves a lot of potential disappointment down the line.
If you have a bit more space or are planning a small orchard, you can definitely explore other varieties. Just make sure you plant compatible partners that flower at the same time.
Before you buy, it's a good idea to see what works well in your area. Below is a quick comparison of some popular varieties suited for Kiwi gardens.
Popular Cherry Varieties for NZ Gardens
| Variety Name | Type (Sweet/Sour) | Self-Fertile? | Best Suited Region | Harvest Time (NZ) |
|---|---|---|---|---|
| Lapins | Sweet | Yes | Most regions, particularly colder South Island areas | Mid to Late-Jan |
| Stella | Sweet | Yes | Widely adaptable, good for warmer North Island spots | Early to Mid-Jan |
| Dawson | Sweet | No | Traditional favourite in cooler climates (e.g., Otago) | Early Jan |
| Morello | Sour | Yes | Cold climates; needs winter chill for good fruiting | Late Jan |
| Rainier | Sweet | No | Colder regions with low rainfall during harvest | Mid-Dec to Early Jan |
| Sweetheart | Sweet | Yes | Adaptable, good for extending the harvest season | Late Jan to Feb |
This table gives you a starting point, but always check with your local nursery for advice tailored to your specific microclimate.
Understanding Rootstocks and Tree Size
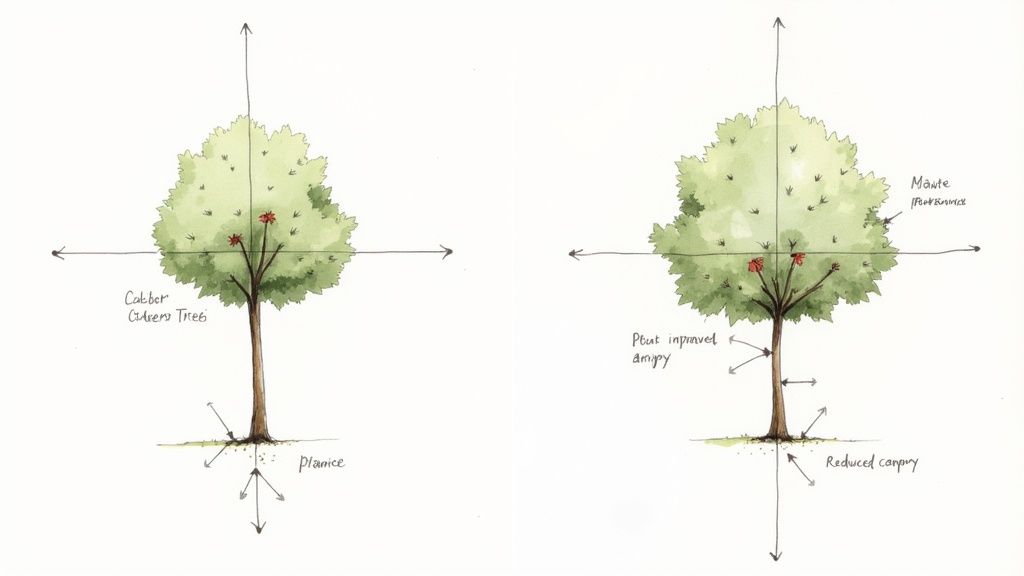
The final piece of the puzzle is the rootstock. This is the part of the tree you'll never see – it's the root system that the fruiting variety (like 'Lapins') is grafted onto. The rootstock's main job is to control how big the tree will ultimately get.
This is brilliant for gardeners because it means you can fit a cherry tree into almost any space.
For instance, a cherry on a dwarfing rootstock might only grow to 2-3 metres tall. This makes it perfect for a small urban garden, a large pot, or even espaliered against a sunny wall. On the other hand, a tree on a vigorous rootstock could easily reach 5-6 metres or more, which is better suited to a lifestyle block.
When you buy your tree, the tag should tell you what rootstock it's on and its expected mature height. Pay close attention to this detail – it ensures your tree will fit your garden plan for years to come. If you're thinking about adding other fruit to your garden, our comprehensive guide to fruit trees in NZ has more handy tips on selection and care.
Laying the Groundwork for a Strong Start

Getting your cherry tree in the ground correctly is one of those things that really sets the stage for its entire life. It’s the foundational work that pays off with a healthy, vigorous tree for years to come, so it’s well worth taking the time to get it right from day one.
Think of it like building a house—you wouldn't start without solid foundations. For a cherry tree, this means scouting the perfect location and preparing the soil to welcome its new roots. A bit of effort now prevents a lot of headaches later on.
Finding the Perfect Spot
Before you even think about digging, take a walk around your garden and just observe. Cherry trees have a few non-negotiables to truly thrive in New Zealand, and finding a spot that ticks these boxes is your first mission.
Here’s what you’re looking for:
- Sunlight: Cherries are sun-worshippers. They need at least six hours of direct sunlight each day to get enough energy for good growth and, most importantly, for developing that sweet, juicy fruit. A north-facing spot is often ideal here in NZ.
- Drainage: They absolutely despise "wet feet." You'll want to avoid any low-lying areas where water tends to pool after a decent rain. Clay-heavy soils, which are pretty common in many Kiwi gardens, will definitely need some work to improve drainage.
- Shelter: That classic nor'wester or a biting southerly can be brutal. A spot that’s sheltered from the prevailing winds will protect those delicate blossoms in spring and stop branches from snapping as the tree gets bigger.
Once you’ve found a location that meets these criteria, you can move on to the soil, which is where the real magic happens.
Preparing Your Soil for Success
Great soil is the secret to a great tree. Most garden soil isn't perfect straight out of the gate, but you can easily improve it to create an ideal home for your cherry tree’s roots to get established and really flourish.
Start by digging a hole that is roughly twice as wide as the root ball, but no deeper. This simple trick encourages the roots to spread outwards into the surrounding soil. Loosening the soil in a wide area gives the tree a much better start than just digging a narrow, deep pit.
Next, it’s all about enrichment. Mix the soil you've just dug out with a generous amount of well-rotted compost or some sheep pellets. This improves the soil structure, helps with drainage, and provides a slow-release source of essential nutrients. For larger plots or areas that need a serious clear-out, certain land clearing and mulching techniques can create nutrient-rich soil that’s ready for planting.
A Quick Soil Test: Grab a handful of moist soil and give it a squeeze. If it forms a hard, solid ball, you’ve likely got heavy clay that needs more compost and maybe some gypsum to break it up. If it just crumbles apart, it’s sandy and will benefit from compost to help it hold onto moisture.
Planting Your Cherry Tree
The best time to plant cherry trees here in NZ is during their dormant period, which runs from late autumn through to early spring (May to September). This timing allows the roots to settle in and get comfortable before the explosive growth of spring kicks off.
For Bare-Root Trees:
If you've bought a bare-root tree (which is common during winter), soak its roots in a bucket of water for an hour or two before planting to rehydrate them. Build a small mound of soil in the centre of your hole and spread the roots out over it, making sure they point downwards and outwards.
For Potted Trees:
Gently slide the tree out of its container. If the roots are tightly coiled (a classic case of being root-bound), carefully tease them apart to encourage them to grow into the new soil. Then, place the tree in the hole.
With either type, the most crucial step is getting the height right. Make sure the graft union—that noticeable bulge near the base of the trunk where the variety was joined to the rootstock—sits about 10cm above the final soil level. If you bury it, the graft can rot, or the top variety might grow its own roots, completely defeating the purpose of the rootstock.
Backfill the hole with your enriched soil mix, gently firming it down as you go to get rid of any air pockets. Give it a deep watering to help the soil settle around the roots.
Finally, apply a good layer of mulch, like bark chip or pea straw, around the base of the tree. Just be sure to keep it from touching the trunk itself. This helps hold in moisture, keeps the weeds down, and regulates the soil temperature.
A Seasonal Guide to Pruning and Training
Giving a cherry tree a good prune can feel a bit daunting, I know. But it's genuinely one of the most important jobs you can do to ensure your tree stays healthy and gives you an incredible harvest. The goal isn't just about hacking it back to keep it small; it's about shaping a strong, open structure. This improves airflow and tells the tree to focus its energy on growing delicious fruit, not just more leaves.
Here in New Zealand, timing your cuts is everything. Pruning at the wrong time of year, especially in our damp winters, is like sending an open invitation to diseases. By following the seasons, you work with your tree's natural rhythm for the best possible results.
Pruning Young Trees for Structure
The first couple of years are all about setting up a solid foundation for the future. We call this formative pruning, and its whole purpose is to establish a strong, open framework that can handle the weight of heavy crops down the line. A well-shaped tree lets sunlight and air right into the canopy, which is your best defence against fungal nasties like brown rot.
You're aiming to develop a classic "vase" shape with three to five main branches, called scaffolds, growing outwards from the trunk.
- Year One (at planting): If you've got a young, unbranched tree (often called a 'whip'), trim it back to about 80cm from the ground. This encourages it to send out side branches at a nice, manageable height. If it already has some branches, pick three or four that are well-spaced around the trunk and snip off the rest.
- Year Two (winter): The following winter (June - August), shorten the main scaffold branches you chose by about a third. This makes them branch out more and beefs up the overall structure. It’s also a good time to remove any new shoots that are growing back towards the centre of the tree – you want to keep that open vase shape.
Getting this early training right sets the tree up for a long and productive life. It helps you avoid those weak, narrow branch angles that are notorious for snapping under the weight of a bumper crop of cherries.
Pruning Mature Trees for Fruit Production
Once your cherry tree is established, usually by its third or fourth year, your pruning focus shifts. It's less about building the frame and more about maintaining it and encouraging as much fruit as possible. The main thing to remember is that cherries fruit on wood that's at least a year old. So, your annual prune is about clearing out old, tired wood to make way for new, fruit-bearing shoots.
The absolute best time for this is in late summer, right after you've picked the last of the fruit. Pruning on a dry, sunny day in February or March lets the cuts heal quickly before the wet winter weather rolls in. This timing dramatically lowers the risk of silver leaf and other bacterial diseases getting into the fresh wounds.
Key Takeaway: For established cherry trees in NZ, try to avoid major winter pruning. The cold, damp conditions are the perfect breeding ground for diseases to infect fresh cuts. Stick to late summer pruning to keep your tree healthy.
When you're making your cuts, think of the three 'D's':
- Dead: Chop out any branches that are obviously dead.
- Diseased: Get rid of any wood showing signs of canker, rot, or other problems.
- Damaged: Tidy up any branches that have been broken by wind or the sheer weight of the fruit.
Once you’ve dealt with the three 'D's', you can thin out the canopy a bit. Take out any branches that are rubbing against each other or growing back into the middle of the tree. The goal is always to maintain that open, light-filled shape you started with. This is a big topic, and if you want a deeper dive, our detailed guide offers more tips on how to prune fruit trees the right way.
Training Techniques for Kiwi Gardens
Beyond just pruning, you can also train your cherry tree's growth. This is particularly handy in smaller gardens where you might want to grow a tree flat against a wall or fence – a technique known as espalier.
Training just means gently bending and tying young, flexible branches into the shape you want. By securing branches horizontally, you can often trick the tree into producing even more fruit. This is a job for summer when the branches are still pliable. Just be sure to use soft ties that won't dig into the bark as the branch thickens.
This simple combination of seasonal pruning and a bit of gentle training will ensure your cherry trees don't just survive in your NZ garden, but truly thrive, rewarding you with bigger and better harvests every year.
Keeping Your Cherry Tree Healthy: Pests and Diseases in NZ
A healthy, well-fed cherry tree that's getting enough sun and water is your best defence against trouble. It can usually shrug off minor issues without any fuss. But even the sturdiest trees can run into problems, so knowing what to look for is key to protecting that beautiful harvest you're dreaming of.
Here in New Zealand, the best approach is to work with nature, not against it. That means focusing on creating a healthy garden environment first, rather than immediately reaching for a spray bottle at the first sign of trouble. Think of it as building your tree's immune system. Good airflow, clean surroundings, and healthy soil are your first and best lines of defence.
Who Are the Usual Suspects?
Knowing what you’re up against is half the battle. In Kiwi gardens, a few common culprits tend to cause headaches for cherry growers. If you can spot them early, you can get things under control before they turn into a real problem.
Keep an eye out for these characters:
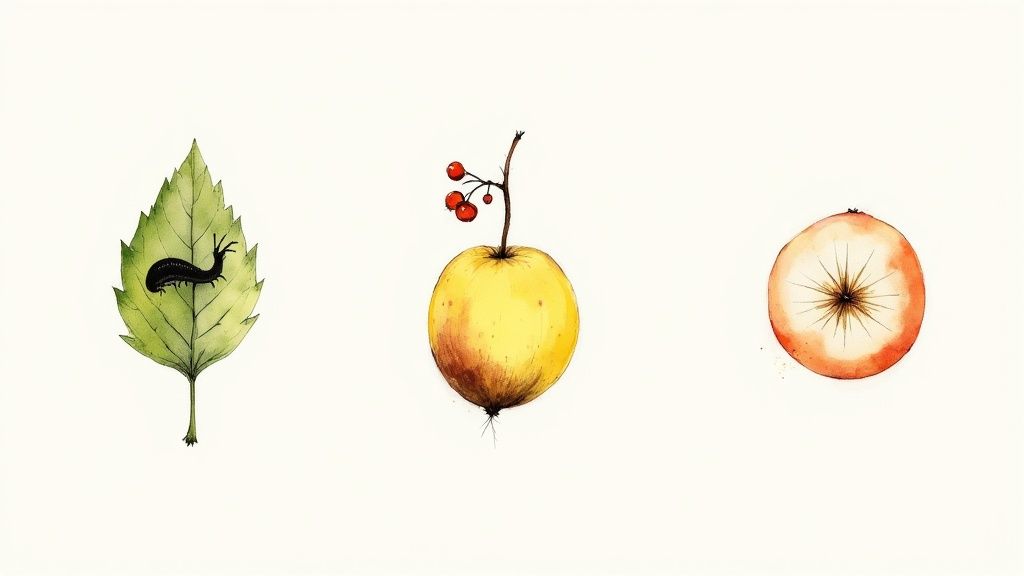
- Cherry Slug (or Pear Slug): Don't let the name fool you; these aren't slugs at all. They're the larvae of the sawfly and look like tiny, slimy, black tadpoles. They'll skeletonise the leaves, munching away the surface and leaving a distinctive lacy pattern behind.
- Aphids: We all know these ones. The tiny, sap-sucking insects love to cluster on tender new spring growth and under the leaves. Their feeding frenzy causes leaves to curl and twist. They also leave behind a sticky "honeydew" which can lead to a secondary problem: sooty mould.
- Brown Rot: This is the big one, a devastating fungal disease that thrives in our more humid regions. It starts as brown spots on your beautiful blossoms, then moves on to rapidly rot the fruit right on the branch. You'll often see tell-tale greyish, fuzzy spores.
Your Best Defence is a Good Offence
Honestly, the best way to handle pests and diseases is to make your garden a place they don't want to be. Good garden hygiene is absolutely non-negotiable, and it costs nothing more than a bit of your time.
Start by being ruthless with your cleanup. Once the season is over, rake up every last fallen leaf and fruit from around the base of your tree. It's crucial not to toss diseased material into your home compost—the spores can easily survive and reinfect your garden next year. While you're at it, snip off any of those shrivelled, mummified fruits still clinging to the branches. They're little brown rot bombs just waiting to go off.
Expert Tip: A dormant spray in winter (June to August in NZ) is one of the single most effective things you can do. A mix of copper oxychloride and horticultural oil cleans up overwintering fungal spores and pest eggs hiding in the bark, giving your tree a fresh, clean start for spring.
A Quick Reference Guide to Common Problems
When pests do show up, it helps to have a plan. Here’s a quick-glance table to help you identify what’s going on and how to deal with it, starting with the gentlest options first.
Common NZ Cherry Tree Problems and Solutions
| Problem | Symptoms | Management Strategy (Organic First) |
|---|---|---|
| Cherry Slug | Skeletonised, lacy-looking leaves. Small, dark, slimy larvae on leaf surfaces. | Organic: A strong jet of water can dislodge them. You can also dust leaves with wood ash or talcum powder. For heavier infestations, an organic spray may be needed. |
| Aphids | Curled, distorted new leaves. Clusters of tiny insects, often green or black. Sticky "honeydew" on leaves, sometimes with black sooty mould. | Organic: Squish small clusters with your fingers. Encourage beneficial insects like ladybirds. Spray with a diluted soapy water solution or a product like Neem oil for plants. |
| Brown Rot | Blossoms turning brown and dying. Brown, spreading rot on fruit, often with grey, fuzzy mould. Mummified fruit on the tree. | Organic: Strict garden hygiene is vital—remove all infected fruit and blossoms immediately. Prune to improve air circulation. A copper-based spray during dormancy is a key preventative measure. |
| Sooty Mould | A black, soot-like coating on leaves and stems. | This is a secondary issue caused by the honeydew from sap-sucking insects like aphids. Manage the pests, and the sooty mould problem will resolve itself. |
This table isn't exhaustive, of course, but it covers the main issues you're likely to encounter. Staying vigilant and acting quickly will keep your cherry tree happy and productive for many seasons to come.
Harvesting and Storing Your Homegrown Cherries
After months of nurturing your cherry tree, the moment you’ve been waiting for has finally arrived. This is the fun part! Knowing exactly when and how to pick your cherries is the final, crucial step to enjoying the literal fruits of your labour. Unlike a banana or an avocado, cherries do not ripen after being picked, so your timing is everything.
Picking them at their peak means you get that full, rich flavour that homegrown fruit is famous for. Go a few days too early, and you’ll be left with tart, underwhelming fruit. Wait too long, and you’re just inviting the birds over for a party before you get a look in.
Knowing When to Pick
The biggest giveaway for a ripe cherry is its colour. You’re looking for a deep, rich, and uniform colour that’s true to the variety you're growing—whether that’s the dark crimson of a 'Lapins' or the bright sunny blush of a 'Rainier'. Don’t just check the fruit basking in the sun; have a peek inside the canopy, too.
Gently cup a cherry in your hand. It should feel firm and plump, not rock-hard. A truly ripe sweet cherry will also come away from its stem with just a gentle pull. Of course, the ultimate decider is a taste test. I always sample one or two from different spots on the tree just to be absolutely certain the whole crop is ready.
The Right Way to Harvest Your Cherries
How you pick the fruit is just as important as when you do it. If you’re careless, you can easily damage the delicate little fruiting spurs on the branches, which are what produce next year’s crop. Damaging these is basically sabotaging future harvests.
The best technique is to hold the stem between your thumb and forefinger and give it a gentle twist and pull. If the cherry is properly ripe, the stem should pop off the spur cleanly. Whatever you do, avoid yanking the fruit straight off, as this can rip the entire spur away from the branch. For those hard-to-reach branches, a small hook on the end of a pole can help bring them down to you.
It's also a great idea to harvest with the stems still attached. This little trick helps the cherries stay fresh for much longer and stops the small wound at the top from weeping or inviting in rot.
A Pro Tip for Harvesting: Head out in the cool of the early morning to pick your cherries. The fruit will be firmer and less prone to bruising, and the cooler temperature helps extend its shelf life once it’s off the tree.
Storing and Preserving Your Bumper Crop
Once you’ve got your haul, pop the cherries into the fridge as soon as you can. A crucial tip: don't wash them until you're about to eat them, as any extra moisture encourages mould and can cause them to split. Stored dry in a breathable bag or an open container in the fridge, fresh cherries will keep beautifully for up to a week.
If you’re lucky enough to have more cherries than you can eat fresh—a wonderful problem to have!—there are plenty of simple ways to preserve them for later.
- Freezing: This is by far the easiest method. Just wash, pit, and pat your cherries dry, then spread them in a single layer on a baking tray. Freeze them until they’re solid, then tip them into freezer bags. They're perfect for smoothies, pies, or sauces all year round.
- Dehydrating: Dried cherries make a delicious, chewy snack. A food dehydrator gives the best results, but a very low-temperature oven can also do the job.
- Jamming and Bottling: Making cherry jam, a rich sauce, or bottling them in syrup are classic ways to savour that summer flavour deep into the New Zealand winter.
Common Questions from Kiwi Gardeners
Even with the best plan, growing cherry trees can throw a few curveballs. Here are some of the most common questions we hear from Kiwi gardeners, with clear, straightforward answers to help you along the way.
How Long Until I Get Cherries?
This is the big one, isn't it? The wait for that first harvest. How long you’ll be waiting for cherries in New Zealand really boils down to the tree's rootstock and its variety.
As a general rule, a cherry tree on a dwarfing rootstock might surprise you with a small, introductory crop within two to three years of planting. If your tree is on a more vigorous rootstock, you'll need a little more patience. These typically take four to six years to start producing properly. Of course, giving your tree the best possible start with full sun, well-drained soil, and consistent water will always encourage it to mature and fruit sooner.
Do I Really Need to Spray My Cherry Tree?
Whether you need to spray often depends on the pest and disease pressure in your specific corner of the country. That said, for most parts of New Zealand, a preventative winter spray is a fantastic idea.
We highly recommend applying a spray of copper oxychloride and horticultural oil during the dormant season (June to August). This one simple step goes a long way in managing fungal diseases like brown rot and taking care of pesky overwintering insects. During the growing season, just keep a close eye on your tree. If you spot problems like aphids or cherry slug, you can often knock them back with organic options like neem oil. Remember, one of the best ways to reduce the need for sprays is to ensure good air circulation through proper pruning.
Many Kiwi gardeners find that creating and tending to their gardens brings a satisfaction that goes far beyond the harvest. If you're interested in the broader benefits of getting your hands dirty, you can explore the healing power of green spaces and nature.
What Is the Best Time to Plant Cherry Trees in NZ?
Timing is everything when you want to give a new tree the strongest possible start. The absolute ideal time to plant a cherry tree in New Zealand is during its dormancy, which runs from late autumn through to early spring.
This window, typically from May to early September, is perfect for planting bare-root trees. It gives the root system plenty of time to get established before the demands of spring growth kick in. If you've bought a container-grown tree, you have a bit more flexibility and can plant it almost any time of year, provided you can keep it well-watered. Even so, it’s always best to avoid planting in the peak heat of summer to minimise stress on the young tree.
Why Are My Cherry Tree Leaves Turning Yellow?
Yellowing leaves, a condition known as chlorosis, can be a flag for a few different issues. In New Zealand gardens, the most common culprit is often related to water.
- Overwatering or planting in poorly drained soil is a primary cause. It essentially suffocates the roots and stops them from absorbing vital nutrients.
- The next most likely reason is a nutrient deficiency, particularly a lack of nitrogen or iron.
Before you reach for fertiliser, check your watering habits and the soil's drainage first—this is often the easiest fix. If the soil seems fine, you can address a potential deficiency by applying a balanced fertiliser specifically for fruit trees in early spring.
At Jungle Story, we're passionate about helping Kiwis grow beautiful, productive gardens. Whether you're looking for your first cherry tree or seeking expert advice, our marketplace connects you with everything you need for success. Explore our wide selection and start your own fruit-growing adventure today at https://junglestory.co.nz.