Picture this: vibrant, show-stopping flowers that bring a splash of the tropics right into your own backyard. For many Kiwi gardeners, growing hibiscus in New Zealand feels like a dream reserved for warmer climes. But I'm here to let you in on a little secret: with a bit of local know-how, these magnificent blooms are not just possible, but incredibly rewarding for everyone.
Bringing Tropical Beauty to Your NZ Garden
The allure of the hibiscus is undeniable. Those large, trumpet-shaped flowers in vivid reds, pinks, oranges, and yellows instantly make you think of a warm, island paradise. It’s a feeling many of us have thought was out of reach, believing our temperate climate was just too much of a challenge for these sun-loving plants.
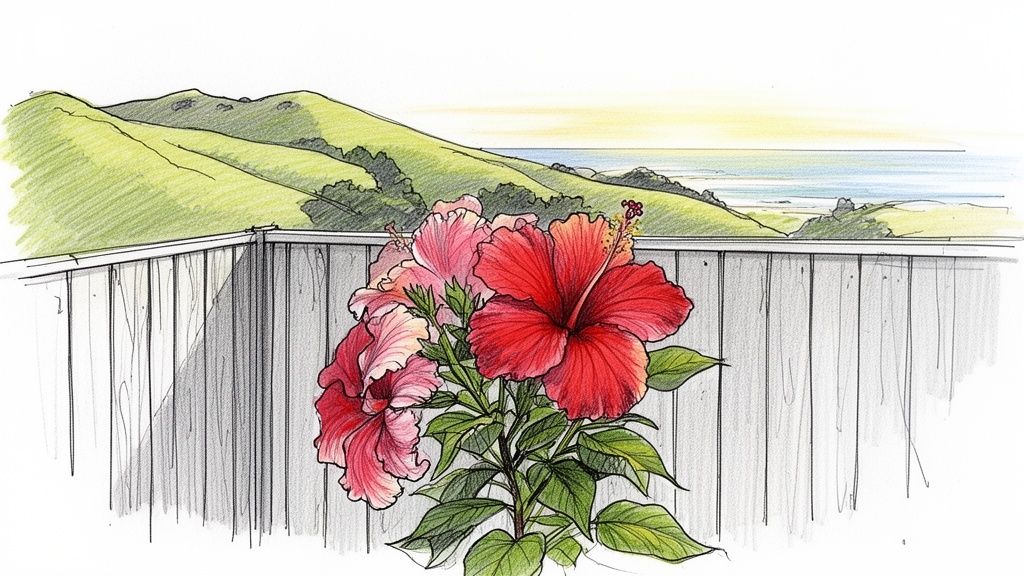
But the truth is, you absolutely can grow hibiscus all over New Zealand—from the subtropical coast of Northland right down to sheltered spots in the South Island. Success isn’t about fighting our climate; it’s about working with it. This guide is all about demystifying the process, giving you the confidence and practical skills to cultivate healthy, thriving hibiscus that will put on a spectacular show, year after year.
More Than Just a Pretty Flower
The connection between hibiscus and New Zealand runs deeper than just backyard aesthetics. It's actually woven into the identity of some of our most beautiful coastal areas. Just think of Auckland's Hibiscus Coast, a region famous for its stunning beaches and laid-back lifestyle, which has become one of the nation's fastest-growing areas. Between 2018 and 2023, its population jumped from 54,948 to 64,542—a hefty 3.27% growth each year. That boom highlights just how much we Kiwis value creating beautiful gardens and outdoor spaces.
This guide will walk you through everything you need to know, focusing on practical steps tailored for our unique environment. We’ll get into:
- Choosing the right varieties that are a perfect match for either the warmer or cooler parts of the country.
- Mastering seasonal care, including when to feed your plants and how to protect them during our winter months (June to August).
- Simple pruning and propagation methods to create healthier plants and even grow new ones for free.
By the end, you'll see that a thriving hibiscus is well within your grasp, ready to become the star of your garden. If you're looking for wider inspiration, learning how to design and create a stunning tropical garden can spark some fantastic ideas. You might also want to check out our guide on other tropical plants for NZ gardens to really complete the look.
Choosing the Right Hibiscus for Your Climate
Picking the perfect hibiscus for your garden isn't about crossing your fingers and hoping for the best. It’s about a quick, honest look at your local climate. Not all hibiscus are built the same, especially when you consider the variety of weather we get across New Zealand. Making the right call from the get-go is the single most important step you can take to get those stunning flowers you’re dreaming of.
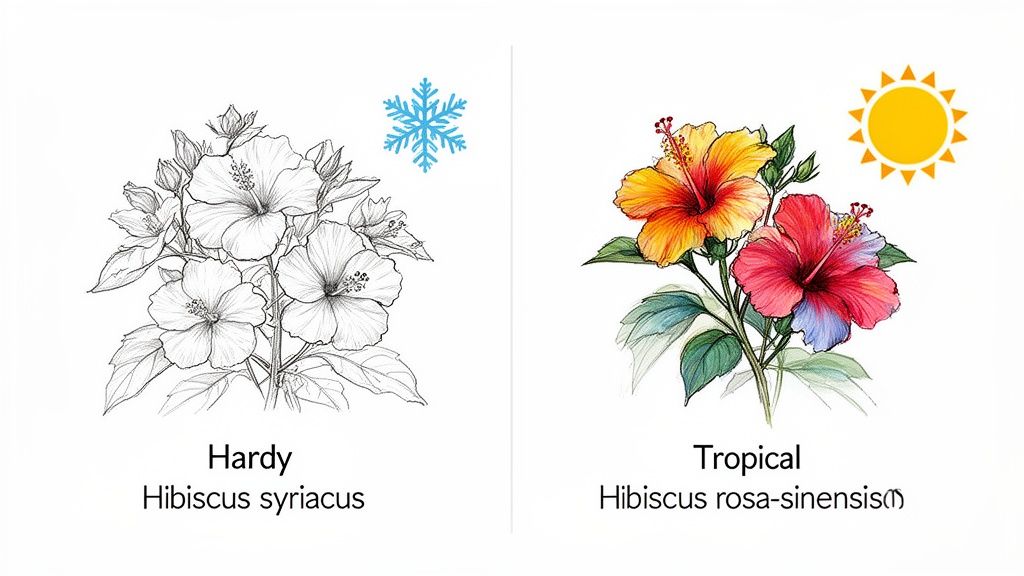
For most gardeners in New Zealand, the choice boils down to two main families: the tough, resilient Hardy Hibiscus and the spectacular but delicate Tropical Hibiscus.
Think of it like choosing a coat. A light jacket is fine for a mild Auckland day but useless for a frosty morning down in Queenstown. It’s the same with these plants. A hibiscus that thrives in a warm, sheltered Northland garden will really struggle outdoors in much of the South Island. Grasping this simple difference is your key to success.
The Hardy Hero: Hibiscus Syriacus
Often called the Rose of Sharon, Hibiscus syriacus is the undisputed champion for any Kiwi garden that sees a proper winter. If you live anywhere that gets regular frosts, this is your go-to.
This deciduous shrub is as tough as old boots. It drops its leaves in autumn, sleeps soundly through the cold, and then bursts back to life in spring, ready for a spectacular show from late summer into early autumn (that’s roughly February to April). While the flowers are a bit smaller than their tropical cousins, they come in gorgeous shades of white, pink, purple, and blue, often with a striking deep red centre.
- Frost Tolerance: Can handle frosts down to around -10°C once it’s well-established.
- Sun Needs: Loves a full-sun spot to pump out the best blooms.
- Best For: Gardeners in the lower North Island and most of the South Island looking for a reliable, low-maintenance flowering shrub.
The Tropical Superstar: Hibiscus Rosa-Sinensis
This is the hibiscus everyone pictures when they imagine a tropical island getaway. Hibiscus rosa-sinensis produces huge, glossy flowers in a dazzling range of fiery reds, bright oranges, sunny yellows, and soft pinks. Its lush, dark green foliage is evergreen, giving you colour all year round.
But all that beauty comes with a catch: it has absolutely no frost tolerance. This plant is a true sun-worshipper that hates cold winds and freezing temperatures, which will quickly damage or kill it. In New Zealand, this variety is really only suited for the warmest, most sheltered coastal spots in the upper North Island.
For everyone else, the secret to growing this tropical stunner is to use a pot. A large container gives you the freedom to move it somewhere protected—like a covered deck, conservatory, or even indoors near a sunny window—over the winter months from June to August.
A classic mistake is planting a Tropical Hibiscus in an exposed garden bed in a cooler region, thinking it will "harden up." Unlike hardy varieties, these plants just don't have the genetics to survive a freeze. Protection is everything.
A Quick Comparison
To help make the choice crystal clear, here’s a side-by-side look at the two main types of hibiscus nz gardeners can grow.
Comparing Hibiscus Varieties for New Zealand Gardens
This table breaks down the key differences to help you choose the best fit for your climate and gardening style.
| Feature | Hardy Hibiscus (Hibiscus syriacus) | Tropical Hibiscus (Hibiscus rosa-sinensis) |
|---|---|---|
| Climate Suitability | Handles frost; suitable for most of NZ. | Frost-tender; best for warm, coastal areas or pots. |
| Foliage | Deciduous (loses leaves in winter). | Evergreen (keeps leaves year-round). |
| Flowering Season (NZ) | Late summer to autumn (Feb-Apr). | Spring through autumn (Sep-May) in warm spots. |
| Flower Size | Medium (typically 6-10 cm across). | Large to very large (often 10-15+ cm across). |
| Primary Use | Garden beds, hedges, feature shrubs. | Patios, containers, conservatories, sheltered gardens. |
Ultimately, it all comes down to matching the plant’s needs with your garden’s reality. By choosing the right type of hibiscus for your specific slice of New Zealand, you’re setting yourself up for a long and beautiful friendship with this incredible plant.
Right, let's get your hibiscus off to the best possible start.
Just like building a house, a gorgeous hibiscus needs a solid foundation to truly flourish. Getting the planting right from day one is honestly the most important thing you can do. It all comes down to creating the perfect home for its roots, which means nailing two key things: the ideal soil mix and the right amount of sun.
These basics are non-negotiable if you want a healthy, flower-filled plant. Skipping this prep work is like trying to run a marathon without training—you just won't get the results you're dreaming of. The good news is, preparing the perfect spot is pretty straightforward with a bit of local know-how.
Crafting the Perfect Soil Mix
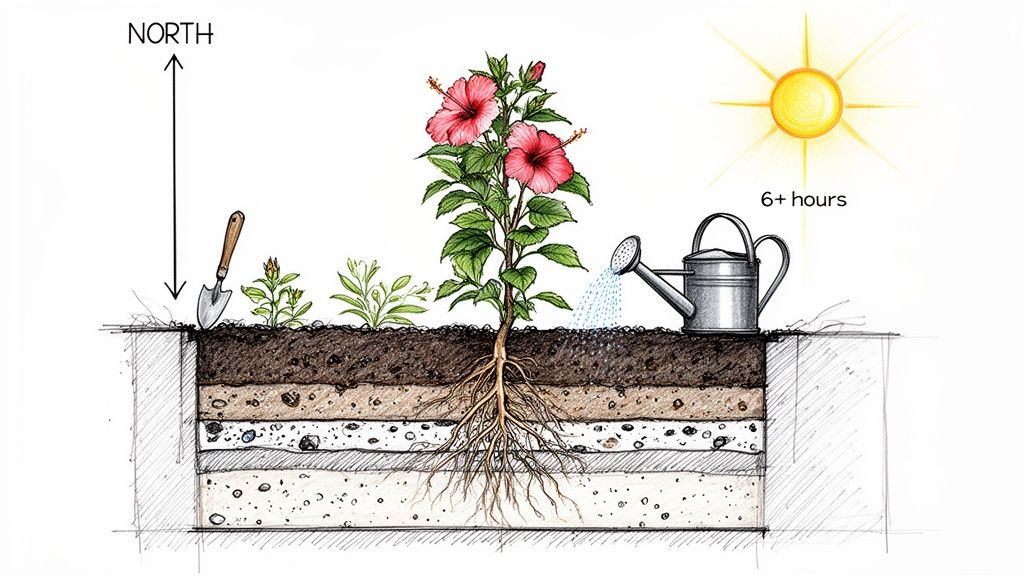
Hibiscus are hungry plants that absolutely love rich, well-draining soil. The one thing they can't stand is having "wet feet," where water pools around their roots, as this is a fast track to root rot. Ideally, you want a slightly acidic soil with a pH somewhere between 6.5 and 6.8, which helps them absorb all the nutrients they need.
New Zealand soils can be a real mixed bag, from the heavy clay common around Auckland to the sandy stuff you find in coastal spots. No matter what you're starting with, your goal is to create a loamy, crumbly texture.
- For Heavy Clay Soil: Clay is great at holding moisture, but it can easily become waterlogged. To fix this, you need to improve its drainage and get more air in there. Dig in generous amounts of organic matter like compost, aged bark fines, or well-rotted manure. This breaks up those dense clay particles and creates a much healthier home for the roots.
- For Sandy Soil: Sandy soil drains fast—sometimes a bit too fast, washing away nutrients with the water. To help it hold onto more moisture and goodness, mix in some compost, peat, or coco coir. This will give the roots a more consistent supply of everything they need.
- For Potted Hibiscus: If you're planting in a container, grab a high-quality, free-draining potting mix. It's best to avoid using soil straight from the garden, as it compacts easily in pots and can suffocate the roots. A premium mix designed for flowering plants is your best bet.
Interestingly, many of the fundamentals for a happy hibiscus are universal. Understanding general plant care principles, like those you'd use for lavender, can make you a more intuitive gardener all around. It helps you spot issues early and really get a feel for what your plants need.
Finding the Sunniest Spot
Think of sunlight as the fuel that powers those incredible flowers. Without enough direct sun, your hibiscus will give you plenty of lush green leaves but very few of the big, spectacular blooms you're actually after. It's a common frustration, but luckily, it's an easy one to avoid.
You'll want to find a spot that gets at least six hours of direct sunlight every day. Here in New Zealand, a north-facing position is the absolute gold standard, as it catches the most sun and warmth all day long. This is especially vital for the frost-tender tropical varieties like Hibiscus rosa-sinensis.
For the tropical types, finding a spot sheltered from those cold southerly winds is just as important as the sunlight. A warm, protected microclimate—like up against a north-facing wall or fence—can be the difference between a plant that just survives and one that truly thrives.
Once you’ve got the perfect spot sorted, planting your hibiscus is easy.
- Dig the Right Hole: Dig a hole that’s twice as wide and just as deep as the plant's root ball. This gives the roots plenty of loosened soil to spread out into.
- Position the Plant: Gently slide the hibiscus out of its nursery pot and pop it in the middle of the hole. The top of the root ball should sit level with the ground around it. Planting it too deep is a common mistake that can cause the stem to rot.
- Backfill and Water: Fill the hole back in with your lovely amended soil, pressing it down gently to get rid of any air pockets. Give the plant a really good watering to help the soil settle in around the roots.
- Mulch Generously: Spread a layer of organic mulch, like bark chips or compost, around the base of the plant. Just make sure to keep the mulch a few centimetres away from the stem to prevent any rot. This will help the soil stay moist and keep the weeds down.
And if you're curious about other members of this amazing plant family, you can take a deep dive into its edible cousin in our guide to growing Roselle hibiscus in NZ.
A New Zealand Gardener's Hibiscus Calendar
Getting hibiscus to thrive in New Zealand isn’t about non-stop, intensive work. It’s more about finding a rhythm and working with our distinct Kiwi seasons. When you match your care to the plant’s natural cycle of growth and rest, you give it exactly what it needs, when it needs it. Suddenly, the whole process feels less like a chore and more like second nature.
Think of it as your hibiscus having its own annual schedule. Spring is its wake-up call, and it’s starving. Summer is showtime, and it needs constant hydration to keep the performance going. As autumn rolls in, it’s winding down for a well-deserved break, and winter is all about resting up for the year ahead. This calendar breaks down the key jobs for each season, setting your hibiscus nz up for year-round success.
Spring: September to November
As the last of the winter chill finally retreats and the days start stretching out, your hibiscus begins to stir from its slumber. This is the official start of the growing season and a crucial time to set the stage for a summer packed with flowers.
First things first: give it a good feed. After a long winter's nap, its energy stores are running on empty. A balanced, slow-release fertiliser scratched into the soil around the base of the plant in early spring gives it a steady supply of nutrients to fuel that first big push of leafy growth. If your hibiscus is in a pot, switching to a regular liquid feed every couple of weeks is a fantastic alternative.
This is also the perfect moment for a light trim, especially if you skipped a hard prune in winter. Just snip off any dead or spindly bits of wood that didn't quite make it through the cold. This quick tidy-up encourages the plant to pour its energy into strong, healthy new stems—the very same ones that will be covered in blooms this summer.
Summer: December to February
Summer in New Zealand is prime time for hibiscus. Those long, sunny days and warm temperatures are exactly what these tropical beauties live for, and they'll thank you with a non-stop parade of incredible flowers. Your main job through these months is simply to support this high-energy performance.
Water is the absolute key. With the combination of intense sun and constant flowering, they can get seriously thirsty, fast. Keep an eye on the soil, particularly for plants in pots, which can dry out in just a few hours on a scorching day. A deep, thorough soaking every few days is much better than a light sprinkle daily, as it encourages the roots to venture deeper into the soil.
To keep the flower show going at full tilt, get into the habit of deadheading. This just means pinching or snipping off the spent flowers once they’ve wilted. It stops the plant from wasting energy making seed pods and nudges it to produce even more new buds.
Autumn: March to May
When the heat of summer starts to fade and the nights get a touch cooler, your hibiscus will naturally begin to slow down. The frantic pace of flowering will ease off as the plant prepares for the coming winter. Your job is to help it make a smooth transition into its dormant phase.
Start by cutting back on watering. The soil will stay damp for longer in the cooler weather, and overdoing it now can lead to root problems. It’s also time to put the fertiliser away. Stop feeding your hibiscus by late April or early May to send a clear signal that the growing season is over. Pushing fresh, tender growth now will only lead to stems that are vulnerable to frost damage.
For those of us with tender tropical hibiscus in pots, autumn is the time to plan their winter accommodation. Well before the first frost is even a whisper on the wind, find a sheltered spot for them—a covered porch, a greenhouse, or a sunny nook indoors is perfect for seeing them through the colder months.
Winter: June to August
Winter is the season of rest and recovery for your hibiscus. It might not look like much is happening, but this dormant period is absolutely vital for the plant’s long-term health.
Hardy Hibiscus syriacus planted out in the garden will be completely bare and need very little from you. They’re tough enough to handle a typical New Zealand frost without any special protection. This is also the best time for any major structural pruning, as the bare branches make it easy to see what you’re doing.
For your potted tropical hibiscus, protection is everything. Keep them in a frost-free spot where they still get bright, indirect light. Water them only sparingly—just enough to stop the soil from turning to dust. It's perfectly normal for them to drop some leaves during this time, so don't panic. And whatever you do, resist the urge to feed them; they need this time to rest completely. Following this seasonal guide provides the consistent, reliable care your hibiscus needs to truly flourish in our unique climate.
Mastering Pruning for More Abundant Flowers
Giving a hibiscus a prune can feel a bit daunting—it’s easy to worry you’re taking too much off. But honestly, it’s one of the best things you can do to encourage a healthier, more compact plant that absolutely explodes with flowers. It's a simple technique that delivers incredible results.
Think of it as a friendly chat with your plant. You’re gently guiding its growth, telling it to focus its energy on producing those gorgeous blooms rather than long, leggy stems. A good prune also improves air circulation, which helps keep diseases at bay, and it stimulates the very new growth where the flowers actually form.
When to Prune Your Hibiscus in NZ
Getting the timing right is crucial for the best results, and it changes slightly depending on which type of hibiscus you’re growing.
-
Hardy Hibiscus (Hibiscus syriacus): These tough cookies are best pruned in late winter or very early spring, around July or August, just before you see signs of new growth. Because they flower on new wood, this timing encourages a fresh flush of stems that will be covered in blooms later in summer.
-
Tropical Hibiscus (Hibiscus rosa-sinensis): For these frost-tender varieties, hold off until early to mid-spring (September), once the risk of any sneaky frosts has completely passed. Pruning too early can expose delicate new growth to a late cold snap, which can cause quite a bit of damage.
A common mistake I see is people pruning their tropical hibiscus too late in the season. A trim in autumn can stimulate new growth that won't have time to harden off before winter, making it extremely vulnerable to cold damage. Stick to a spring haircut for the main prune.
Simple Pruning Techniques
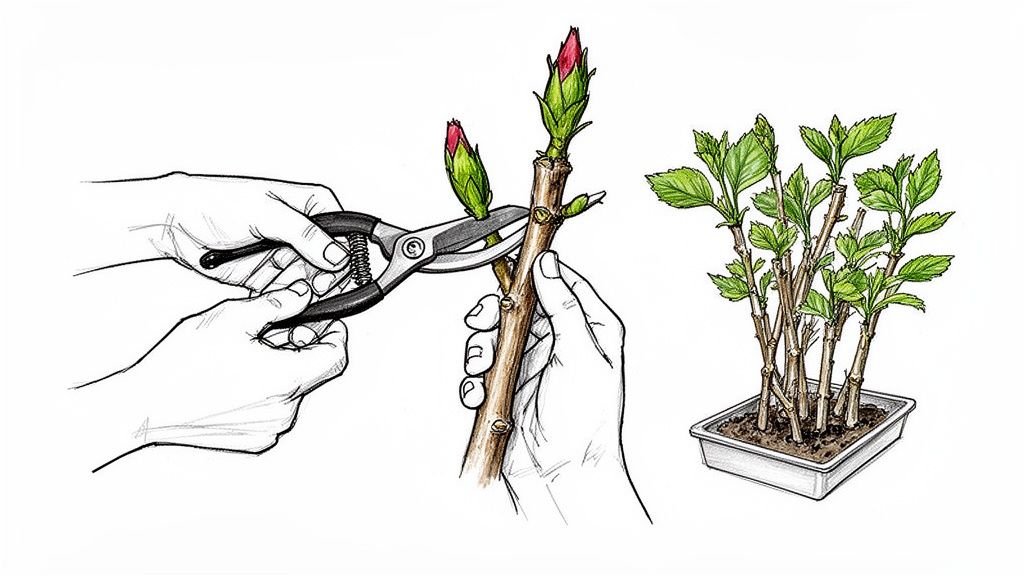
You don’t need to be an expert to get this right. All you need is a clean, sharp pair of secateurs. The main goal is to create an open, well-shaped plant that lets the light and air in.
- Remove the Dead and Damaged: Start with the easy stuff. Snip out any dead, diseased, or broken branches. This instantly tidies up the plant and is a great first step.
- Cut Back by a Third: For a general maintenance prune, aim to reduce the plant's overall size by about one-third. This is usually enough to kickstart strong new growth without stressing the plant.
- Encourage Outward Growth: When you make a cut, do it about 5 mm above a node (the small bump on the stem where a leaf grows). Try to cut just above a node that faces outwards, away from the plant's centre. This encourages the new branch to grow outwards, creating a more open and attractive shape.
- Tidy Up Crossing Branches: Lastly, have a look for any branches that are crossing over or rubbing against each other and remove them. This simple step dramatically improves airflow, which is vital for preventing fungal issues.
Turning Cuttings into New Plants
One of the best bits about pruning your hibiscus nz is that you can use the offcuts to grow brand new plants for free! This process, called propagation, is surprisingly simple and so rewarding.
Here’s how to do it with semi-hardwood cuttings:
- Select Your Cutting: Choose a healthy stem from this season's growth. You want one that’s firm but not yet fully woody, about 10-15 cm long.
- Prepare the Stem: Make a clean, angled cut just below a leaf node. Carefully strip the leaves from the bottom half of the cutting, leaving just two or three at the top to do the hard work.
- Pot It Up: Dip the cut end into rooting hormone powder (this is optional, but it definitely helps speed things up) and plant it in a small pot with a free-draining mix. A seed-raising mix or a blend of perlite and sand works perfectly.
- Create a Humid Home: Give the cutting a good water and then cover the pot with a plastic bag or pop it in a mini-greenhouse to keep things humid. Find it a warm spot with bright, indirect light.
- Be Patient: Roots should start to form in about 6-8 weeks. To check, give the cutting a very gentle tug—if you feel a bit of resistance, you’ve got roots!
Once your new plant is well-rooted and showing signs of new growth, you can pot it on into a larger container and treat it just like any other young hibiscus. It’s that easy.
Find Your Perfect Hibiscus at Jungle Story
You’re now equipped with all the know-how to choose, plant, and care for your hibiscus. So, what's next? The exciting part: finding that perfect, healthy plant to bring into your garden. This is where your journey really begins, and here at Jungle Story, we make it simple.
We’re New Zealand's go-to online marketplace for sourcing an incredible variety of beautiful hibiscus. Think of us as a bridge, connecting you directly with trusted local sellers from all over the country. Whether you're after a hardy outdoor shrub for a Christchurch garden or a stunning tropical specimen for a sunny Auckland patio, our platform makes it easy to browse and buy with complete confidence. Your chosen plant is then packed with care and delivered safely to your door, anywhere in NZ.
More Than Just a Marketplace
We see ourselves as your partner in gardening success, not just a place to buy plants. That's why we provide ongoing support and detailed care guides—we want you to feel confident as you watch your new hibiscus settle in and grow. Our goal is to make sure you have everything you need for a thriving garden.
This commitment feels especially relevant right now. Recent figures show New Zealand's economy is expanding, and with it, an increase in household spending. Often, this means we're investing more in our homes and gardens, creating beautiful spaces to enjoy. For more on this, you can explore the details of New Zealand's economic rebound on hibiscuscoastapp.nz.
Investing in your garden is more than just a purchase; it's an investment in your home's beauty and your own well-being. A carefully chosen hibiscus can bring years of joy and spectacular colour to your personal sanctuary.
Your Hibiscus Journey Starts Here
Finding the right hibiscus nz gardeners are talking about is a breeze on our user-friendly platform. You can explore a huge range of options from different sellers, all in one spot. We’ve made sure the whole process is secure and straightforward, so you can focus on the fun part—choosing your new favourite plant.
Ready to find your perfect match? Our extensive selection is waiting for you. And if you're looking for a few extra tips and tricks, our guide on how to buy plants online in NZ has even more advice for a great experience. Let’s get your hibiscus journey started.
A Few Common Hibiscus Questions
Even the most seasoned gardeners run into curly questions. When it comes to hibiscus, a few common puzzles pop up time and again. Here are some quick answers to the things Kiwi gardeners ask us most.
Why Are My Hibiscus Leaves Turning Yellow?
Yellow leaves are your hibiscus’s way of telling you something’s not quite right. More often than not, it’s a simple fix.
The first thing to check is the watering. Before you do anything else, stick your finger into the soil. Is it soggy? You’re likely overwatering. Let it dry out a bit more between drinks and make sure your pot has excellent drainage. If the soil is bone-dry, well, your plant is thirsty and needs a good, deep soak.
If watering isn’t the issue, it could be a nutrient problem, especially a lack of magnesium or iron. You'll often see this on the older leaves first. During the growing season (spring and summer), a dose of Epsom salts dissolved in water or a balanced liquid feed with trace elements usually gets that vibrant green colour back in no time.
Can I Grow Tropical Hibiscus Outdoors in Wellington or Christchurch?
This is a big one for gardeners in the cooler parts of the country. Growing a true tropical hibiscus (Hibiscus rosa-sinensis) outdoors year-round in places like Wellington or Christchurch is tough, simply because they have zero tolerance for frost.
You might pull it off in a perfectly sheltered, north-facing spot that’s completely protected from those icy southerlies. But it’s a gamble.
A much safer and saner approach for cooler regions is to grow your tropical hibiscus in a large pot. This gives you the best of both worlds: you get to enjoy those incredible flowers on the deck all summer, then simply move the plant indoors or into a greenhouse to keep it safe and sound through winter.
How Often Should I Fertilise My Hibiscus?
To get that non-stop flower show, regular feeding is a must, but you need to time it with our seasons. From spring (September) right through to the end of summer (February), your hibiscus is in full growth mode and will be seriously hungry.
- Potted Plants: For hibiscus in containers, a balanced liquid fertiliser every two to three weeks keeps them powered up for their big performance.
- Garden Plants: If your hibiscus is in the ground, a slow-release granular fertiliser is a great set-and-forget option. Pop some down at the start of spring and again in early summer.
When you're choosing a fertiliser, look for one with a higher potassium (K) number—that’s the magic ingredient for encouraging loads of flowers. Once autumn rolls around, ease off on the feeding, and stop completely over winter while the plant has a rest.
Ready to bring a slice of the tropics to your garden? At Jungle Story, we connect you with New Zealand's best growers, delivering a stunning selection of hibiscus right to your door. Find your perfect hibiscus today at junglestory.co.nz.