The Peace Lily, or Spathiphyllum as it's known botanically, is so much more than just another elegant houseplant. For Kiwis, it's practically a household staple, and for very good reasons. Its lush, dark green leaves and forgiving nature make it the perfect choice for both new plant parents and seasoned collectors alike.
This guide is all about giving you practical, NZ-specific advice to help your Peace Lily not just survive, but truly thrive.
Why Every Kiwi Home Needs a Peace Lily
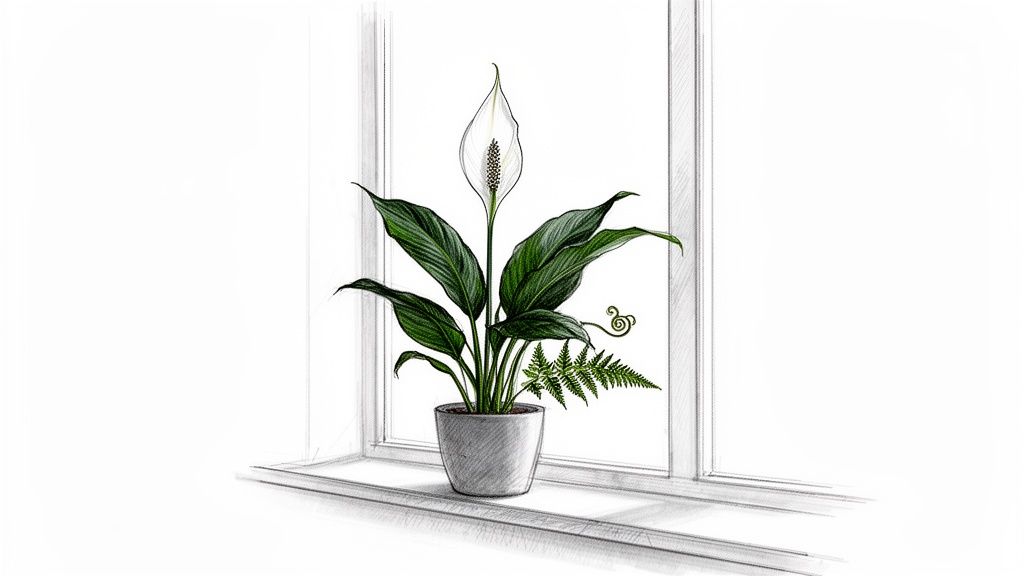 From a bustling Auckland apartment to a quiet home in Christchurch, the Peace Lily has found its way into the hearts of New Zealanders. There's just something about those graceful white spathes and deep green leaves that brings a sense of calm and natural beauty to any room. It has a knack for turning a simple space into a real sanctuary.
But its charm isn't just skin deep. The Peace Lily is famous for being incredibly easy-going, which makes it a fantastic starting point if you're new to the world of houseplants. It even tells you what it needs—a slight droop of the leaves is a clear signal that it's time for a drink. That kind of resilience makes it a rewarding companion that really builds your confidence.
A Symbol of Serenity and Strength
Beyond its good looks, the Peace Lily genuinely contributes to a more tranquil atmosphere. Its ability to flourish with minimal fuss offers a quiet lesson in resilience, a quality that really resonates with the Kiwi spirit. In fact, after the 2011 Christchurch earthquake, Peace Lily sales reportedly jumped by 35% as they became symbols of hope in recovery gardens. It's a powerful reminder of how much indoor greenery can support our well-being.
The Peace Lily is not just a plant; it’s a living piece of décor that actively improves your environment. Its air-purifying capabilities and effortless elegance make it a functional and beautiful addition to any New Zealand home.
Creating a Peaceful Environment
Having lush greenery around is a cornerstone of a serene living space, and the Peace Lily is a master at softening interiors and promoting a sense of calm. Of course, there are other ways to enhance that peaceful vibe—exploring aromatherapy, for instance, can be a great step towards creating a calmer home and boosting your overall well-being.
This guide is designed to give you all the tools you need to master Peace Lily care, tailored specifically for our unique seasons here in Aotearoa.
Choosing Your Perfect Peace Lily in New Zealand
 Deciding to bring a peace lily home is the easy part. The next fun step is picking the right one from all the options we have here in New Zealand. This is about more than just grabbing the first one you see on the shelf. Taking a moment to find a healthy, well-suited plant is the best way to set yourself up for years of lush leaves and beautiful flowers.
Think of it like choosing a new flatmate – you want one that’s healthy, happy, and a good fit for your space. When you're at the garden centre or browsing online, you’re on the lookout for a plant that’s full of life. This ensures it’s got the best chance to settle into its new home with you.
What to Look For in a Healthy Plant
A healthy peace lily gives off some pretty clear signals. The first thing to check is the foliage. You're looking for deep, glossy green leaves that feel firm and stand up proudly. Steer clear of any plants with lots of yellowing, brown spots, or crispy edges. These are usually signs of stress, disease, or pests.
The overall shape of the plant matters, too. A great specimen will look full and bushy, with plenty of new leaves unfurling from the centre. That’s a sure sign of active, happy growth. If you can, have a little peek at the roots. Healthy roots are usually white or light tan and firm, not brown and mushy, which can be a tell-tale sign of root rot.
Here’s a quick checklist to keep in your back pocket:
- Vibrant, Glossy Leaves: The foliage should have a rich, consistent green colour.
- No Pests: Check under the leaves and around the stems for any signs of unwanted visitors like mealybugs or spider mites.
- Strong Root System: If you can see them through the drainage holes, the roots should look healthy, not soggy or tightly circling the pot.
- New Growth: Look for small, unfurling leaves at the base as a sign of a thriving plant.
Popular Peace Lily Varieties in New Zealand
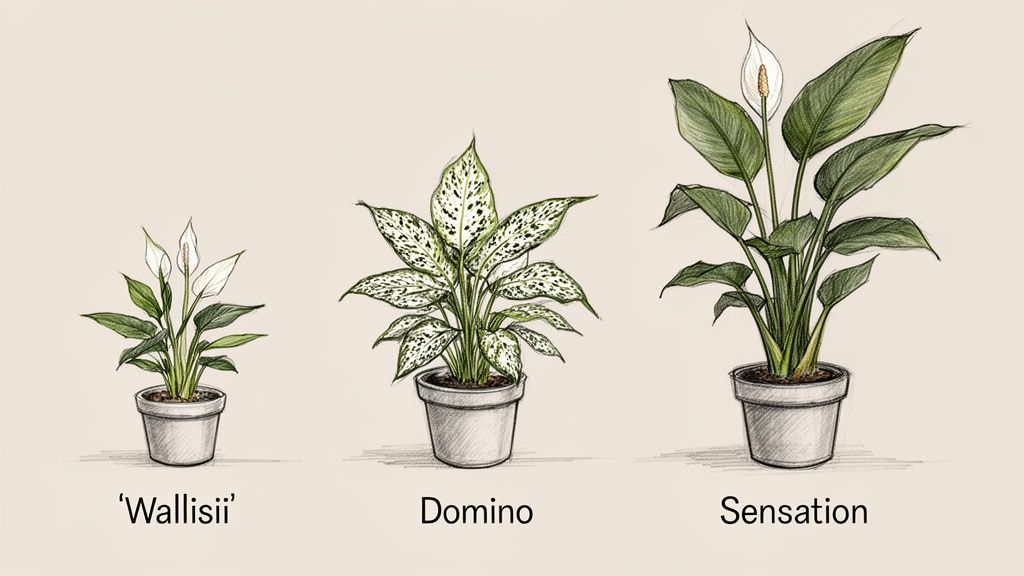
While the classic Spathiphyllum wallisii is a common sight, Kiwi gardeners have access to a few other stunning types. Each one offers something a little different in size and look, so you can find the perfect match for your home's style and the space you have available. From compact varieties perfect for a desk to giant statement plants, there's a peace lily for every spot.
Choosing the right variety isn't just about looks; it's about matching the plant's mature size to your environment. A 'Sensation' might look manageable as a young plant, but it will quickly outgrow a small shelf.
To help you decide, let's look at some of the most popular varieties you'll find in local garden centres and online.
Popular Peace Lily Varieties in New Zealand
A quick comparison of common Peace Lily cultivars available in NZ to help you choose the right one for your home.
| Variety Name | Mature Size | Key Feature | Ideal For |
|---|---|---|---|
| Spathiphyllum wallisii | 30-60 cm tall | The classic, compact peace lily. Hardy and a reliable bloomer. | Desks, shelves, and smaller spaces where you want a touch of green. |
| 'Domino' | 60-90 cm tall | Beautiful variegated leaves with splashes and speckles of white. | Brightly lit rooms where its unique foliage can be appreciated. |
| 'Sensation' | Up to 1.5 m tall | The largest of the peace lilies, with huge, deeply ribbed leaves. | Creating a dramatic, tropical focal point in a large room or entryway. |
| 'Chopin' | 40-60 cm tall | Known for being a prolific bloomer, producing many elegant white flowers. | Anyone who loves the classic flowers and wants a full, lush plant. |
Each of these brings its own unique character to a space, making it easy to find a peace lily that feels like it was meant for your home.
Mastering Peace Lily Care for the NZ Climate
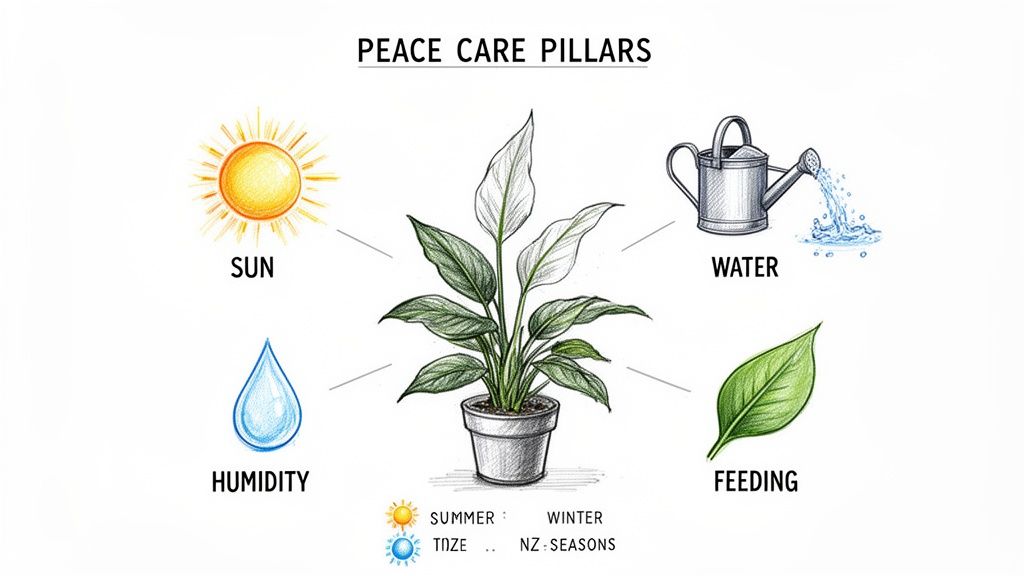
Alright, you've got your beautiful peace lily—now for the fun part. Keeping it happy and healthy in your New Zealand home is surprisingly intuitive once you learn to speak its language. The best way to think about it is through four core pillars that work together: light, water, humidity, and food.
We'll break down these essentials with practical tips tailored to our unique Kiwi climate. Once you get the hang of these, you’ll be able to confidently adjust your care routine, whether you're dealing with a balmy Northland summer or a chilly Southland winter.
Finding the Perfect Light
Peace lilies naturally grow on the floors of tropical rainforests, getting dappled, filtered light through a thick canopy of trees. Your goal is to replicate that gentle brightness inside. Here in New Zealand, an east-facing window is usually the sweet spot, giving the plant soft morning sun that won’t scorch its leaves.
Direct, harsh sunlight is the enemy—think of the intense glare from a north-facing window at the peak of summer. That’s a surefire way to get brown, crispy patches on the leaves. If a bright spot is your only option, just pop a sheer curtain over the window to diffuse the light.
Think of your peace lily's leaves as solar panels. If they start looking pale or bleached, they're getting too much light. If new growth is small and spindly, or the plant refuses to flower, it's likely not getting enough energy and needs a slightly brighter location.
Watering Your Peace Lily Correctly
Watering is where most new plant parents trip up, but thankfully, the peace lily isn't shy about telling you what it needs. Its most famous trait is the dramatic droop. When you see those leaves start to wilt, that's your plant's way of saying, "I need a drink, please!"
A good rule of thumb is to check the top 2-3 centimetres of the potting mix with your finger. If it feels dry, it’s time to water. Give it a good soak until water runs out of the drainage holes at the bottom, then make sure you let it drain completely. Never, ever let your peace lily sit in a saucer of water—that's the fastest way to invite root rot.
Your watering schedule will definitely change with the Kiwi seasons:
- Summer (December-February): During our warmest months, the plant is actively growing and will be much thirstier. You might find yourself watering once a week, or even more often.
- Winter (June-August): As the days get shorter and cooler, growth slows right down. You’ll need to cut back on watering, allowing the soil to dry out a lot more between drinks.
Creating the Right Humidity and Temperature
Being tropical natives, peace lilies adore warmth and humidity. They're happiest in temperatures between 18°C and 27°C, which lines up perfectly with most Kiwi homes. They are, however, sensitive to sudden cold snaps and draughts, so keep them away from open windows in winter or the direct blast of an air conditioner.
Our homes can get seriously dry, especially in winter when the heat pump or fireplace is going. This lack of humidity is a classic cause of those frustrating brown leaf tips.
Here’s how to easily boost the humidity for your plant:
- Group Plants Together: Plants naturally release moisture through transpiration. Clustering them together creates a lovely little humid microclimate.
- Use a Pebble Tray: Place the pot on a tray filled with pebbles and a little water. As the water evaporates, it adds humidity right where it's needed.
- Mist Regularly: A quick spritz with a spray bottle every few days gives an instant humidity boost, especially during those dry winter months.
Feeding for Healthy Growth and Flowers
To push out those stunning white spathes and lush leaves, your peace lily needs a bit of food. It's a light feeder, though, so don't go overboard. The main growing season in New Zealand is spring and summer (September to February), and that's the time to use a balanced liquid fertiliser.
Feed your plant about once a month, but always dilute the fertiliser to half the strength recommended on the bottle. Over-fertilising can burn the roots and cause those dreaded burnt leaf tips. To dive deeper into plant nutrition, check out our guide on indoor plant fertilizer.
Come autumn and winter, stop feeding completely. This lets the plant have a natural rest period, saving its energy for the big spring growth spurt.
Knowing When to Repot
Peace lilies actually don't mind being a little snug in their pot, so there's no need to repot them constantly. A good rule of thumb is to think about it every 18-24 months, or when you spot these tell-tale signs:
- Roots are poking out of the drainage holes.
- The plant looks top-heavy and crowded in its pot.
- Water rushes straight through the pot without soaking in.
The best time to repot is in spring, just as the growing season kicks off. Choose a new pot that’s only one size bigger than the current one and use a fresh, high-quality indoor potting mix. This will set your peace lily up for another couple of years of happy, healthy growth.
Troubleshooting Common Peace Lily Problems
Even with the best intentions, a peace lily can sometimes have an off day. If your plant is looking a little sorry for itself, don’t panic. These plants are fantastic communicators, and their symptoms are usually clear clues about what they need. Think of this section as your personal plant clinic, helping you decode the signs and fix the most common issues we see here in New Zealand.
The good news is that most problems are surprisingly simple to solve once you know what to look for. By linking the symptom to its likely cause in a typical Kiwi home, you can get your plant back on the path to good health in no time.
Why Are My Peace Lily's Leaves Turning Yellow?
Yellowing leaves are probably the most common complaint we hear, and nine times out of ten, the culprit is water-related. It's your plant's way of sending up a little yellow flag for help. More often than not, it’s a sign of overwatering. When the roots sit in soggy, waterlogged soil, they simply can't breathe.
But it's a bit of a double-edged sword, as underwatering can also cause yellowing when the plant starts sacrificing older leaves to conserve moisture. The best way to know for sure? Get your hands dirty. Feel the soil. If it’s damp, heavy, and clinging to your finger, you’re overwatering. If it’s bone dry and pulling away from the sides of the pot, your plant is crying out for a drink.
Occasionally, especially if it’s been a while since you’ve fed your plant, yellow leaves can point to a nutrient deficiency. This is most likely if you haven't fertilised during the key growing seasons of spring and summer.
Solving Brown and Crispy Leaf Tips
Those frustrating brown, crispy tips are a dead giveaway for a humidity issue. Peace lilies are jungle natives that thrive on moisture in the air, but our Kiwi homes can get incredibly dry, especially in winter. The moment we crank up a heat pump, dehumidifier, or fireplace to fight off the chill, we’re stripping the air of the very humidity your plant craves.
What happens is the plant loses moisture from its leaves faster than its roots can pull it up from the soil, causing the delicate tips to dry out and turn brown. Another common cause is the chemicals in our tap water, like chlorine, which can build up in the soil over time and burn the leaf tips.
To get things back on track, try these simple fixes:
- Boost Humidity: Group your peace lily with other plants to create a little humid microclimate, or place its pot on a tray of pebbles filled with water.
- Mist Regularly: A light misting with a spray bottle every few days can work wonders, particularly during those dry winter months.
- Switch Your Water Source: If you think tap water is the problem, try using filtered water. Alternatively, you can let tap water sit out for 24 hours before using it, which allows some of the chemicals to dissipate.
My Peace Lily Won't Flower
A peace lily that refuses to put out its famous white spathes is a common frustration, but the reason is usually straightforward. Flowering takes a huge amount of energy, and a plant will only bloom when its conditions are just right. The two most likely culprits are not enough light or its age.
While peace lilies are legendary for their low-light tolerance, they still need bright, indirect light to gather enough energy to produce flowers. A plant tucked away in a dark corner might survive, but it simply won't have the fuel to bloom. On the other hand, a very young plant might not be mature enough yet, while an old, pot-bound plant might stop flowering as a signal that it's desperate for a repot.
A Quick Diagnostic Guide: Think of a non-flowering peace lily as a car with an empty petrol tank. If you give it the right fuel (bright, indirect light) and enough room to grow (a properly sized pot), it will have the energy it needs to get moving and produce blooms.
To help you quickly figure out what's going on with your plant, we've put together a simple chart. Just match the symptom with its likely cause and solution.
Peace Lily Problem Diagnostic Chart
Quickly identify and solve common peace lily issues based on visual symptoms.
| Symptom | Likely Cause in NZ Homes | Solution |
|---|---|---|
| Yellow Leaves | Overwatering or underwatering. Soil is either constantly soggy or bone dry. | Check the soil moisture. Adjust your watering frequency to allow the top 2-3 cm of soil to dry out between waterings. |
| Brown Leaf Tips | Low humidity, often from indoor heating like heat pumps in winter, or chemical sensitivity to tap water. | Increase humidity by misting, using a pebble tray, or grouping plants. Try using filtered or rainwater. |
| Drooping Leaves | Thirst. This is the plant's most direct way of asking for a drink. | Water the plant thoroughly until water runs from the drainage holes. The leaves should perk up within a few hours. |
| No Flowers | Insufficient light. The plant is surviving but doesn't have enough energy to bloom. | Move the plant to a spot with brighter, indirect light, such as near an east-facing window. |
| Scorched Patches | Too much direct sunlight. The intense Kiwi sun is burning the leaves. | Move the plant away from direct sun. A sheer curtain can help diffuse harsh light from a north-facing window. |
With these tips, you'll be able to read your peace lily's signals like a pro and keep it looking lush and healthy year-round.
How to Propagate Your Peace Lily and Share the Joy
When your peace lily is happy and flourishing, it’ll naturally start producing new clumps of leaves around the base. Think of this as its way of telling you it’s ready to be multiplied, giving you an easy way to create new plants for friends or other rooms in your home.
The best and simplest method is propagation by division. It might sound a bit technical, but it’s really just about splitting the plant into smaller, self-sufficient pieces. It’s a lot like separating a batch of dough into individual rolls—each new piece has everything it needs to grow on its own. It's a hugely rewarding process that gives you more of the plant you love, for free!
When to Propagate Your Peace Lily in New Zealand
Timing is everything if you want to give your new plants the best possible start in life. The ideal time to propagate your peace lily here in New Zealand is during spring, from September to November. This is when the plant is waking up from its winter dormancy and kicking into a period of active growth.
Propagating in spring gives your new, smaller plants the entire growing season to get settled. They can take full advantage of the warmer temperatures and brighter days to put their energy into establishing strong new roots and pushing out fresh leaves.
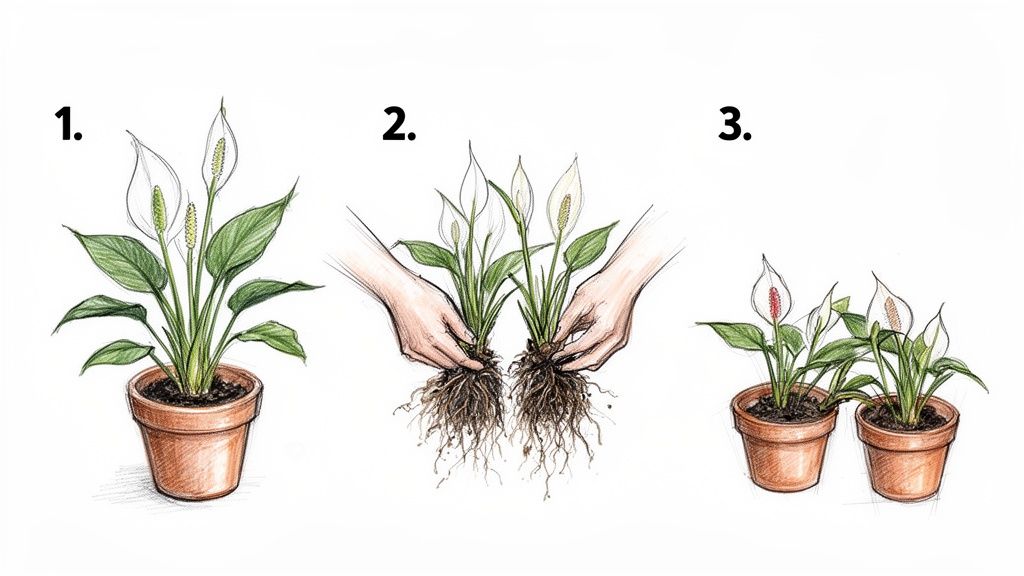
A Step-by-Step Guide to Division
Ready to create some new plant babies? You'll just need some fresh potting mix, a few new pots, and a clean, sharp knife. Here’s how to do it in four easy steps.
-
Prepare Your Plant Start by giving your peace lily a good watering the day before you plan to divide it. A well-hydrated plant handles the stress of division much better, making the whole process smoother and reducing the risk of transplant shock.
-
Remove and Inspect the Root Ball Gently ease the entire plant out of its pot. Lay it on its side and carefully brush away as much of the old soil as you can. This will give you a clear view of the root system and the natural clumps, or crowns, at the base.
-
Gently Separate the Clumps You’ll see the plant is actually made up of several distinct sections. Each of these crowns, complete with its own leaves and roots, has the potential to become a brand new plant. Often, you can gently tease them apart with your fingers. If the roots are a tangled mess, use your sterilised knife to make clean cuts, making sure each new section has a healthy portion of roots attached.
-
Pot Up Your New Plants Place each new division into its own pot filled with a fresh, high-quality indoor potting mix. Choose a new pot that’s only slightly larger than the division's root ball. Water lightly to help the soil settle, then pop your new plants in a spot with warm, bright, indirect light.
Aftercare Tip: Don't panic if your new divisions look a little sad and droopy for the first week or two! This is just a bit of transplant shock and is completely normal. Keep the soil consistently moist (but not waterlogged) and hold off on the fertiliser until you see definite signs of new growth.
For those wanting to give their new divisions an extra helping hand, products like rooting hormone can encourage faster root development. You can find out more about how they work in our detailed guide on rooting hormone in NZ. With just a little patience, your new peace lilies will soon settle in and start to thrive.
Bringing Your New Peace Lily Home in New Zealand
There's nothing quite like the excitement of bringing a new plant home, and a peace lily is a fantastic choice. But before you get swept up in the moment, it's worth thinking about where you get it from. Here in New Zealand, our natural environment is precious, and we all have a part to play in protecting it from pests and diseases. That responsibility starts with making a smart choice.
The best and safest bet is always to buy from reputable, New Zealand-based sellers. Why? Because these growers and businesses are on the front line of biosecurity. They work hard to supply healthy, pest-free plants that are already used to our Kiwi conditions. This not only gives your plant the best possible start in life but also gives you complete peace of mind, knowing you're not accidentally bringing any unwanted guests into your home or garden.
Shopping for Plants Online
In the last few years, it's become so much easier to find incredible plants from all over Aotearoa, thanks to trusted online marketplaces. Think of them as a hub that connects you directly with dedicated local growers who are serious about plant health and quality.
Going this route does more than just give you a fantastic selection to browse through. It adds a layer of confidence to your purchase. When you buy from a trusted online source, you know you’re supporting a Kiwi business that’s committed to doing things the right way.
Your New Peace Lily Has Arrived — What Next?
Let’s be honest, being packed in a box and shipped across the country can be a bit of a shock for a living thing. When your peace lily arrives, it’s going to need a little TLC to recover from its journey and settle into its new surroundings. What you do in these first few hours can make a huge difference.
Just follow these simple steps to help it transition smoothly:
- Unbox Gently: Carefully remove all the packaging. The leaves and stems might be a little delicate after their trip, so take your time.
- A Well-Deserved Drink: The soil will almost certainly be dry. Give it a good, thorough watering until you see water flowing out of the drainage holes. Just be sure not to leave it sitting in a puddle.
- Find a Temporary Spot: For the first week, place it somewhere with medium, indirect light. Steer clear of any direct sun or draughts while it’s in recovery mode.
- Don’t Repot Yet: As tempting as it is to get it into a new pot straight away, hold off. Give the plant at least two to three weeks to get used to your home’s environment first.
Giving your new peace lily this gentle "decompression" period allows it to adjust from the stress of shipping without overwhelming it. This patience sets the foundation for a healthy, thriving plant that will bring you joy for years to come.
Ready to find the perfect plant for your space? You can explore a beautiful range of peace lily options available from trusted NZ sellers.
Your Peace Lily Questions, Answered
Even with the best guide in hand, a few questions always pop up. Here are some of the most common things we get asked by fellow peace lily parents across New Zealand. Let's clear them up so you can care for your plant with complete confidence.
Are Peace Lilies Toxic to Pets in Our Kiwi Homes?
Yes, unfortunately, they are. Peace lilies contain calcium oxalate crystals, making them toxic to both cats and dogs if they decide to have a chew on the leaves. This can cause some nasty oral irritation, drooling, vomiting, and even difficulty swallowing. While it's very rarely fatal, it's definitely something to avoid for your furry friend's comfort.
The best solution is to keep your peace lily nz well out of reach. Think high shelves, hanging planters, or placing it in a room your pets can't access. If you suspect a nibble has occurred, it's best to call your local New Zealand vet right away for professional advice.
Why Has My Peace Lily Stopped Flowering?
Don't panic! It's completely normal for a peace lily to take a break from flowering, especially during the darker, cooler months of a Kiwi winter (June to August). Pushing out those stunning white spathes takes a huge amount of energy, so the plant naturally goes into a rest period when light is low.
As long as your plant is healthy, you can expect it to put on a show again in spring and summer. If you've got a mature plant that hasn't bloomed for a long time despite having good light and care, it might be a sign it's root-bound. A quick repot could be just what it needs to encourage a fresh round of flowers.
Can I Keep My Peace Lily Outside in New Zealand?
As a true tropical, the peace lily just can't handle the cold. It's not frost-tolerant and is much happier living as an indoor plant throughout most of Aotearoa, where it can enjoy the stable, warm conditions of our homes.
If you live in the warmest, most sheltered, and completely frost-free parts of the upper North Island, you might get away with keeping it outdoors in a shady spot during summer. For almost everyone else, though, it’s strictly an indoor-only plant. Cold drafts, unpredictable weather, and even a light frost will quickly damage its beautiful leaves.
What's the Best Potting Mix for a Peace Lily in NZ?
The magic formula for a happy peace lily is a mix that holds onto moisture but also drains really well. You can find excellent quality indoor plant potting mixes at garden centres all over New Zealand that will do the job perfectly.
Look for a blend that contains ingredients like peat, perlite, and bark. This kind of mix holds just enough water to keep the roots hydrated without becoming a swamp, which is the absolute key to preventing root rot—one of the few real threats to this gorgeous plant.
At Jungle Story, we partner with New Zealand's finest growers to bring you healthy, vibrant peace lilies that are ready to settle into your home. Check out our collection and find your perfect plant today at https://junglestory.co.nz.