If you've ever dreamt of having a tropical oasis in your own backyard, the Plumeria 'Penang Peach' might just be the plant to make it happen. This frangipani is a real favourite, and for good reason. It's known for its absolutely stunning apricot-peach flowers and a sweet, powerful fragrance that can fill the air.
One of the best things about it is its compact growth. This makes it a brilliant choice if you're working with a smaller garden or even just a pot on the deck, letting Kiwis everywhere get that tropical vibe, even in more temperate spots.
A Tropical Treasure for Your Garden
The 'Penang Peach' really does turn the dream of a home-grown tropical paradise into a reality. Unlike some of the larger, more sprawling frangipani varieties that can be a bit tricky in parts of the country, this one is much more manageable without skimping on the incredible flower show.
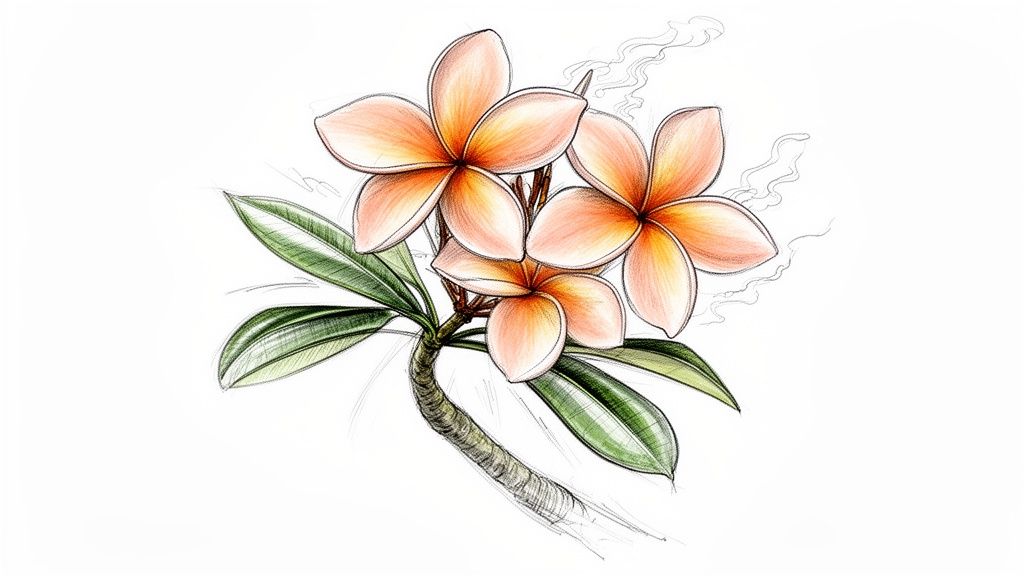
And the flowers are the main event, no doubt about it. They're a decent size, usually around 7-8 cm across, and they open up in these breathtaking clusters of apricot and peach colours. You'll often see a blush of pink and a really striking golden-orange centre.
But it's not just about looks. The fragrance is intoxicating—a sweet, peachy scent that really comes alive in the warm evening air. It's perfect for planting near a patio or deck where you can sit and enjoy it.
Distinguishing Features of Penang Peach
So, what really makes 'Penang Peach' stand out from other frangipanis? If you look closely, you’ll spot a few unique traits.
The lush, green leaves often have a subtle little hook right at the tip, which is a classic tell-tale sign of this particular variety. The flowers themselves also have distinct brown markings deep down in the throat, which adds to their intricate beauty.
It's this mix of a compact size, incredible scent, and unique floral details that makes the Plumeria 'Penang Peach' a must-have. It’s perfect for seasoned collectors and beginners who just want to add an exotic touch to their garden.
A Perfect Fit for New Zealand
This cultivar's adaptability makes it one of the more rewarding tropical plants for NZ gardens. Here in New Zealand, we're pretty good at growing things, and our success with stone fruits like peaches hints at the potential for these tropical beauties.
The 'Penang Peach' is a star performer for Jungle Story collectors—a compact bloomer with those impressive apricot-peach flowers, hooked leaves, and distinct throat markings.
Throughout this guide, we’ll walk you through everything you need to know to grow your own Plumeria 'Penang Peach' successfully, from picking the perfect sunny spot to encouraging a massive display of its famous flowers.
Choosing The Ideal Location In Your NZ Garden

Finding the perfect home for your 'Penang Peach' is probably the most critical step you'll take. Honestly, get this right, and you're ninety per cent of the way there. These are tropical beauties, pure and simple, and their happiness is directly linked to how much sun they can soak up.
For us here in New Zealand, that means finding the sunniest, warmest, and most protected corner of your entire property. You're hunting for a spot that gets an absolute minimum of six to eight hours of direct sun each day, especially during those peak summer months from December through to February. This isn't just a suggestion; it's essential for coaxing out those incredible, fragrant blooms.
If your plumeria isn't flowering, the first question I always ask is, "How much direct sun is it getting?" More often than not, that's the culprit. Plenty of leaves but no flowers is a classic sign of not enough light.
Mastering Sun And Warmth In A Kiwi Climate
To really give your plant a head start, try to position it against a north-facing wall or fence. Being in the Southern Hemisphere, this is our sunniest aspect. A wall here acts like a giant storage heater, absorbing warmth all day and then radiating it back onto the plant well into the cool of the evening.
This creates a little microclimate, a pocket of warmth that helps buffer the plant against our often-unpredictable Kiwi temperatures. The difference it makes is huge, especially in parts of the country where summer nights can still get a bit chilly. It helps mimic the consistent heat of their native home.
A warm, sheltered, north-facing spot is the gold standard for growing plumeria in New Zealand. It maximises light and heat, providing the ideal conditions for a healthy plant that produces an abundance of flowers.
Creating The Perfect Soil Foundation
Just as vital as sun is the ground your plumeria's roots will call home. They absolutely cannot stand having "wet feet." Letting them sit in soggy, waterlogged soil is a one-way ticket to root rot, which is almost always fatal for these plants.
The goal is to create a soil mix that is incredibly fast-draining. Water needs to pass through quickly, leaving just enough moisture for the roots without ever pooling.
If you're planting directly into the garden, you'll likely need to do some prep work. Our heavy clay soils, common across much of New Zealand, need a serious upgrade. I recommend digging in plenty of organic matter like good compost, but also adding things like pumice or coarse sand to open up the soil structure and boost drainage.
For most Kiwi gardeners, growing in a pot is the easier and often better option. It gives you complete control. You can craft the perfect soil blend right from the start. A recipe that's never failed me is:
- 2 parts of a high-quality potting mix
- 1 part coarse perlite or pumice
- 1 part coarse sand or even a fine orchid bark
This mix strikes the perfect balance. The potting mix provides the food, while the perlite and sand ensure air gets to the roots and water drains away freely. And of course, always, always choose a pot with plenty of drainage holes at the bottom.
A Practical Guide To Planting And Ongoing Care
So you've picked the perfect sunny spot. Now it's time to get your Plumeria 'Penang Peach' settled into its new home. Whether you're starting with a well-rooted cutting or a more established plant, the goal is the same: encourage strong root growth without overwhelming it.
If you have a plant from a nursery pot, slide it out gently and take a look at the roots. If they’re a tangled, tightly wound mess, carefully tease a few of the outer ones loose before popping it into its new pot or garden bed. The most important thing is to plant it at the exact same depth it was in its original container. Burying the stem too deep is a fast track to rot.
For those starting with a cutting, you'll want to plant the callused end about 8-10 cm deep into your gritty, free-draining mix. This gives it enough stability to stay upright while it works on growing roots.
For either method, just firm the soil gently around the base. It can be a good idea to add a stake for a bit of initial support, especially if your garden is a bit of a wind tunnel.
Planting And Initial Support
Once your plumeria is in place, give it a light watering to help the soil settle. Whatever you do, resist the urge to completely drench it. For cuttings, it's actually best to hold off on watering for another week or two. This feels counterintuitive, but it seriously helps prevent rot before the new roots have a chance to form.
A simple bamboo stake and a soft plant tie are your best friends here. They'll stop a top-heavy young plant from taking a tumble before it has developed a solid root system to anchor itself. Just remember to check the ties every few months to make sure they aren’t digging into the expanding stem.
A Fertilising Routine For Abundant Blooms
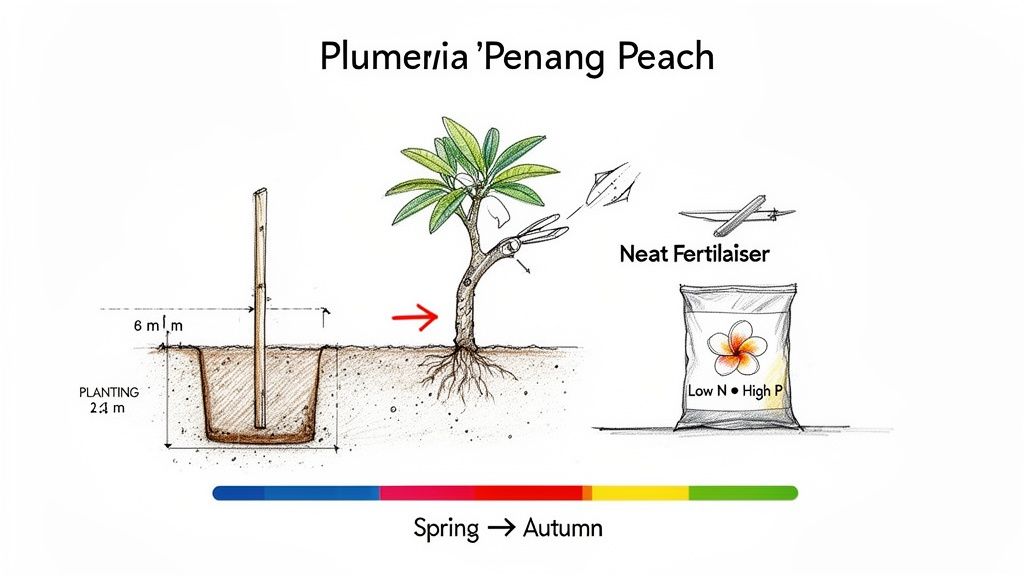
If you want those incredible peachy flowers—and let's be honest, that's the whole point—you need to get the feeding right. Throughout the New Zealand growing season, which kicks off in spring and runs right through to late autumn, your plumeria has some specific dietary needs. Too much nitrogen is a classic mistake; you'll get a gorgeous, leafy green bush with hardly any flowers to show for it.
The real secret is a fertiliser that’s low in nitrogen (N) but high in phosphorus (P). Phosphorus is the magic ingredient that fuels flower production.
Here’s a simple feeding schedule that works wonders:
- Spring (September - November): As soon as you see new leaves unfurling, start feeding every two to three weeks with a high-phosphorus liquid fertiliser.
- Summer (December - February): Keep this routine going during the peak growing and flowering months. This supports continuous blooming all summer long.
- Autumn (March - May): As the weather starts to cool down, ease back on the feeding. By late autumn, stop completely so the plant can prepare for its winter dormancy.
A common mistake is over-fertilising or just grabbing any old all-purpose plant food. To get the best results, stick to a specialised bloom-booster formula. This directs all the plant's energy into producing that spectacular floral display instead of just more leaves.
Demystifying Pruning For A Fuller Plant
Pruning your Plumeria 'Penang Peach' isn't something you need to do every year, but it’s a brilliant way to encourage a fuller, bushier shape with way more flowering tips. The ideal time to get the secateurs out in New Zealand is late winter or the very start of spring (think August or September), right before the new season's growth bursts through.
Here's the cool part: when you prune a branch, it usually splits into two or even three new branches just below the cut. More branches mean more tips, and more tips mean more clusters of those beautiful flowers.
Just grab a clean, sharp pair of secateurs or a small saw. You can trim branches back to improve the overall shape of the plant or snip off any that are crossing over each other or look out of place. And don't throw away the offcuts—they are perfect for propagating new plumeria plants
How To Propagate Cuttings And Expand Your Collection
One of the most satisfying parts of growing a Plumeria 'Penang Peach' is discovering just how easily you can create new plants from a single parent. Propagation is a brilliant way to multiply your collection, whether you want backups for yourself or lovely gifts for friends and family. The whole process is surprisingly straightforward and incredibly rewarding.
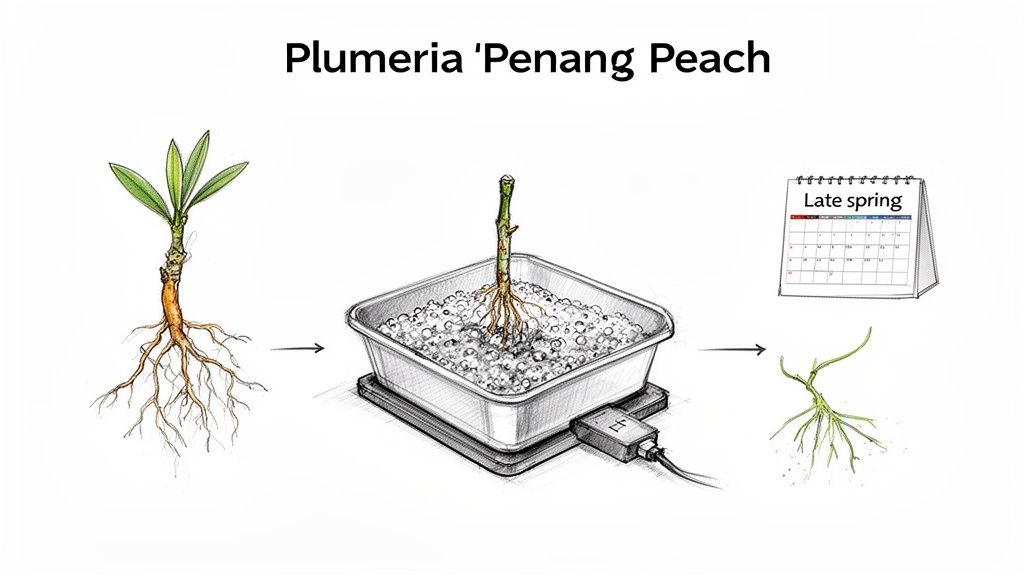
Here in New Zealand, the best time to take cuttings is during the plant's active growing season. I always aim for late spring through to early summer, roughly from November to January. This is when the parent plant is full of vigour, and the warm weather gives your new cuttings the best possible chance to root successfully.
Preparing Your Penang Peach Cutting
First things first, you need to select a healthy, mature branch from your existing plumeria. Look for a stem that feels firm and has a greyish-brown colour, avoiding the young, green tips. Using a clean, sharp pair of secateurs or a knife, make a decisive cut to get a section that is at least 20-30 cm long.
Once you have your cutting, carefully remove all the leaves except for the small cluster right at the top. This simple step helps the cutting focus all its energy on growing roots instead of trying to keep its foliage alive.
Now for the most critical part: curing the cutting. Just lay it down in a dry, shady spot with good air circulation for one to two weeks. You're waiting for a dry, sealed cap—called a callus—to form over the cut end.
I can't stress this enough: this callusing step is non-negotiable. If you plant a fresh plumeria cutting straight into the soil, it will almost certainly suck up too much water and rot before it even thinks about growing roots. Patience is your best friend here.
Rooting And Potting Your New Plant
With your cutting properly callused, it’s finally time to plant. Grab a pot and fill it with the same gritty, fast-draining mix you'd use for a mature plumeria. A blend of good quality potting mix with perlite or pumice is perfect for this.
Gently push the callused end about 8 cm deep into the mix, firming the soil around it to keep the cutting upright and stable.
Now, hold off on watering. Give it a week or so before you add just a small amount of water. On cooler Kiwi spring days, a seedling heat pad placed under the pot can be a game-changer. It provides that consistent bottom warmth that plumerias crave and can seriously speed up root development. Thankfully, the 'Penang Peach' is known for being an easy-rooter, which is one of the traits that makes it so popular.
This resilience is something we appreciate in New Zealand horticulture, and it reflects a broader story of adaptation. The plant's easy propagation mirrors the innovation seen in our own fruit industries, like how growers adapted after the Roxdale cannery closure to create new markets for peaches. You can explore more about the resilience of our local fruit industry on Summerfruit NZ's website.
While the method for plumeria is specific, the core principles of taking cuttings apply to many other plants. If you enjoy this process, you may also find our guide on how to propagate snake plants a useful next step in expanding your indoor collection. Be patient, as rooting can take anywhere from six to eight weeks. You’ll know you’ve succeeded when you see fresh, new leaves beginning to sprout.
Troubleshooting Common Issues In New Zealand
Even with the best care, your Plumeria 'Penang Peach' can sometimes hit a snag. The key is knowing what to look for so you can act fast. The great news is, most common problems are pretty straightforward to sort out, especially if you catch them early.
Here in New Zealand, our unique climate can throw up a few specific challenges. Those humid summers, especially up in Auckland and Northland, can be a perfect breeding ground for fungal problems. On the flip side, our cooler, wetter winters can leave plants vulnerable to root issues if you're not careful.
Tackling Common Pests On Your Plumeria
Plumerias are generally quite resilient, but a couple of sap-sucking pests might take a liking to your 'Penang Peach'. The two you're most likely to meet are spider mites and mealybugs.
Spider mites are tiny blighters, often too small to see easily. You'll know they're there by the fine, silky webbing they leave on the undersides of leaves. A heavy infestation can make the leaves look speckled or bronzed.
Mealybugs are much easier to spot. They look like little bits of white cotton fluff, usually tucked into the nooks where leaves join the stem.
For both of these, you can often knock back a small group with a strong jet of water from the hose or just by wiping the leaves down with a cloth. If they're being stubborn, a spray with a good quality insecticidal soap or neem oil from your local Kiwi garden centre is a fantastic organic fix. Just be sure to apply it in the evening to avoid any risk of leaf scorch.
Preventing Fungal Diseases
The most common disease you'll likely encounter on plumeria in New Zealand is plumeria rust. It shows up as orange-yellow powdery spots on the undersides of the leaves. While it looks a bit dramatic, it rarely does serious damage to the plant, though it can cause the leaves to drop earlier than they should.
Your best defence against rust is prevention, and that comes down to good air circulation. Don't crowd your plants. When you water, aim for the soil and try to keep the leaves as dry as you can. If you do spot rust, snip off the affected leaves right away and throw them in the bin—not the compost.
The other big one to watch for is root rot. This is almost always caused by too much water or soil that just doesn't drain well enough. Telltale signs include yellowing leaves, a soft or mushy base of the stem, and a general look of unhappiness. If you suspect root rot, you need to act immediately. Stop watering, and in bad cases, you might have to repot the plant into fresh, dry, free-draining mix after carefully trimming off any black, mushy roots. It's the one time where less care is definitely more.
Frequently Asked Questions From NZ Gardeners
Even the greenest thumbs have questions, and when it comes to a tropical treasure like the Penang Peach, a few always seem to crop up. Here are the most common queries we get from fellow Kiwi gardeners, with some straight-up advice from our own experience.
Why Are My Penang Peach Leaves Turning Yellow?
Seeing yellow leaves can cause a bit of a panic, but more often than not, it’s just your Plumeria responding to the New Zealand seasons. It's completely normal for the leaves to yellow and drop as autumn rolls in (around March to May). The plant is just getting ready for its winter nap.
If it's happening in the middle of the growing season, however, your first suspect should always be water. Overwatering is the number one mistake we see, leading to sad, yellow leaves as the roots struggle for air. Before you do anything else, check the soil. Let it dry out a good few centimetres deep before you even think about watering again. On the off chance it's not water, it could be a sign of magnesium deficiency, which a bit of Epsom salts can sort out. But honestly, check your watering schedule and the calendar first.
How Can I Get My Penang Peach To Flower?
Ah, the million-dollar question! To get that legendary display of fragrant, peachy flowers, you need to give the plant exactly what it craves: sun, heat, and the right food.
Your Plumeria needs at least 6-8 hours of direct, blazing sun every single day. No compromises. In a typical NZ garden, the best spot is hard up against a north-facing wall. This spot acts like a radiator, soaking up the sun and throwing that heat back onto the plant, which it absolutely loves.
Then there's the food. During the growing season (spring through late summer in NZ), you need to be feeding it a fertiliser that's low in nitrogen (N) but high in phosphorus (P). This basically tells the plant, "stop making leaves, start making flowers!" Look for a "bloom booster" formula and cut off all feeding once autumn arrives.
A classic mistake is giving a Plumeria a general-purpose, high-nitrogen feed. You'll get a big, bushy, green plant, but you'll be left wondering where all the famous peachy blooms are. For flowers, phosphorus is your friend.
Can I Grow Penang Peach Outdoors All Year In New Zealand?
This one really comes down to your postcode. If you're lucky enough to live in the truly frost-free, subtropical parts of the upper North Island—think Northland or coastal Auckland—then yes, an established plant in a sheltered, sunny spot can often stay outside year-round.
For the rest of us, where winter frosts are a real threat, you absolutely have to bring it in. The simplest way is to grow your Plumeria in a pot. This makes it easy to shift into a glasshouse, garage, or even onto a covered deck for the coldest months (June to August). It only takes one decent frost to badly damage or kill a Plumeria, so winter protection is non-negotiable.
What's The Best Pot Size For My Plumeria?
It feels counterintuitive, but resist the urge to give your Plumeria a huge pot to grow into. They are one of those rare plants that actually prefer their roots to be a little snug and slightly root-bound. A pot that’s too big holds onto water for far too long, which is a one-way ticket to root rot.
A good rule of thumb is to only go up one pot size at a time. Pick a new pot that’s just 5-10 cm wider than the old one.
- A fresh cutting is perfectly happy starting out in a 4-6 litre pot.
- You'll likely only need to repot every two or three years.
- Whatever you choose, make sure it has excellent drainage holes. We love terracotta pots because the porous clay helps the soil breathe and dry out more evenly.
Ready to bring the stunning fragrance and colour of the Plumeria 'Penang Peach' into your own garden? At Jungle Story, we put you in touch with trusted local sellers offering healthy, gorgeous plants that are ready for a new home. Find your perfect Plumeria and start your tropical garden journey today.